2007 SUZUKI FORENZA door lock
[x] Cancel search: door lockPage 53 of 225
2-5 FEATURES AND CONTROLS
85Z03-03E
manual door lock located on the window
sill on each door.
From the inside, you can also lock and
unlock the doors with the power door lock
switches located on the driver’s door trim
pad.Central Door Locking SystemThe central door locking system is acti-
vated using the switch on the driver’s door.
From the outside, you can lock or unlock all
of the doors on your vehicle from the
driver’s door by using either the key or the
optional keyless entry transmitter. From the
inside, you can lock or unlock all of the
doors using the driver’s power door lock
switch.
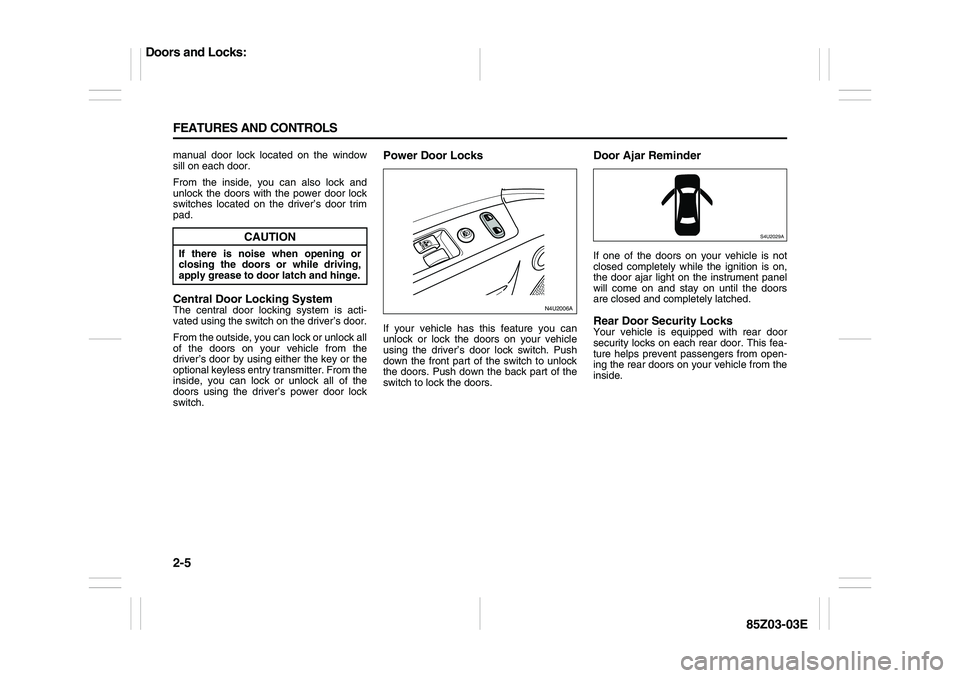
Power Door LocksIf your vehicle has this feature you can
unlock or lock the doors on your vehicle
using the driver’s door lock switch. Push
down the front part of the switch to unlock
the doors. Push down the back part of the
switch to lock the doors.
Door Ajar ReminderIf one of the doors on your vehicle is not
closed completely while the ignition is on,
the door ajar light on the instrument panel
will come on and stay on until the doors
are closed and completely latched.Rear Door Security LocksYour vehicle is equipped with rear door
security locks on each rear door. This fea-
ture helps prevent passengers from open-
ing the rear doors on your vehicle from the
inside.
CAUTION
If there is noise when opening or
closing the doors or while driving,
apply grease to door latch and hinge.
N4U2006A
S4U2029A
Doors and Locks:
Page 54 of 225
2-6 FEATURES AND CONTROLS
85Z03-03E
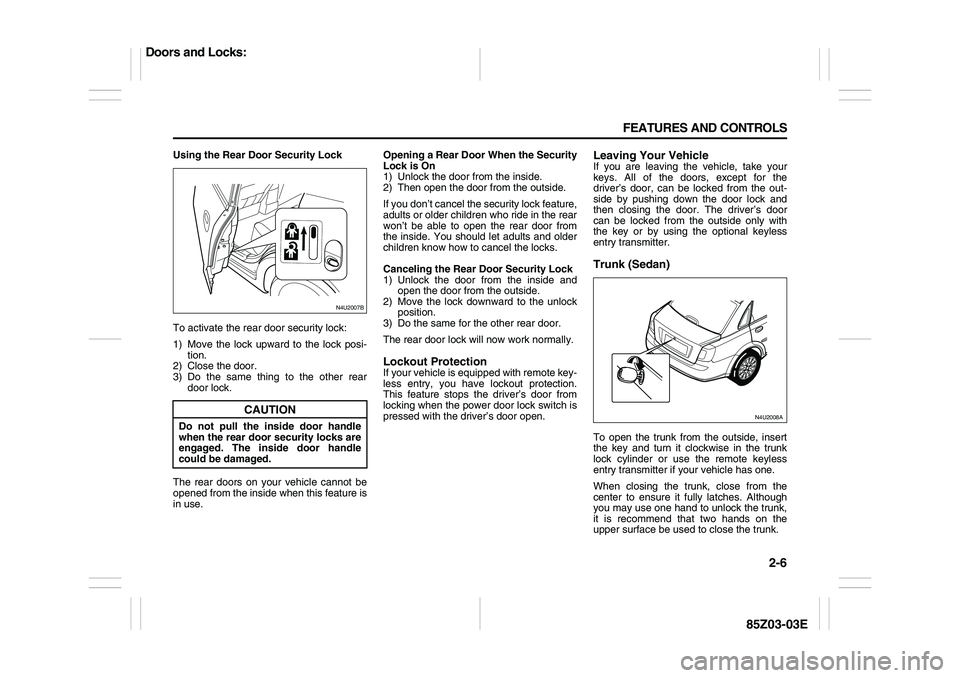
Using the Rear Door Security Lock
To activate the rear door security lock:
1) Move the lock upward to the lock posi-
tion.
2) Close the door.
3) Do the same thing to the other rear
door lock.
The rear doors on your vehicle cannot be
opened from the inside when this feature is
in use.Opening a Rear Door When the Security
Lock is On
1) Unlock the door from the inside.
2) Then open the door from the outside.
If you don’t cancel the security lock feature,
adults or older children who ride in the rear
won’t be able to open the rear door from
the inside. You should let adults and older
children know how to cancel the locks.
Canceling the Rear Door Security Lock
1) Unlock the door from the inside and
open the door from the outside.
2) Move the lock downward to the unlock
position.
3) Do the same for the other rear door.
The rear door lock will now work normally.
Lockout ProtectionIf your vehicle is equipped with remote key-
less entry, you have lockout protection.
This feature stops the driver’s door from
locking when the power door lock switch is
pressed with the driver’s door open.
Leaving Your VehicleIf you are leaving the vehicle, take your
keys. All of the doors, except for the
driver’s door, can be locked from the out-
side by pushing down the door lock and
then closing the door. The driver’s door
can be locked from the outside only with
the key or by using the optional keyless
entry transmitter.Trunk (Sedan)To open the trunk from the outside, insert
the key and turn it clockwise in the trunk
lock cylinder or use the remote keyless
entry transmitter if your vehicle has one. When closing the trunk, close from the
center to ensure it fully latches. Although
you may use one hand to unlock the trunk,
it is recommend that two hands on the
upper surface be used to close the trunk.
CAUTION
Do not pull the inside door handle
when the rear door security locks are
engaged. The inside door handle
could be damaged.
N4U2007B
N4U2008A
Doors and Locks:
Page 55 of 225
2-7 FEATURES AND CONTROLS
85Z03-03E
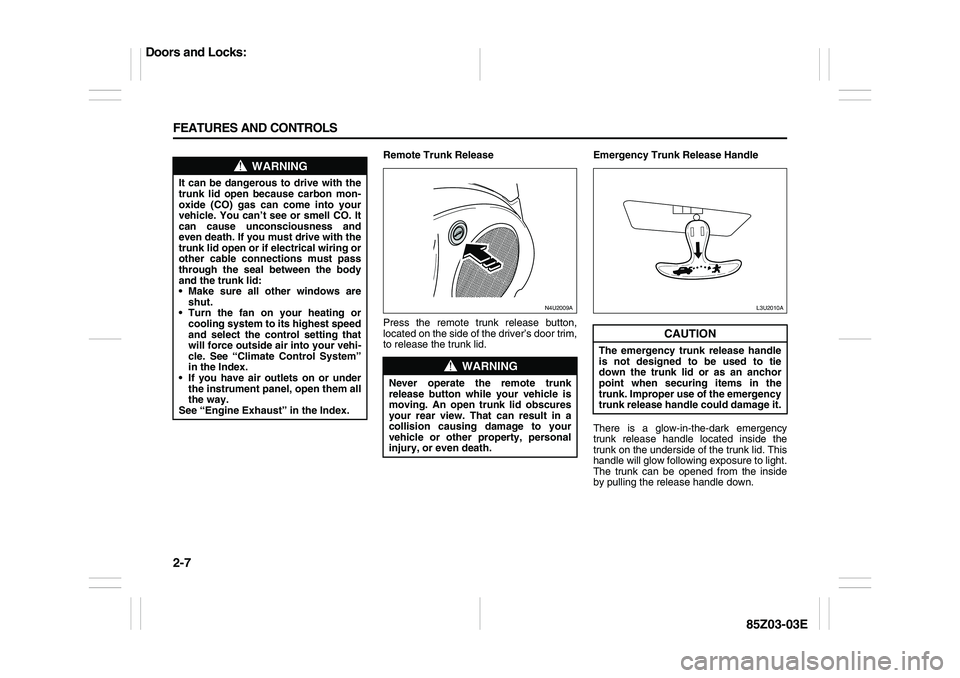
Remote Trunk Release
Press the remote trunk release button,
located on the side of the driver’s door trim,
to release the trunk lid.Emergency Trunk Release Handle
There is a glow-in-the-dark emergency
trunk release handle located inside the
trunk on the underside of the trunk lid. This
handle will glow following exposure to light.
The trunk can be opened from the inside
by pulling the release handle down.
WARNING
It can be dangerous to drive with the
trunk lid open because carbon mon-
oxide (CO) gas can come into your
vehicle. You can’t see or smell CO. It
can cause unconsciousness and
even death. If you must drive with the
trunk lid open or if electrical wiring or
other cable connections must pass
through the seal between the body
and the trunk lid:
Make sure all other windows are
shut.
Turn the fan on your heating or
cooling system to its highest speed
and select the control setting that
will force outside air into your vehi-
cle. See “Climate Control System”
in the Index.
If you have air outlets on or under
the instrument panel, open them all
the way.
See “Engine Exhaust” in the Index.
WARNING
Never operate the remote trunk
release button while your vehicle is
moving. An open trunk lid obscures
your rear view. That can result in a
collision causing damage to your
vehicle or other property, personal
injury, or even death.
N4U2009A
CAUTION
The emergency trunk release handle
is not designed to be used to tie
down the trunk lid or as an anchor
point when securing items in the
trunk. Improper use of the emergency
trunk release handle could damage it.
L3U2010A
Doors and Locks:
Page 56 of 225
2-8 FEATURES AND CONTROLS
85Z03-03E
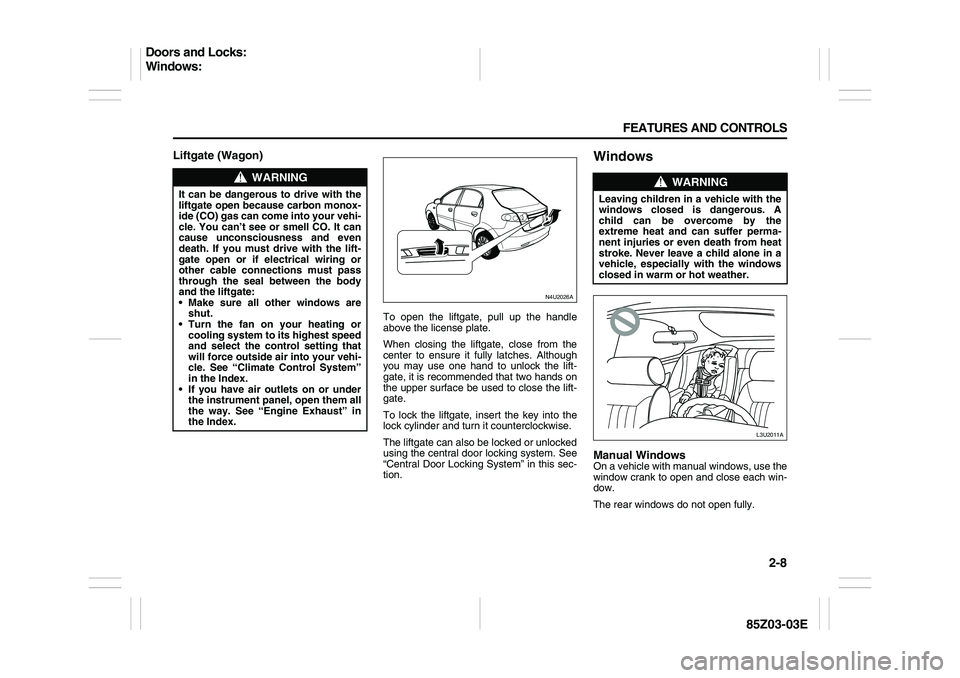
Liftgate (Wagon)
To open the liftgate, pull up the handle
above the license plate.
When closing the liftgate, close from the
center to ensure it fully latches. Although
you may use one hand to unlock the lift-
gate, it is recommended that two hands on
the upper surface be used to close the lift-
gate.
To lock the liftgate, insert the key into the
lock cylinder and turn it counterclockwise.
The liftgate can also be locked or unlocked
using the central door locking system. See
“Central Door Locking System” in this sec-
tion.
WindowsManual WindowsOn a vehicle with manual windows, use the
window crank to open and close each win-
dow.
The rear windows do not open fully.
WARNING
It can be dangerous to drive with the
liftgate open because carbon monox-
ide (CO) gas can come into your vehi-
cle. You can’t see or smell CO. It can
cause unconsciousness and even
death. If you must drive with the lift-
gate open or if electrical wiring or
other cable connections must pass
through the seal between the body
and the liftgate:
Make sure all other windows are
shut.
Turn the fan on your heating or
cooling system to its highest speed
and select the control setting that
will force outside air into your vehi-
cle. See “Climate Control System”
in the Index.
If you have air outlets on or under
the instrument panel, open them all
the way. See “Engine Exhaust” in
the Index.
N4U2026A
WARNING
Leaving children in a vehicle with the
windows closed is dangerous. A
child can be overcome by the
extreme heat and can suffer perma-
nent injuries or even death from heat
stroke. Never leave a child alone in a
vehicle, especially with the windows
closed in warm or hot weather.
L3U2011A
Doors and Locks:
Windows:
Page 57 of 225
2-9 FEATURES AND CONTROLS
85Z03-03E
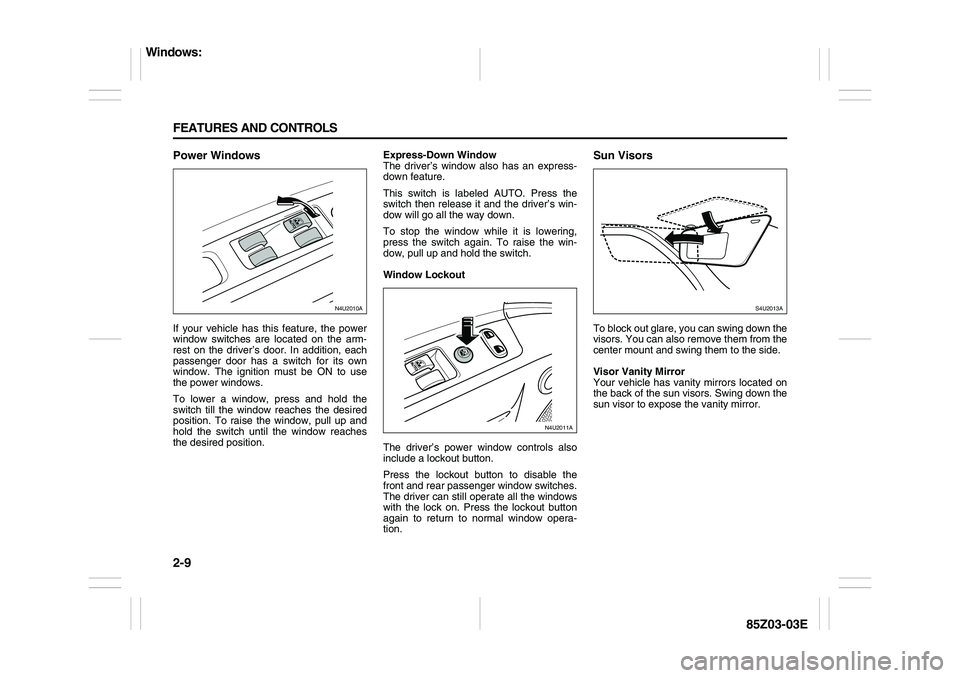
Power WindowsIf your vehicle has this feature, the power
window switches are located on the arm-
rest on the driver’s door. In addition, each
passenger door has a switch for its own
window. The ignition must be ON to use
the power windows.
To lower a window, press and hold the
switch till the window reaches the desired
position. To raise the window, pull up and
hold the switch until the window reaches
the desired position.Express-Down Window
The driver’s window also has an express-
down feature.
This switch is labeled AUTO. Press the
switch then release it and the driver’s win-
dow will go all the way down.
To stop the window while it is lowering,
press the switch again. To raise the win-
dow, pull up and hold the switch.
Window Lockout
The driver’s power window controls also
include a lockout button.
Press the lockout button to disable the
front and rear passenger window switches.
The driver can still operate all the windows
with the lock on. Press the lockout button
again to return to normal window opera-
tion.
Sun VisorsTo block out glare, you can swing down the
visors. You can also remove them from the
center mount and swing them to the side.
Visor Vanity Mirror
Your vehicle has vanity mirrors located on
the back of the sun visors. Swing down the
sun visor to expose the vanity mirror.
N4U2010A
N4U2011A
S4U2013A
Windows:
Page 58 of 225
2-10 FEATURES AND CONTROLS
85Z03-03E
Theft-Deterrent SystemsVehicle theft is big business, especially in
some cities. Although your vehicle has a
number of theft-deterrent features, we
know that nothing we put on it can make it
impossible to steal.Theft-Deterrent SystemYour vehicle may have a theft-deterrent
system.
Arming the System
To arm the system, do the following:
1) Turn the ignition switch to the LOCK
and remove the key from the ignition. If
the key is inserted in the ignition switch,
the transmitter will not operate the theft-
deterrent system.
2) Close the doors, the windows, the
hood, and the trunk. Make sure the win-
dows are closed, as the system can be
activated even if the windows are open.
3) Lock the doors using the remote key-
less entry transmitter. The transmitter
must be used to activate the theft-deter-
rent system.
– The LED on the transmitter will flash
once.
– All of the doors will lock.
– The hazard warning lamps will flash
once and the horn will chirp.
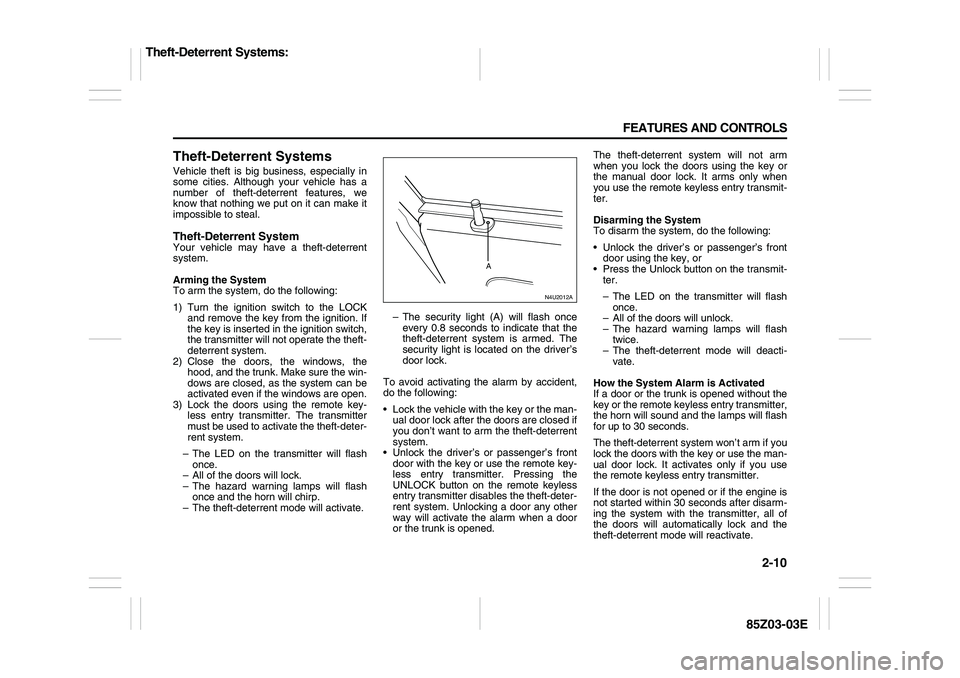
– The theft-deterrent mode will activate.– The security light (A) will flash once
every 0.8 seconds to indicate that the
theft-deterrent system is armed. The
security light is located on the driver’s
door lock.
To avoid activating the alarm by accident,
do the following:
Lock the vehicle with the key or the man-
ual door lock after the doors are closed if
you don’t want to arm the theft-deterrent
system.
Unlock the driver’s or passenger’s front
door with the key or use the remote key-
less entry transmitter. Pressing the
UNLOCK button on the remote keyless
entry transmitter disables the theft-deter-
rent system. Unlocking a door any other
way will activate the alarm when a door
or the trunk is opened.The theft-deterrent system will not arm
when you lock the doors using the key or
the manual door lock. It arms only when
you use the remote keyless entry transmit-
ter.
Disarming the System
To disarm the system, do the following:
Unlock the driver’s or passenger’s front
door using the key, or
Press the Unlock button on the transmit-
ter.
– The LED on the transmitter will flash
once.
– All of the doors will unlock.
– The hazard warning lamps will flash
twice.
– The theft-deterrent mode will deacti-
vate.
How the System Alarm is Activated
If a door or the trunk is opened without the
key or the remote keyless entry transmitter,
the horn will sound and the lamps will flash
for up to 30 seconds.
The theft-deterrent system won’t arm if you
lock the doors with the key or use the man-
ual door lock. It activates only if you use
the remote keyless entry transmitter.
If the door is not opened or if the engine is
not started within 30 seconds after disarm-
ing the system with the transmitter, all of
the doors will automatically lock and the
theft-deterrent mode will reactivate.
N4U2012A
A
Theft-Deterrent Systems:
Page 59 of 225

2-11 FEATURES AND CONTROLS
85Z03-03E
How to Turn Off the System Alarm
If the system alarm is active, it can be
deactivated using the following methods:
Press the Lock or Unlock button on the
remote keyless entry transmitter.
Unlock the driver’s or passenger’s front
door using the key.
Otherwise, the alarm will automatically
stop after 30 seconds. The system will
then lock the doors and reactivate the
theft-deterrent system.
How to Detect a Tamper Condition
If the hazard lamps flash once when the
Lock or Unlock button on your transmitter
is pressed, that means the theft-security
system alarm was triggered while you
were away.
Daily Inspection ChecklistBefore Driving1) Make sure that windows, mirrors, lights
and reflectors are clean and unob-
structed.
2) Visually check the tires for the following
points:
– the depth of the tread groove
– abnormal wear, cracks and damage
– loose wheel nuts
– existence of foreign material such as
nails, stones, etc.
Refer to “Tires” in the “SERVICE AND
APPEARANCE CARE” section for details.
3) Look for oil or other fluid leaks.
NOTE:
It is normal for water to drip from the air
conditioning system after use.
4) Make sure the hood is fully closed and
latched.
5) Check the headlights, turn signal lights,
brake lights and horn for proper opera-
tion.
6) Lock all doors.
7) Adjust the seat and adjustable head
restraints (if equipped).
8) Check the brake pedal.
9) Adjust the mirrors.
10)Make sure that you and all passengers
have properly fastened your safety
belts.11)Make sure that all warning lights come
on as the key is turned to the “ON” or
“START” position.
12)Check all gauges.
13)Make sure that the BRAKE light turns
off when the parking brake is released.
Once a week, or each time you fill your fuel
tank, perform the following under-hood
checks:
1) Engine oil level
2) Coolant level
3) Brake fluid level
4) Power steering (if equipped) fluid level
5) Windshield washer fluid level
6) Hood latch operation
Pull the hood release handle inside the
vehicle. Make sure that you cannot
open the hood all the way without
releasing the secondary latch. Be sure
to close the hood securely after check-
ing for proper latch operation. See the
item “Lubricate Locks, Hinges & Hood
Latch” under “Chassis and Body” in the
“MAINTENANCE SCHEDULE” section
for the lubrication schedule.
WARNING
Make sure the hood is fully closed
and latched before driving. If it is not,
it can fly up unexpectedly during
driving, obstructing your view and
resulting in an accident.
Theft-Deterrent Systems:
Daily Inspection Checklist:
Page 85 of 225

3-9 INSTRUMENT PANEL
85Z03-03E
Erasing Speed Memory
When you turn off the cruise control or the
ignition, your cruise control set speed
memory is erased.Exterior LampsThe lever on the left side of the steering
column operates the exterior lamps.
The exterior lamp band has three posi-
tions:
(Headlamps):
Turn the band to this position to turn on the
headlamps, together with the following:
Tail Lamps
License Plate Lamp
Instrument Panel Lights
The headlamps will turn off automatically
when the ignition switch is turned to LOCK
or ACC. (Parking Lamps):
Turn the band to this position to turn on the
parking lamps, together with the previously
listed lamps and lights.
OFF (Off):
Turn the band to this position to turn all
lamps off except the Daytime Running
Lamps (DRL).
Lamps On Reminder
You will hear a warning chime when the
exterior lamp band is in the or
position and driver’s door is open.
Daytime Running Lamps (DRL)
Daytime Running Lamps (DRL) can make
it easier for others to see the front of your
vehicle during the day. DRL can be helpful
in many different driving conditions, but
they can be especially helpful in the short
periods after dawn and before sunset.
The DRL system will make your low-beam
headlamps come on in daylight when the
following conditions are met:
The ignition is on, and
the exterior lamp band is in OFF or in the
parking lamp position, and
the parking brake is released.
When the DRL system is on, the tail lamps,
side marker lamps, parking lamps and
instrument panel lights will not be illumi-
nated unless you have turned the exterior
lamps control to the parking lamp position.An indicator light on the secondary infor-
mation center will come on when the DRL
system is on. See “Daytime Running
Lamps Indicator Light” in this section.
The DRL system will turn off under the fol-
lowing conditions:
The ignition is off, or
the parking brakes are on, or
the high-beam headlamps are on, or
the low-beam headlamps are on, or
flash-to-pass is used.
As with any vehicle, you should turn on the
regular headlamp system when you need
it.
Fog Lamps
If your vehicle has this feature, use your
fog lamps for better visibility in foggy or
misty conditions.
The control for your front fog lamps is
located on the middle of the turn signal/
multifunction lever. To turn on front fog
lamps, turn the fog lamp band to ON. To
turn off the front fog lamps, turn the fog
lamp band to OFF.
N6U3004A
Instrument Panel Overview: