Page 9 of 43
 Sat Compass Navigation System Manual General comments
8
•If the information “ SAFE” appears in the display afte r switching on the unit, it
can only be operated again by entering the correct code ⇒page 15.
Button
With the navi")
General comments
8
•If the information “ SAFE” appears in the display afte r switching on the unit, it
can only be operated again by entering the correct code ⇒page 15.
Button
With the navigation system there is the poss ibility to record traffic information over
a period of 2 and/or 24 hours. Up to nine traffic reports with a total duration of
maximum 4 minutes can be automatically recorded.
The TP stations always record traffic report s during operation, also if the play func-
tion is aborted by pressing the button . In the case of EON stations, also the
recording is aborted.
If the system is switched off, the reports are only recorded if the function TIM is acti-
vated.
Activate 24 hour TIM readiness
•If the system is switched off and the ignition key is withdrawn, hold the button pressed for a few seconds.
Activate 2 hour TIM readiness
•Withdraw the ignition key when the system is switched on and the vehicle is
stationary. The recording readiness is deactivated by switching the system on.
Note
•The 24 hour TIM readiness leads to an increased power consumption over 24
hours. This can lead to problems with th e voltage of the vehicle battery, if the
vehicle is only driven on short distance s. In this case the 24 hour TIM readiness
should not be activated.
•The oldest traffic information will be overwritten if the traffic information
memory is full. If a report lasts more than four minutes, the beginning of this report
is overwritten.
Button
The display contrast can be set with the button . – Press the button .
– The contrast can be set by pressing the menu knob .
– Confirm the set value by pressing the menu knob .
Button
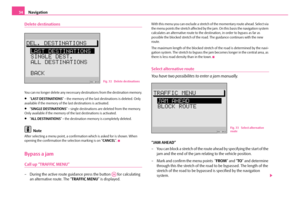
With the button incoming traffic re
ports can be displayed in the display
via the TMC (T raffic Message Channel - traffic message ch annel). These reports are
used by the navigation system for the dy namic route guidance, if this option is
active ⇒page 29.
The number of received traffic repo rts is shown below the display “TMC” through
corresponding points.
If the button is pressed, a text appears in the display. In the standard field
- background - of the display ⇒ page 9, fig. 2 the number of the indicated report
and the number of stored re ports is shown behind “TRAFFIC INFO”.
To change in-between individual reports, turn the menu knob .
Note
The TMC function is only available if a navigation CD has been inserted. Reports are
deleted after 15 minutes, if they are not rece ived again. If there is no report, a corre-
sponding note is displayed in the display.
Button
Mute the audio sources by pressing the button . “ AUDIO OFF”
is shown on the display.
– Press the button again or turn the rotary/push knob to switch the mute function on/off.
TIM
FMA2
TIMA3
DSP
DSPA9
DSP
A25
A25
TELE
TELEA13
TELEA13
A25
MUTE
MUTEA15
MUTEA15A19
s2ck.7.book Page 8 Friday, April 20, 2007 12:38 PM
Page 10 of 43
 Sat Compass Navigation System Manual General comments9
Button
All receivable stations in each band can be played for 5 seconds with the
function radio scan.
– Select with the buttons , or the band in
which you wish to car")
General comments9
Button
All receivable stations in each band can be played for 5 seconds with the
function radio scan.
– Select with the buttons , or the band in
which you wish to carry out the scan finding.
– Press the button briefly.
– If you wish to select the scanned station, press again the button .
Note
If you have selected no stat ion, the function radio scan is repeated after a frequency
process.
Button
– Press the button to receive more information about the current destination or the list entr ies, which are marked with continu-
ation points.
After pressing the button the current destination is shown in the standard
field - foreground - of the display ⇒fig. 2 and a repetition of the last voice response
of the navigation is performed if th e route guidance function is active.
A detailed display of the list entries shown with continuation points is given in list
menus.
Other list entries can be retrieved by pressing the menu knob .
Note
If further information is avai lable on your navigation CD, it can be called up in the
menu “ TRAVEL GUIDE ”.
Display
Display
The functions and menus displayed on th e display result from the following
standard fields ⇒fig. 2 :
Background
If the navigation is active the status of the functions radio, CD or CD changer* is
displayed at the top of the display. In radi o or CD mode the function of the naviga-
tion active at this moment in time is displayed.
Foreground
In case of active navigation, the optical driving recommendations are shown in the
foreground. In radio mode the station or th e frequency is shown in this standard
field, in CD mode “ TRACK” and the current track number.
Status range
The display appears only in audio mode.
The status range serves as display of the current audio source and the traffic radio
readiness.
SCAN
FMA2TMCA5AMA6
SCANA16
SCAN
A16
INFO
INFOA17
INFOA17
A25
Fig. 2 Layout of the display
s2ck.7.book Page 9 Friday, April 20, 2007 12:38 PM
Page 11 of 43
 Sat Compass Navigation System Manual General comments
10
Display contents
The display shows the following content:
selected audio source,
selected memory space,
name of the selected station,
display that the set station is a TMC stat")
General comments
10
Display contents
The display shows the following content:
selected audio source,
selected memory space,
name of the selected station,
display that the set station is a TMC station as well as the number of received
traffic reports,
arrival time,
selected route option (here dynamic),
distance to destination,
direction arrow,
distance to the next decision point,
name of the currently driven road.
Alarm
If your navigation system rece ives a disaster announcement, “ ALARM” is displayed
in the standard field - foreground - of the display. The display appears in the
standard field - background du ring active route guidance.
The play function of the active audio so urce is interrupted and the navigation
system switches over to the correspond ing radio station that is receiving the
disaster announcement.
The play function of the announceme nt is perfomed with the volume ⇒page 13
set for traffic information.
At the end of the announcement it switches back automatically to the last active
audio source.
You can end the traffic information at any time by switching over to another audio
source or setting another station.
Te l e p h o n e
If your vehicle is eq uipped with a “hands-free system*” , the voice play function of
the telephone is performed via the navigation system.
If the telephone is activated, the au dio sources are switched to mute. “ PHONE” is
displayed on the display.
After the end of the conversation, the audio play function is continued.
Note
If the navigation system is switched off, it switches on automatically when activating
the telephone. The display is not switched on. You can phone as before. After the
end of the conversation, the navigation system automatically switches off again.
Fig. 3 Display overview
AA
AB
AC
AD
AE
AF
AG
AH
AI
AJ
s2ck.7.book Page 10 Friday, April 20, 2007 12:38 PM
Page 12 of 43
 Sat Compass Navigation System Manual General comments11
Basic settings of the navigation system
SETUP MENU
– Call up the “SETUP MENU” by pressing the button .
All basic functions of your navigation system are set in the “ SETU")
General comments11
Basic settings of the navigation system
SETUP MENU
– Call up the “SETUP MENU” by pressing the button .
All basic functions of your navigation system are set in the “ SETUP MENU” ⇒ fig. 4 .
The display contents of the menu are divided into menu title and menu points.
If one menu contains more than five menu points, thus the other menu points are
not within the illustrated range. Such me nus are marked by arrows on the right.
Other menu points are shown if the selection marking is moved before the last or
second menu point of the list. After a fu rther actuation of the menu knob the
selection marking remains at the point and the other menu points are displayed.
Selecting and confirming menu points
Select and operate the menu points by using the menu knob .
– To move the selection marking upwa rds or downwards, turn the menu
knob to the right or left. The selected menu is displayed inversely.
– Confirm the selection by pressing the menu knob .
If the selection has been confirmed, th e next sub-menu will be displayed. The
selection marking remains on the first menu point. The menu title is shown in the
standard field - background - of the disp lay. Mark and confirm the menu point to
be changed by using the menu knob . The setting can be carried out.
Change the settings
The menu point you wish to change is circ led. The setting is changed by turning the
menu knob . Confirm the changed se tting by pressing the menu knob .
Exit the menu
– If you do not wish to take over the changed setting, press the button
.
– If you wish to change to the previous menu, press once again the button .
– To exit a basic menu, select another function, e.g. FM or CD.
Navigation settings
– Call up the menu “ SETUP-NAVIGATION ” by selecting the menu point
“ NAVIGATION ” in the “SETUP MENU ”.
Fig. 4 Layout of the menu
SETA28
A25
A25
A25
A25
A25
A25A25
A27
A27
Fig. 5 Naviga tion settings
s2ck.7.book Page 11 Friday, April 20, 2007 12:38 PM
Page 13 of 43
 Sat Compass Navigation System Manual General comments
12
“SETTINGS”
Here you will reach a sub-menu for determining the system settings:
•“ TIME INFO ” - here you can select if the “ ARRIVAL TIME” at destination or the
“")
General comments
12
“SETTINGS”
Here you will reach a sub-menu for determining the system settings:
•“ TIME INFO ” - here you can select if the “ ARRIVAL TIME” at destination or the
“ REMAINING TRAVEL TIME ” to the destination should be displayed.
•“LANGUAGE ” - if the route guidance should be performed without voice
response, then select the option “ OFF”. In case of deactivated voice response, the
route guidance can only be performed wi th optical driving recommendations on
the display or the instrument cluster.
•“ REMEMB. DEST. ” - automatically stores the last 10 destinations in the
memory “ LAST DESTINATIONS ” switch on or off.
•“DRIVING SYMBOLS ” - if you wish the display of optical driving recommenda-
tions only in the instrument cluster, then select the option “ OFF”.
“LOCATION”
If no GPS reception ⇒ page 5 is possible, the location can be entered here manu-
ally.
“TYRE CHANGE”
If new tyres were mounted ⇒ page 7, select this menu point.
Audio settings
The settings for the audio mode ca n be carried out in the menu “SETUP AUDIO”
⇒ fig. 6 .
“RDS NAME”
Certain stations use RDS not only to transm it their name but also for advertisement.
Here you can set if the name of a station called up out of the memory should be set
fixed in the display “ FIX” or if alternative news, e.g. advertisement, should be
displayed “ VAR”.
“RDS-REG”
Here you can select if the navigation sy stem should also set RDS stations, which
transmit another regional program than the currently heard one. This setting may
be necessary, if the reception is so weak, that there is a risk of a “program loss”
⇒ page 16.
•“AUTO ” - when selecting this setting the change to regional “related” station
frequencies is only performed if there is a risk of a “program loss”.
•“ OFF ” - a regional related station frequency can be set manually. No automatic
change is carried out.
“CD-MIX”
This menu point can only be activate d in combination with CD changer *.
•Set the “DISC”, if first all tracks of the active CD and then all tracks of another CD
should be played in random order.
•Set the “ MAG” (Magazine), in order to hear all tracks of the entire magazine in
random order.
“MUSIC/SP.”
RDS stations have the possibility to transmit a signal which in case of text messages
switches over the frequency input of your navigation system to the voice play func-
tion, to do so e.g. treble is decreased. The voice play function is clearer and can be
heard better.
•“ AUTO ” - the frequency response of the vo ice play function is automatically
changed when the corresponding signal is received.
•“ OFF ” - select, if you do not wish an automatic adaptation of the frequency
response.Fig. 6 Audio settings
s2ck.7.book Page 12 Friday, April 20, 2007 12:38 PM
Page 14 of 43
 Sat Compass Navigation System Manual General comments13
“TA”
Here you can set if your na vigation system should repl ay incoming traffic informa-
tion.
•“ ON ” - all incoming traffic information is replayed. If TA is switched o")
General comments13
“TA”
Here you can set if your na vigation system should repl ay incoming traffic informa-
tion.
•“ ON ” - all incoming traffic information is replayed. If TA is switched on, only TP
stations can be set.
•“ OFF ” - Traffic information is not replayed.
Volume settings
“VOL-ON ” - Setting the switch on volume of the system.
“ TA MI N ” - setting the minimum volume for traffic information.
“ NAV-MIN ” - setting the minimum volume for the voice response of the naviga-
tion.
“ TELEPHONE ” - if your vehicle is equipped with a hands-fr ee system*, a call is
replayed via the navigation system. Here you can set the volume, with which you
can hear your conv ersation partner.
“ GALA ” - the volume of your navigation sy stem is increased automatically with
increasing speed and thus high exterior noises. Here you can set the degree of
accentuation.
Note
If at a particular time of a traffic information or voice response the system volume
is higher than “ TA MIN” or “NAV-MIN ”, this is also performed in the system
volume.
Macro button settings
The macro button can be assigned to one of the following functions:
•“ ROUTE GUIDANCE ” - activates the route guidance, if a destination has already
been defined.
•“ ROUTE OPTIONS ” - calls up the menu for se lecting the route calculation.
•“ROUTE LIST ” - calls up the route list during an active route guidance.
•“LAST DESTINATIONS ” - shows the content of the memory - LAST
DESTINATIONS - of the navigation.
•“ ALPH.DEST.MEMORY ” - calls up the alphabetica lly classified destination
memory.
•“ GPS STATUS ” - shows the number of current GPS satellite receptions and the
geographic position.
•“ TOGGLE TIME INFO ” - allows the switch-over between arrival time and
remaining travel time.
Fig. 7 Volume settings
Fig. 8 Macro button settings
A29
s2ck.7.book Page 13 Friday, April 20, 2007 12:38 PM
Page 15 of 43
 Sat Compass Navigation System Manual General comments
14
•“ SHOW LOCATION ” - the route guidance is performed under the information
of all directions, where the destination is located and if necessary the name of the
driven road.")
General comments
14
•“ SHOW LOCATION ” - the route guidance is performed under the information
of all directions, where the destination is located and if necessary the name of the
driven road.
Note
When calling up the menu the selection marking is on the menu point “ ROUTE
GUIDANCE ”. The current assignment of the macro button is marked with an
arrow.
Time settings
•The menu point “ GPS TIME” cannot be set. It serves for the calculation of the
system time for GPS reception. If the “ GPS TIME” is available, the “ SYSTEM TIME”
cannot be set manually.
•“ TIME ZONE ” - here you can enter the difference of the time zone in which you
are at the moment to the world standard time - UTC.
•“ DAYL. SAV. ” - select “ON”, if you are in a country, in which daylight saving
applies at the time of the setting.
•“ SYSTEM TIME ” -select and confirm the menu point “ SYSTEM TIME” with the
menu knob . Now the time can be set by pressing the menu knob . In order
to change to minutes, press once again the menu knob . End the setting by
pressing once again the menu knob .
Note
•The system time can only be changed, if no GPS Time can be received.
Language
The displays and the announcements of th e navigation can be selected in the
following languages:
•Czech
•German
•English (Imperial) - Measur ements given in yards
•English (Metric) - Measurements given in metres
•Spanish
•French
•Italian
•Dutch
Factory settings
Here you can reset all settings of the SETUP menus and the sound settings to the
factory setting. Language setting and calibration are exempt.
If you select and confirm the menu point “ FA C TO R Y S E T T I N G S” after pressing the
button you will be requested once ag ain to confirm your selection. If you
have selected and confirmed the menu point “YES ”, the factory settings are reset
(language setting and calibration are exempt). The navigation system switches off
briefly and then on again.
If you do not wish to reset the naviga tion system, select the menu point “NO”.Fig. 9 Time settings
A25A25A25A25
SETA28
s2ck.7.book Page 14 Friday, April 20, 2007 12:38 PM
Page 16 of 43
 Sat Compass Navigation System Manual General comments15
Note
If the navigation CD is inserted there is the possibility beforehand to delete the
stored destinations. If you wish to delete the stored destinations, select the menu
point")
General comments15
Note
If the navigation CD is inserted there is the possibility beforehand to delete the
stored destinations. If you wish to delete the stored destinations, select the menu
point “ YES”, if not, select “ NO”.
Anti-theft protection
Anti-theft coding
The anti-theft coding of yo ur navigation system prevents an operation of the
system after a voltage interruption, e.g. during a vehicle repair or after theft.
After disconnecting the battery, after separa ting the navigation system from the on-
board voltage of the vehicle and after a de fective protection, the entry of the code
is required when operating.
In such cases “ SAFE” is shown in the display after switching on.
Caution
•This code number is affixed together wi th the unit number on the “Unit card”,
which is located behind the instructions.
•The “unit card” must be disconnected and stored outside the vehicle.
Note
The code is normally stored in the instrume nt cluster. Through this the navigation
system is automatically decoded (convenien ce coding). A manual entry of the code
is normally not necessary.
Code entry
The electronical lock is cancelled by entering the correct code. The order
of the following operating steps must be maintained: – Switch on the navigation system - after the start screen with the
display “ SAFE” the request for entry of the code number is displayed
after 2 seconds “ 1000” is shown on the display.
– Continue pressing the station selection button 1 until the first digit
of the code number is shown in the display.
– Insert the other digits of the code number by repetitively pressing the
station selection button 2, and/or 3 or 4 .
– If the entire code number was entered, press the menu knob or the button or the button for at least 2 seconds.
Entry of an incorrect code number
If inadvertently an incorrect code number was confirmed when entering, “ SAFE” is
shown again in the display. First of all flashing and then permanent. “ WRONG
TRIES: 1 ” is shown on the display.
Now the entire process can be repeated once again.
If the code number is entered incorrectly fo r the second time, the navigation system
will be blocked for approx. one hour. It is only possible to repeat the entry of the
code number after an hour has expired and while the navigation system is switched
on and the ignition key remains in the ignition lock.
If once again two non-valid attempts are undertaken, the navigation system will be
blocked again for an hour.
The cycle - two attempts, blocked for an hour - furthermore applies.
Note
Please do not hesitate to contact your Šk oda Service Partner should you have lost
the “unit card”.
A22
A22
A25
A1A14
s2ck.7.book Page 15 Friday, April 20, 2007 12:38 PM