Page 73 of 304

73 9-3 Convertible
"Easy entry"To facilitate getting in and out of the rear
seat, the front seats can be slid forward.
Manually adjusted passenger seats3
1 Raise the handle by the head restraint
on the seat.
2 Tip the backrest and slide the seat
forward.
Repositioning:
1 Tip back the backrest.
2 Slide the seat back to the desired
position.
Make sure the backrest and seat are prop-
erly locked in position.Electrically adjustable front seats3
1 Raise the handle by the head restraint
on the seat.
2 Tip the backrest forward.
3 The seat now moves to its foremost
position.
Repositioning:
1 Tip the backrest back to its normal
position.
2 Raise and hold the handle until the seat
has returned to its previous position.Repositioning (seats without memory):
1 Tip the backrest back but not to its
normal position.
2 Raise and hold the handle until the seat
has returned to its previous position.
3 Release the handle and move the back-
rest to locked position.
WARNING
Always check that the backrest locks
properly when returned to normal
position.
Check that the fore-and-aft position of
the seat is properly locked. The back-
rest and the entire belt-in seat must be
locked in position; otherwise the occu-
pant of the seat is at risk of injury
during braking or in the event of a
crash, especially if a rear-facing child
seat is fitted behind the backrest.
"Easy entry" function. Illustration shows an electrically adjustable seat
3
93_U S _M 07.book Page 73 W ednesday, April 12, 2006 9:30 AM
ProCarManuals.com
Page 74 of 304

74 9-3 ConvertibleHead restraintsThe front seats are equipped with Saab
Active Head Restraints (SAHRs). These are
designed to reduce the risk of neck injury if
the car is hit from behind.
The SAHR is a mechanical system, actu-
ated by body weight. The mechanism is built
into the top of the backrest, where it is con-
nected to the head restraint.
In the event of a rear-end crash, the body is
forced back against the backrest. This, in
turn, causes the mechanism to press the
head restraint forward and upward, thus lim-
iting the backward movement of the head.
The front seat head restraints must be set at
a height where at least one notch is visible
on the rear of the head restraint stem (pole).
In this position the vertical distance between
the top of the seat back and the head
restraint should be greater than 30 mm
when measured at the rear. See page 23.Under no circumstances should the front
seat head restraint be forced down below
this position.The front head restraints can be raised and
lowered to a number of positions, the rear
has two positions.
Raising: grasp the head restraint on both
sides and pull it straight up.
Lowering: Press the head restraint
forward and downward.
The rear head restraints can be fully low-
ered to improve rearward vision when the
rear seats are unoccupied.
WARNING
Adjust the head restraint so that the
head is optimally supported and the
center of the head restraint is at ear
height, thus reducing the likelihood of
neck injury in a crash.
Raise the head restraints in the seats
that are occupied.
Rear head restraint Front head restraint
93_U S _M 07.book Page 74 W ednesday, April 12, 2006 9:30 AM
ProCarManuals.com
Page 75 of 304

75 9-3 Convertible
Safety belts, rear seat,
ConvertibleThe two rear seats have three-point safety
belts with inertia reels.
Fasten the belt by pulling the belt and insert-
ing the tongue in the buckle. Check that it is
securely fastened.
Position the lap part low across the hips.
Grasp the shoulder belt close to the buckle
and pull the belt towards the shoulder to
tighten the lap belt part.
The belt must be as far in on the shoulder as
possible.
Press the red button on the belt buckle to
release the belt.
Refer to page 260 for how to check the func-
tion of the safety belts, cleaning, etc.
For how to secure loads on the rear seat,
refer to page 17.
WARNING
If cargo has to be placed on a seat, it
must be properly secured with the
safety belt. This reduces the risk of the
cargo being thrown about during hard
braking or a crash, which could cause
personal injury.
Check that the belt is not twisted or
lying against sharp edges.
Make sure you use the correct seat-
belt buckle.Safety belts, rear seat, Convertible
93_U S _M 07.book Page 75 W ednesday, April 12, 2006 9:30 AM
ProCarManuals.com
Page 76 of 304

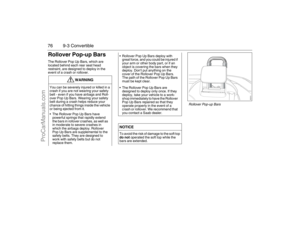
76 9-3 ConvertibleRollover Pop-up BarsThe Rollover Pop Up Bars, which are
located behind each rear seat head
restraint, are designed to deploy in the
event of a crash or rollover.
WARNING
You can be severely injured or killed in a
crash if you are not wearing your safety
belt - even if you have airbags and Roll-
over Pop Up Bars. Wearing your safety
belt during a crash helps reduce your
chance of hitting things inside the vehicle
or being ejected from it.
The Rollover Pop Up Bars have
powerful springs that rapidly extend
the bars in rollover crashes, as well as
in moderate to severe crashes in
which the airbags deploy. Rollover
Pop Up Bars are supplemental to the
safety belts. They are designed to
work with safety belts but do not
replace them.
Rollover Pop Up Bars deploy with
great force, and you could be injured if
your arm or other body part, or if an
object is covering the bars when they
deploy. Don't put anything on the
cover of the Rollover Pop Up Bars.
The path of the Rollover Pop Up Bars
must be kept clear.
The Rollover Pop Up Bars are
designed to deploy only once. If they
deploy, take your vehicle to a work-
shop immediately to have the Rollover
Pop Up Bars repaired so that they
operate properly in the event of a
crash or rollover. We recommend that
you contact a Saab dealer.NOTICETo avoid the risk of damage to the soft top
do not operated the soft top while the
bars are extended.
Rollover Pop-up Bars
93_U S _M 07.book Page 76 W ednesday, April 12, 2006 9:30 AM
ProCarManuals.com
Page 77 of 304

77 9-3 Convertible
Electric windows
To openSoft top raised – The windows open individ-
ually.
Soft top folded – The button for the front
window opens both side windows.
Automatic opening
Press the button all the way down and
release it. If the soft top is folded, the rear
side window is also lowered.
To closeSoft top raised – The windows are operated
individually.
Soft top folded – The button for the front
window closes both side windows.
Automatic closing of a front side window
Raise the button all the way and release it.
The rear side window must be fully closed.
Pinch protection3 is available for the front
side windows.
For further information on the electric win-
dows, refer to page 119.Deactivating the passenger door
window buttonWith the button on the driver’s door,
you can deactivate the window button on
the passenger door.
The illuminated switch will change color
from green to amber (deactivated).
WARNING
Bear in mind the pinch hazard when clos-
ing the side windows. May cause serious
or fatal injuries!
Always remove the remote control
from the ignition switch when you
leave the car to prevent personal
injury caused by the activation of the
electric windows, for example, due to
children playing.
The person operating the electric
window is responsible for ensuring
that no one, especially a child, has
their head, hands or fingers in the
window openings, before raising the
window.
Do not stick any part of the body or the
head out through an open window
while the car is moving.
Window switches
93_U S _M 07.book Page 77 W ednesday, April 12, 2006 9:30 AM
ProCarManuals.com
Page 78 of 304

78 9-3 ConvertibleCalibrating front electric
windows with pinch protection3The window lifts should be calibrated if auto-
matic closing does not work or if the battery
has been disconnected. The pinch protec-
tion will not work if the windows are not
calibrated.
Perform calibration as follows:
1 Make sure the soft top is raised.
2 Make sure the doors are closed.
3 Let the engine idle.
4 Press and hold the soft top button up
until a chime sounds.
During calibration, the four windows will
be raised and lowered several times.
If calibration fails twice in a row, have the car
checked and rectified. We recommend that
you contact a Saab dealer.
Interior lightingThe interior lighting consists of a front roof
light, two front reading lights, footwell light-
ing and courtesy lighting in the doors. The
light switches are located in the roof con-
sole.
The cabin lighting comes on:
When a door is opened and the ignition is
OFF.
When the remote control is removed from
the ignition switch.
The lighting goes out:
When the car is locked.
When the ignition is turned on.
Approx. 20 s after closing all doors.
The lights are dimmed out gradually.
If a door is left open with the ignition OFF,
the interior lighting goes out automatically
after 5 min so as not to drain the battery.
The interior lighting can be switched off
completely.
1 Open the driver’s door.
2 Turn off the cabin lighting with the center
button, see illustration.
This is canceled when the ignition switch is
turned to position ON or when the car is
locked with the remote control.
Front interior lighting - Convertible1 Left-hand reading light
2 Cabin light
3 Right-hand reading light
93_U S _M 07.book Page 78 W ednesday, April 12, 2006 9:30 AM
ProCarManuals.com
Page 79 of 304

79 9-3 Convertible
Glove boxThe glove box lighting comes on when the
compartment is opened and goes out when
it is closed.
For changing bulbs, refer to page 230.Sun visorAn illuminated vanity mirror is provided on
the inside of the sun visors. The lighting
comes on when the cover is raised and goes
out when it is closed.Trunk lightingThe trunk lighting comes on and goes out
when the trunk lid is opened and closed.
If the trunk lid is left open, the lighting will be
switched off automatically after 20 min to
prevent the battery from running flat.
For changing bulbs, refer to page 232.
Unlocking the trunk lid
manuallyIf the trunk lid is not unlocked by the central
locking system, it can be unlocked
manually.
1 Take the traditional key out of the
remote control by pressing the emblem
on the reverse (see page 54).
2 Carefully prise off the round cover using
your nails, a credit card or similar so as
not to damage the paintwork.
3 Unlock the trunk lid using the traditional
key.
We recommend that you contact a Saab
dealer to have the central locking system
checked.
Unlocking the trunk lid manually
93_U S _M 07.book Page 79 W ednesday, April 12, 2006 9:30 AM
ProCarManuals.com
Page 80 of 304
80 9-3 ConvertiblePlacing two golf bags
in the trunkThere is sufficient space in the trunk of the
Convertible for two golf bags. Proceed as
follows.
1 Start by inserting the narrow end of the
first bag to the right.
2 Lie down the bag. Turn the bag so that it
lies on its widest side and slide it
forward, in under the soft top storage
(see illustration).
3 Put in the second bag in the same way
as the first, but lie it on its narrow side
(see illustration).
Spoiler on trunklid3
Wind deflector3A wind deflector is available as an acces-
sory. Follow the fitting instructions supplied
with the wind deflector carefully.
WARNING
Some models have a spoiler on the trunk-
lid. Avoid getting fingers and hands
trapped between the spoiler and rear
fender when closing the trunklid.
Position of first golf bag Position of second golf bag
93_U S _M 07.book Page 80 W ednesday, April 12, 2006 9:30 AM
ProCarManuals.com