2007 NISSAN TIIDA door lock
[x] Cancel search: door lockPage 4383 of 5883

MWI-76
< ECU DIAGNOSIS >
IPDM E/R (INTELLIGENT POWER DISTRIBUTION MODULE ENGINE ROOM)
THFT HRN REQNot operated OFF
Panic alarm is activated
Horn is activated with VEHICLE SECURITY (THEFT WARNING) SYS-
TEMON
HORN CHIRPNot operated OFF
Door locking with keyfob or Intelligent Key (if equipped) (horn chirp mode) ON Monitor Item Condition Value/Status
Page 4432 of 5883
![NISSAN TIIDA 2007 Service Repair Manual PCS-18
< ECU DIAGNOSIS >[IPDM E/R]
IPDM E/R (INTELLIGENT POWER DISTRIBUTION MODULE ENGINE ROOM)
THFT HRN REQNot operated OFF
Panic alarm is activated
Horn is activated with VEHICLE SECURITY (THEFT NISSAN TIIDA 2007 Service Repair Manual PCS-18
< ECU DIAGNOSIS >[IPDM E/R]
IPDM E/R (INTELLIGENT POWER DISTRIBUTION MODULE ENGINE ROOM)
THFT HRN REQNot operated OFF
Panic alarm is activated
Horn is activated with VEHICLE SECURITY (THEFT](/manual-img/5/57395/w960_57395-4431.png)
PCS-18
< ECU DIAGNOSIS >[IPDM E/R]
IPDM E/R (INTELLIGENT POWER DISTRIBUTION MODULE ENGINE ROOM)
THFT HRN REQNot operated OFF
Panic alarm is activated
Horn is activated with VEHICLE SECURITY (THEFT WARNING) SYS-
TEMON
HORN CHIRPNot operated OFF
Door locking with keyfob or Intelligent Key (if equipped) (horn chirp mode) ON Monitor Item Condition Value/Status
Page 4454 of 5883
![NISSAN TIIDA 2007 Service Repair Manual PCS-40
< ON-VEHICLE MAINTENANCE >[POWER DISTRIBUTION SYSTEM]
PRE-INSPECTION FOR DIAGNOSTIC
ON-VEHICLE MAINTENANCE
PRE-INSPECTION FOR DIAGNOSTIC
Basic InspectionINFOID:0000000001697628
The engine start NISSAN TIIDA 2007 Service Repair Manual PCS-40
< ON-VEHICLE MAINTENANCE >[POWER DISTRIBUTION SYSTEM]
PRE-INSPECTION FOR DIAGNOSTIC
ON-VEHICLE MAINTENANCE
PRE-INSPECTION FOR DIAGNOSTIC
Basic InspectionINFOID:0000000001697628
The engine start](/manual-img/5/57395/w960_57395-4453.png)
PCS-40
< ON-VEHICLE MAINTENANCE >[POWER DISTRIBUTION SYSTEM]
PRE-INSPECTION FOR DIAGNOSTIC
ON-VEHICLE MAINTENANCE
PRE-INSPECTION FOR DIAGNOSTIC
Basic InspectionINFOID:0000000001697628
The engine start function, door lock function, power distribution system and NATS-NVIS system are closely
related to each other regarding control. Narrow down the functional area in question by performing basic
inspection to identify which function is malfunctioning. The vehicle security function can operate only when the
door lock and power distribution system are operating normally. Therefore, it is easy to identify any factor
unique to the vehicle security system by performing the vehicle security operation check after basic inspection.
1. CHECK DOOR LOCK OPERATION
1. Check the door lock for normal operation with the keyfob or Intelligent Key (if equipped) and door request
switch.
Successful door lock operation with the keyfob or Intelligent Key (if equipped) and request SW indicates
that the remote keyless entry receiver and inside key antenna (with Intelligent Key) required for engine
start are functioning normally.
Identify the malfunctioning point by referring to the DLK section if the door cannot be unlocked.
Can the door be locked with the Intelligent Key and door request switch?
YES >> GO TO 2
NO >> Refer to DLK-191, "
DOOR LOCK AND UNLOCK SWITCH : Symptom Table" (with Intelligent Key
without super lock), DLK-420, "
DOOR LOCK AND UNLOCK SWITCH : Symptom Table" (with
Intelligent Key and super lock), DLK-567, "
DOOR LOCK AND UNLOCK SWITCH : Symptom
Table" (without Intelligent Key without super lock) or DLK-718, "DOOR LOCK AND UNLOCK
SWITCH : Symptom Table" (without Intelligent Key with super lock).
2. CHECK ENGINE STARTING
1. Checks that the engine starts.
Does the engine start?
YES >> GO TO 3
NO >> Refer to SEC-76, "
Symptom Table" (with Intelligent Key) or SEC-117, "Symptom Table" (without
Intelligent Key).
3. CHECK STEERING LOCKING (MODELS WITH INTELLIGENT KEY)
1. Does the steering lock when operating door switch after switching the power supply from ON position (or
ACC position) to LOCK position?
If door switch is malfunctioning, BCM cannot lock the steering. If BCM does not detect DTC, steering lock
unit is normal.
Does steering lock?
YES >> GO TO 4
NO >> Refer to STC-29, "
Symptom Chart".
4. CHECK VEHICLE SECURITY SYSTEM
1. Check the vehicle security system for normal operation.
The vehicle security function can operate only when the door lock and power distribution functions are
operating normally.
Therefore, it is easy to identify any factor unique to the vehicle security by performing the vehicle security
operation check after this basic inspection.
>> Refer to SEC-75, "
Symptom Table" (with Intelligent Key) or SEC-116, "Symptom Table" (without
Intelligent Key).
Page 4463 of 5883

PWC-2
PASSENGER SIDE : Component Inspection .........25
REAR LH ...................................................................25
REAR LH : Description ...........................................25
REAR LH : Component Function Check ................25
REAR LH : Diagnosis Procedure ............................25
REAR LH : Component Inspection .........................26
REAR RH ..................................................................27
REAR RH : Description ..........................................27
REAR RH : Component Function Check ................27
REAR RH : Diagnosis Procedure ...........................27
REAR RH : Component Inspection ........................28
ENCODER .........................................................29
DRIVER SIDE ............................................................29
DRIVER SIDE : Description ....................................29
DRIVER SIDE : Component Function Check .........29
DRIVER SIDE : Diagnosis Procedure ....................29
DRIVER SIDE : Special Repair Requirement .........31
DOOR SWITCH .................................................32
Description ..............................................................32
Component Function Check ...................................32
Diagnosis Procedure ..............................................32
Component Inspection ............................................33
POWER WINDOW LOCK SWITCH ...................34
Description ..............................................................34
Component Function Check ...................................34
Special Repair Requirement ...................................34
ECU DIAGNOSIS ........................................35
BCM (BODY CONTROL MODULE) ..................35
Reference Value .....................................................35
POWER WINDOW MAIN SWITCH ....................36
Reference Value .....................................................36
Wiring Diagram - LHD - ..........................................38
Wiring Diagram - RHD - ..........................................45
Fail Safe .................................................................51
SYMPTOM DIAGNOSIS ............................53
NONE OF THE POWER WINDOWS CAN BE
OPERATED USING ANY SWITCH ...................
53
Diagnosis Procedure ...............................................53
DRIVER SIDE POWER WINDOW ALONE
DOES NOT OPERATE ......................................
54
Diagnosis Procedure ...............................................54
FRONT PASSENGER SIDE POWER WIN-
DOW ALONE DOES NOT OPERATE ...............
55
Diagnosis Procedure ...............................................55
REAR LH SIDE POWER WINDOW ALONE
DOES NOT OPERATE ......................................
56
Diagnosis Procedure ...............................................56
REAR RH SIDE POWER WINDOW ALONE
DOES NOT OPERATE ......................................
57
Diagnosis Procedure ...............................................57
ANTI-PINCH SYSTEM DOES NOT OPERATE
NORMALLY (DRIVER SIDE) ............................
58
Diagnosis Procedure ...............................................58
AUTO OPERATION DOES NOT OPERATE
BUT MANUAL OPERATE NORMALLY
(DRIVER SIDE) ..................................................
59
Diagnosis Procedure ...............................................59
POWER WINDOW RETAINED POWER OP-
ERATION DOES NOT OPERATE PROPERLY
...
60
Diagnosis Procedure ...............................................60
POWER WINDOW LOCK SWITCH DOES
NOT FUNCTION ................................................
61
Diagnosis Procedure ...............................................61
ON-VEHICLE MAINTENANCE ..................62
PRE-INSPECTION FOR DIAGNOSTIC ............62
Basic Inspection ......................................................62
Page 4465 of 5883

PWC-4
< BASIC INSPECTION >
INSPECTION AND ADJUSTMENT
INSPECTION AND ADJUSTMENT
ADDITIONAL SERVICE WHEN REMOVING BATTERY NEGATIVE TERMINAL
ADDITIONAL SERVICE WHEN REMOVING BATTERY NEGATIVE TERMINAL : De-
scription
INFOID:0000000001696361
Initial setting is necessary when battery terminal is diconnected.
CAUTION:
The following specified operations are not performed under the non-initialized condition.
• Auto-up operation
Anti-pinch function
Retained power operation
ADDITIONAL SERVICE WHEN REMOVING BATTERY NEGATIVE TERMINAL : Spe-
cial Repair Requirement
INFOID:0000000001696362
INITIALIZATION PROCEDURE
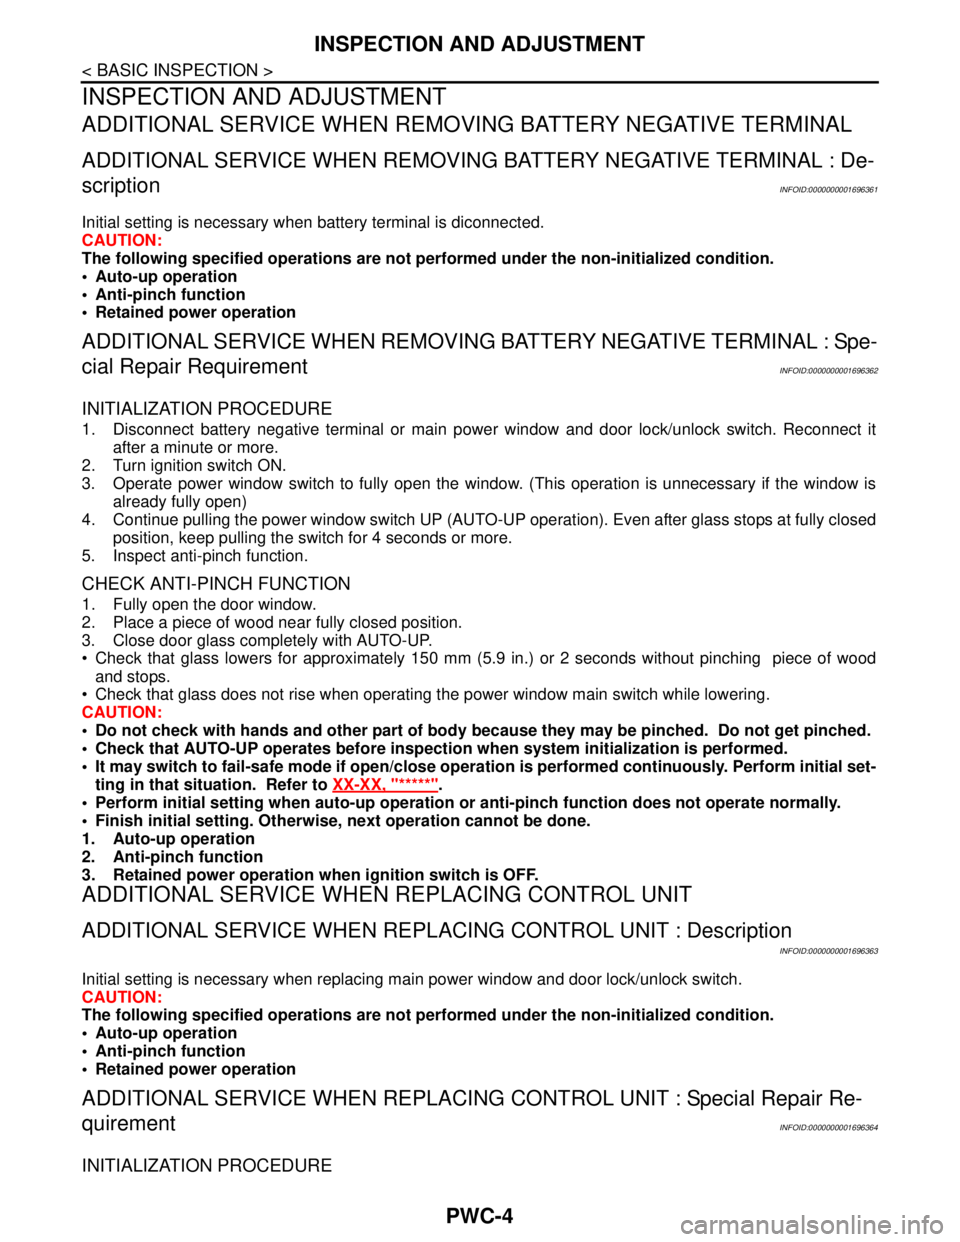
1. Disconnect battery negative terminal or main power window and door lock/unlock switch. Reconnect it
after a minute or more.
2. Turn ignition switch ON.
3. Operate power window switch to fully open the window. (This operation is unnecessary if the window is
already fully open)
4. Continue pulling the power window switch UP (AUTO-UP operation). Even after glass stops at fully closed
position, keep pulling the switch for 4 seconds or more.
5. Inspect anti-pinch function.
CHECK ANTI-PINCH FUNCTION
1. Fully open the door window.
2. Place a piece of wood near fully closed position.
3. Close door glass completely with AUTO-UP.
Check that glass lowers for approximately 150 mm (5.9 in.) or 2 seconds without pinching piece of wood
and stops.
Check that glass does not rise when operating the power window main switch while lowering.
CAUTION:
Do not check with hands and other part of body because they may be pinched. Do not get pinched.
Check that AUTO-UP operates before inspection when system initialization is performed.
It may switch to fail-safe mode if open/close operation is performed continuously. Perform initial set-
ting in that situation. Refer to XX-XX, "*****"
.
Perform initial setting when auto-up operation or anti-pinch function does not operate normally.
Finish initial setting. Otherwise, next operation cannot be done.
1. Auto-up operation
2. Anti-pinch function
3. Retained power operation when ignition switch is OFF.
ADDITIONAL SERVICE WHEN REPLACING CONTROL UNIT
ADDITIONAL SERVICE WHEN REPLACING CONTROL UNIT : Description
INFOID:0000000001696363
Initial setting is necessary when replacing main power window and door lock/unlock switch.
CAUTION:
The following specified operations are not performed under the non-initialized condition.
Auto-up operation
Anti-pinch function
Retained power operation
ADDITIONAL SERVICE WHEN REPLACING CONTROL UNIT : Special Repair Re-
quirement
INFOID:0000000001696364
INITIALIZATION PROCEDURE
Page 4466 of 5883

INSPECTION AND ADJUSTMENT
PWC-5
< BASIC INSPECTION >
C
D
E
F
G
H
I
J
L
MA
B
PWC
N
O
P
1. Disconnect battery negative terminal or main power window and door lock/unlock switch. Reconnect it
after a minute or more.
2. Turn ignition switch ON.
3. Operate power window switch to fully open the window. (This operation is unnecessary if the window is
already fully open)
4. Continue pulling the power window switch UP (AUTO-UP operation). Even after glass stops at fully closed
position, keep pulling the switch for 4 seconds or more.
5. Inspect anti-pinch function.
CHECK ANTI-PINCH FUNCTION
1. Fully open the door window.
2. Place a piece of wood near fully closed position.
3. Close door glass completely with AUTO-UP.
Check that glass lowers for approximately 150 mm (5.9 in.) or 2 seconds without pinching piece of wood
and stops.
Check that glass does not rise when operating the main power window and door lock/unlock switch while
lowering.
CAUTION:
Do not check with hands and other part of body because they may be pinched. Do not get pinched.
Check that AUTO-UP operates before inspection when system initialization is performed.
It may switch to fail-safe mode if open/close operation is performed continuously. Perform initial set-
ting in that situation. Refer to XX-XX, "*****"
.
Perform initial setting when auto-up operation or anti-pinch function does not operate normally.
Finish initial setting. Otherwise, next operation cannot be done.
1. Auto-up operation
2. Anti-pinch function
3. Retained power operation when ignition switch is OFF.
Page 4467 of 5883

PWC-6
< FUNCTION DIAGNOSIS >
POWER WINDOW SYSTEM
FUNCTION DIAGNOSIS
POWER WINDOW SYSTEM
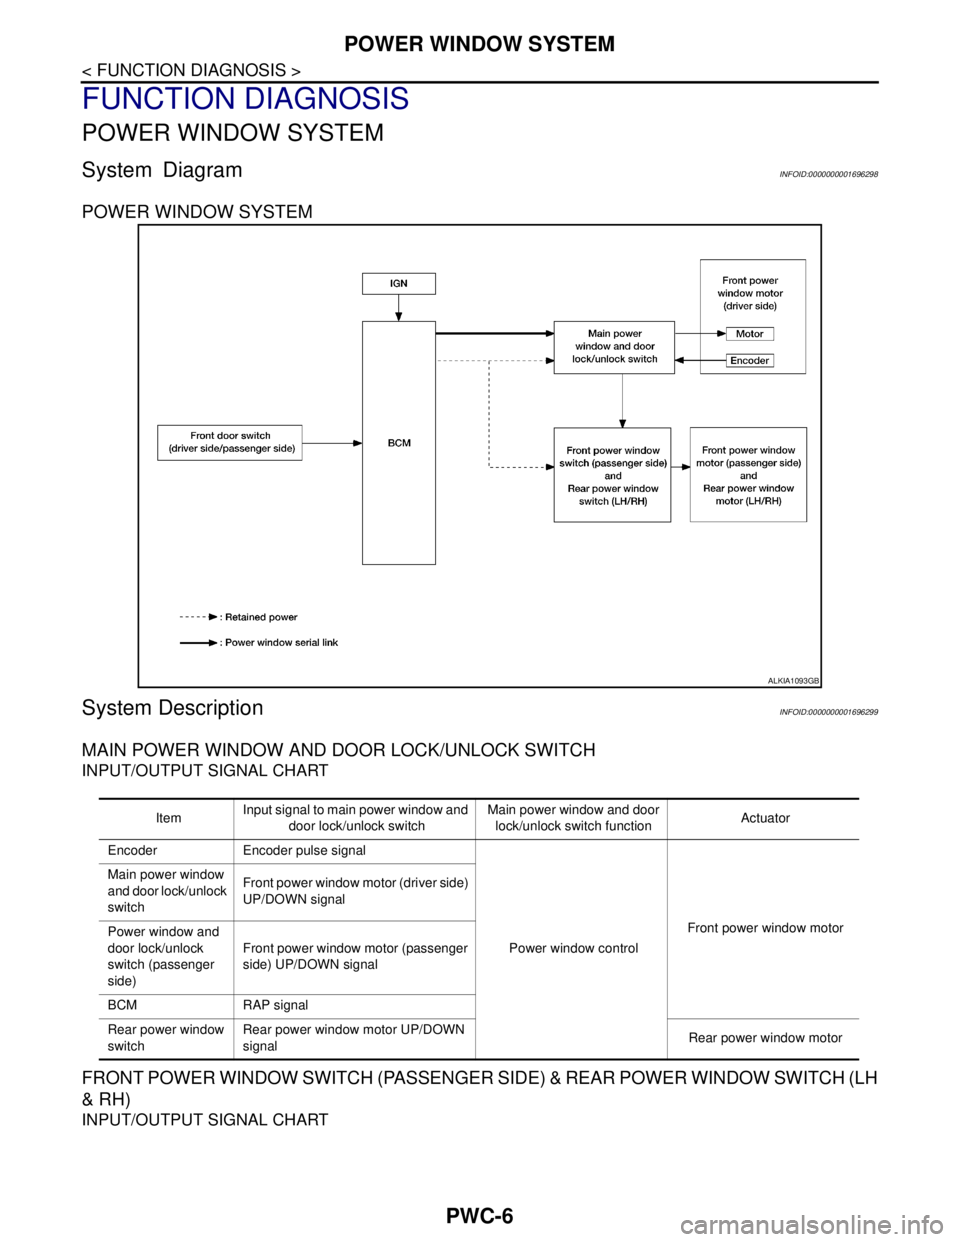
System DiagramINFOID:0000000001696298
POWER WINDOW SYSTEM
System DescriptionINFOID:0000000001696299
MAIN POWER WINDOW AND DOOR LOCK/UNLOCK SWITCH
INPUT/OUTPUT SIGNAL CHART
FRONT POWER WINDOW SWITCH (PASSENGER SIDE) & REAR POWER WINDOW SWITCH (LH
& RH)
INPUT/OUTPUT SIGNAL CHART
ALKIA1093GB
ItemInput signal to main power window and
door lock/unlock switchMain power window and door
lock/unlock switch functionActuator
Encoder Encoder pulse signal
Power window controlFront power window motor Main power window
and door lock/unlock
switchFront power window motor (driver side)
UP/DOWN signal
Power window and
door lock/unlock
switch (passenger
side) Front power window motor (passenger
side) UP/DOWN signal
BCM RAP signal
Rear power window
switchRear power window motor UP/DOWN
signalRear power window motor
Page 4468 of 5883

POWER WINDOW SYSTEM
PWC-7
< FUNCTION DIAGNOSIS >
C
D
E
F
G
H
I
J
L
MA
B
PWC
N
O
P
POWER WINDOW OPERATION
Power window system is operable during the retained power operation timer after turning ignition switch ON
and OFF.
Main power window and door lock/unlock switch can open/close all windows.
Front & rear power window switches can open/close the corresponding windows.
POWER WINDOW AUTO-OPERATION (FRONT DRIVER SIDE)
AUTO UP/DOWN operation can be performed when main power window and door lock/unlock switch turns
to AUTO.
Encoder continues detecting the movement of power window motor and transmits to main power window
and door lock/unlock switch as the encoder pulse signal while power window motor is operating.
Main power window and door lock/unlock switch reads the changes of encoder signal and stops AUTO oper-
ation when door glass is at fully opened/closed position.
Power window motor is operable in case encoder is malfunctioning.
RETAINED POWER OPERATION
Retained power operation is an additional power supply function that enables power window system to oper-
ate during the 45 seconds even when ignition switch is turned OFF
Retained power function cancel conditions Front door CLOSE (door switch OFF)→OPEN (door switch ON).
When ignition switch is ON.
When timer time passes (45 seconds).
POWER WINDOW LOCK
Ground circuit inside main power window and door lock/unlock switch shuts off when power window lock
switch is ON. This inhibits power window switch operation except with the main power window and door lock/
unlock switch.
ANTI-PINCH OPERATION (FRONT DRIVER SIDE)
Pinch foreign material in the door glass during AUTO-UP operation,and it is the anti-pinch function that low-
ers the door glass 150 mm (5.9 in.) or 2 seconds when detected.
Encoder continues detecting the movement of power window motor and transmits to main power window
and door lock/unlock switch as the encoder pulse signal while power window motor is operating.
Resistance is applied to the power window motor rotation that changes the frequency of encoder pulse sig-
nal if foreign material is trapped in the door glass.
Power window switch controls to lower the window glass for 150 mm (5.9 in.) or 2 seconds after it detects
encoder pulse signal frequency change.
OPERATION CONDITION
When door glass AUTO-UP operation is performed (anti-pinch function does not operate just before the door
glass closes and is fully closed)
NOTE:
Depending on environment and driving conditions, if a similar impact or load is applied to the door glass, it
may lower.
Item Input signal to front power window
switch (passenger side) & rear power
window switch (LH & RH)Front power window switch
(passenger side) & rear power
window switch (LH & RH) func-
tionActuator
Front power window
switch (passenger
side)Front power window motor (passen-
ger side) UP/DOWN signal
Power window controlFront power window motor
(passenger side)
Rear power window
switch (LH & RH)Rear power window motor (LH & RH)
UP/DOWN signalRear power window motor (LH
& RH)