2007 NISSAN TIIDA steering wheel adjustment
[x] Cancel search: steering wheel adjustmentPage 1376 of 5883
![NISSAN TIIDA 2007 Service Repair Manual INSPECTION AND ADJUSTMENT
EC-27
< BASIC INSPECTION >[HR16DE (WITH EURO-OBD)]
C
D
E
F
G
H
I
J
K
L
MA
EC
N
P O
quirementINFOID:0000000001161131
1.START
1. Make sure that accelerator pedal is fully relea](/manual-img/5/57395/w960_57395-1375.png "NISSAN TIIDA 2007 Service Repair Manual INSPECTION AND ADJUSTMENT
EC-27
< BASIC INSPECTION >[HR16DE (WITH EURO-OBD)]
C
D
E
F
G
H
I
J
K
L
MA
EC
N
P O
quirementINFOID:0000000001161131
1.START
1. Make sure that accelerator pedal is fully relea")
INSPECTION AND ADJUSTMENT
EC-27
< BASIC INSPECTION >[HR16DE (WITH EURO-OBD)]
C
D
E
F
G
H
I
J
K
L
MA
EC
N
P O
quirementINFOID:0000000001161131
1.START
1. Make sure that accelerator pedal is fully released.
2. Turn ignition switch ON and wait at least 2 seconds.
3. Turn ignition switch OFF and wait at least 10 seconds.
4. Turn ignition switch ON and wait at least 2 seconds.
5. Turn ignition switch OFF and wait at least 10 seconds.
>> END
THROTTLE VALVE CLOSED POSITION LEARNING
THROTTLE VALVE CLOSED POSITION LEARNING : DescriptionINFOID:0000000001161132
Throttle Valve Closed Position Learning is a function of ECM to learn the fully closed position of the throttle
valve by monitoring the throttle position sensor output signal. It must be performed each time harness connec-
tor of electric throttle control actuator or ECM is disconnected.
THROTTLE VALVE CLOSED POSITION LEARNING : Special Repair Requirement
INFOID:0000000001161133
1.START
1. Make sure that accelerator pedal is fully released.
2. Turn ignition switch ON.
3. Turn ignition switch OFF and wait at least 10 seconds.
Make sure that throttle valve moves during above 10 seconds by confirming the operating sound.
>> END
IDLE AIR VOLUME LEARNING
IDLE AIR VOLUME LEARNING : DescriptionINFOID:0000000001161134
Idle Air Volume Learning is a function of ECM to learn the idle air volume that keeps each engine idle speed
within the specific range. It must be performed under any of the following conditions:
Each time electric throttle control actuator or ECM is replaced.
Idle speed or ignition timing is out of specification.
IDLE AIR VOLUME LEARNING : Special Repair RequirementINFOID:0000000001161135
1.PRECONDITIONING
Make sure that all of the following conditions are satisfied.
Learning will be cancelled if any of the following conditions are missed for even a moment.
Battery voltage: More than 12.9V (At idle)
Engine coolant temperature: 70 - 100°C (158 - 212°F)
Park/neutral position switch: ON
Electric load switch: OFF
(Air conditioner, headlamp, rear window defogger)
On vehicles equipped with daytime light systems, set lighting switch to the 1st position to light only
small lamps.
Steering wheel: Neutral (Straight-ahead position)
Vehicle speed: Stopped
Transmission: Warmed-up
- For A/T models with CONSULT-III
Drive vehicle until “ATF TEMP SE 1” in “DATA MONITOR” mode of “A/T” system indicates less than 0.9V.
- For A/T models without CONSULT-III and M/T models.
Drive vehicle for 10 minutes
Do you have CONSULT-III?
YES >> GO TO 2.
Page 1734 of 5883
![NISSAN TIIDA 2007 Service Repair Manual INSPECTION AND ADJUSTMENT
EC-385
< BASIC INSPECTION >[HR16DE (WITHOUT EURO-OBD)]
C
D
E
F
G
H
I
J
K
L
MA
EC
N
P O
INSPECTION AND ADJUSTMENT
BASIC INSPECTION
BASIC INSPECTION : Special Repair Requiremen](/manual-img/5/57395/w960_57395-1733.png "NISSAN TIIDA 2007 Service Repair Manual INSPECTION AND ADJUSTMENT
EC-385
< BASIC INSPECTION >[HR16DE (WITHOUT EURO-OBD)]
C
D
E
F
G
H
I
J
K
L
MA
EC
N
P O
INSPECTION AND ADJUSTMENT
BASIC INSPECTION
BASIC INSPECTION : Special Repair Requiremen")
INSPECTION AND ADJUSTMENT
EC-385
< BASIC INSPECTION >[HR16DE (WITHOUT EURO-OBD)]
C
D
E
F
G
H
I
J
K
L
MA
EC
N
P O
INSPECTION AND ADJUSTMENT
BASIC INSPECTION
BASIC INSPECTION : Special Repair RequirementINFOID:0000000001161429
1.INSPECTION START
1. Check service records for any recent repairs that may indicate a related malfunction, or a current need for
scheduled maintenance.
2. Open engine hood and check the following:
- Harness connectors for improper connections
- Wiring harness for improper connections, pinches and cut
- Vacuum hoses for splits, kinks and improper connections
- Hoses and ducts for leaks
- Air cleaner clogging
- Gasket
3. Confirm that electrical or mechanical loads are not applied.
- Headlamp switch is OFF.
- Air conditioner switch is OFF.
- Rear window defogger switch is OFF.
- Steering wheel is in the straight-ahead position, etc.
4. Start engine and warm it up until engine coolant temperature
indicator points the middle of gauge.
Ensure engine stays below 1,000 rpm.
5. Run engine at about 2,000 rpm for about 2 minutes under no
load.
6. Make sure that no DTC is displayed with CONSULT-III.
Is any DTC detected?
YES >> GO TO 2.
NO >> GO TO 3.
2.REPAIR OR REPLACE
Repair or replace components as necessary according to corresponding Diagnostic Procedure.
>> GO TO 3
3.CHECK TARGET IDLE SPEED
1. Run engine at about 2,000 rpm for about 2 minutes under no load.
SEF983U
SEF976U
SEF977U
Page 1739 of 5883
![NISSAN TIIDA 2007 Service Repair Manual EC-390
< BASIC INSPECTION >[HR16DE (WITHOUT EURO-OBD)]
INSPECTION AND ADJUSTMENT
quirement
INFOID:0000000001161437
1.START
1. Make sure that accelerator pedal is fully released.
2. Turn ignition switc](/manual-img/5/57395/w960_57395-1738.png "NISSAN TIIDA 2007 Service Repair Manual EC-390
< BASIC INSPECTION >[HR16DE (WITHOUT EURO-OBD)]
INSPECTION AND ADJUSTMENT
quirement
INFOID:0000000001161437
1.START
1. Make sure that accelerator pedal is fully released.
2. Turn ignition switc")
EC-390
< BASIC INSPECTION >[HR16DE (WITHOUT EURO-OBD)]
INSPECTION AND ADJUSTMENT
quirement
INFOID:0000000001161437
1.START
1. Make sure that accelerator pedal is fully released.
2. Turn ignition switch ON and wait at least 2 seconds.
3. Turn ignition switch OFF and wait at least 10 seconds.
4. Turn ignition switch ON and wait at least 2 seconds.
5. Turn ignition switch OFF and wait at least 10 seconds.
>> END
THROTTLE VALVE CLOSED POSITION LEARNING
THROTTLE VALVE CLOSED POSITION LEARNING : DescriptionINFOID:0000000001161438
Throttle Valve Closed Position Learning is a function of ECM to learn the fully closed position of the throttle
valve by monitoring the throttle position sensor output signal. It must be performed each time harness connec-
tor of electric throttle control actuator or ECM is disconnected.
THROTTLE VALVE CLOSED POSITION LEARNING : Special Repair Requirement
INFOID:0000000001161439
1.START
1. Make sure that accelerator pedal is fully released.
2. Turn ignition switch ON.
3. Turn ignition switch OFF and wait at least 10 seconds.
Make sure that throttle valve moves during above 10 seconds by confirming the operating sound.
>> END
IDLE AIR VOLUME LEARNING
IDLE AIR VOLUME LEARNING : DescriptionINFOID:0000000001161440
Idle Air Volume Learning is a function of ECM to learn the idle air volume that keeps each engine idle speed
within the specific range. It must be performed under any of the following conditions:
Each time electric throttle control actuator or ECM is replaced.
Idle speed or ignition timing is out of specification.
IDLE AIR VOLUME LEARNING : Special Repair RequirementINFOID:0000000001161441
1.PRECONDITIONING
Make sure that all of the following conditions are satisfied.
Learning will be cancelled if any of the following conditions are missed for even a moment.
Battery voltage: More than 12.9V (At idle)
Engine coolant temperature: 70 - 100°C (158 - 212°F)
Park/neutral position switch: ON
Electric load switch: OFF
(Air conditioner, headlamp, rear window defogger)
On vehicles equipped with daytime light systems, set lighting switch to the 1st position to light only
small lamps.
Steering wheel: Neutral (Straight-ahead position)
Vehicle speed: Stopped
Transmission: Warmed-up
- For A/T models
With CONSULT-III: Drive vehicle until “FLUID TEMP SE” in “DATA MONITOR” mode of “A/T” system indi-
cates less than 0.9V.
Without CONSULT-III: Drive vehicle for 10 minutes.
- For M/T models
Drive vehicle for 10 minutes.
Page 2038 of 5883
![NISSAN TIIDA 2007 Service Repair Manual INSPECTION AND ADJUSTMENT
EC-689
< BASIC INSPECTION >[MR18DE]
C
D
E
F
G
H
I
J
K
L
MA
EC
N
P O
INSPECTION AND ADJUSTMENT
BASIC INSPECTION
BASIC INSPECTION : Special Repair RequirementINFOID:00000000011](/manual-img/5/57395/w960_57395-2037.png "NISSAN TIIDA 2007 Service Repair Manual INSPECTION AND ADJUSTMENT
EC-689
< BASIC INSPECTION >[MR18DE]
C
D
E
F
G
H
I
J
K
L
MA
EC
N
P O
INSPECTION AND ADJUSTMENT
BASIC INSPECTION
BASIC INSPECTION : Special Repair RequirementINFOID:00000000011")
INSPECTION AND ADJUSTMENT
EC-689
< BASIC INSPECTION >[MR18DE]
C
D
E
F
G
H
I
J
K
L
MA
EC
N
P O
INSPECTION AND ADJUSTMENT
BASIC INSPECTION
BASIC INSPECTION : Special Repair RequirementINFOID:0000000001161702
1.INSPECTION START
1. Check service records for any recent repairs that may indicate a related malfunction, or a current need for
scheduled maintenance.
2. Open engine hood and check the following:
- Harness connectors for improper connections
- Wiring harness for improper connections, pinches and cut
- Vacuum hoses for splits, kinks and improper connections
- Hoses and ducts for leaks
- Air cleaner clogging
- Gasket
3. Confirm that electrical or mechanical loads are not applied.
- Headlamp switch is OFF.
- Air conditioner switch is OFF.
- Rear window defogger switch is OFF.
- Steering wheel is in the straight-ahead position, etc.
4. Start engine and warm it up until engine coolant temperature
indicator points the middle of gauge.
Ensure engine stays below 1,000 rpm.
5. Run engine at about 2,000 rpm for about 2 minutes under no
load.
6. Make sure that no DTC is displayed with CONSULT-III or GST.
Is any DTC detected?
YES >> GO TO 2.
NO >> GO TO 3.
2.REPAIR OR REPLACE
Repair or replace components as necessary according to corresponding Diagnostic Procedure.
>> GO TO 3.
3.CHECK TARGET IDLE SPEED
1. Run engine at about 2,000 rpm for about 2 minutes under no load.
SEF983U
SEF976U
SEF977U
Page 2043 of 5883
![NISSAN TIIDA 2007 Service Repair Manual EC-694
< BASIC INSPECTION >[MR18DE]
INSPECTION AND ADJUSTMENT
THROTTLE VALVE CLOSED POSITION LEARNING
THROTTLE VALVE CLOSED POSITION LEARNING : DescriptionINFOID:0000000001161713
Throttle Valve Closed](/manual-img/5/57395/w960_57395-2042.png "NISSAN TIIDA 2007 Service Repair Manual EC-694
< BASIC INSPECTION >[MR18DE]
INSPECTION AND ADJUSTMENT
THROTTLE VALVE CLOSED POSITION LEARNING
THROTTLE VALVE CLOSED POSITION LEARNING : DescriptionINFOID:0000000001161713
Throttle Valve Closed")
EC-694
< BASIC INSPECTION >[MR18DE]
INSPECTION AND ADJUSTMENT
THROTTLE VALVE CLOSED POSITION LEARNING
THROTTLE VALVE CLOSED POSITION LEARNING : DescriptionINFOID:0000000001161713
Throttle Valve Closed Position Learning is a function of ECM to learn the fully closed position of the throttle
valve by monitoring the throttle position sensor output signal. It must be performed each time harness connec-
tor of electric throttle control actuator or ECM is disconnected.
THROTTLE VALVE CLOSED POSITION LEARNING : Special Repair Requirement
INFOID:0000000001161714
1.START
1. Make sure that accelerator pedal is fully released.
2. Turn ignition switch ON.
3. Turn ignition switch OFF and wait at least 10 seconds.
Make sure that throttle valve moves during above 10 seconds by confirming the operating sound.
>> END
IDLE AIR VOLUME LEARNING
IDLE AIR VOLUME LEARNING : DescriptionINFOID:0000000001161715
Idle Air Volume Learning is a function of ECM to learn the idle air volume that keeps each engine idle speed
within the specific range. It must be performed under any of the following conditions:
Each time electric throttle control actuator or ECM is replaced.
Idle speed or ignition timing is out of specification.
IDLE AIR VOLUME LEARNING : Special Repair RequirementINFOID:0000000001161716
1.PRECONDITIONING
Make sure that all of the following conditions are satisfied.
Learning will be cancelled if any of the following conditions are missed for even a moment.
Battery voltage: More than 12.9V (At idle)
Engine coolant temperature: 70 - 100°C (158 - 212°F)
PNP switch: ON
Electric load switch: OFF
(Air conditioner, headlamp, rear window defogger)
On vehicles equipped with daytime light systems, set lighting switch to the 1st position to light only
small lamps.
Steering wheel: Neutral (Straight-ahead position)
Vehicle speed: Stopped
Transmission: Warmed-up
Drive vehicle for 10 minutes.
Do you have CONSULT-III?
YES >> GO TO 2.
NO >> GO TO 3.
2.IDLE AIR VOLUME LEARNING
With CONSULT-III
1. Perform Accelerator Pedal Released Position Learning. Refer to EC-693, "
ACCELERATOR PEDAL
RELEASED POSITION LEARNING : Special Repair Requirement".
2. Perform Throttle Valve Closed Position Learning. Refer to EC-694, "
THROTTLE VALVE CLOSED POSI-
TION LEARNING : Special Repair Requirement".
3. Start engine and warm it up to normal operating temperature.
4. Select “IDLE AIR VOL LEARN” in “WORK SUPPORT” mode.
5. Touch “START” and wait 20 seconds.
Is
“CMPLT” displayed on CONSULT-III screen?
YES >> GO TO 4.
NO >> GO TO 5.
Page 2648 of 5883

EM-1
ENGINE
C
D
E
F
G
H
I
J
K
L
M
SECTION EM
A
EM
N
O
P
CONTENTS
ENGINE MECHANICAL
HR16DE
SYMPTOM DIAGNOSIS ...............................
5
NOISE, VIBRATION AND HARSHNESS
(NVH) TROUBLESHOOTING .............................
5
NVH Troubleshooting - Engine Noise .......................5
Use the Chart Below to Help You Find the Cause
of the Symptom .........................................................
6
PRECAUTION ...............................................7
PRECAUTIONS ...................................................7
Precaution for Supplemental Restraint System
(SRS) "AIR BAG" and "SEAT BELT PRE-TEN-
SIONER" ...................................................................
7
Precaution for Procedure without Cowl Top Cover ......7
Precaution Necessary for Steering Wheel Rota-
tion After Battery Disconnect .....................................
7
Precaution for Drain Coolant .....................................8
Precaution for Disconnecting Fuel Piping .................8
Precaution for Removal and Disassembly ................8
Precaution for Inspection, Repair and Replace-
ment ..........................................................................
8
Precaution for Assembly and Installation ..................8
Parts Requiring Angular Tightening ..........................8
Precaution for Liquid Gasket .....................................9
PREPARATION ...........................................11
PREPARATION ..................................................11
Special Service Tools ..............................................11
Commercial Service Tools ......................................12
ON-VEHICLE MAINTENANCE ....................15
DRIVE BELTS ....................................................15
Checking .................................................................15
Tension Adjustment ................................................15
Removal and Installation .........................................16
AIR CLEANER FILTER ......................................18
Removal and Installation .........................................18
SPARK PLUG ...................................................19
Exploded View .........................................................19
Removal and Installation .........................................19
CAMSHAFT VALVE CLEARANCE ..................21
Inspection and Adjustment ......................................21
COMPRESSION PRESSURE ...........................24
Inspection ................................................................24
ON-VEHICLE REPAIR .................................25
DRIVE BELT IDLER PULLEY ..........................25
Exploded View .........................................................25
Removal and Installation .........................................25
AIR CLEANER AND AIR DUCT .......................27
Exploded View .........................................................27
Removal and Installation .........................................27
Inspection ................................................................28
INTAKE MANIFOLD .........................................29
Exploded View .........................................................29
Removal and Installation .........................................29
EXHAUST MANIFOLD ......................................32
Exploded View .........................................................32
Removal and Installation .........................................32
FUEL INJECTOR AND FUEL TUBE ................35
Exploded View .........................................................35
Removal and Installation .........................................35
Inspection ................................................................39
OIL PAN (LOWER) ...........................................40
Exploded View .........................................................40
Removal and Installation .........................................40
Inspection ................................................................41
OIL PAN (UPPER) AND OIL STRAINER .........42
Component ..............................................................42
Page 2649 of 5883

EM-2
Removal and Installation ........................................42
IGNITION COIL, SPARK PLUG AND ROCK-
ER COVER .........................................................
47
Exploded View ........................................................47
Removal and Installation ........................................47
TIMING CHAIN ..................................................50
Exploded View ........................................................50
Removal and Installation ........................................50
Inspection ...............................................................57
CAMSHAFT .......................................................59
Exploded View ........................................................59
Removal and Installation ........................................59
Inspection ...............................................................71
OIL SEAL ...........................................................77
VALVE OIL SEAL .....................................................77
VALVE OIL SEAL : Removal and Installation .........77
FRONT OIL SEAL .....................................................77
FRONT OIL SEAL : Removal and Installation ........78
REAR OIL SEAL .......................................................78
REAR OIL SEAL : Removal and Installation ..........78
CYLINDER HEAD ..............................................80
Removal and Installation ........................................80
Disassembly and Assembly ....................................82
REMOVAL AND INSTALLATION ...............89
ENGINE ASSEMBLY .........................................89
Exploded View ........................................................89
Removal and Installation ........................................89
Inspection ...............................................................92
DISASSEMBLY AND ASSEMBLY .............94
ENGINE STAND SETTING ................................94
Setting ....................................................................94
ENGINE UNIT ....................................................95
Disassembly ...........................................................95
Assembly ................................................................95
OIL PAN (UPPER) .............................................96
Exploded View ........................................................96
Removal and Installation ........................................96
Inspection ...............................................................99
CYLINDER BLOCK .........................................100
Exploded View .......................................................100
Disassembly and Assembly ...................................101
Inspection ..............................................................108
HOW TO SELECT PISTON AND BEARING ...117
Description .............................................................117
Connecting Rod Bearing .......................................117
Main Bearing .........................................................119
SERVICE DATA AND SPECIFICATIONS
(SDS) .........................................................
122
SERVICE DATA AND SPECIFICATIONS
(SDS) ................................................................
122
General Specification ............................................122
Drive Belts .............................................................122
Spark Plug ............................................................123
Exhaust Manifold ..................................................123
Camshaft ...............................................................123
Cylinder Head .......................................................125
Cylinder Block .......................................................127
Connecting Rod Bearing .......................................130
Main Bearing .........................................................131
MR18DE
SYMPTOM DIAGNOSIS ...........................
132
NOISE, VIBRATION AND HARSHNESS
(NVH) TROUBLESHOOTING ...........................
132
NVH Troubleshooting - Engine Noise ...................132
Use the Chart Below to Help You Find the Cause
of the Symptom .....................................................
133
PRECAUTION ...........................................134
PRECAUTIONS ................................................134
Precaution for Supplemental Restraint System
(SRS) "AIR BAG" and "SEAT BELT PRE-TEN-
SIONER" ...............................................................
134
Precaution for Procedure without Cowl Top Cover .134
Precaution Necessary for Steering Wheel Rota-
tion After Battery Disconnect ................................
134
Precaution for Drain Coolant .................................135
Precaution for Disconnecting Fuel Piping .............135
Precaution for Removal and Disassembly ............135
Precaution for Inspection, Repair and Replace-
ment ......................................................................
135
Precaution for Assembly and Installation ..............135
Parts Requiring Angular Tightening ......................135
Precaution for Liquid Gasket .................................136
PREPARATION .........................................138
PREPARATION ................................................138
Special Service Tool .............................................138
Commercial Service Tool ......................................140
ON-VEHICLE MAINTENANCE .................142
DRIVE BELTS ..................................................142
Component ...........................................................142
Checking Drive Belts .............................................142
Tension Adjustment ..............................................142
Removal and Installation .......................................142
AIR CLEANER FILTER ....................................144
Removal and Installation .......................................144
SPARK PLUG ...................................................145
Page 3182 of 5883
FSU-6
< ON-VEHICLE MAINTENANCE >
FRONT SUSPENSION ASSEMBLY
ON-VEHICLE MAINTENANCE
FRONT SUSPENSION ASSEMBLY
On-Vehicle Inspection and ServiceINFOID:0000000001716890
Make sure the mounting conditions (looseness, back lash) of each component and component conditions
(wear, damage) are normal.
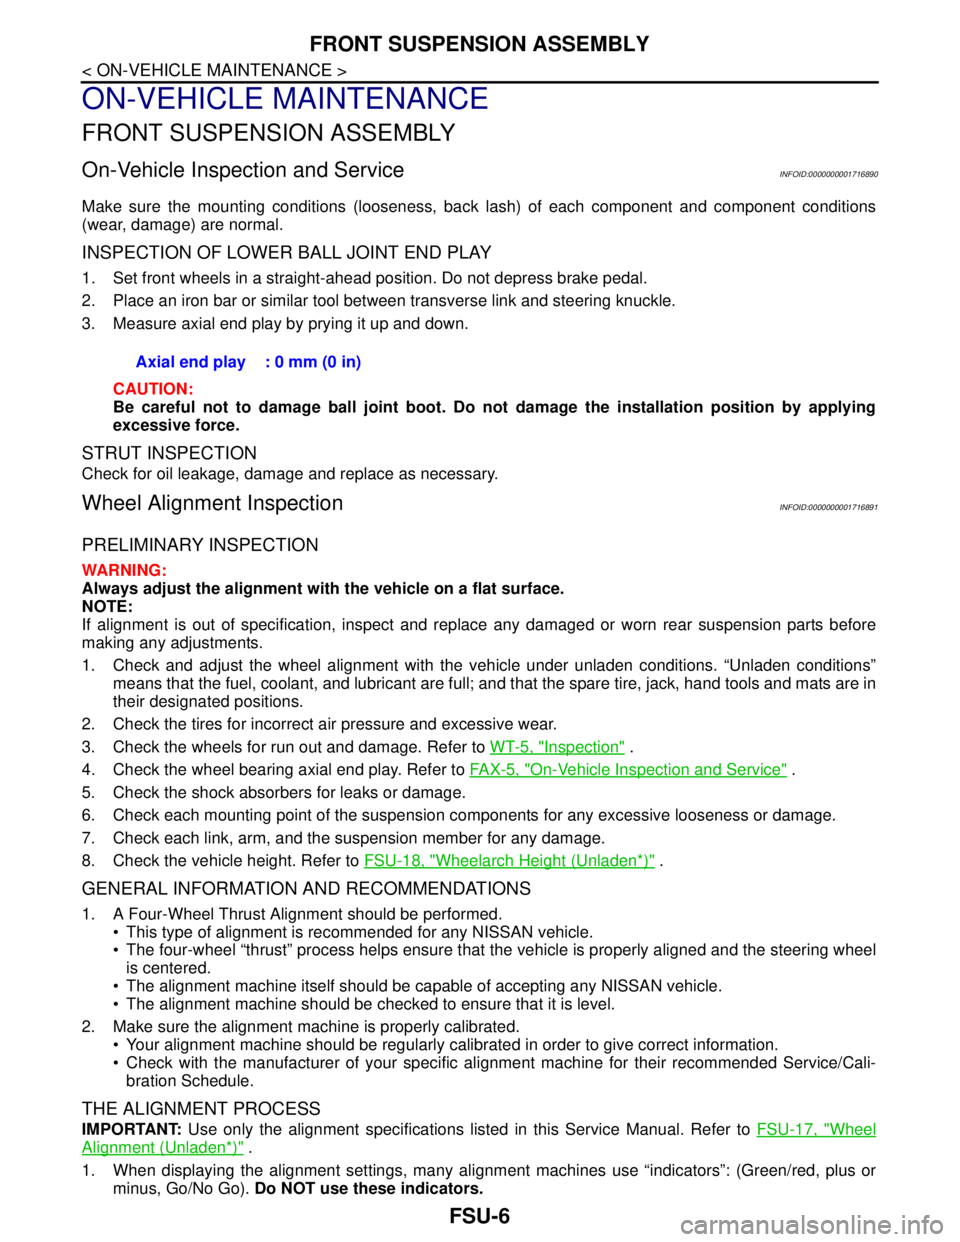
INSPECTION OF LOWER BALL JOINT END PLAY
1. Set front wheels in a straight-ahead position. Do not depress brake pedal.
2. Place an iron bar or similar tool between transverse link and steering knuckle.
3. Measure axial end play by prying it up and down.
CAUTION:
Be careful not to damage ball joint boot. Do not damage the installation position by applying
excessive force.
STRUT INSPECTION
Check for oil leakage, damage and replace as necessary.
Wheel Alignment InspectionINFOID:0000000001716891
PRELIMINARY INSPECTION
WARNING:
Always adjust the alignment with the vehicle on a flat surface.
NOTE:
If alignment is out of specification, inspect and replace any damaged or worn rear suspension parts before
making any adjustments.
1. Check and adjust the wheel alignment with the vehicle under unladen conditions. “Unladen conditions”
means that the fuel, coolant, and lubricant are full; and that the spare tire, jack, hand tools and mats are in
their designated positions.
2. Check the tires for incorrect air pressure and excessive wear.
3. Check the wheels for run out and damage. Refer to WT-5, "
Inspection" .
4. Check the wheel bearing axial end play. Refer to FA X - 5 , "
On-Vehicle Inspection and Service" .
5. Check the shock absorbers for leaks or damage.
6. Check each mounting point of the suspension components for any excessive looseness or damage.
7. Check each link, arm, and the suspension member for any damage.
8. Check the vehicle height. Refer to FSU-18, "
Wheelarch Height (Unladen*)" .
GENERAL INFORMATION AND RECOMMENDATIONS
1. A Four-Wheel Thrust Alignment should be performed.
This type of alignment is recommended for any NISSAN vehicle.
The four-wheel “thrust” process helps ensure that the vehicle is properly aligned and the steering wheel
is centered.
The alignment machine itself should be capable of accepting any NISSAN vehicle.
The alignment machine should be checked to ensure that it is level.
2. Make sure the alignment machine is properly calibrated.
Your alignment machine should be regularly calibrated in order to give correct information.
Check with the manufacturer of your specific alignment machine for their recommended Service/Cali-
bration Schedule.
THE ALIGNMENT PROCESS
IMPORTANT: Use only the alignment specifications listed in this Service Manual. Refer to FSU-17, "Wheel
Alignment (Unladen*)" .
1. When displaying the alignment settings, many alignment machines use “indicators”: (Green/red, plus or
minus, Go/No Go). Do NOT use these indicators. Axial end play : 0 mm (0 in)