Page 65 of 90
 65
Audio Operation
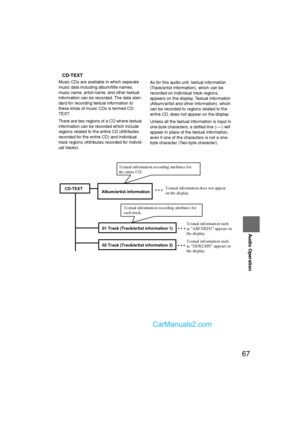
lUse discs that have been legitimately
produced. If illegally-copied discs such as
pirated discs are used, the system may not
operate properly.
l Be sure never to touch the signa")
65
Audio Operation
lUse discs that have been legitimately
produced. If illegally-copied discs such as
pirated discs are used, the system may not
operate properly.
l Be sure never to touch the signal surface
when handling the CDs. Pick up a CD by
grasping the outer edge or the edge of the
hole and the outer edge.
l Do not stick paper or tape on the CD.
Avoid scratching the reverse side (the side
without a label). The disc may not eject
resulting in a malfunction.
l Dust, finger smudges, and dirt can
decrease the amount of light reflected from
the signal surface, thus affecting sound
quality. If the CD should become soiled,
gently wipe it with a soft cloth from the
center of the CD to the edge.
l Do not use record sprays, antistatic
agents, or household spray cleaners.
Volatile chemicals such as benzine and
thinner can also damage the surface of the
CD and must not be used. Anything that
can damage, warp, or fog plastic should
never be used to clean CDs.
l Insert discs one by one. If two discs are
inserted at the same time, the system may
not operate properly.
l The In-dash CD changer ejects the CD if
the CD is inserted upside down. Also dirty
and/or defective CDs may be ejected.
l Do not insert any disc with a peel-off seal
affixed to it. Handling the In-dash CD changer
l
This unit may not be able to play certain
CD-R/CD-RWs made using a computer or
music CD recorder due to disc
characteristics, scratches, smudges, dirt,
etc., or due to dust or condensation on the
lens inside the unit.
l Storing CDs in the vehicle exposed to
direct sunlight or high temperature may
damage the CD-R/CD-RWs, and make
them unplayable.
l CD-R/CD-RWexceeding 700 MB cannot
be played.
l This unit may not be able to play certain
discs made using a computer due to the
application (writing software) setting used.
(For details, consult the store where the
application was purchased.)
l It is possible that certain text data, such as
titles, recorded on a CD-R/CD-RW may
not be displayed when musical data (CD-
DA) is playing.
l The period from when a CD-RWis inserted
to when it begins playing is longer than a
normal CD or CD-R.
l Completely read the instruction manual
and cautions for CD-R/CD-RWs.
l Do not use discs with cellophane tape
adhering, partially peeled off labels, or
adhesive material exuding from the edges
of the CD label. Also, do not use discs with
a commercially-available CD-R label
affixed. The disc may not eject resulting in
a malfunction.
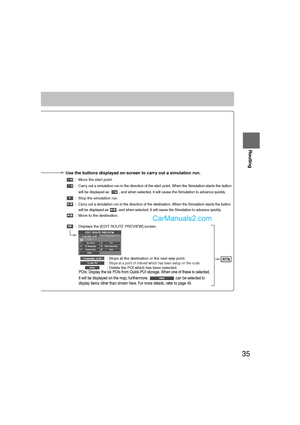
�%�:�����A�'�#���D�Q�Q�M�����2�C�I�G�����������9�G�F�P�G�U�F�C�[�����5�G�R�V�G�O�D�G�T�������������������������������2�/
Page 66 of 90
 66
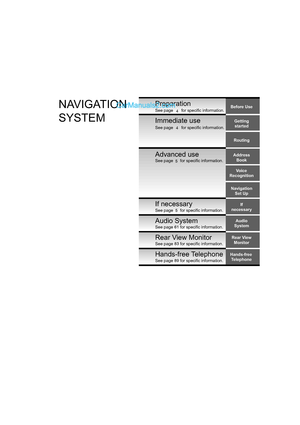
Before
UseGetting
started
RoutingAddress
Book
Vo i c e Recognition
Navigation
Set Up
RDM-TMC
Audio Operation
Navigation
Set Up
nOperating tips for MP3
l
This audio system handles MP3 files tha")
66
Before
UseGetting
started
RoutingAddress
Book
Vo i c e Recognition
Navigation
Set Up
RDM-TMC
Audio Operation
Navigation
Set Up
nOperating tips for MP3
l
This audio system handles MP3 files that
have been recorded on CD-R/CDRW/CD-
ROMs. Discs that have been recorded
using the following formats can be played:
• ISO9660 level 1
• ISO 9660 level 2
• Joliet extended format
• Romeo extended format
l This unit handles MP3 files conforming to
the MP3 format containing both header
frames and data frames.
l If a disc has both music data (CD-DA) and
MP3 files, playback of the two file types
differs depending on how the disc was
recorded.
l Packet written discs cannot be played on
this unit.
l This unit does not play CDs recorded
using MP3i (MP3 interactive), MP3 PRO
and RIFF MP3 formats. Specialized glossary
MP3
Abbreviation for “MPEG Audio Layer 3”.
A technical standard for audio compression
as decided by an ISO (International
Organization for Standardization) MPEG
working group.
Use of MP3 allows for audio data to be
compressed to approximately a tenth of the
source data size.
ISO 9660
An international standard for logical
formatting of CD-ROM files and folders.
It is divided into three separate levels based
on differences in file naming procedures,
data configuration and other characteristics.
Bit rate
Refers to the volume of data per second,
expressed in bps (bits per second).
Generally, the larger the number of the
transfer bit rate when compressing an MP3
file, the more information regarding musical
reproduction it carries, and therefore the
better the sound quality.
Packet writing
A general term for the method, similar to that
used for floppy discs or hard drives, of
recording the required file in a single
increment on a CD-R and similar.
NOTE
Supply of this product only conveys a
license for private, non-commercial use
and does not convey a license nor imply
any right to use this product in any
commercial (i.e. revenue-generating) real
time broadcasting (terrestrial, satellite,
cable and/or any other media),
broadcasting/streaming via the Internet,
intranets and/or other networks or in other
electronic content distribution systems,
such as pay-audio or audio-ondemand
applications. An independent license for
such use is required. For details, please
visit http://www.mp3licensing.com.
CAUTION
This unit can only play MP3 files that have
an MP3 file extension (.mp3) attached.
Do not attach an MP3 file extension to
any other type file as it could cause noise
to be emitted or a malfunction in the unit.
�%�:�����A�'�#���D�Q�Q�M�����2�C�I�G�����������6�W�G�U�F�C�[�����5�G�R�V�G�O�D�G�T�������������������������������2�/
Page 67 of 90
 67
Audio Operation
nCD-TEXT
Music CDs are available in which separate
music data including album/title names,
music name, artist name, and other textual
information can be recorded. The data stan-")
67
Audio Operation
nCD-TEXT
Music CDs are available in which separate
music data including album/title names,
music name, artist name, and other textual
information can be recorded. The data stan-
dard for recording textual information to
these kinds of music CDs is termed CD-
TEXT.
There are two regions of a CD where textual
information can be recorded which include
regions related to the entire CD (Attributes
recorded for the entire CD) and individual
track regions (Attributes recorded for individ-
ual tracks).As for this audio unit, textual information
(Track/artist information), which can be
recorded on individual track regions,
appears on the display. Textual information
(Album/artist and other information), which
can be recorded to regions related to the
entire CD, does not appear on the display.
Unless all the textual information is input in
one-byte characters, a dotted line (----) will
appear in place of the textual information,
even if one of the characters is not a one-
byte character (Two-byte character).
Album/artist information
CD-TEXT
01 Track (Track/artist information 1)
02 Track (Track/artist information 2)Textual information recording attributes for
the entire CD.
Textual information does not appear
on the display.
Textual information such
as "ABCDEFG" appears in
the display.
Textual information such
as "HIJKLMN" appears in
the display.
Textual information recording attributes for
each track.
�%�:�����A�'�#���D�Q�Q�M�����2�C�I�G�����������6�W�G�U�F�C�[�����5�G�R�V�G�O�D�G�T�������������������������������2�/
Page 68 of 90
 68
Before
UseGetting
started
RoutingAddress
Book
Vo i c e Recognition
Navigation
Set Up
RDM-TMC
Audio Operation
Navigation
Set Up
l
The liquid crystal display may not open if the power supply had")
68
Before
UseGetting
started
RoutingAddress
Book
Vo i c e Recognition
Navigation
Set Up
RDM-TMC
Audio Operation
Navigation
Set Up
l
The liquid crystal display may not open if the power supply had been interrupted due to the
vehicle battery being disconnected.
l If the liquid crystal display stays open/closed (or partly opened) and does not move when
the liquid crystal display is pressed, turn the ignition switch and then on again. Then try the
open/close operation again. If the liquid crystal display still does not move, contact an
Authorized Mazda Dealer.
The beep sound and voice guidance related to the audio operation are not heard while a
hands-free telephone is being used.
Operating Tips for Display
nDo not place any objects on the dashboard. If you drop any objects onto
the dashboard or spill liquid on it, it may result in system malfunction.
nBe careful not to pinch your hands or fingers when the liquid crystal
display is closed.
nDo not open/close the liquid crystal display manually. It may damage the
equipment.
Beep sound and voice guidance restrictions while using hands-free telephone
�%�:�����A�'�#���D�Q�Q�M�����2�C�I�G�����������6�W�G�U�F�C�[�����5�G�R�V�G�O�D�G�T�������������������������������2�/
Page 69 of 90
 69
Audio Operation
nPower ON/OFF
Turn the ignition switch to the ACC or ON position.
Press the power/volume dial to turn the audio system on.
Press the power/volume dial again to turn the audio system")
69
Audio Operation
nPower ON/OFF
Turn the ignition switch to the ACC or ON position.
Press the power/volume dial to turn the audio system on.
Press the power/volume dial again to turn the audio system off.
Note
To prevent the battery from being discharged, do not leave the audio system on for a long
period of time when the engine is not running.
nVolume adjustment
To adjust the volume, turn the power/volume dial.
Turn the power/volume dial to the right to increase volume, to the left to decrease it.
nAudio sound adjustment
1.Press the desired button corresponding to one of the following modes.• Audio button (AUDIO): Audio mode
• CD button (CD): CD mode
• MEDIA button (MEDIA): Image and Sound playback is possible using a portable video player connected to an external input terminal.
*
*The external input terminal is not equipped on your vehicle because it is not standard equipment.
2.Select the (SOUND) on-screen button to display the sound adjustment screen.
3.Select the on-screen button to display the sound adjustment screen (AudioPilot™, Centerpoint
®, Rear seat-optimized).
Power/Volume/Sound Controls
Select the
on-
screen
button.
Power / Volume dial
CD button
MEDIA button
AUDIO button
�%�:�����A�'�#���D�Q�Q�M�����2�C�I�G�����������6�W�G�U�F�C�[�����5�G�R�V�G�O�D�G�T�������������������������������2�/
Page 70 of 90
 70
Before
UseGetting
started
RoutingAddress
Book
Vo i c e Recognition
Navigation
Set Up
RDM-TMC
Audio Operation
Navigation
Set Up
nSound quality adjustment
TREB (treble sound)
Select the on-scr")
70
Before
UseGetting
started
RoutingAddress
Book
Vo i c e Recognition
Navigation
Set Up
RDM-TMC
Audio Operation
Navigation
Set Up
nSound quality adjustment
TREB (treble sound)
Select the on-screen button to increase treble, and to decrease.
BASS (low pitch sound)
Select the on-screen button to increase bass, and to decrease.
nVolume balance adjustment
Front/back volume balance
Select the FRONT on-screen button to increase the volume at the front, and REAR
to increase the volume to the back.
Left/right volume balance
Select the RIGHT on-screen button to increase the volume to the right, and LEFT to
increase the volume to the left.
Note
l
Pressing an on-screen adjustment button for 0.5 seconds or more progressively changes
the adjustment range towards +/–, up/down, or left/right.
l While an adjustment button is selected in this manner, the level indicator will momentarily
stop at the medium range position and a beep sound will be heard before proceeding.
l Select the on-screen button to reset bass, treble, and balance.
l To return to the previous screen, select the on-screen button.
nAudioPilot™
AudioPilot automatically adjusts audio volume and sound quality in accordance with the level
of noise entering the vehicle interior while driving. When AudioPilot is turned ON, the system
automatically calculates the conditions for optimum hearing of sound which may be difficult to
hear depending on exterior noise.
Select the AUDIOPILOT on-screen button when AudioPilot is on. Select the
AUDIOPILOT on-screen button when AudioPilot is off.
AudioPilot™ is a registered trademark of Bose Corporation.
ON
OFF
�%�:�����A�'�#���D�Q�Q�M�����2�C�I�G�����������6�W�G�U�F�C�[�����5�G�R�V�G�O�D�G�T�������������������������������2�/
Page 71 of 90
 71
Audio Operation
nCenterpoint®
Centerpoint offers you the experience of 5.1 channel surround sound in your vehicle even
with your conventional 2 channel sound.
Select the Centerpoint on-screen b")
71
Audio Operation
nCenterpoint®
Centerpoint offers you the experience of 5.1 channel surround sound in your vehicle even
with your conventional 2 channel sound.
Select the Centerpoint on-screen button when Centerpoint is on. Select the Centerpoint
on-screen button when Centerpoint is off.
Note
lCenterpoint does not work with AM/FM/SIRIUS/AUX.
lIf a CD or a DVD is inserted in the Rear Entertainment System main unit and selected as an audio
source, and the CD or DVD audio is 5.1 DolbyDigital/DTS audio, Centerpoint cannot be selected.
Centerpoint® is a registered trademark of Bose Corporation.
nRear seat-optimized (With Rear Entertainment System)
The rear seat-optimized function allows passengers to optimize the audio output to the rear
for a more pleasurable acoustic field.
Select the REAR SEAT-OPTIMIZED on-screen button to increase the surround effect to
the rear seat. Select the REAR SEAT-OPTIMIZED on-screen button to apply the sur-
round effect to all seats.
Note
Rear seat-optimized is only effective if a CD or a DVD is inserted in the Rear Entertainment
System main unit and selected as an audio source, and the CD or DVD audio is 5.1 DolbyDigital/
DTS audio.
nSurround
Centerpoint
When Centerpoint is on, the surround effect can be enjoyed at five separate levels.
Rear seat-optimized
When rear seat-optimized is on, the surround effect can be enjoyed at five separate levels.
IndicationVolume change
Minimum
Low
Medium
High
Maximum
IndicationVolume change MinimumLow
Medium
High
Maximum
ON
OFF
ON
OFF
�%�:�����A�'�#���D�Q�Q�M�����2�C�I�G�����������6�W�G�U�F�C�[�����5�G�R�V�G�O�D�G�T�������������������������������2�/
Page 72 of 90
 72
Before
UseGetting
started
RoutingAddress
Book
Vo i c e Recognition
Navigation
Set Up
RDM-TMC
Audio Operation
Navigation
Set Up
nRadio ON
Press a band selector button (FM/AM) to turn the radio")
72
Before
UseGetting
started
RoutingAddress
Book
Vo i c e Recognition
Navigation
Set Up
RDM-TMC
Audio Operation
Navigation
Set Up
nRadio ON
Press a band selector button (FM/AM) to turn the radio on.
nBand selection
Successively pressing the band selector button (FM/AM) switches the bands as follows:
FM1 FM2 AM.
The selected mode will be indicated. If FM stereo is being received, STEREO will be dis-
played.
nTu n i n g
The radio has the following tuning methods: Manual, Seek, Scan, Preset channel, and Auto
memory tuning. The easiest way to tune stations is to set them on preset channels.
Note
l
If the FM broadcast signal becomes weak, reception automatically changes from STEREO
to MONO for reduced noise, and the STEREO indicator will go out.
l To clear the information, press the NAVI button.
l If the power supply is interrupted (fuse blows or the battery is disconnected), the preset
channels will be canceled.
Operating the Radio
Channel preset
on-screen button
Seek tuning button
Band selector button
Satellite button
on-screen button
Scan button
�%�:�����A�'�#���D�Q�Q�M�����2�C�I�G�����������6�W�G�U�F�C�[�����5�G�R�V�G�O�D�G�T�������������������������������2�/