Page 3514 of 4647
HEADLAMP (FOR USA) - XENON TYPE -
LT-63
C
D
E
F
G
H
I
J
L
MA
B
LT
Revision: 2007 April2007 M35/M45
Headlamp High Beam Does Not Illuminate (One Side)NKS003OX
1. CHECK BULB
Check bulb of lamp which does not illuminate.
OK or NG
OK >> GO TO 2.
NG >> Replace headlamp bulb.
2. CHECK HEADLAMP INPUT SIGNAL
With CONSULT-II
1. Turn ignition switch OFF.
2. Disconnect front combination lamp RH or LH connector.
3. Select “IPDM E/R” on CONSULT-II. Select “ACTIVE TEST” on “SELECT DIAG MODE” screen.
4. Select “LAMPS” on “SELECT TEST ITEM” screen.
5. Touch “HI” screen.
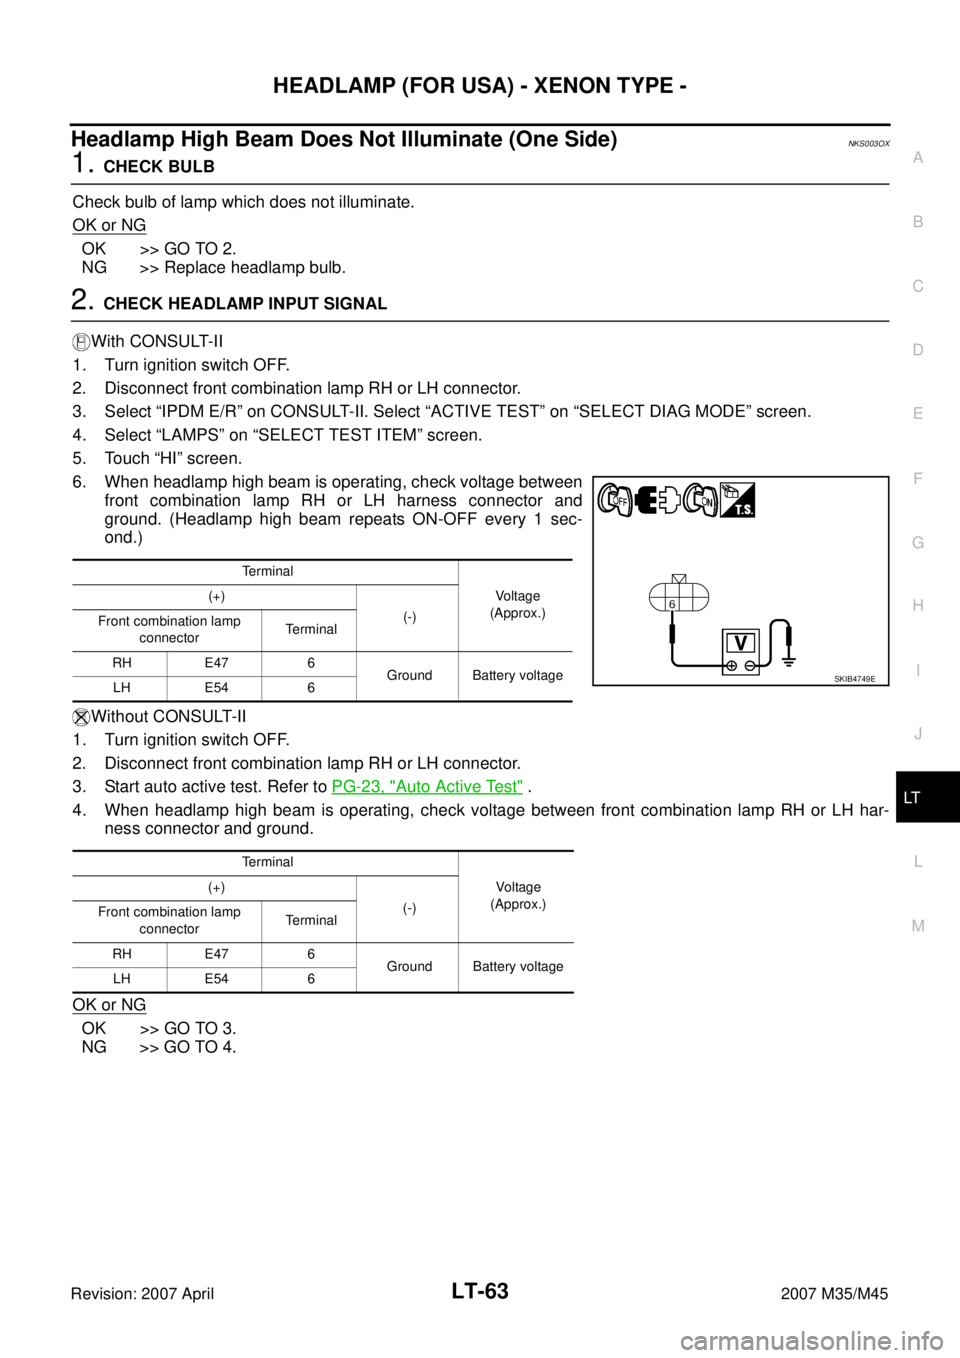
6. When headlamp high beam is operating, check voltage between
front combination lamp RH or LH harness connector and
ground. (Headlamp high beam repeats ON-OFF every 1 sec-
ond.)
Without CONSULT-II
1. Turn ignition switch OFF.
2. Disconnect front combination lamp RH or LH connector.
3. Start auto active test. Refer to PG-23, "
Auto Active Test" .
4. When headlamp high beam is operating, check voltage between front combination lamp RH or LH har-
ness connector and ground.
OK or NG
OK >> GO TO 3.
NG >> GO TO 4.
Terminal
Voltage
(Approx.) (+)
(-)
Front combination lamp
connectorTerminal
RH E47 6
Ground Battery voltage
LH E54 6
Terminal
Voltage
(Approx.) (+)
(-)
Front combination lamp
connectorTerminal
RH E47 6
Ground Battery voltage
LH E54 6
SKIB4749E
Page 3517 of 4647
LT-66
HEADLAMP (FOR USA) - XENON TYPE -
Revision: 2007 April2007 M35/M45
3. CHECK IPDM E/R
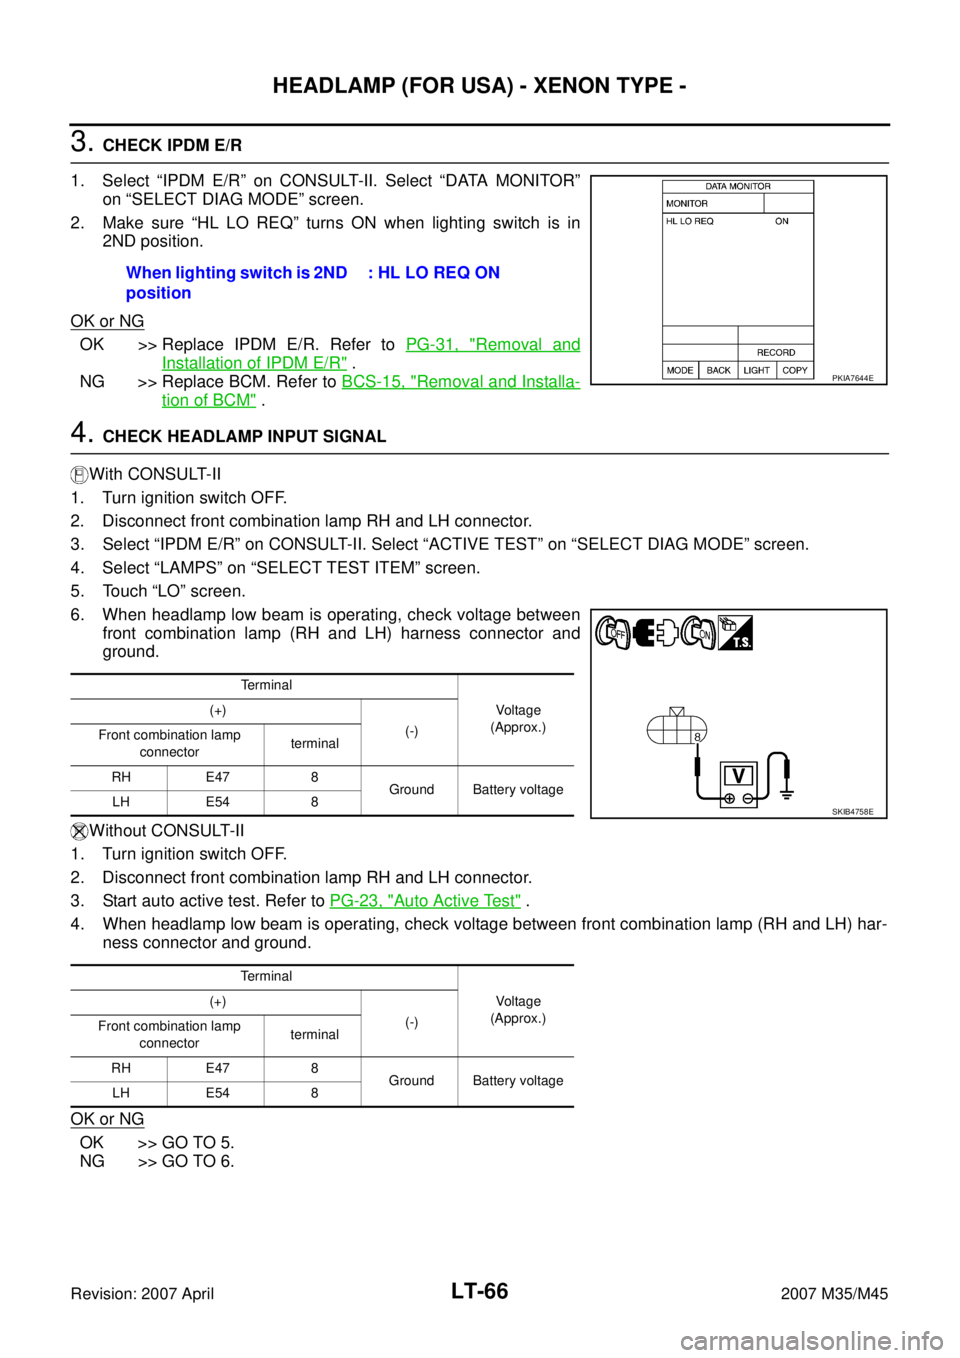
1. Select “IPDM E/R” on CONSULT-II. Select “DATA MONITOR”
on “SELECT DIAG MODE” screen.
2. Make sure “HL LO REQ” turns ON when lighting switch is in
2ND position.
OK or NG
OK >> Replace IPDM E/R. Refer to PG-31, "Removal and
Installation of IPDM E/R" .
NG >> Replace BCM. Refer to BCS-15, "
Removal and Installa-
tion of BCM" .
4. CHECK HEADLAMP INPUT SIGNAL
With CONSULT-II
1. Turn ignition switch OFF.
2. Disconnect front combination lamp RH and LH connector.
3. Select “IPDM E/R” on CONSULT-II. Select “ACTIVE TEST” on “SELECT DIAG MODE” screen.
4. Select “LAMPS” on “SELECT TEST ITEM” screen.
5. Touch “LO” screen.
6. When headlamp low beam is operating, check voltage between
front combination lamp (RH and LH) harness connector and
ground.
Without CONSULT-II
1. Turn ignition switch OFF.
2. Disconnect front combination lamp RH and LH connector.
3. Start auto active test. Refer to PG-23, "
Auto Active Test" .
4. When headlamp low beam is operating, check voltage between front combination lamp (RH and LH) har-
ness connector and ground.
OK or NG
OK >> GO TO 5.
NG >> GO TO 6.When lighting switch is 2ND
position: HL LO REQ ON
PKIA7644E
Terminal
Voltage
(Approx.) (+)
(-)
Front combination lamp
connectorterminal
RH E47 8
Ground Battery voltage
LH E54 8
Terminal
Voltage
(Approx.) (+)
(-)
Front combination lamp
connectorterminal
RH E47 8
Ground Battery voltage
LH E54 8
SKIB4758E
Page 3519 of 4647
LT-68
HEADLAMP (FOR USA) - XENON TYPE -
Revision: 2007 April2007 M35/M45
Headlamp Low Beam Does Not Illuminate (One Side)NKS003P0
1. CHECK BULB
Check ballast (HID control unit) and xenon bulb of lamp which does not illuminate. Refer to LT- 7 1 , "
Xenon
Headlamp Trouble Diagnosis" .
OK or NG
OK >> GO TO 2.
NG >> Repair malfunctioning part.
2. CHECK HEADLAMP INPUT SIGNAL
With CONSULT-II
1. Turn ignition switch OFF.
2. Disconnect front combination lamp RH or LH connector.
3. Select “IPDM E/R” on CONSULT-II. Select “ACTIVE TEST” on “SELECT DIAG MODE” screen.
4. Select “LAMPS” on “SELECT TEST ITEM” screen.
5. Touch “LO” screen.
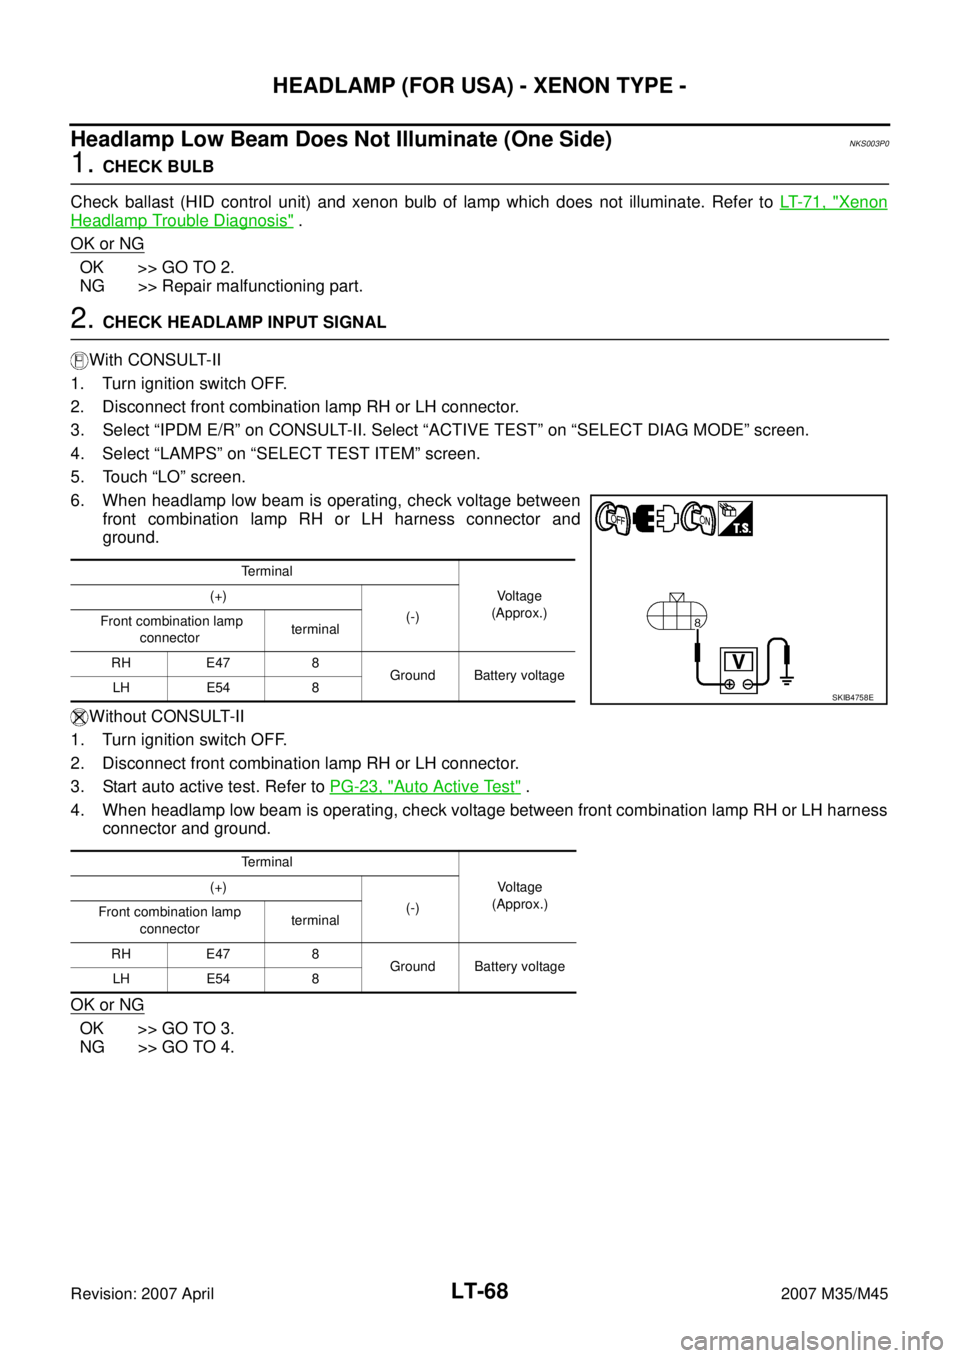
6. When headlamp low beam is operating, check voltage between
front combination lamp RH or LH harness connector and
ground.
Without CONSULT-II
1. Turn ignition switch OFF.
2. Disconnect front combination lamp RH or LH connector.
3. Start auto active test. Refer to PG-23, "
Auto Active Test" .
4. When headlamp low beam is operating, check voltage between front combination lamp RH or LH harness
connector and ground.
OK or NG
OK >> GO TO 3.
NG >> GO TO 4.
Terminal
Voltage
(Approx.) (+)
(-)
Front combination lamp
connectorterminal
RH E47 8
Ground Battery voltage
LH E54 8
Terminal
Voltage
(Approx.) (+)
(-)
Front combination lamp
connectorterminal
RH E47 8
Ground Battery voltage
LH E54 8
SKIB4758E
Page 3522 of 4647

HEADLAMP (FOR USA) - XENON TYPE -
LT-71
C
D
E
F
G
H
I
J
L
MA
B
LT
Revision: 2007 April2007 M35/M45
General Information for Xenon Headlamp Trouble DiagnosisNKS003P2
In most cases, malfunction of xenon headlamp - "does not illuminate", "flickers" or "dark" - is caused by a mal-
functioning xenon bulb. A HID control unit or lamp housing, however, may be a cause of malfunction. Be sure
to perform trouble diagnosis following the steps described below.
Caution:NKS003P3
�Installation or removal of connector must be done with lighting switch OFF.
�Disconnect the battery cable from the negative terminal or remove power fuse.
�When the lamp is illuminated (when lighting switch is ON), never touch harness, HID control unit, inside of
lamp, or lamp metal parts.
�To check illumination, temporarily install lamp in vehicle. Be sure to connect power at vehicle side connec-
tor.
�If error can be traced directly to electrical system, first check for items such as blown fuses and fusible
links, broken wires or loose connectors, dislocated terminals, and improper connections.
�Never work with wet hands.
�Using a tester for HID control unit circuit trouble diagnosis is prohibited.
�Disassembling HID control unit or harnesses (bulb socket harness, ECM harness) is prohibited.
�Immediately after illumination, light intensity and color will fluctuate, but there is nothing wrong.
�When bulb has come to end of its life, brightness will drop significantly, it will flash repeatedly, or light color
will turn reddish.
Xenon Headlamp Trouble DiagnosisNKS003P4
1. CHECK 1: XENON HEADLAMP LIGHTING
Install normal xenon bulb to corresponding xenon bulb headlamp, and check if lamp lights up.
OK or NG
OK >> Replace xenon bulb.
NG >> GO TO 2.
2. CHECK 2: XENON HEADLAMP LIGHTING
Install normal HID control unit to corresponding xenon headlamp, and check if lamp lights up.
OK or NG
OK >> Replace HID control unit.
NG >> GO TO 3.
3. CHECK 3: XENON HEADLAMP LIGHTING
Install normal xenon lamp housing assembly to corresponding xenon headlamp, and check if lamp lights up.
OK or NG
OK >> Replace xenon headlamp housing assembly.
NG >> INSPECTION END
Page 3524 of 4647
HEADLAMP (FOR USA) - XENON TYPE -
LT-73
C
D
E
F
G
H
I
J
L
MA
B
LT
Revision: 2007 April2007 M35/M45
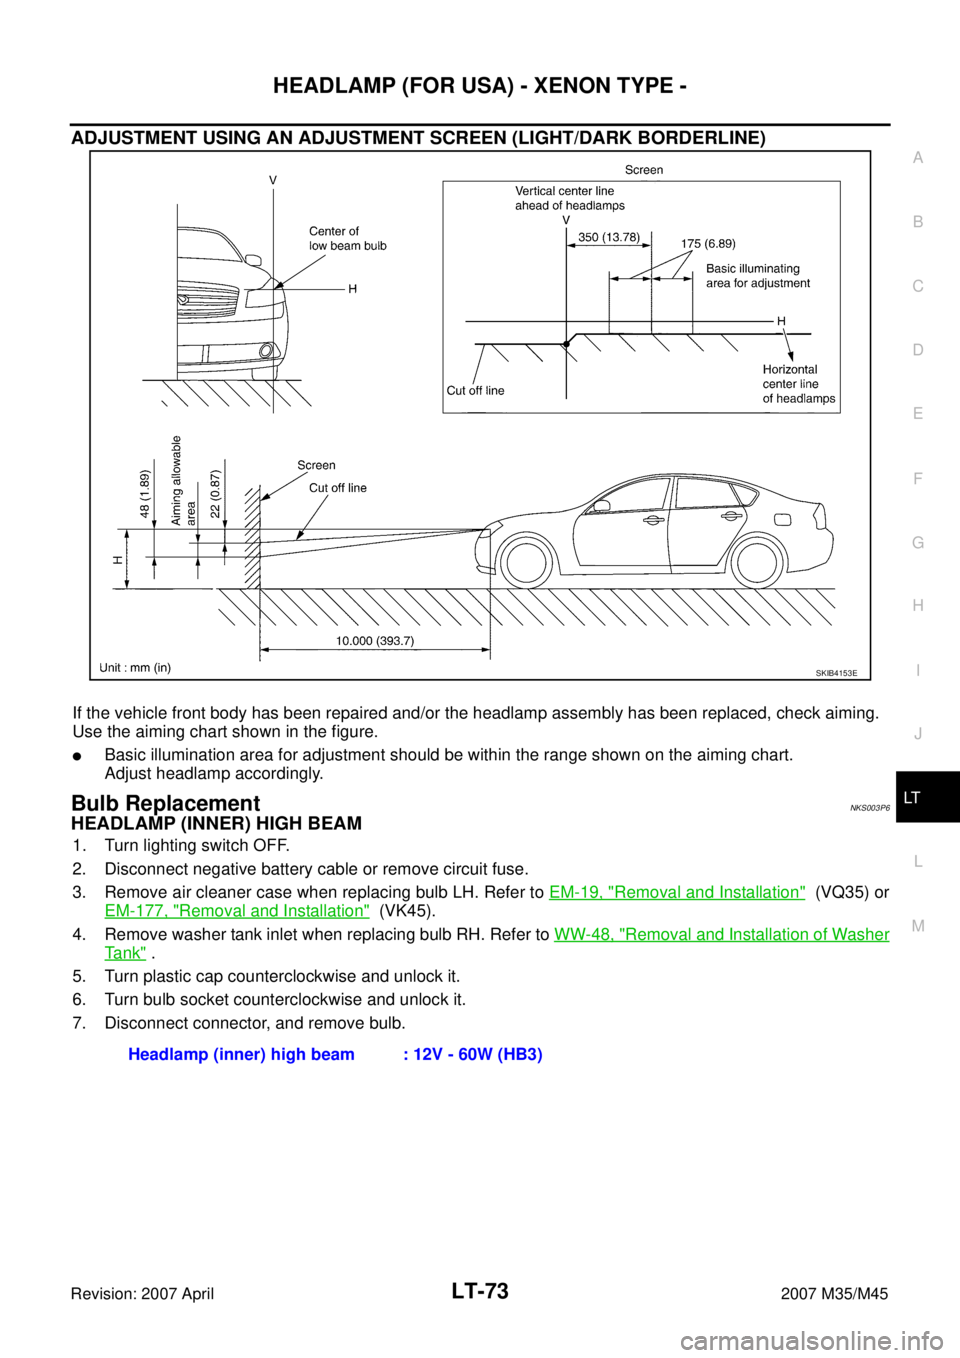
ADJUSTMENT USING AN ADJUSTMENT SCREEN (LIGHT/DARK BORDERLINE)
If the vehicle front body has been repaired and/or the headlamp assembly has been replaced, check aiming.
Use the aiming chart shown in the figure.
�Basic illumination area for adjustment should be within the range shown on the aiming chart.
Adjust headlamp accordingly.
Bulb ReplacementNKS003P6
HEADLAMP (INNER) HIGH BEAM
1. Turn lighting switch OFF.
2. Disconnect negative battery cable or remove circuit fuse.
3. Remove air cleaner case when replacing bulb LH. Refer to EM-19, "
Removal and Installation" (VQ35) or
EM-177, "
Removal and Installation" (VK45).
4. Remove washer tank inlet when replacing bulb RH. Refer to WW-48, "
Removal and Installation of Washer
Ta n k" .
5. Turn plastic cap counterclockwise and unlock it.
6. Turn bulb socket counterclockwise and unlock it.
7. Disconnect connector, and remove bulb.
SKIB4153E
Headlamp (inner) high beam : 12V - 60W (HB3)
Page 3525 of 4647
LT-74
HEADLAMP (FOR USA) - XENON TYPE -
Revision: 2007 April2007 M35/M45
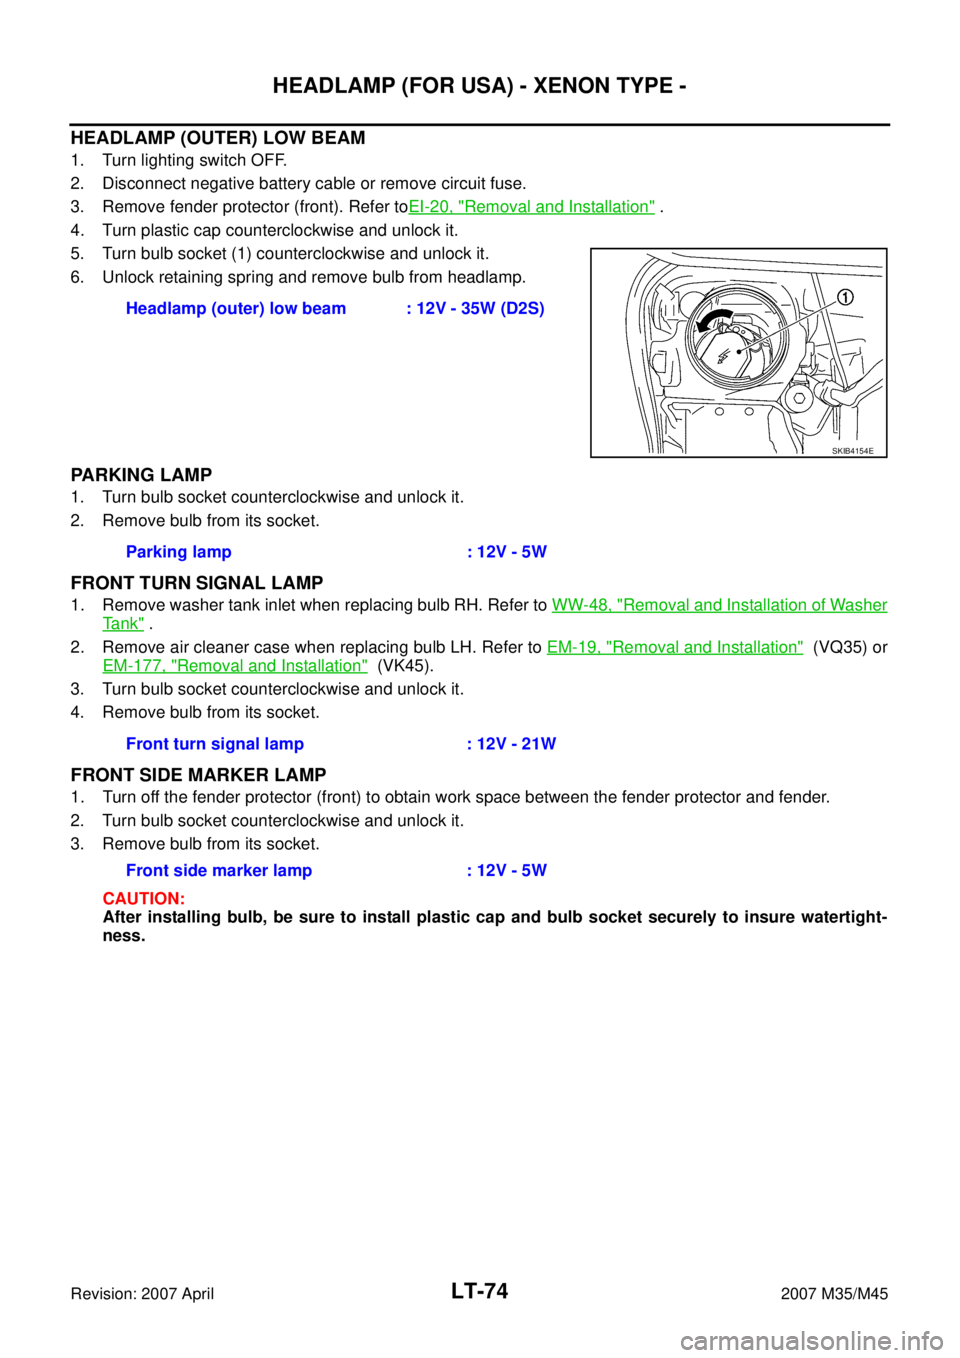
HEADLAMP (OUTER) LOW BEAM
1. Turn lighting switch OFF.
2. Disconnect negative battery cable or remove circuit fuse.
3. Remove fender protector (front). Refer toEI-20, "
Removal and Installation" .
4. Turn plastic cap counterclockwise and unlock it.
5. Turn bulb socket (1) counterclockwise and unlock it.
6. Unlock retaining spring and remove bulb from headlamp.
PARKING LAMP
1. Turn bulb socket counterclockwise and unlock it.
2. Remove bulb from its socket.
FRONT TURN SIGNAL LAMP
1. Remove washer tank inlet when replacing bulb RH. Refer to WW-48, "Removal and Installation of Washer
Ta n k" .
2. Remove air cleaner case when replacing bulb LH. Refer to EM-19, "
Removal and Installation" (VQ35) or
EM-177, "
Removal and Installation" (VK45).
3. Turn bulb socket counterclockwise and unlock it.
4. Remove bulb from its socket.
FRONT SIDE MARKER LAMP
1. Turn off the fender protector (front) to obtain work space between the fender protector and fender.
2. Turn bulb socket counterclockwise and unlock it.
3. Remove bulb from its socket.
CAUTION:
After installing bulb, be sure to install plastic cap and bulb socket securely to insure watertight-
ness.Headlamp (outer) low beam : 12V - 35W (D2S)
SKIB4154E
Parking lamp : 12V - 5W
Front turn signal lamp : 12V - 21W
Front side marker lamp : 12V - 5W
Page 3526 of 4647
HEADLAMP (FOR USA) - XENON TYPE -
LT-75
C
D
E
F
G
H
I
J
L
MA
B
LT
Revision: 2007 April2007 M35/M45
Removal and InstallationNKS003P7
REMOVAL
1. Disconnect the battery cable from the negative terminal.
2. Remove front bumper. Refer to EI-11, "
Removal and Installation" .
3. Remove front bumper retainer (upper). Refer to EI-11, "
Removal and Installation" .
4. Remove front bumper clips. Refer to EI-11, "
Removal and Installation" .
5. Remove headlamp mounting bolts and nuts.
6. Remove plastic bumper bracket, then pull headlamp toward vehicle front, disconnect connector, and
remove headlamp.
INSTALLATION
Note the following, and installation is the reverse order of removal.
NOTE:
After installation, perform aiming adjustment. Refer to LT- 7 2 , "
Aiming Adjustment" .
1. Nut 2. Bolt 3. Headlamp assembly
4. Bolt
: N·m (kg-m, in-lb)
SKIB4155E
Headlamp mounting bolt : 5.5 N·m (0.56 kg-m, 49 in-lb)
Headlamp mounting nut : 5.5 N·m (0.56 kg-m, 49 in-lb)
Page 3530 of 4647

HEADLAMP (FOR CANADA) - DAYTIME LIGHT SYSTEM -
LT-79
C
D
E
F
G
H
I
J
L
MA
B
LT
Revision: 2007 April2007 M35/M45
OUTLINE
Power is supplied at all times
�to headlamp high relay, located in IPDM E/R (intelligent power distribution module engine room) and
�to headlamp low relay, located in IPDM E/R, from battery direct,
�through 15A fuse (No. 71, located in IPDM E/R)
�to CPU (central processing unit), located in IPDM E/R,
�through 15A fuse (No. 78, located in IPDM E/R)
�to CPU, located in IPDM E/R,
�through 50A fusible link (letter F, located in fuse and fusible link block)
�to BCM terminal 55,
�through 10A fuse [No. 21, located in fuse block (J/B)]
�to BCM terminal 42 and
�to combination meter terminal 23,
�through 10A fuse (No. 32, located in IPDM E/R)
�to daytime light relay terminals 2 and 5,
�through 10A fuse [No. 19, located in fuse block (J/B)]
�to unified meter and A/C amp. terminal 54,
�through 10A fuse [No. 22, located in fuse block (J/B)]
�to key slot terminal 1.
When the ignition switch is in ON or START position, power is supplied
�to CPU, located in IPDM E/R,
�through 15A fuse [No. 1, located in fuse block (J/B)]
�to BCM terminal 38,
�through 10A fuse [No. 14, located in fuse block (J/B)]
�to combination meter terminal 12,
�through 10A fuse [No. 12, located in fuse block (J/B)]
�to unified meter and A/C amp. terminal 53.
Ground is supplied
�to BCM terminal 52
�to combination meter terminals 9, 10, and 11
�to unified meter and A/C amp. terminal 55 and 71
�to push-button ignition switch (push switch) terminal 1
�to key slot terminal 8
�through grounds M16 and M70,
�to IPDM E/R terminals 38 and 51
�through grounds E22 and E43.