2007 Hyundai Terracan headlight aiming
[x] Cancel search: headlight aimingPage 224 of 291
Engine Compartment .................................................... 6-2
General Checks ........................................................... 6-5
Maintenance Precautions ............................................. 6-6
Checking the Engine Oil .............................................. 6-6
Checking and Changing the Engine Coolant..............6-10
Changing the Air Cleaner Filte r ...................................6-13
Checking the Transmission Oil (Manual)................... 6-16
Checking the Transmission Fluid (Automatic)............6-17
Checking the Brakes .................................................. 6-20
Checking the Clutch Fluid ........................................... 6-21
Air Conditioning Care .................................................. 6-22
Changing the Climate Control Air Filter .. ....................6-23
Checking and Replacing Fuses ..................................6-24
Checking The Battery ................................................. 6-27
Checking The Electric Cooling Fans ..........................6-29
Power Steering Fluid Level ......................................... 6-29
Fuel Filter ..................................................................... 6-30
Replacement of Headlight Bulbs ................................. 6-34
Headlight Aiming Adjustment ...................................... 6-35
Bulb Wattages ............................................................. 6-38
Fuse Panel D escription ............................................... 6-39
DO-IT-YOURSELF MAINTENANCE
6
6
Page 258 of 291
6
DO-IT-YOURSELF MAINTENANCE
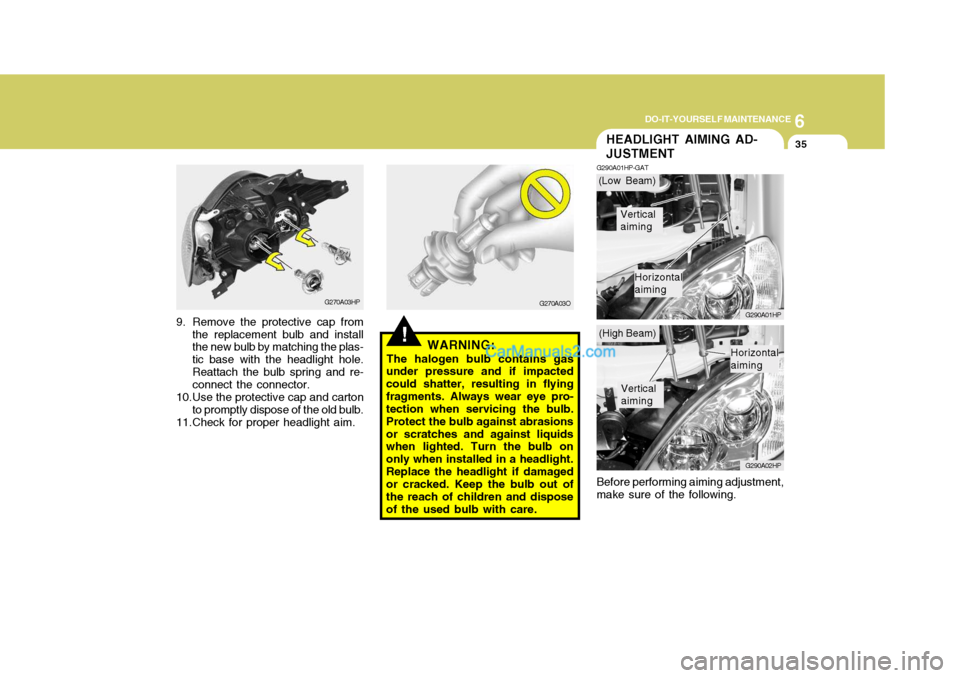
35HEADLIGHT AIMING AD- JUSTMENT
G290A01HP-GAT
G290A01HP G290A02HP
Before performing aiming adjustment, make sure of the following.
!WARNING:
The halogen bulb contains gas
under pressure and if impacted could shatter, resulting in flyingfragments. Always wear eye pro- tection when servicing the bulb. Protect the bulb against abrasionsor scratches and against liquids when lighted. Turn the bulb on only when installed in a headlight.Replace the headlight if damaged or cracked. Keep the bulb out of the reach of children and disposeof the used bulb with care.
G270A03HP
9. Remove the protective cap from the replacement bulb and install the new bulb by matching the plas- tic base with the headlight hole.Reattach the bulb spring and re- connect the connector.
10.Use the protective cap and carton to promptly dispose of the old bulb.
11.Check for proper headlight aim. G270A03O(Low Beam)
(High Beam)
Vertical aiming
Horizontal aiming
Vertical aiming
Horizontal aiming
Page 259 of 291
6 DO-IT-YOURSELF MAINTENANCE
36
1. Keep all tires inflated to the correct
pressure.
2. Place the vehicle on level ground and press the front bumper & rear bumper down several times. Placevehicle at a distance of 3m (118.1 in.) from the test wall.
3. See that the vehicle is unloaded (except for full levels of coolant, engine oil and fuel, and spare tire,jack, and tools). Have the driver or equivalent weight placed in driver's seat.
4. Clean the headlight lens and turn on the headlight.
5. Open the hood.
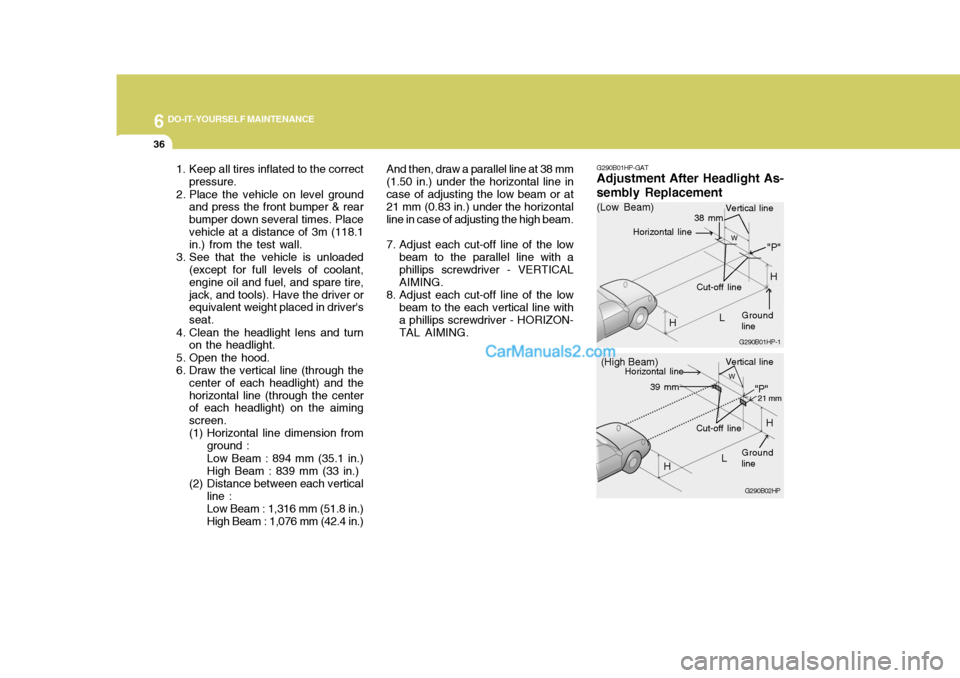
6. Draw the vertical line (through the center of each headlight) and thehorizontal line (through the center of each headlight) on the aiming screen.
(1) Horizontal line dimension from
ground : Low Beam : 894 mm (35.1 in.) High Beam : 839 mm (33 in.)
(2) Distance between each vertical line : Low Beam : 1,316 mm (51.8 in.) High Beam : 1,076 mm (42.4 in.) And then, draw a parallel line at 38 mm
(1.50 in.) under the horizontal line incase of adjusting the low beam or at 21 mm (0.83 in.) under the horizontal line in case of adjusting the high beam.
7. Adjust each cut-off line of the low beam to the parallel line with a phillips screwdriver - VERTICAL AIMING.
8. Adjust each cut-off line of the low beam to the each vertical line witha phillips screwdriver - HORIZON-TAL AIMING. G290B01HP-GAT
Adjustment After Headlight As- sembly Replacement
G290B02HP
LW
H Cut-off line
"P"
Vertical line
Horizontal line
Ground line
21 mm39 mm
(High Beam)
H
G290B01HP-1
LW
"P"
38 mm
H
H
(Low Beam)
Vertical line
Ground line
Cut-off line
Horizontal line
Page 260 of 291
6
DO-IT-YOURSELF MAINTENANCE
37
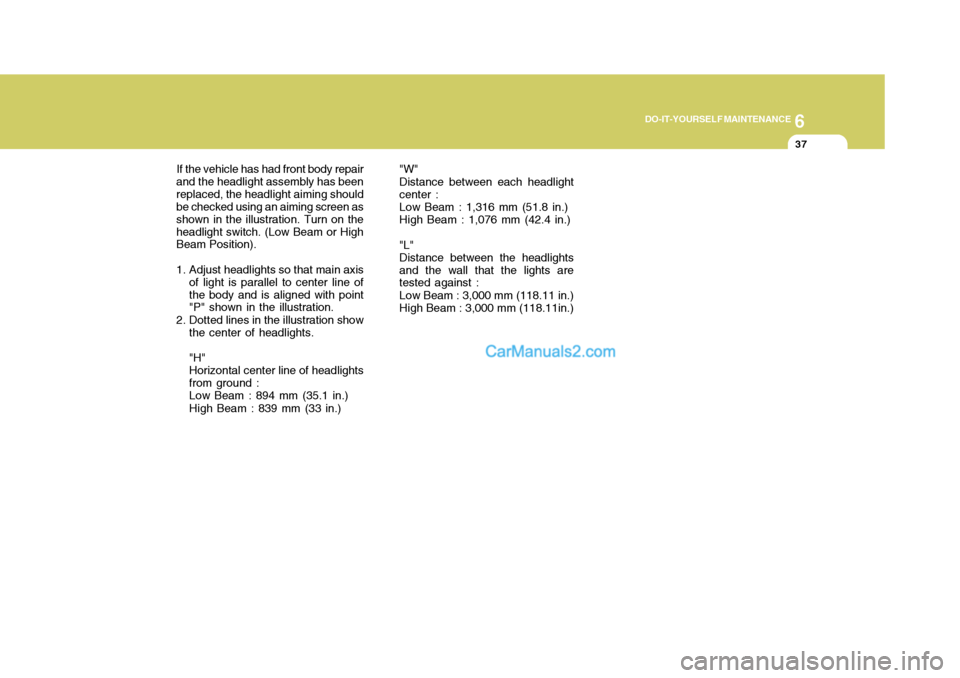
"W" Distance between each headlight center :Low Beam : 1,316 mm (51.8 in.) High Beam : 1,076 mm (42.4 in.) "L" Distance between the headlightsand the wall that the lights are tested against : Low Beam : 3,000 mm (118.11 in.) High Beam : 3,000 mm (118.11in.)
If the vehicle has had front body repair
and the headlight assembly has beenreplaced, the headlight aiming should be checked using an aiming screen as shown in the illustration. Turn on theheadlight switch. (Low Beam or High Beam Position).
1. Adjust headlights so that main axis of light is parallel to center line of the body and is aligned with point "P" shown in the illustration.
2. Dotted lines in the illustration show the center of headlights. "H" Horizontal center line of headlightsfrom ground :Low Beam : 894 mm (35.1 in.) High Beam : 839 mm (33 in.)
Page 286 of 291
10
INDEX
3
D Defrosting/Defogging ................................................ 1-110
Door
Locking and unlocking front door with a key .......... 1-11
Drink Holder ............................................................... 1-81
Driving Driving for economy ............................................... 2-23
Smooth corneri ng .................................................... 2-25
Winter driving .......................................................... 2-25
EEmission Control Syst em ........................................... 7-1
Catalytic converter ................................................... 7-3
EGR System ............................................................ 7-5
Engine
Before starting the engine ....................................... 2-3 Compartment (3.5 V6) ............................................. 6-2
Compartment (2.5 TCI) ............................................ 6-3
Compartment (2.9 CRDi) ......................................... 6-4 Coolant ................................................................... 6-10
Coolant temperature gauge .....................................1-65
If the engine overheats ............................................. 3-4
Number ..................................................................... 8-2
Oil ............................................................................. 6-6 Starting ..................................................................... 2-5
Engine Exhaust Can Be Dangerous ............................ 2-2 F
Fan Speed Control .............
...........................1-105, 1-116
Fog Light Switch
Front ....................................................................... 1-75
Rear ........................................................................ 1-75
Four-Wheel Drive (4WD) ............................................ 2-14
Front Seats
Adjustable front seats ............................................ 1-18
Adjustable headrest s .............................................. 1-19
Adjusting seat forward and rear ward..................... 1-18
Adjusting seatback angle .......................................1-19
Front/Rear Window Defroster Sw itch....................... 1-78
Fuel
Capacity ................................................................... 9-2
Diesel ....................................................................... 1-2
Gauge .................................................................... 1-65
Unleaded gasolin e ................................................... 1-2
Fuel Filler Lid Remote release ...................................................... 1-96
Full-time 4WD Operation ............................................ 2-17
Fuses ........................................................................ 6-24
GGeneral Checks ........................................................... 6-5
Glove Box ................................................................. 1-86
HHazard Warning System ............................................ 1-77
Headlight Aiming Adjustment..................................... 6-35