2007 FORD FIESTA wiring
[x] Cancel search: wiringPage 760 of 1226

Engine Cooling - 1.3L Duratec-8V
(Rocam)ll125L Duratec-1 6V (Sigma)ll14L
3-03A-18 Duratec-I 6V (Sigma)ll.GL Duratec-1 6V (Sigma) 303-03A-18
DIAGNOSIS AND TESTING
N0TE:The results from the test are more thermostats may increase the coolant temperature
conclusive if the engine is cold when the test is up to 1
OO°C (212OF) under light engine load
started. conditions.
Carry out a road test. The
engine should start cleanly and the ECT value
REFER to:
RoadlRoller Testing (1 00-00 General
Information, Description and Operation).
4. Drive the vehicle at a constant throttle opening
and set speed until the ECT value settles into
a shallow rise and fall signal, close to a straight
line. This indicates that the thermostat is
functioning correctly.
N0TE:Some thermostats indicate the
temperature(s) in Celsius and Fahrenheit.
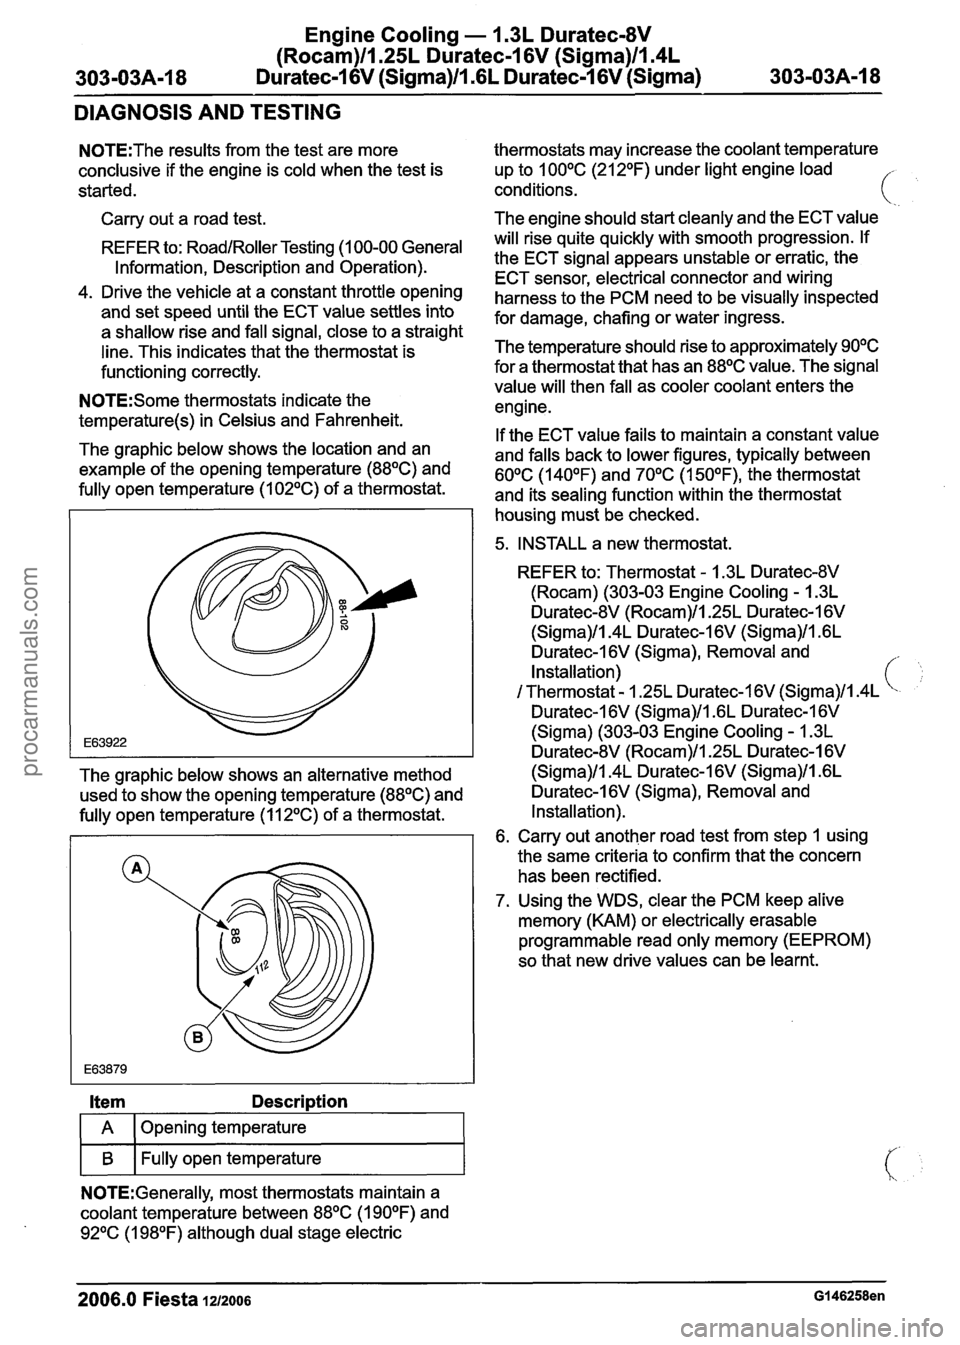
The graphic below shows the location and an
example of the opening temperature
(88OC) and
fully open temperature (1
02OC) of a thermostat. will
risequite quickly with smooth progression.
If
the ECT signal appears unstable or erratic, the
ECT sensor, electrical connector and wiring
harness to the PCM need to be visually inspected
for damage, chafing or water ingress.
The temperature should rise to approximately
90°C
for a thermostat that has an 88OC value. The signal
value will then fall as cooler coolant enters the
engine.
If the ECT value fails to maintain a constant value
and falls back to lower figures, typically between
60°C (140°F) and 70°C (1 50°F), the thermostat
and its sealing function within the thermostat
housing must be checked.
5. INSTALL a new thermostat.
REFER to: Thermostat
- 1.3L Duratec-8V
(Rocam) (303-03 Engine Cooling - 1.3L
Duratec-8V (Rocam)ll.25L Duratec-I 6V
(Sigma)ll.4L Duratec-I 6V (Sigma)ll .6L
Duratec-1
6V (Sigma), Removal and
Installation)
I Thermostat - 1.25L Duratec-I 6V (Sigma)ll.4L
Duratec-1 6V (Sigma)ll .6L Duratec-1 6V
(Sigma) (303-03 Engine Cooling - 1.3L
Duratec-8V (Rocam)ll.25L Duratec-I 6V
The graphic below shows an alternative method (Sigma)/l.4L Duratec-1 6V (Sigma)ll .6L
used to show the opening temperature
(88OC) and Duratec-1 6V (Sigma), Removal
and
fully open temperature (1
12OC) of a thermostat. Installation).
6. Carry out another road test from step 1 using
the same criteria to confirm that the concern
has been rectified.
7. Using the WDS, clear the PCM keep alive
memory (KAM) or electrically erasable
programmable read only memory (EEPROM)
so that new drive values can be learnt.
Item Description
I A 1 Opening temperature I
I B I Fully open temperature I
NOTE:Generally, most thermostats maintain a
coolant temperature between
88OC (1 90°F) and
92OC (1 98OF) although dual stage electric
2006.0 Fiesta 1212006 GI 46258en
procarmanuals.com
Page 779 of 1226

303-03B-9 Engine Cooling - 2.OL Duratec-HE (M14) 303-03B-9
DIAGNOSIS AND TESTING
.Engine Cooling
' . Special Tool(s)
Pressure Tester, Cooling
System
303-396 (24-001 A)
Inspection and Verification
1. Verify the customer concern.
2. Visually inspect for obvious signs of mechanical
( I or electrical damage. Visual
lns~ection Chart
I Mechanical I Electrical I
Coolant leak(s)
Coolant
level
Gasket(s) or seal(s)
Core plug(s)
Hose(s) or hose
joints
Coolant expansion
tank cap and seal
Coolant expansion
tank
Radiator
Coolant pump
Thermostat housing
Heater core
Accessory drive belt
Coolant outlet
connector
Fuse(s)
Relay(s)
Wiring harness
Electrical
connector(s)
Engine coolant
temperature (ECT) sensor
Cooling fan motor
Powertrain control
module (PCM)
3. If an obvious cause for an observed or reported
concern is found, correct the cause (if possible)
before proceeding to the next step
4. If the cause is not visually evident, verify the
symptom and refer to the Symptom Chart.
Symptom Chart
Symptom Chart
Symptom
Loss of coolant Possible Sources
Action
Hose(s) or hose joint(s).
Radiator. INSPECT
the hoses and hose
joints. INSTALL a new
hose(s)
as necessary.
INSPECT the radiator for leaks.
CARRY OUT the Pressure Test
Component Test in this section.
INSTALL a new radiator as
necessary.
REFER to: Radiator (303-03
Engine Cooling
- 2.OL
Duratec-H E (M 14), Removal
and Installation).
2006.0 Fiesta 1212006 G426582en
procarmanuals.com
Page 786 of 1226

303-03B-16 Engine Cooling - 2.OL Duratec-HE (M14) 303-03B-16
DIAGNOSIS AND TESTING
Item Description
I A 1 Opening temperature I
I B I Fully open temperature I
NOTE:Generally, most thermostats maintain a
coolant temperature between
88OC (1 90°F) and
92OC (1 98OF) although dual stage electric
thermostats may increase the coolant temperature
up to
100°C (212OF) under light engine load
conditions.
The engine should start cleanly and the ECT value
will rise quite quickly with smooth progression. If
the ECT signal appears unstable or erratic, the
ECT sensor, electrical connector and wiring
harness to the PCM need to be visually inspected
for damage, chafing or water ingress.
The temperature should rise to approximately
90°C
for a thermostat that has an 88OC value. The signal
value will then fall as cooler coolant enters the
engine.
If the ECT value fails to maintain a constant value
and falls back to lower figures, typically between
60°C (140°F) and 70°C (1 50°F), the thermostat
and its sealing function within the thermostat
housing must be checked.
5, INSTALL a new thermostat housing and
thermostat housing gasket as necessary.
REFER to: Thermostat Housing (303-03 Engine
Cooling
- 2.OL Duratec-HE (M14), Removal
and Installation).
6. Carry out another road test from step 1 using
the same criteria to confirm that the concern
has been rectified.
7. Using the WDS, clear the PCM keep alive
memory (KAM) or electrically erasable
programmable read only memory (EEPROM)
so that new drive values can be learnt.
2006.0 Fiesta 1212006 G426582en
procarmanuals.com
Page 799 of 1226

Fuel Charging and Controls - 1.25L
Duratec-1 6V (Sigma)ll.4L Duratec-I 6V
-04A-1 (Sigma)lI.GL Duratec-I 6V (Sigma) 303-04A-1
SECTION 303-04A Fuel Charging and Controls - 1.25L
Duratec-1 6V (Sigma)/l.4L Duratec-1 6V (Sigma)/l .6L
Duratec-I 6V (Sigma)
VEHICLE APPLICATION:2006.0 Fiesta
CONTENTS
PAGE
SPECIFICATIONS
Specifications
........................................................................\
.............................................. 303-04A-2
DIAGNOSIS AND TESTING
Fuel Charging and Controls
........................................................................\
.................. 303-04A-3
Principles Of Operation ........................................................................\
............................ 303-04A-3
Inspection and Verification ........................................................................\
.......................... 303-04A-3
REMOVAL AND INSTALLATION
Throttle Body
........... ........................................................................\
............... (23 198 0) 303-04A-4
Fuel Charging Wiring Harness ....................................................................... \
(36 437 0) 303-04A-5
Fuel Injection Supply Manifold ......................................... .......................... (23 450 0) 303-04A-7
procarmanuals.com
Page 801 of 1226

Fuel Charging and Controls - 1.25L
Duratec-1 6V (Sigma)ll.4L Duratec-1 6V
303-04A-3 (Sigma)ll .6L Duratec-1 6V (Sigma) 303-04A-3 - -
DIAGNOSIS AND TESTING
Fuel Charging and Controls
Principles Of Operation
REFER to: Acceleration Control (31 0-02A,
Diagnosis and Testing).
lnspection and Verification
1. Verify the customer concern.
2. Visually inspect for obvious signs of mechanical
or electrical damage.
Visual Inspection Chart
I Mechanical I Electrical I
- Fuel leak(s)
- Blocked or contamin-
ated fuel filter
- Fuel rail
- Vacuum line(s)
- Throttle body
- Wiring harness
- Electrical
connector(s)
- Fuel injector(s)
- Throttle body
I
3. If an obvious cause for an observed or reported
concern is found, correct the cause (if possible)
before proceeding to the next step.
4. If the cause is not visually evident, verify the
symptom and refer to WDS.
2006.0 Fiesta 1212006 G28679en
procarmanuals.com
Page 803 of 1226

Fuel Charging and Controls - 1.25L
Duratec-1 6V (Sigma)llI4L Duratec-1 6V
(Sigma)llI6L Duratec-1 6V (Sigma)
REMOVAL AND INSTALLATION
Fuel Charging Wiring Harness(36 437 0)
Removal
1. Remove the air cleaner. For additional
5. N0TE:lt is necessary to lift the red locking
tab before the electrical connector can be
disconnected.
information, refer to Section
303-12 [Intake the throttle body electrical Air Distribution and Filtering].
connector.
2. Disconnect the spark plug wires from the
ignition coil.
6. Disconnect the fuel charging wiring harness
electrical connector.
3. Disconnect the engine coolant temperature
(ECT) sensor electrical connector.
(
7. Remove the positive crankcase ventilation
(PCV) hose.
4. Disconnect the camshaft position (CMP)
sensor electrical connector.
2006.0 Fiesta 1212006 GI 89082en
procarmanuals.com
Page 804 of 1226

Fuel Charging and Controls - 1.25L
Duratec-1 6V (Sigma)ll.4L Duratec-1 6V
(Sigma)ll .6L Duratec-1 6V (Sigma)
REMOVAL AND INSTALLATION
8. Disconnect the fuel injector electrical
connectors and remove the fuel charging
wiring harness.
Installation
I. To install, reverse the removal procedure.
2006.0 Fiesta 1212006 GI 89082en
procarmanuals.com
Page 805 of 1226

Fuel Charging and Controls - 1.25L
Duratec-1 6V (Sigma)llI4L Duratec-1 6V
303-04A-7 (Sigma)llI6L Duratec-1 6V (Sigma) 303-04A-7
REMOVAL AND INSTALLATION
Fuel Injection Supply Manifold(23 450 0)
Removal
WARNINGS:
A Do not smoke or carry lighted tobacco or
open flame of any type when working on
or near any fuel related components.
Highly flammable vapors are always
present and can ignite. Failure to follow
these instructions may result in personal
injury.
A This procedure involves fuel handling. Be
prepared for fuel spillage at all times and
always observe fuel handling precautions.
Failure to follow these instructions may
result in personal injury.
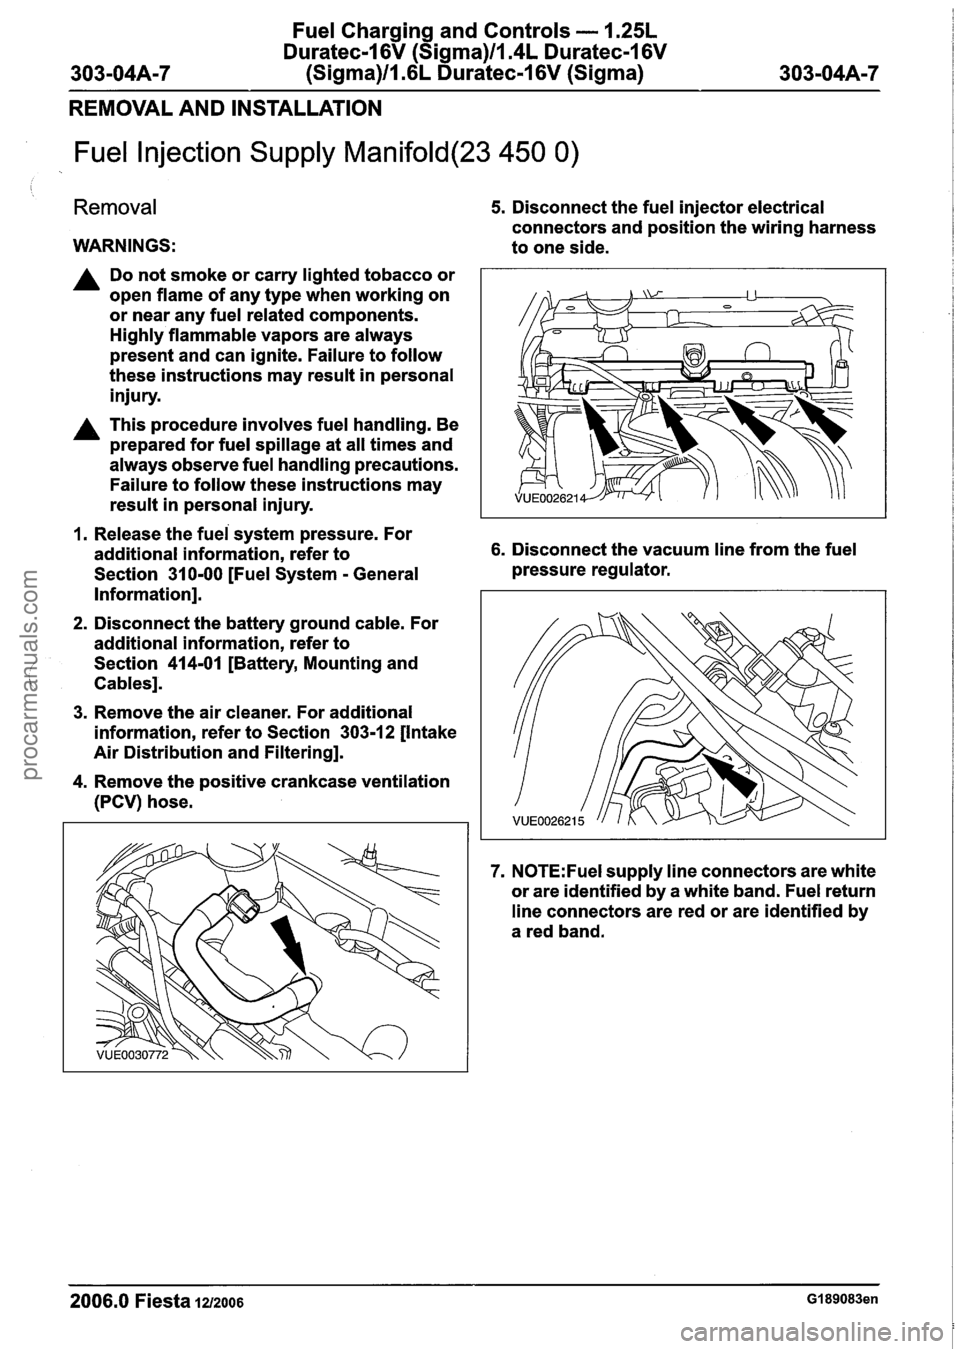
5. Disconnect the fuel injector electrical
connectors and position the wiring harness
to one side.
1. Release the fuei system pressure. For
additional information, refer to 6. Disconnect the vacuum line from the fuel
Section
31 0-00 [Fuel System - General pressure
regulator.
Information].
2. Disconnect the battery ground cable. For
additional information, refer to
Section
414-01 [Battery, Mounting and
Cables].
3. Remove the air cleaner. For additional
information, refer to Section
303-12 [Intake
Air Distribution and Filtering].
4. Remove the positive crankcase ventilation
(PCV) hose.
7. N0TE:Fuel supply line connectors are white
or are identified by a white band. Fuel return
line connectors are red or are identified by
a red band.
2006.0 Fiesta 1212006 GI 89083en
procarmanuals.com