Page 17 of 234

16Nero603 83 540 Connect DOBLO GB
CONNECT Nav
16
MAIN MODE
The MAIN mode is activated by
pushing the “MAIN” button 17-fig. 1
on the front panel.
It is possible to access the Set-up
menu from the MAIN mode.
To access the Set-up menu, display
the page MAIN then push on knob 22-
fig.1. Set-up functions will be ac-
cessed (refer to the SET-UP chapter).
Depress several times “ESC” 23-
fig.1 for returning to the display of
MAIN.STANDARD INFORMATION
The display shows information rele-
vant to the main system modules:
– AUDIO
– TELEPHONE
– NAVIGATOR
Three fields are displayed fig. 4:
– Navigation: current vehicle position
(street and town), graphic symbol rep-
resenting next manoeuvre and dis-
tance or position data if the navigation
CD ROM is not inserted, fig. 5.– Telephone: GSM provider (if no
provider is present, then the display
shows “FIND…”. If phone is switched
off, the string will be “TEL OFF” fig. 6.
Active call forward arrow-shaped icon,
unread SMS message envelope-shaped
icon, field strength status bar.
– Audio source: RDS string, tuned
band and frequency, or CD playback
track.
In MAIN mode the following keys are
active: “SRC” 15-fig. 1to select the re-
quired audio source, multifunction keys
1÷12-fig. 1to activate the options
available in the selected audio source.
fig. 4
F0D2002g
fig. 5
F0D2130g
fig. 6
F0D2003g
001-023 Doblo Connect GB 15-06-2007 10:32 Pagina 16
Page 18 of 234

17Nero603 83 540 Connect DOBLO GB
CONNECT Nav
17
“SETUP” FUNCTION
The SETUP mode enables to set dif-
ferent vehicle and CONNECT system
operating modes and parameters.
To enter the SETUP mode, press the
MAIN button 17-fig. 1and then the
knob 22-fig. 1, the display will show
the following menu fig. 7:
– LANGUAGE
– CONNECT.
fig. 7
F0D2161g
Select LANGUAGE by rotating knob
22-fig. 1and confirm by depressing it.
Languages available with system will be
displayed: ITALIAN, GERMAN, ENG-
LISH, FRENCH, PORTUGUESE and
DUTCH; select the required language
by turning knob 22-fig 1, then depress
it to confirm the operation.WARNINGChange of language will
involve both the written text and the
language of vocal commands.
WARNINGBefore starting language
change procedure, be sure that the
provided SETUP CD is available and
ready to be used.
WARNINGTo change the language
the ignition key shall be at MARand
the system shall be on.
A special message will then be dis-
played, asking the user to insert the
provided SETUP CD or to wait if the
SETUP CD is already inserted. A series
of messages will inform the user about
procedure progress and end: it is es-
sential to not “disturb” the system dur-
ing this operation.
001-023 Doblo Connect GB 15-06-2007 10:32 Pagina 17
Page 19 of 234

18Nero603 83 540 Connect DOBLO GB
CONNECT Nav
18
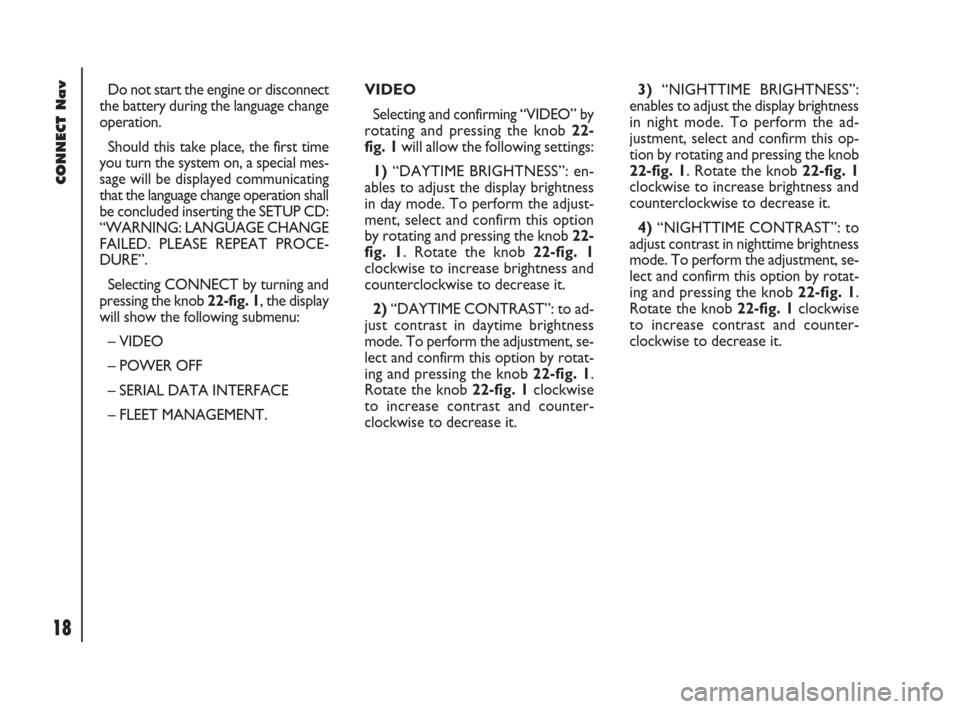
3)“NIGHTTIME BRIGHTNESS”:
enables to adjust the display brightness
in night mode. To perform the ad-
justment, select and confirm this op-
tion by rotating and pressing the knob
22-fig. 1. Rotate the knob 22-fig. 1
clockwise to increase brightness and
counterclockwise to decrease it.
4)“NIGHTTIME CONTRAST”: to
adjust contrast in nighttime brightness
mode. To perform the adjustment, se-
lect and confirm this option by rotat-
ing and pressing the knob 22-fig. 1.
Rotate the knob 22-fig. 1clockwise
to increase contrast and counter-
clockwise to decrease it. Do not start the engine or disconnect
the battery during the language change
operation.
Should this take place, the first time
you turn the system on, a special mes-
sage will be displayed communicating
that the language change operation shall
be concluded inserting the SETUP CD:
“WARNING: LANGUAGE CHANGE
FAILED. PLEASE REPEAT PROCE-
DURE”.
Selecting CONNECT by turning and
pressing the knob 22-fig. 1, the display
will show the following submenu:
– VIDEO
– POWER OFF
– SERIAL DATA INTERFACE
– FLEET MANAGEMENT.VIDEO
Selecting and confirming “VIDEO” by
rotating and pressing the knob 22-
fig. 1will allow the following settings:
1)“DAYTIME BRIGHTNESS”: en-
ables to adjust the display brightness
in day mode. To perform the adjust-
ment, select and confirm this option
by rotating and pressing the knob 22-
fig. 1. Rotate the knob 22-fig. 1
clockwise to increase brightness and
counterclockwise to decrease it.
2)“DAYTIME CONTRAST”: to ad-
just contrast in daytime brightness
mode. To perform the adjustment, se-
lect and confirm this option by rotat-
ing and pressing the knob 22-fig. 1.
Rotate the knob 22-fig. 1clockwise
to increase contrast and counter-
clockwise to decrease it.
001-023 Doblo Connect GB 15-06-2007 10:32 Pagina 18
Page 20 of 234

19Nero603 83 540 Connect DOBLO GB
CONNECT Nav
19
5)“MODE, DIMMING, CON-
TRAST”: selecting and confirming this
option by rotating and pressing the
knob 22-fig. 1, the following settings
are possible:
“AUTOMATIC”: enables to adjust
automatically the day/night mode de-
pending on vehicle lights switching
on/off.
“DAY”: activates day mode.
“NIGHT”: activates night mode.
After selecting the required setting,
press the knob 22-fig. 1to confirm.
If the automatic mode is “DAY” on-
ly day adjustment is displayed and the
night one is deactivated.
If the automatic mode is “NIGHT”
only night adjustment is displayed and
the day one is deactivated.POWER OFF
Select and confirm “POWER OFF”
by rotating and pressing the knob 22-
fig. 1to access the type of setting that
determines CONNECT switching off
(dependent on or independent of ig-
nition key).
Possible settings, only with ignition
key at MAR, are the following:
– “key-dependent auto-off”
– “key-independent auto-off”
Current activated setting will be high-
lighted.
Select and confirm the required set-
ting by rotating and pressing the knob
22-fig. 1.SERIAL DATA INTERFACE
IMPORTANTThe SERIAL DATA
INTERFACE function is not support-
ed by system.
001-023 Doblo Connect GB 15-06-2007 10:32 Pagina 19
Page 21 of 234

20Nero603 83 540 Connect DOBLO GB
CONNECT Nav
20
FLEET MANAGEMENT
When choosing this function, the
CONNECT Nav system sends auto-
matically SMS messages (to a suitable
preset receiver, e.g. a control centre)
containing the position of the vehicle
mounting the CONNECT Nav.
SMS messages are structured as fol-
lows:
– vehicle location (latitude and lon-
gitude)
– city (only with navigation CD in-
serted; if no CD is inserted, the field
is empty)
– street (only with navigation CD in-
serted; if no CD is inserted, the field
is empty)
– time and date
– vehicle ID (number plate).Example: LT:-2.30000;LG:-2.40000; #Benevento;#
Via Basilio Giannelli;#S:30;M:20; H:19;ND:2;D:02;MH:10;Y:2001;#BR757AM;#
To activate the FLEET MANAGE-
MENT function, proceed as follows:
– press the “MAIN” button 17-fig. 1
to display the main screen;
– turn and press the knob 22-fig. 1
to select and confirm “CONNECT”;
the display will show the “CON-
NECT” menu;
– turn and press the knob 22-fig. 1
to select and confirm “FLEET MAN-
AGEMENT” fig. 8; the screen in fig. 9
will be displayed; Latitude: -2.30000
Longitude: -2.40000
City: Benevento
StreetVia Basilio Giannelli
Time and date hour19.20 minutes,
30 seconds
Tuesday 2/10/2001
Number plate BR757AM
If the navigation CD is inserted, the
vehicle position is processed matching
coordinates with system maps.
In any case, navigation CD absence,
does not impair system operation.
The system will send the SMS message
even if the GPS coverage is temporari-
ly missing; in this case the vehicle posi-
tion is calculated through the “dead
reckoning” procedure.
fig. 8
F0D2160g
001-023 Doblo Connect GB 15-06-2007 10:32 Pagina 20
Page 22 of 234

21Nero603 83 540 Connect DOBLO GB
CONNECT Nav
21
– select and confirm “Sending mode”
by rotating and pressing the knob 22-
fig. 1, the screen in fig. 10will be dis-
played;– select and confirm “ON” (or
“OFF” if you want to deactivate it) by
rotating and pressing the knob 22-
fig. 1;
– turn the knob 22-fig. 1to select
“EVENT MODE” then press the knob
to confirm; the condition shown in
fig. 11will be displayed;
– turn the knob 22-fig. 1to select
“ROUTE (km/mi)” or “TIME (hours)”,
then press the knob to confirm. Selecting “ROUTE (km/mi)” the
message will be sent at the number
of km or miles set in “DATA FRE-
QUENCY SEND”; selecting “TIME
(hours)” the message will be sent at
the number of hours set in “DATA
FREQUENCY SEND”;
– turn knob 22-fig. 1to select “DA-
TA FREQUENCY SEND” then press
to confirm; according to the previously
set parameter (route or time) the dis-
play will show the screen in fig. 12or
fig. 13;
fig. 9
F0D2162g
fig. 10
F0D2163g
fig. 11
F0D2164g
fig. 12
F0D2165g
001-023 Doblo Connect GB 15-06-2007 10:32 Pagina 21
Page 23 of 234

22Nero603 83 540 Connect DOBLO GB
CONNECT Nav
22fig. 13
F0D2168g
fig. 14
F0D2166g
fig. 15
F0D2167g
– turn knob 22-fig. 1to select the
required value, then press to confirm;
– turn knob 22-fig. 1to select “VE-
HICLE ID” then press to confirm; the
display will show the screen in fig. 14
and the keypad for typing in the vehi-
cle identification data (e.g.: number
plate; turn knob 22-fig. 1to select in
sequence the required digits and/or
letters, then press each time to con-
firm the character. Once you have
completed the vehicle ID, select “OK”
and press knob 22-fig. 1the display
will return to the initial screen and thefield near “Vehicle ID” will show the
entered alphanumeric string;
– turn knob 22-fig. 1to select
“TELEPHONE NUMBER”; the screen
in fig. 15will be displayed together
with the alphanumeric keypad for di-
alling the required telephone number
to which SMS shall be sent; turn knob
22-fig. 1to select in sequence the re-
quired numbers and press it to con-
firm each time. Once you have com-
pleted the telephone number, select
“OK” and press the knob 22-fig. 1;
the display will return to the initial
screen and the field near “TELE-
PHONE NUMBER” will show the en-
tered number;– turn knob 22-fig. 1to select “OK”
then press the knob to confirm set-
tings; the display will return to the ini-
tial screen.
001-023 Doblo Connect GB 15-06-2007 10:32 Pagina 22
Page 24 of 234
23Nero603 83 540 Connect DOBLO GB
CONNECT Nav
23
Operation requirements
The “FLEET MANAGEMENT” func-
tion is operational if the following con-
ditions are present:
– “FLEET MANAGEMENT” function
active;
– service centre telephone number
entered;
– vehicle ID entered;
– frequency set (timeor route);
– CONNECT on;
– SIM card inserted;
– sufficient credit;
– GSM coverage.Failing message sending
Should one or more of the following
conditions - e.g.: CONNECT off, SIM
card not inserted or disabled, insuffi-
cient GSM coverage - take place when
sending SMS messages, their regular
transmission will be impaired.
In this case the system will store the
messages and send them later (max.
10 messages) when normal operating
conditions are restored.IMPORTANTMore particularly,
the condition of CONNECT off will
store the messages with incorrect po-
sition, since the first position present
at system switching on will be detect-
ed.
001-023 Doblo Connect GB 15-06-2007 10:32 Pagina 23