Page 113 of 166
: shows informa-
tion about")
112
CONNECT Nav+
To select the required function, ro-
tate the knob 15-fig. 1and then press
it to confirm.
– Service Info (available only by se-
lection from “Atlas”): shows informa-
tion about a “service” selected on the
map fig. 131.
– Locate(available only by selection
from “Atlas”): shows the car position
on the map. All keys are disabled and
an arrow identifies the car position.
Car orientation (arrow direction) can
be modified by rotating and pressing
the knob 15-fig. 1. –Calculate Route
Selecting and confirming “Calculate
Route” by rotating and pressing the
knob 15-fig. 1, will activate route cal-
culation to the required destination. If
a destination is already set, the system
will ask for confirmation before chang-
ing destination.
– Bookmarks
This option may be used to store a
selected point in the navigation phone
book and associate it with a name (e.g.
Home), so that it may be called up eas-
ily fig. 109.
The name to be associated with the
destination can be entered, after se-
lecting and confirming “Name”, by ro-
tating and pressing the knob 15-fig. 1.
IMPORTANT When selecting
“Name”, remember that it is not pos-
sible to add a name already present in
the Telephone (TEL) function direc-
tory.
To enter the characters simply select
them one by one by rotating and press-
ing the knob 15-fig. 1.
Then, select OK using the keypad and
press the knob 15-fig. 1.The “Voice recognition” key allows
to associate a voice sample to a desti-
nation stored in the directory. Sym-
bol “√” at the left of the key shows if
a sample has already been associated.
Selecting and confirming “Voice
recognition” will display the screen in
fig. 130:
“New voice command”: allows
recording of a new voice sample. User
is invited to pronounce twice the name
to be recorded.
“Delete voice command”: allows
deletion of a previously recorded voice
sample. If there is no sample, this key
is disabled.
“Listen to voice command”: repro-
duces a previously recorded voice
sample. If there is no recorded sample,
this key is disabled.
DEST 1 DEST 2 INFO ATLANTE DETOUR MAP
Voice phonebook
fig. 130
F0L3141g
DEST 1 DEST 2 INFO ATLANTE DETOUR MAP
fig. 131
F0L3144g
092-115 Connect CROMA GB 4-07-2007 14:06 Pagina 112
Page 114 of 166
: shows information
about the “RDS-TMC” icon selected
on the map fig. 132.
–Dest 1 and Dest 2: store the se-
lected point")
113
CONNECT Nav+
RDS-TMC(available only by selec-
tion from “Atlas”): shows information
about the “RDS-TMC” icon selected
on the map fig. 132.
–Dest 1 and Dest 2: store the se-
lected point in the relevant memories.
If a point has already been previous-
ly stored as “Dest1” or “Dest2 ”, a
warning box asks the user for confir-
mation about substitution.
Pressing Dest1 or Dest2 16-fig.
1and then the knob 15-fig. 1to con-
firm, will start route calculation to the
destination stored in Dest1 or Dest
2.SETTINGS
When in the main navigation screen,
select the Settings option by turning
knob 15-fig. 1and confirm by press-
ing the knob.
The following keys are available:
– Volume
– Map preferences
– Route options
Volume
Used to adjust the volume of voice
information supplied by the system.
To increase/decrease the volume,
turn knob 15-fig. 1and confirm by
pressing.Map options
To select “Map options”, rotate the
knob 15-fig. 1and then press it to
confirm.
This function allows set up of map
displaying with the following options
fig. 134:
DEST 1 DEST 2 INFO ATLANTE DETOUR MAP
Toll Roads
Route options
Ferries
Route type
Shortest time
YES
YES
fig. 133
F0L3161g
DEST 1 DEST 2 INFO ATLANTE DETOUR MAP
fig. 132
F0L3145g
DEST 1 DEST 2 INFO ATLANTE DETOUR MAPPA
fig. 134
F0L3166g
092-115 Connect CROMA GB 4-07-2007 14:06 Pagina 113
Page 115 of 166

moves accordingly;
– “Oriented automatically”: cursor
(car) is")
114
CONNECT Nav+
Draw map: to set map orientation:
– “Oriented towards north”: map is
displayed North-oriented, cursor (car)
moves accordingly;
– “Oriented automatically”: cursor
(car) is displayed in central position
and the map is oriented according to
car direction.
- “Bird view”: the map is oriented ac-
cording to car direction. With per-
spective towards the horizon, the
point of view is set behind the car at
a certain height and preset angle.
This option, if active, will force the
following submenu options: ddraw ar-
eas (forced at 2D), draw icons (forced
at NO), draw RDS-TMC (forced at
NO).Draw areas: allows to set the map
through two different options:
– “2D”: the map is shown by seg-
ments and coloured areas;
– “NO”: the map is shown by graph-
ic segments only.Draw icon: enables or disables
(“NO”) the display of icon category
(e.g.: hotels, restaurants, service sta-
tions, etc.) on the map;
Draw RDS-TMC: enables or dis-
ables (“NO”) the display of the icons
related to RDS-TMC category (if avail-
able): Traffic, Weather, Info etc..., on
the map;
Draw wording: enables (“YES”) or
disables (“NO”) the indications of the
places names (town, etc..) on the map;
092-115 Connect CROMA GB 4-07-2007 14:06 Pagina 114
Page 116 of 166
 or disables (“NO”) the zoom
intersection option, i.e. whether to
zoom the map when car approaches
an intersection;
OK: activates settings.Ro")
115
CONNECT Nav+
Zoom intersection: enables
(“YES”) or disables (“NO”) the zoom
intersection option, i.e. whether to
zoom the map when car approaches
an intersection;
OK: activates settings.Route options
“Set route” allows to define the
route calculation parameters.
When selecting this function by ro-
tating the knob 15-fig. 1and pressing
it to confirm, the display shows the fol-
lowing options fig. 133:
– Route type
Selecting and confirming “Route
type” by rotating and pressing the
knob 15-fig. 1, makes it possible to
set the route calculation criteria ac-
cording to two different modes:
“Shortest time” or “Shortest dis-
tance”.
–Ferries
Select the Ferries key by turning
knob 15-fig. 1and confirm by press-
ing the knob to determine whether or
not the route may or may not include
ferry crossings.– Highway
Select and confirm “Highway” by ro-
tating and pressing the knob 15-fig.
1to define if route can include high-
way segments or not.
To activate set calculation parame-
ters, select icon “OK” turning the
knob 15-fig. 1and pressing it to con-
firm.
092-115 Connect CROMA GB 4-07-2007 14:06 Pagina 115
Page 117 of 166
. Certain in-
formation is on")
116
CONNECT Nav+
GENERAL INFORMATION
The on-board computer provides a
series of helpful data relevant to cur-
rent travel (e.g.: times, distances,
speed, fuel consumption). Certain in-
formation is only available with navi-
gation function on and depends on set
navigation route.
IMPORTANTCertain informa-
tion/operations hereafter described
are available/possible only with ignition
key turned to ON.
TRIP menu allows to set the desired
distance and fuel consumption mea-
sure unit.
TRIP menu also allows to input a
number of events (e.g. Tyre replace-
ment..., Birthday…) that can be trig-
gered both on set date or mileage.To display on-board computer
screen, press “TRIP” key 4-fig. 1.
To perform new settings or to have
information about TRIP settings, press
keypad16-fig. 1buttons: “TRIP”,
“TRIP B”, “SPEED”, “INFO” or “RE-
SET”.“GENERAL TRIP”
and “TRIP B” FUNCTION
Press TRIP key 4-fig. 1on CON-
NECT Nav+ front panel to open the
“General Trip” screen fig. 138.
With “General Trip” screen open,
pushing one of the keypad buttons 16-
fig. 1, on “TRIP B” will open the rel-
evant screen.
O O
N N
- -
B B
O O
A A
R R
D D
C C
O O
M M
P P
U U
T T
E E
R R
( (
T T
R R
I I
P P
) )
fig. 138
116-123 Connect CROMA GB 2-07-2007 15:43 Pagina 116
Page 118 of 166

– Distance to destination
– Speed limit")
117
CONNECT Nav+
Information displayed on “General
Trip” fig. 138and “Trip B” fig. 139
screen are the following:
– ETA (Estimated Time of Arrival)
– Distance to destination
– Speed limit
– km/miles to empty
– Inst. fuel consumpt.
(instantaneous fuel consumption)
– Trip time (*)
– Distance traveled (*)
– Average speed (*)
– Average fuel consum (*)
Information marked with (*) are re-
settable (refer to paragraph “TRIP: Re-
set”).With “General Trip” screen open,
pressing one of the keypad keys 16-
fig. 1, on “RESET” will reset data
marked with (*) present on both Gen-
eral Trip and Trip B.
With “Trip B” screen open, pressing
one of the keypad keys 16-fig. 1, on
“RESET” will reset only data marked
with (*) present on Trip B.
“ETA”
(Estimated Time of Arrival)
This information is present only
when the navigation function is on and
indicates the expected time of arrival
to destination. Time is expressed in
“hh:mm” (hours and minutes).“Distance to destination”
This information is present only
when the navigation function is on and
indicates the distance between current
position and the destination set. Dis-
tance value is expressed in “km” (kilo-
metres) unless otherwise set by the
user (see paragraph “MY CAR”).
“Speed limit”
This function is used to set car speed
limit; if this is exceeded the driver is
warn by a buzzer and a display warn-
ing message on the instrument panel.
“km/miles to empty”
This shows the distance that the car
can still cover before needing fuel. This
value is the same for both “General
Trip” and “Trip B”. Value is expressed
in “km” (kilometres) unless otherwise
set by the user (see paragraph “TRIP:
MY CAR”).
fig. 139
116-123 Connect CROMA GB 2-07-2007 15:43 Pagina 117
Page 119 of 166

118
CONNECT Nav+
“Inst. fuel consumpt.”
This shows the fuel consumption of
the car while driving and is therefore
helpful for learning the fuel consump-
tion in relation to the driving style
adopted. This value is the same for
both “General Trip” and “Trip B”. The
value is expressed in “l/100 km” (litres
per 100 kilometres) unless otherwise
set by the user (see paragraph “TRIP:
MY CAR”).
“Trip time”
This shows the time elapsed (travel
time) since the last manual reset of the
on-board computer (“TRIP: RESET”
function). The value is expressed in
“hh:mm” (hours and minutes).“Distance traveled”
This shows the distance traveled by
the car from the last manual reset of
the on-board computer (“TRIP: RE-
SET” function). The value is expressed
in “km” (kilometres) unless otherwise
set by the user (see paragraph “TRIP:
MY CAR”).
“Average speed”
This shows the average speed of the
car calculated from the last manual re-
set of the on-board computer (“TRIP:
RESET” function). The value is ex-
pressed in “km/h” (kilometres per
hour) unless otherwise set by the user
(see paragraph “TRIP: MY CAR”).
“Average fuel consum”
This shows the average consumption
of the car calculated from the last
manual reset of the on-board com-
puter (“TRIP: RESET” function). The
value is expressed in “l/100 km” (litres
per 100 kilometres) unless otherwise
set by the user (see paragraph “TRIP:
MY CAR”).TRIP: SPEED
Pressing one of the keypad keys 16-
fig. 1, on “SPEED” fig. 138 - 139, dis-
plays fig. 140screen showing the cur-
rent status of “Speed limit” function
(ENABLED or DISABLED) and the set
speed limit.
fig. 140
116-123 Connect CROMA GB 2-07-2007 15:43 Pagina 118
Page 120 of 166

119
CONNECT Nav+
To change any set data, select
“Change” icon; a screen with the fol-
lowing functions is displayed fig. 141:
“Limit” (km/h or mph, according to
set unit;
“Alarm”;
“OK”.
IMPORTANTChanges can only be
performed with ignition key to ON.
With ignition key at OFFany attempt
to enter changes is rejected and the
display will show “Setup change failed”.“Limit (km/h or mph)”
Select “Limit (km/h or mph)” with
the knob 15-fig. 1and press it to con-
firm. Rotate the knob14-fig. 1to
change the set speed limit by steps of
5 km/h (or mph according to set unit).
Press the knob 15-fig. 1to confirm.
“Alarm”
The “Alarm” function enables/dis-
ables warning indication when set
speed limit is exceeded.
To enable/disable this function, select
and confirm “Alarm” by rotating and
pressing the knob 15-fig. 1. The dis-
play will show: “ENABLED” or “DIS-
ABLED”.“OK”
To confirm selected options, select
“OK” with the knob 15-fig. 1and
then press it.
TRIP UNITS OF MEASURE
The “MY CAR” function enables to
change the units of measure relevant
to distance, speed and fuel consump-
tion.
When in the MAIN screen, select
MY CAR mode using knob 15-fig. 1
and confirm by pressing the knob to
gain access to the screen in fig. 142,
which contains the current settings.
fig. 141
06
SYSTEM
fig. 142
116-123 Connect CROMA GB 2-07-2007 15:43 Pagina 119
 1
1 2
2 3
3 4
4 5
5 6
6 7
7 8
8 9
9 10
10 11
11 12
12 13
13 14
14 15
15 16
16 17
17 18
18 19
19 20
20 21
21 22
22 23
23 24
24 25
25 26
26 27
27 28
28 29
29 30
30 31
31 32
32 33
33 34
34 35
35 36
36 37
37 38
38 39
39 40
40 41
41 42
42 43
43 44
44 45
45 46
46 47
47 48
48 49
49 50
50 51
51 52
52 53
53 54
54 55
55 56
56 57
57 58
58 59
59 60
60 61
61 62
62 63
63 64
64 65
65 66
66 67
67 68
68 69
69 70
70 71
71 72
72 73
73 74
74 75
75 76
76 77
77 78
78 79
79 80
80 81
81 82
82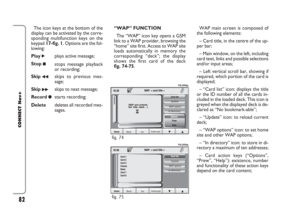 83
83 84
84 85
85 86
86 87
87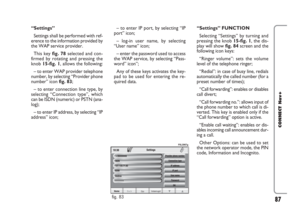 88
88 89
89 90
90 91
91 92
92 93
93 94
94 95
95 96
96 97
97 98
98 99
99 100
100 101
101 102
102 103
103 104
104 105
105 106
106 107
107 108
108 109
109 110
110 111
111 112
112 113
113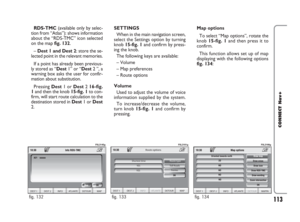 114
114 115
115 116
116 117
117 118
118 119
119 120
120 121
121 122
122 123
123 124
124 125
125 126
126 127
127 128
128 129
129 130
130 131
131 132
132 133
133 134
134 135
135 136
136 137
137 138
138 139
139 140
140 141
141 142
142 143
143 144
144 145
145 146
146 147
147 148
148 149
149 150
150 151
151 152
152 153
153 154
154 155
155 156
156 157
157 158
158 159
159 160
160 161
161 162
162 163
163 164
164 165
165