Page 18 of 173
Handlebar fitting, left1Cruise-control system
OE
( 63)
2 Operating ESA
OE
( 69)
3 Operating ASC
OE
( 61)
4 Windscreen adjustment
( 63)
5 Horn
6 Flashing turn indicators,
left ( 56), Hazard warn-
ing flashers ( 57)
7 High-beam headlight and
headlight flasher ( 56)
216zGeneral views
Page 21 of 173
Headlight1Side lights
2 Low-beam headlight
3 High-beam headlight
219zGeneral views
Page 24 of 173
Standard status
indicatorsMultifunction display1Fuel capacity ( 22)
2 Gear indicator ( 22)
3 Coolant temperature
( 22)
4 Clock ( 49)
5 Odometer
6 Trip meter ( 49)
Telltale lights1Flashing turn indicators, left
2 High-beam headlight
3 Idle
4 Flashing turn indicators,
rightFuel capacity
The column below the fuel-
pump symbol indicates the
remaining quantity of fuel.
When the fuel in the tank is
topped up the gauge briefly
shows the original level, before
the reading is updated.
Gear indicator
The gear engaged or
N
for neutral appears on the
display.
If no gear is engaged, the
'neutral' telltale light also
lights up.
Coolant temperature
The column below the tem-
perature symbol indicates
the coolant temperature.
Service-due indicatorIf the next service is due in less
than one month, the date for
322zStatus indicators
Page 32 of 173
complete set of spare bulbs if
possible.
Low-beam headlight, high-beam
headlight, side-light or turn-indic-
ator bulb defective.Replacing low-beam and high-
beam headlight bulb ( 123)
Replacing parking-light bulbs
( 126)
Replacing front turn indicator
bulbs ( 129)
Bulbs defective General warning light shows
yellow.
Bulb symbol with two ar-
rows appears on the dis-
play.
A defective bulb places
your safety at risk because
it is easier for other users to
oversee the motorcycle.
Replace defective bulbs as
soon as possible; always carry a complete set of spare bulbs if
possible.
A combination of the bulb de-
fects described above has oc-
curred.
See the fault descriptions
above.
Warnings issued by the
on-board computer
OE
Mode of presentation
Warnings issued by the on-board
computer appear in panel 1.
The possible warnings are listed
on the next page.
330zStatus indicators
Page 58 of 173

Low-beam headlightThe low-beam headlight switches
on automatically when you start
the engine.When the engine is not
running you can switch on
the lights by switching on the ig-
nition and either switching on the
high-beam headlight or operating
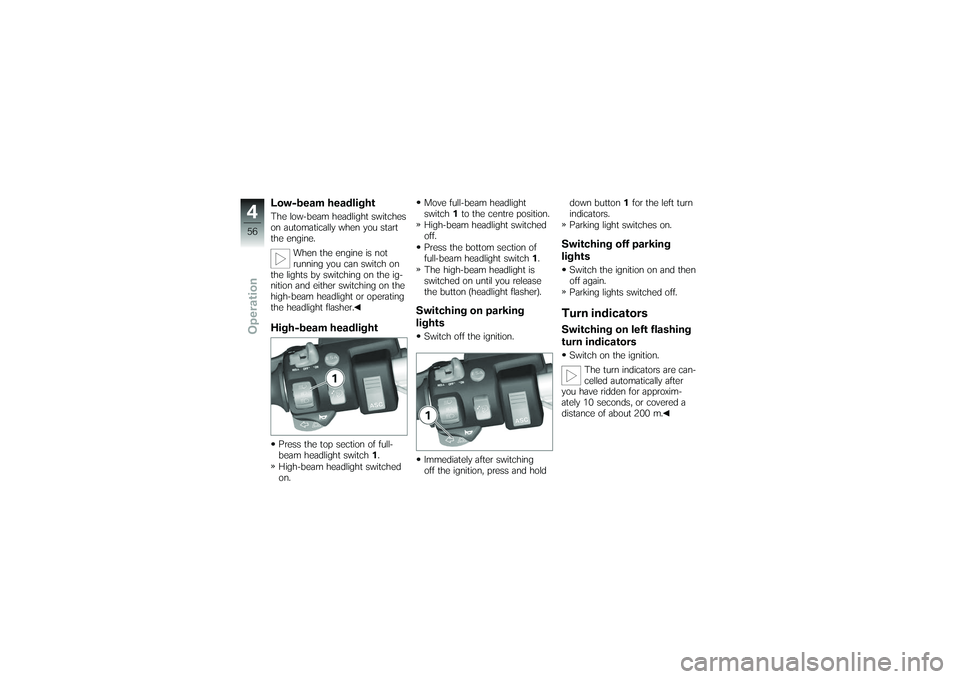
the headlight flasher.High-beam headlightPress the top section of full-
beam headlight switch 1.
High-beam headlight switched
on. Move full-beam headlight
switch
1to the centre position.
High-beam headlight switched
off.
Press the bottom section of
full-beam headlight switch 1.
The high-beam headlight is
switched on until you release
the button (headlight flasher).
Switching on parking
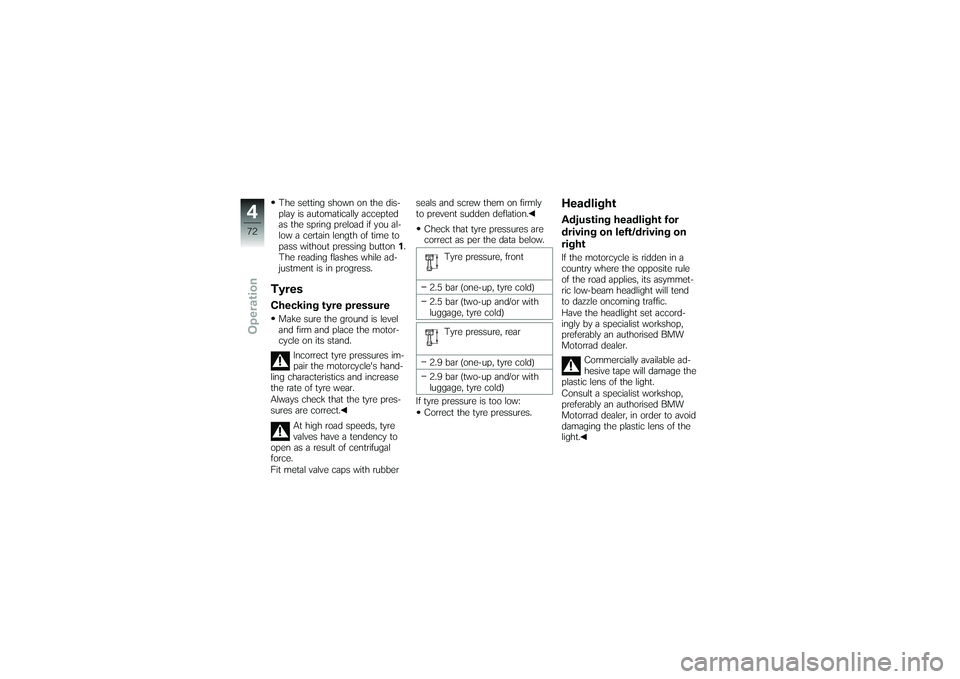
lightsSwitch off the ignition.
Immediately after switching
off the ignition, press and hold down button
1for the left turn
indicators.
Parking light switches on.
Switching off parking
lightsSwitch the ignition on and then
off again.
Parking lights switched off.Turn indicatorsSwitching on left flashing
turn indicatorsSwitch on the ignition.
The turn indicators are can-
celled automatically after
you have ridden for approxim-
ately 10 seconds, or covered a
distance of about 200 m.
456zOperation
Page 74 of 173

The setting shown on the dis-
play is automatically accepted
as the spring preload if you al-
low a certain length of time to
pass without pressing button1.
The reading flashes while ad-
justment is in progress.TyresChecking tyre pressureMake sure the ground is level
and firm and place the motor-
cycle on its stand.
Incorrect tyre pressures im-
pair the motorcycle's hand-
ling characteristics and increase
the rate of tyre wear.
Always check that the tyre pres-
sures are correct.
At high road speeds, tyre
valves have a tendency to
open as a result of centrifugal
force.
Fit metal valve caps with rubber seals and screw them on firmly
to prevent sudden deflation.
Check that tyre pressures are
correct as per the data below.
Tyre pressure, front
2.5 bar (one-up, tyre cold)
2.5 bar (two-up and/or with
luggage, tyre cold) Tyre pressure, rear
2.9 bar (one-up, tyre cold)
2.9 bar (two-up and/or with
luggage, tyre cold)
If tyre pressure is too low: Correct the tyre pressures.
HeadlightAdjusting headlight for
driving on left/driving on
rightIf the motorcycle is ridden in a
country where the opposite rule
of the road applies, its asymmet-
ric low-beam headlight will tend
to dazzle oncoming traffic.
Have the headlight set accord-
ingly by a specialist workshop,
preferably an authorised BMW
Motorrad dealer.
Commercially available ad-
hesive tape will damage the
plastic lens of the light.
Consult a specialist workshop,
preferably an authorised BMW
Motorrad dealer, in order to avoid
damaging the plastic lens of the
light.
472zOperation
Page 125 of 173

BulbsGeneral instructionsThe failure of a bulb is signalled
in the display by the defect-
ive lamp symbol. The bulbs for
brake light and rear light are the
same; the brightness of the light
is regulated in accordance with
the application.A defective bulb places
your safety at risk because
it is easier for other users to
oversee the motorcycle.
Replace defective bulbs as
soon as possible; always carry a
complete set of spare bulbs if
possible.
The bulb is pressurised and
can cause injury if dam-
aged.
Wear protective goggles and
gloves when changing bulbs. The types of bulb fitted to
your motorcycle are listed
in the section entitled "Technical
data".
Do not touch the glass of
new bulbs with your fingers.
Use a clean, dry cloth to hold
the bulbs when handling them.
Dirt deposits, in particular oil and
grease, interfere with heat radi-
ation from the bulb. This leads
to overheating and shortens the
bulb's operating life.
Replacing low-beam and
high-beam headlight bulb
If it is not standing firmly,
the motorcycle could topple
in the course of the operations
described below.
Always make sure that the
motorcycle is stable and firmly
supported. with OE Xenon lights:
Xenon lights operate with
high voltage; incorrect
working procedures can result in
fatalities.
Have all work on the xenon light
system, including the work in-
volved in replacing bulbs, per-
formed by a specialist work-
shop, preferably by an authorised
BMW Motorrad dealer.
For the time being, ride with
the high-beam headlight
switched on.
In order not to dazzle oncom-
ing traffic, set the headlight
beam throw adjuster to the po-
sition for riding with maximum
payload.
Have the bulb replaced as
soon as possible by a specialist
workshop, preferably an author-
ised BMW Motorrad dealer.
8123zMaintenance
Page 126 of 173
Make sure the ground is level
and firm and place the motor-
cycle on its stand.
Switch off the ignition.
Remove cover1(low-beam
headlight) or covers 2(high-
beam headlight).
Remove the covers of the
high-beam headlight bulbs
by turning them counter-
clockwise. To remove the cover of the
low-beam headlight bulb, push
locking lever
3down, swing the
cover down and remove.
Disconnect plug 4. Disengage spring clip
5from
the latches and swing it up.
The spring clip might face
in a direction other than
that shown here, depending on
the light.
8124zMaintenance