Page 76 of 417
75 Safety and Security
Occupant safety
The 7indicator lamp located in the
center console will be illuminated, except
with the SmartKey removed or in the start-
er switch position0.
Self-test BabySmart
TM without special
child seat installed
After turning the SmartKey in the starter
switch to position1 or2, the
7indicator lamp located in the center
console comes on for approximately
six seconds and then goes out.
If the indicator lamp should not come on or
is continuously lit, the system is not func-
tioning. You must see an authorized
Mercedes-Benz Light Truck Center before
seating any child on the front passenger
seat.
For more information, see “Practical hints”
section (
�page 297).
i
The system does not deactivate the
emergency tensioning device.
Warning!G
The BabySmartTM airbag deactivation sys-
tem will ONLY work with a special child seat
designed to operate with it. It will not work
with child seats which are not BabySmart
TM
compatible.
Never place anything between seat cushion
and child seat (e.g. pillow), since it reduces
the effectiveness of the deactivation sys-
tem. The bottom of the child seat must
make full contact with the passenger seat
cushion. An incorrectly mounted child seat
could cause injuries to the child in case of an
accident, instead of protecting the child.
Follow the manufacturer’s instructions for
installation of special child seats.
When using a BabySmart
TM compatible
child seat on the front passenger seat, the
passenger front airbag will not deploy only
if the 7 indicator lamp remains
illuminated.
Warning!G
Make sure to check the indicator every time
you use the special system child seat.
Should the light go out while the restraint is
installed, please check installation. If the
light remains out, do not use the
BabySmart
TM restraint to transport children
on the front passenger seat until the system
has been repaired.
Warning!G
Do not place powered-on laptops, cell
phones, electronic tags such as those used
in ski passes and like electronic devices on
the front passenger seat. Signals from such
devices may interfere with the BabySmart
TM
system. Such signal interference, for exam-
ple, may cause the 7 indicator lamp not
to come on during self-test or be continu-
ously lit, indicating that the system is not
functioning.
Page 79 of 417
78 Safety and Security
Occupant safety
Blocking rear door window operation
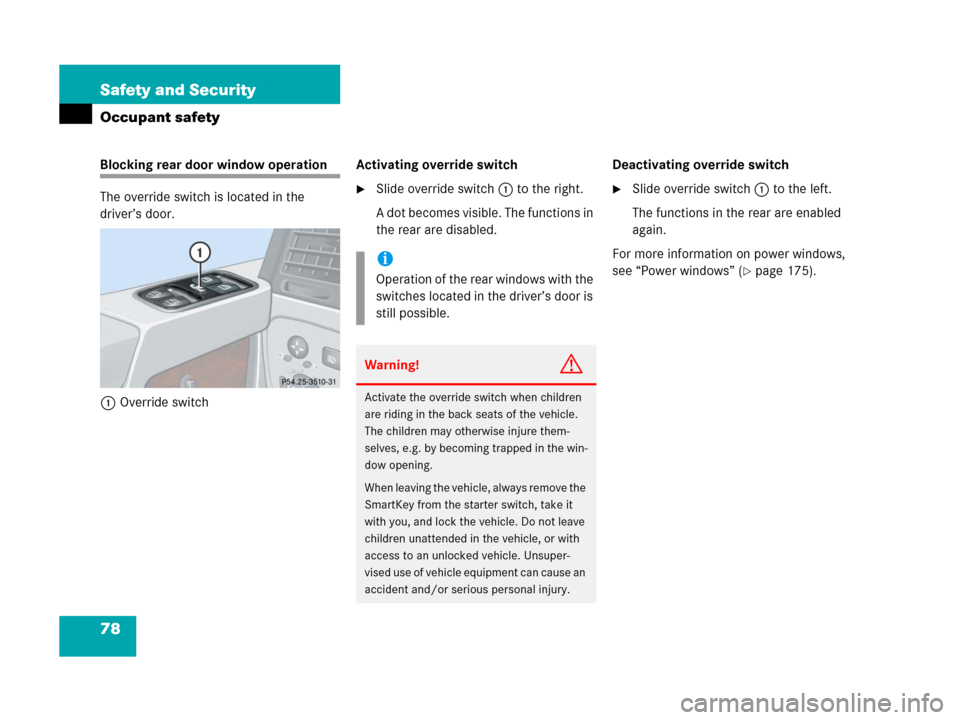
The override switch is located in the
driver’s door.
1Override switchActivating override switch
�Slide override switch1 to the right.
A dot becomes visible. The functions in
the rear are disabled.Deactivating override switch�Slide override switch1 to the left.
The functions in the rear are enabled
again.
For more information on power windows,
see “Power windows” (
�page 175). i
Operation of the rear windows with the
switches located in the driver’s door is
still possible.
Warning!G
Activate the override switch when children
are riding in the back seats of the vehicle.
The children may otherwise injure them-
selves, e.g. by becoming trapped in the win-
dow opening.
When leaving the vehicle, always remove the
SmartKey from the starter switch, take it
with you, and lock the vehicle. Do not leave
children unattended in the vehicle, or with
access to an unlocked vehicle. Unsuper-
vised use of vehicle equipment can cause an
accident and/or serious personal injury.
Page 80 of 417
79 Safety and Security
Panic alarm
�Panic alarm
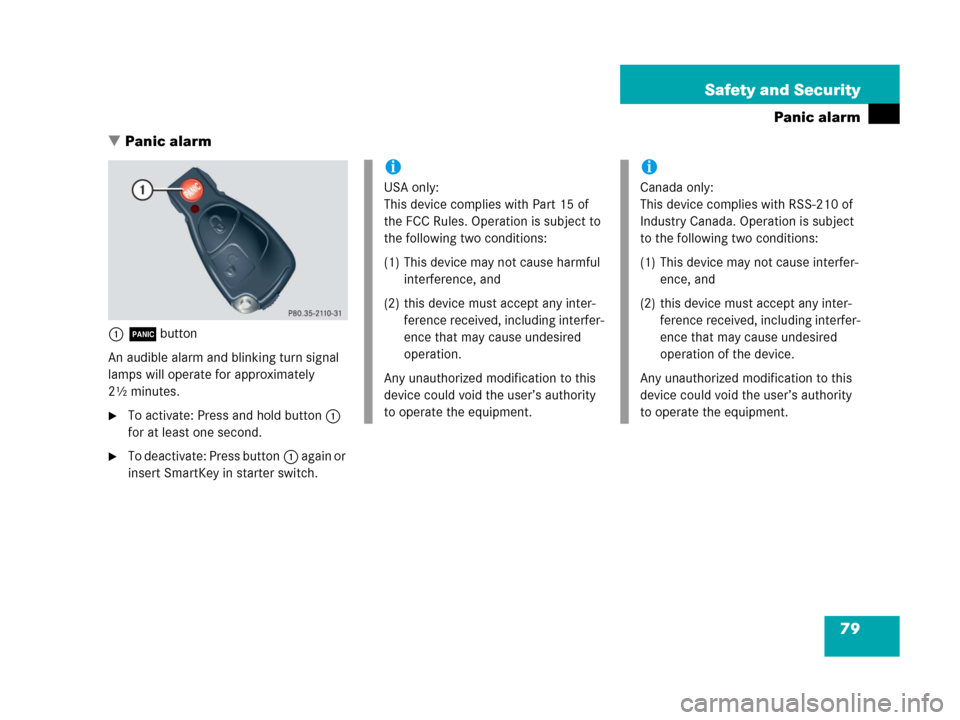
1Âbutton
An audible alarm and blinking turn signal
lamps will operate for approximately
2½ minutes.
�To activate: Press and hold button1
for at least one second.
�To deactivate: Press button1 again or
insert SmartKey in starter switch.
i
USA only:
This device complies with Part 15 of
the FCC Rules. Operation is subject to
the following two conditions:
(1) This device may not cause harmful
interference, and
(2) this device must accept any inter-
ference received, including interfer-
ence that may cause undesired
operation.
Any unauthorized modification to this
device could void the user’s authority
to operate the equipment.
i
Canada only:
This device complies with RSS-210 of
Industry Canada. Operation is subject
to the following two conditions:
(1) This device may not cause interfer-
ence, and
(2) this device must accept any inter-
ference received, including interfer-
ence that may cause undesired
operation of the device.
Any unauthorized modification to this
device could void the user’s authority
to operate the equipment.
Page 82 of 417
81 Safety and Security
Driving and safety systems
Continuous steady brake pedal pressure
yields the advantages provided by the ABS,
namely braking power and the ability to
steer the vehicle.
On slippery road surfaces, the ABS will re-
spond even with light brake pressure. The
pulsating brake pedal can be an indication
of hazardous road conditions and func-
tions as a reminder to take extra care while
driving.
The -indicator lamp in the instrument
cluster (
�page 24) comes on when you
turn the SmartKey to position2. It goes
out when the engine is running.Braking
At the instant one of the wheels is about to
lock up, a slight pulsation can be felt in the
brake pedal, indicating that the ABS is in
the regulating mode.
�Keep firm and steady pressure on the
brake pedal while experiencing the pul-
sation.
Emergency brake maneuver
�Keep continuous full pressure on the
brake pedal.LOW RANGE– ABS
During off-road driving a special low range
system for the antilock brake system (ABS)
is operational with transfer case in position
LOW (
�page 157).
An improved braking action (dig-in effect)
is obtained for vehicle speeds up to
37 mph (60 km/h) through a change in the
ABS control function.
For more information, see “Practical hints”
(
�page 290).
i
If the ABS is malfunctioning, the BAS,
EBB, ESP, and 4-ETS are also switched
off.
Normal driving and braking functions
are still available.
Page 89 of 417
88 Safety and Security
Anti-theft systems
Immobilizer
The immobilizer prevents unauthorized
persons from starting your vehicle.
Activating
Removing the SmartKey from the starter
switch activates the immobilizer.
Deactivating
Inserting the SmartKey in the starter
switch deactivates the immobilizer.Anti-theft alarm
Once the alarm system has been armed, a
visual and audible alarm is triggered when
someone opens
�a door
�the tailgate
�the hood
The alarm will stay on even if the activating
element (a door, for example) is immedi-
ately closed.
The alarm system will also be triggered
when
�someone attempts to raise the vehicle
�the vehicle is opened with the mechan-
ical key
�someone opens a door from the inside
�someone opens the tailgate from the
insideArming the alarm system
The alarm system is armed after locking
the vehicle with the SmartKey. The turn
signal lamps blink three times to indicate
that the alarm system is being armed.
A red lamp in the tow-away alarm switch
begins to blink after arming the alarm
system (
�page 28).
i
In case the engine cannot be started
(yet the vehicle’s battery is charged),
the system is not operational. Contact
an authorized Mercedes-Benz Light
Truck Center or call
1-800-FOR-MERCedes (in the USA), or
1-800-387-0100 (in Canada).
i
If the alarm stays on for more than
20 seconds, an emergency call is initi-
ated automatically by the Tele Aid sys-
tem (
�page 202) provided Tele Aid
service was subscribed to and properly
activated, and that necessary cellular
service and GPS coverage are avail-
able.
Page 90 of 417
89 Safety and Security
Anti-theft systems
Disarming the alarm system
The alarm system is disarmed when you
unlock your vehicle with the SmartKey. The
turn signal lamps blink once to indicate
that the alarm system is disarmed.Canceling the alarm
To cancel the alarm:
�Press the Œ or ‹ button on the
SmartKey.
or
�Insert the SmartKey in the starter
switch.
Tow-away alarm
Once the tow-away alarm is armed, a visual
and audible alarm will be triggered when
someone attempts to raise the vehicle.i
If the turn signal lamps do not blink
three times, one of the following ele-
ments may not be properly closed:
�a door
�the tailgate
�the hood
Close the respective element and lock
the vehicle again.
i
The alarm system will rearm automati-
cally after approximately 40 seconds if
neither a door nor the tailgate was
opened.
i
The tow-away protection alarm is trig-
gered, for example, if the vehicle is lift-
ed on one side.
If the alarm stays on for more than
20 seconds, an emergency call is initi-
ated automatically by the Tele Aid sys-
tem provided Tele Aid service was
subscribed to and properly activated,
and that necessary cellular service and
GPS coverage are available.
Page 91 of 417
90 Safety and Security
Anti-theft systems
Arming tow-away alarm
When you lock your vehicle, the tow-away
alarm is automatically armed.
When you unlock your vehicle, the
tow-away protection disarms
automatically.
Disarming tow-away alarm
To prevent triggering the tow-away alarm
feature, switch off the tow-away alarm be-
fore towing the vehicle, or when parking on
a surface subject to movement, such as
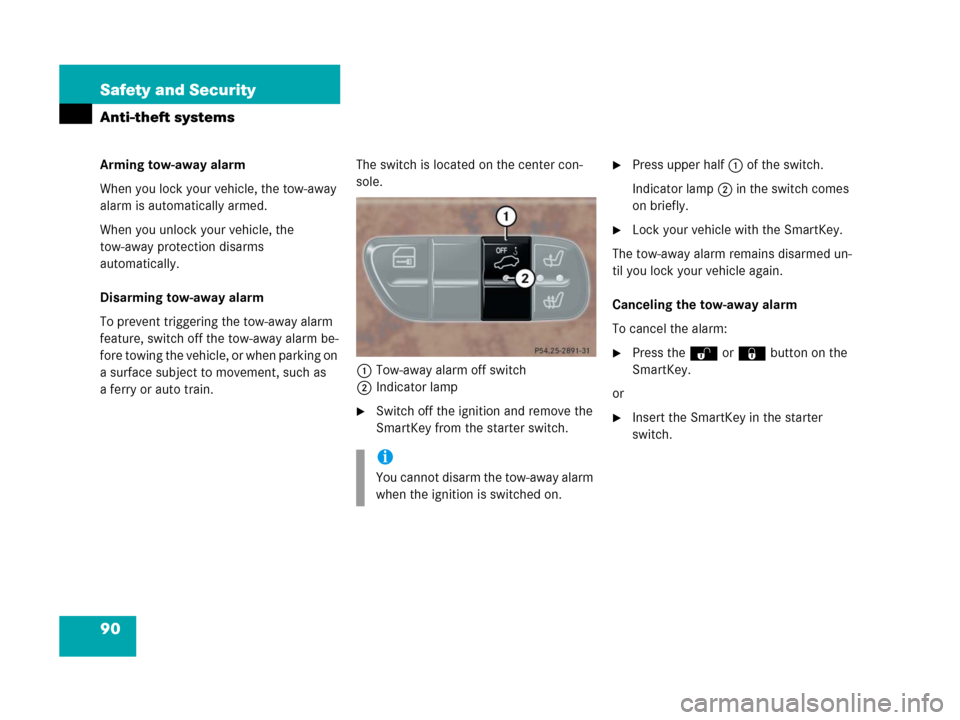
a ferry or auto train.The switch is located on the center con-
sole.
1Tow-away alarm off switch
2Indicator lamp
�Switch off the ignition and remove the
SmartKey from the starter switch.
�Press upper half1 of the switch.
Indicator lamp2 in the switch comes
on briefly.
�Lock your vehicle with the SmartKey.
The tow-away alarm remains disarmed un-
til you lock your vehicle again.
Canceling the tow-away alarm
To cancel the alarm:
�Press the Œ or ‹ button on the
SmartKey.
or
�Insert the SmartKey in the starter
switch.
i
You cannot disarm the tow-away alarm
when the ignition is switched on.
Page 93 of 417
92 Controls in detail
In the “Controls in detail” section you will
find detailed information on how to oper-
ate the equipment installed in your vehicle.
If you are already familiar with the basic
functions of your vehicle, this section will
be of particular interest to you.
To quickly familiarize yourself with the ba-
sic functions of the vehicle, refer to the
“Getting started” section of this manual.
The corresponding page numbers are giv-
en at the beginning of each segment.
Locking and unlocking
SmartKey
Your vehicle comes supplied with two
SmartKeys, each with remote control and
a removable mechanical key. The locking
tabs for the mechanical key portion of the
two SmartKeys are a different color to help
distinguish each SmartKey unit.
The SmartKey provides an extended oper-
ating range. To prevent theft, however, it is
advisable to only unlock the vehicle when
you are in close proximity to it.
The SmartKey centrally locks and unlocks:
�the doors
�the tailgate
�the fuel filler flap
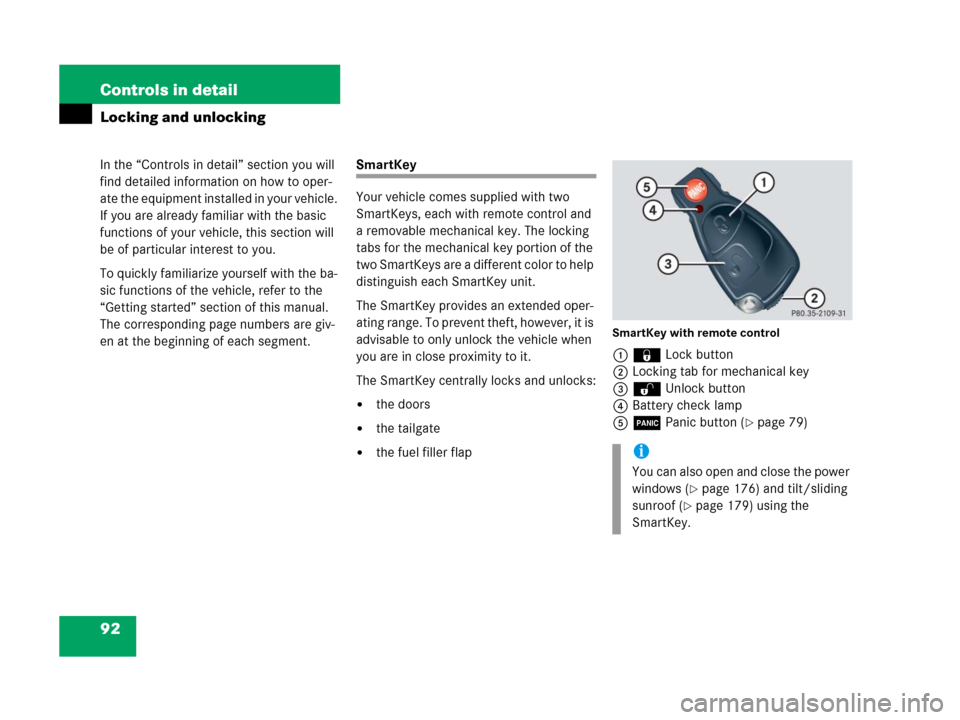
SmartKey with remote control
1‹ Lock button
2Locking tab for mechanical key
3ΠUnlock button
4Battery check lamp
5Â Panic button (
�page 79)
i
You can also open and close the power
windows (
�page 176) and tilt/sliding
sunroof (
�page 179) using the
SmartKey.