Page 61 of 202
59 Audio
CD operation
Previous track or start of title (if more
than 10 seconds of playing time has
elapsed)
�Press g.
Playback begins.
Select any desired track
�Press g or h as many times as
necessary.
With the joystick
�Push the joystick to g or G to play
the next or previous track.With the number keypad
�Activate the CD main menu
(
�page 56).
�Press *.
An input line will appear in the CD main
menu.
1Number of tracks on CD corresponds
with the valid number range
2Input line
E.g.: Track 14.
�Press 1 and 4 in short succession.
�After entering the track number, wait
approximately 3 seconds.
The selected track is played. The CD
main menu is displayed.
CD track scan
The tracks on a CD can be scanned one
after the other for 8 seconds each. The
function will switch off automatically when
the starting track is reached. You can also
manually stop the scan function.
i
Entries higher than the number of
tracks available on the CD are not
possible.
Page 66 of 202

64 Audio
MP3 CD operation
� MP3 CD operation
i
Depending on vehicle production date
the MP3 CD feature may not be
available in your vehicle.
Safety instructions
WarningG
In order to avoid distraction which could
lead to an accident, the driver should insert
CDs with the vehicle at a standstill and
operate the audio system only if permitted
by road, weather and traffic conditions.
Bear in mind that at a speed of just 30 mph
(approximately 50 km/h), your car covers a
distance of 44 feet (approximately 14 m)
every second.
WarningG
The CD drive is a Class 1 laser product.
There is a danger of invisible laser radiation
when you open or damage the cover.
Do not remove the cover. The CD drive does
not contain any parts which can be serviced
by the user. For safety reasons, have any ne-
cessary service work performed by qualified
personnel.
Tips on data storage media
!
Do not attach labels of any type to the
CD. They may become detached and
damage the drive.
!
Your CD drive has been designed to
play CDs which correspond to the IEC
60908 standard. Therefore only CDs
not exceeeding a thickness of 1.3 mm
can be used.
If you insert thicker data carriers, e.g.
ones that have data on both sides (one
side with DVD data, the other side with
audio data), they will become stuck and
damage the drive.
Do not play single CDs (80mm) with an
adapter. An adapter could become
stuck and damage the drive. Only use
12 cm diameter CDs.
Page 68 of 202

66 Audio
MP3 CD operation
File structure
When creating a MP3 CD, you can organize
MP3 tracks into folders. A folder can also
contain additional folders.
A CD may have a maximum of 255 folders
in total.
A maximum of 255 tracks are permissible
per folder.
Mathematically a maximum of 65025
tracks would result. However, this amount
is usually not reached since MP3 requires
approx. 1 MB storage per minute recorded.Track names and folder names
When creating an MP3 CD, you can assign
names to the MP3 tracks and folders.
COMAND uses these names in MP3 mode
for the corresponding display.
Please note the following when assigning
folder and track names:
�Track and folder names must contain
at least 1 character.
�Track names may contain up to either
thirty or fifty characters depending on
the CD format. If a name exceeds this
character limit, COMAND will not be
able to display it in full.
�Track names must have the extension
“mp3”.
�A period must appear between the
track name and the file extension.
Example of a correct track name:
Track1.mp3
In the example, the track name con-
tains six characters, followed by a peri-
od and the file extension “mp3”.
Empty folders or folders containing data
other than MP3 or audio CD tracks will not
be displayed by COMAND.
Page 84 of 202
82 Satellite radio*
Satellite radio operation
Ending scan function and playing a
station
�Press the Scan soft key again.
The station selected will appear with
the station name.
Scan will appear in
white lettering again.Station selection via direct channel
entry
�Press *.
Input line will appear.
�Enter the desired channel number with
the number keys, e.g. 24 for chan-
nel 24.
The channel you have selected will be-
gin to play. The corresponding station
name will appear, if station is available.
Page 93 of 202
91 Telephone*
Important notes
�The message Telephone being ac-
tivated, please wait
appears.
COMAND prepares the telephone for
use. Select other system functions, e.g.
radio, by pressing the corresponding
button or wait until the telephone is ac-
tive.
�The message Phone not inserted
appears.
�Please connect the mobile phone.
�The message Phone not available
appears.
�Please contact an authorized
Mercedes-Benz Center.GSM mobile phone
�If the message Please insert SIM
card (Emergency Call 911 only
possible with phone)
appears:
�Insert the SIM card into the mobile
phone (Telephone Operating
Manual).
�The message Call failed may
appear if you place an outgoing call
(
�page 99).
�Try again later.
Page 95 of 202

93 Telephone*
Telephone operation
You can make an emergency call to an
emergency rescue station with a mobile
communication network.
The emergency call will be placed as long
as the corresponding mobile communicati-
on network is available. To do this, switch
the telephone on if you have not already
done so.
�TDMA or CDMA mobile phone
The emergency call will also be placed
if the phone is locked (
�page 94).
�GSM mobile phone
If no SIM card is in the phone or SIM
PIN is not entered, you can only make
an emergency call at the mobile phone.
Emergency calls may not be possible with
all mobile phone networks or if certain net-
work services and/or telephone functions
are active. Check with your local network
operating company.
If you cannot make an emergency call, you
must initiate rescue measures yourself.
Emergency call “911”
i
This function places a call to the local
911 provider. It does not initiate a
Tele Aid* call.
WarningG
The 911 emergency call system is a public
service. Using it without due cause is a cri-
minal offense.
Page 104 of 202

102 Telephone*
Telephone operation
Selecting an entry from the Dialed num-
bers list
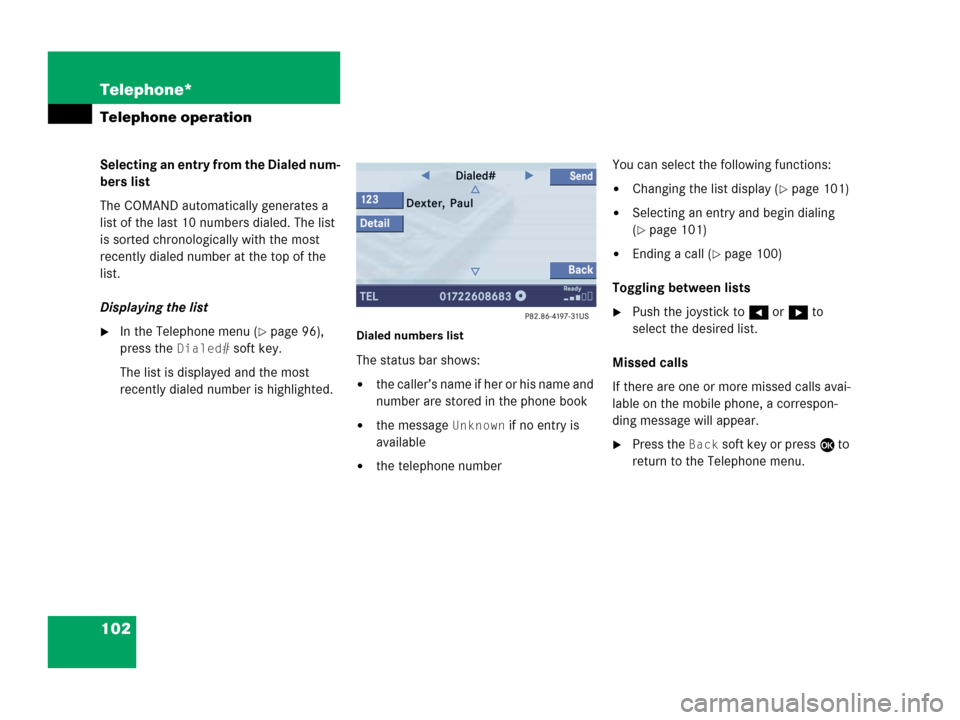
The COMAND automatically generates a
list of the last 10 numbers dialed. The list
is sorted chronologically with the most
recently dialed number at the top of the
list.
Displaying the list
�In the Telephone menu (�page 96),
press the
Dialed# soft key.
The list is displayed and the most
recently dialed number is highlighted. Dialed numbers list
The status bar shows:
�the caller’s name if her or his name and
number are stored in the phone book
�the message Unknown if no entry is
available
�the telephone numberYou can select the following functions:
�Changing the list display (�page 101)
�Selecting an entry and begin dialing
(
�page 101)
�Ending a call (�page 100)
Toggling between lists
�Push the joystick to H or h to
select the desired list.
Missed calls
If there are one or more missed calls avai-
lable on the mobile phone, a correspon-
ding message will appear.
�Press the Back soft key or press E to
return to the Telephone menu.
Page 114 of 202
112 Navigation*
Important notes
If your vehicle has been transported (e.g.
by a car, train or ferry) the system may
make navigation announcements which do
not correspond to the vehicle’s position.
The system needs to redetermine its
position.
Determining the location after the
vehicle has been transported
The system will need some time to
determine its location after the car has
been transported. The time required for
the system to do so varies from case to
case.
�Switch the COMAND on.
�Activate the Navigation main menu
(
�page 114).
The navigation DVD needs to be in the
DVD NAVIGATION slot (
�page 165).
�Drive and press c.
Drive until the position or the road
indicated correspond to the real
circumstances. The system is now
correctly adjusted.
Route guidance after the vehicle has
been transported