Page 3027 of 5621
EI-22
CENTER MUD GUARD
Revision: 2006 January2006 M35/M45
CENTER MUD GUARDPFP:76850
Removal and InstallationNIS0024L
REMOVAL
1. Remove screw and nuts of wind deflector and remove wind
deflector.
2. Remove screws of mudguard front/rear side.
3. Remove screws of mudguard lower side.
4. Fully open front door and rear door.
5. Remove clips from back of mudguard using clip clamp remover.
6. Remove center mudguard from body side.
INSTALLATION
Install in the reverse order of removal.
CAUTION:
When installing center mud guard, make sure that clips are securely fitted in panel holes on body, and
then press them in.
1. Center mud guard
PIIB2941J
PIIB3973J
Page 3030 of 5621
ROOF SIDE MOLDING
EI-25
C
D
E
F
G
H
J
K
L
MA
B
EI
Revision: 2006 January2006 M35/M45
ROOF SIDE MOLDINGPFP:73854
Removal and InstallationNIS0024O
REMOVAL
1. Apply protective tape around roof side molding.
2. Disengage clips while pinching molding from rear end of rear
window to front end of front window, and then remove roof side
molding.
CAUTION:
Front and rear ends of roof side molding are placed under
the body side. Pull them out after disengaging plastic clip
joints.
NOTE:
Molding fasteners of front windshield glass and rear window glass are secured with rivet. Remove and
install front windshield glass and rear window glass when replacing the molding fasteners.
Heat adhesive tape interface using a dryer, and then peel roof side molding clips (body side) using long-
nose pliers.
1. Roof side molding 2. Roof outer panel 3. Windshield glass
4. Clip (body side) 5. Molding fastener 6. Rivet
7. Clip (molding side) 8. Body side outer clip
PIIB2753J
PIIB2749J
Page 3031 of 5621
EI-26
ROOF SIDE MOLDING
Revision: 2006 January2006 M35/M45
INSTALLATION
1. Place roof side molding on roof groove, and then insert the end into front fender.
2. Align roof side molding clips (molding side) (2),(3), and (4) of front pillar with fastener position, and then
insert roof side molding clip (molding side) (1).
3. Insert roof side molding clips (molding side) of front pillar in order of (2) to (4) into molding fastener.
4. Insert body side outer clips of roof in the order of (5) to (9).
5. Insert rear end of roof side molding into trunk lid.
6. Temporarily set roof side molding clips (molding side) of rear pillar on fasteners and insert them in the
order of (10) to (13).
CAUTION:
Be careful not to damage the body.
PIIB4179J
Page 3033 of 5621

EI-28
DOOR SASH MOLDING
Revision: 2006 January2006 M35/M45
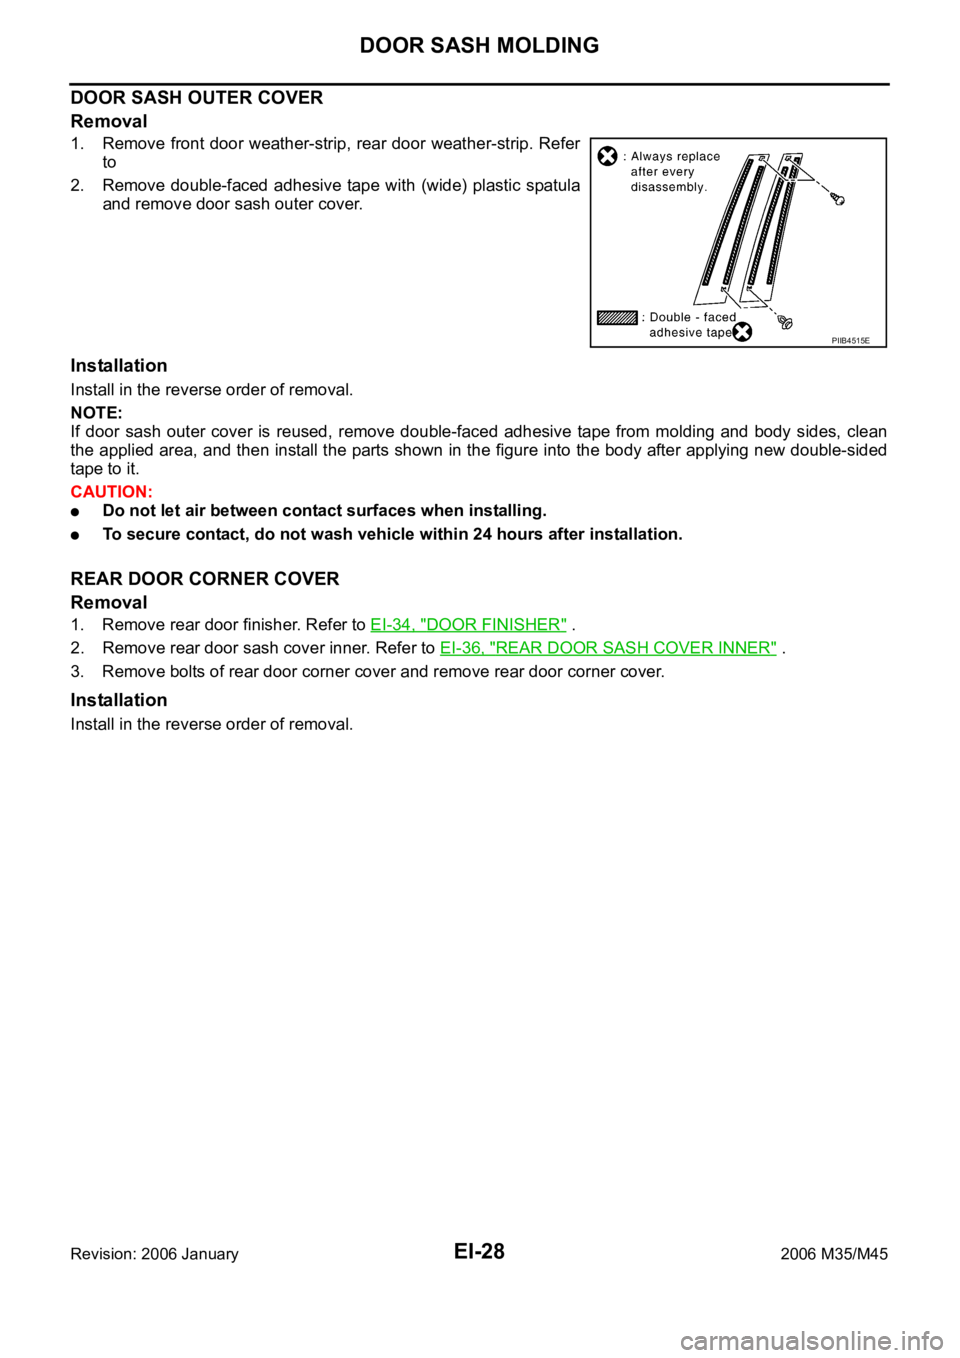
DOOR SASH OUTER COVER
Removal
1. Remove front door weather-strip, rear door weather-strip. Refer
to
2. Remove double-faced adhesive tape with (wide) plastic spatula
and remove door sash outer cover.
Installation
Install in the reverse order of removal.
NOTE:
If door sash outer cover is reused, remove double-faced adhesive tape from molding and body sides, clean
the applied area, and then install the parts shown in the figure into the body after applying new double-sided
tape to it.
CAUTION:
Do not let air between contact surfaces when installing.
To secure contact, do not wash vehicle within 24 hours after installation.
REAR DOOR CORNER COVER
Removal
1. Remove rear door finisher. Refer to EI-34, "DOOR FINISHER" .
2. Remove rear door sash cover inner. Refer to EI-36, "
REAR DOOR SASH COVER INNER" .
3. Remove bolts of rear door corner cover and remove rear door corner cover.
Installation
Install in the reverse order of removal.
PIIB4515E
Page 3038 of 5621

TRUNK LID FINISHER
EI-33
C
D
E
F
G
H
J
K
L
MA
B
EI
Revision: 2006 January2006 M35/M45
TRUNK LID FINISHERPFP:84810
Removal and InstallationNIS0024T
REMOVAL
1. Fully open trunk lid.
2. Remove trunk lid finisher inner. Refer to EI-57, "
REMOVAL AND INSTALLATION OF TRUNK LID FIN-
ISHER INNER" .
3. Remove trunk lid finisher upper mounting nuts.
4. Disconnect back lamp, license lamp and trunk opener switch harness connector.
5. Remove double-faced adhesive tapes with (wide) plastic spatula.Disconnect clips and remove trunk lid
finisher outer.
INSTALLATION
Install in the reverse order of removal.
CAUTION:
Replace double-faced adhesive tape on back of finisher with a new tape if trunk lid finisher outer is
reused.
Remove double-faced adhesive tape remaining on body and back of finisher using double-faced
adhesive tape remover when removing finisher outer.
Install after cleaning adhesive parts of body side and back of finisher outer.
Do not wash the vehicle within 24 hours after installing so as to keep adhesive.
1. Trunk lid finisher outer
PIIB4516E
Page 3040 of 5621

DOOR FINISHER
EI-35
C
D
E
F
G
H
J
K
L
MA
B
EI
Revision: 2006 January2006 M35/M45
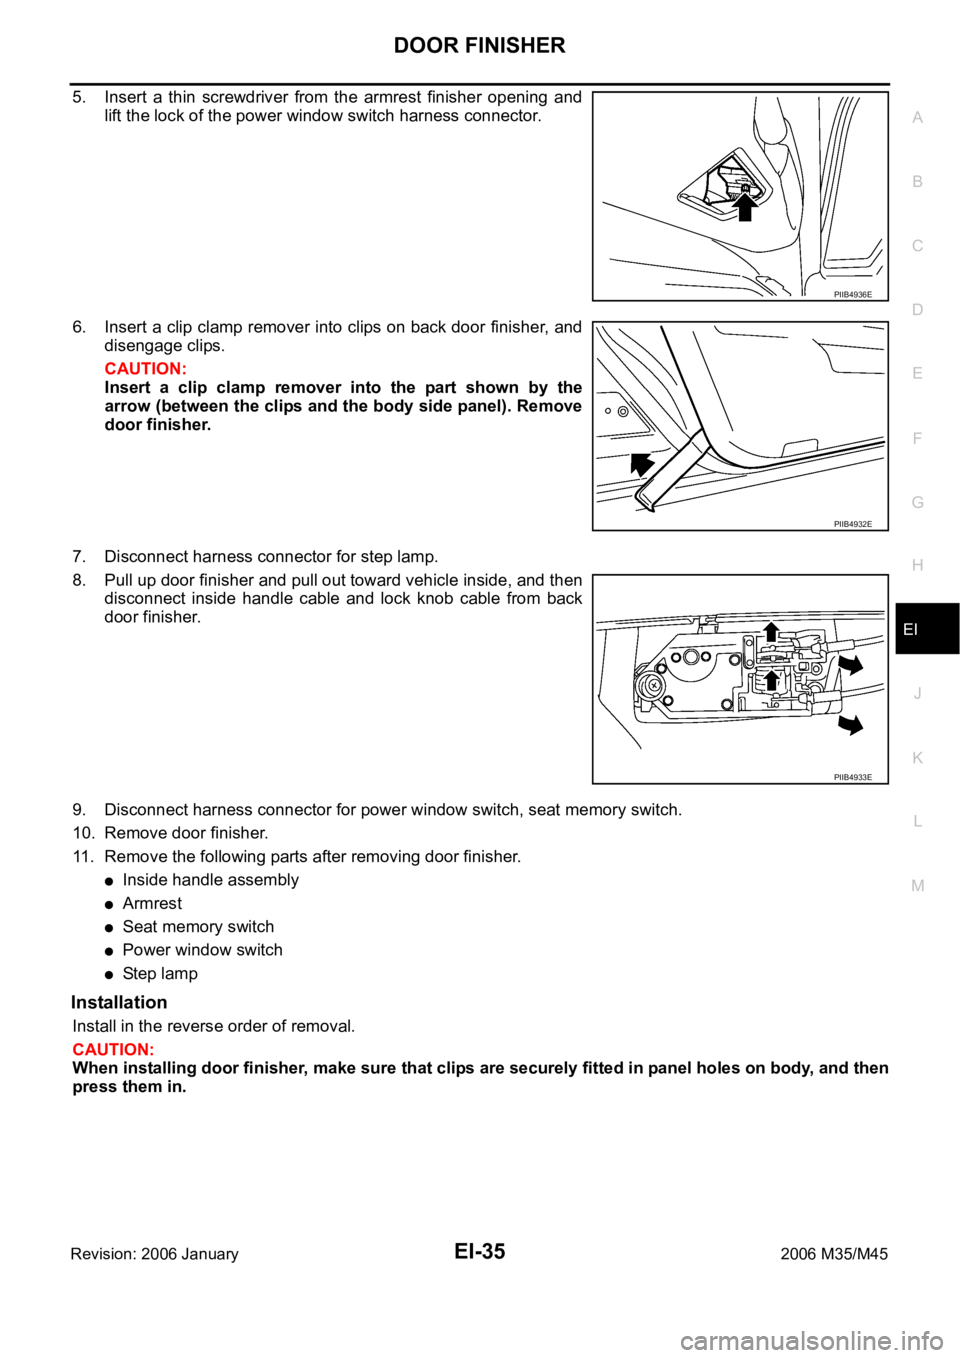
5. Insert a thin screwdriver from the armrest finisher opening and
lift the lock of the power window switch harness connector.
6. Insert a clip clamp remover into clips on back door finisher, and
disengage clips.
CAUTION:
Insert a clip clamp remover into the part shown by the
arrow (between the clips and the body side panel). Remove
door finisher.
7. Disconnect harness connector for step lamp.
8. Pull up door finisher and pull out toward vehicle inside, and then
disconnect inside handle cable and lock knob cable from back
door finisher.
9. Disconnect harness connector for power window switch, seat memory switch.
10. Remove door finisher.
11. Remove the following parts after removing door finisher.
Inside handle assembly
Armrest
Seat memory switch
Power window switch
St e p l am p
Installation
Install in the reverse order of removal.
CAUTION:
When installing door finisher, make sure that clips are securely fitted in panel holes on body, and then
press them in.
PIIB4936E
PIIB4932E
PIIB4933E
Page 3042 of 5621
BODY SIDE TRIM
EI-37
C
D
E
F
G
H
J
K
L
MA
B
EI
Revision: 2006 January2006 M35/M45
BODY SIDE TRIMPFP:76913
Removal and InstallationNIS0024V
CAUTION:
Wrap the tip of flat-bladed screwdriver with a cloth when removing metal clips from garnishes.
1. Front pillar garnish 2. Dash side finisher 3. Front body side welt
4. Front kicking plate outer 5. Front kicking plate inner 6. Center pillar lower garnish
7. Rear kicking plate inner 8. Rear wheel house garnish 9. Rear pillar finisher
10. Rear body side welt 11. Center pillar upper garnish 12. Rear kicking plate outer
Clip Pawl Metal clip
PIIB2755J
Page 3043 of 5621
EI-38
BODY SIDE TRIM
Revision: 2006 January2006 M35/M45
FRONT PILLAR GARNISH
Removal
Remove pillar garnish mounting clips using a clip clamp remover,
and then remove pillar garnish.
Installation
Install in the reverse order of removal.
FRONT KICKING PLATE OUTER
Removal
Remove front kicking plate outer mounting clips using a clip clamp
remover, and then remove kicking plate outer.
Installation
Install in the reverse order of removal.
FRONT KICKING PLATE INNER
Removal
1. Remove front kicking plate inner mounting clips using a clip
clamp remover.
2. Disconnect kicking plate illumination harness connector.
3. Remove front kicking plate inner.
Installation
Install in the reverse order of removal.
PIIB2760J
PIIB2761J
PIIB2762J