2006 Hyundai Terracan wheel
[x] Cancel search: wheelPage 371 of 539
1
CONTROLS AND EQUIPMENT
63
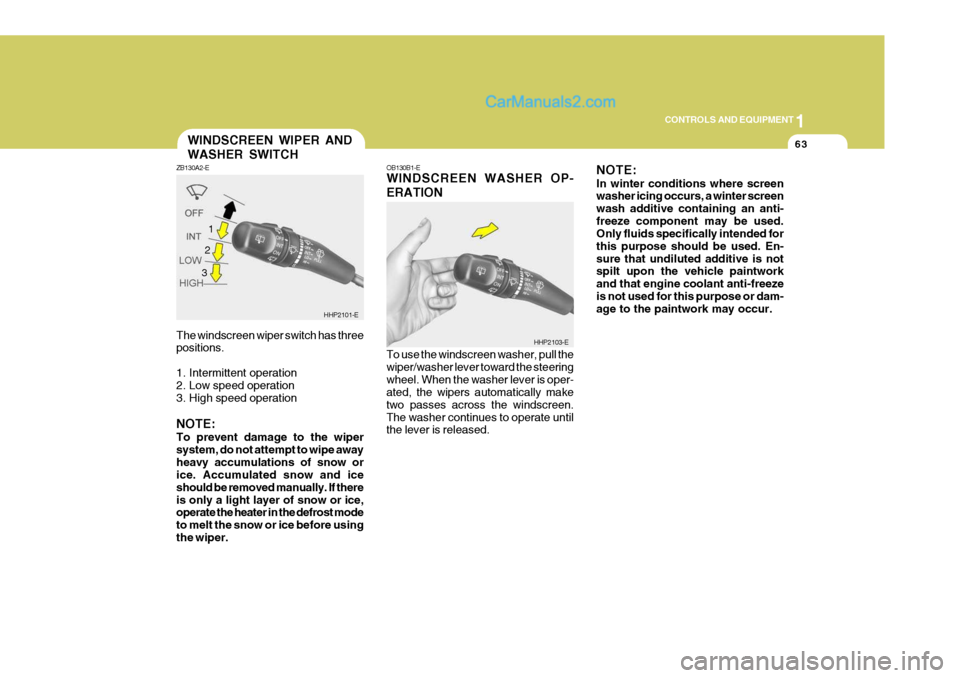
The windscreen wiper switch has three positions.
1. Intermittent operation
2. Low speed operation
3. High speed operation NOTE: To prevent damage to the wiper system, do not attempt to wipe awayheavy accumulations of snow or ice. Accumulated snow and ice should be removed manually. If thereis only a light layer of snow or ice, operate the heater in the defrost mode to melt the snow or ice before usingthe wiper.WINDSCREEN WIPER AND WASHER SWITCH
ZB130A2-E
HHP2101-E
1
OB130B1-E WINDSCREEN WASHER OP- ERATION To use the windscreen washer, pull the wiper/washer lever toward the steeringwheel. When the washer lever is oper- ated, the wipers automatically make two passes across the windscreen.The washer continues to operate until the lever is released. NOTE: In winter conditions where screen washer icing occurs, a winter screen wash additive containing an anti-freeze component may be used. Only fluids specifically intended for this purpose should be used. En-sure that undiluted additive is not spilt upon the vehicle paintwork and that engine coolant anti-freezeis not used for this purpose or dam- age to the paintwork may occur.
HHP2103-E
2 3
Page 393 of 539
1
CONTROLS AND EQUIPMENT
85
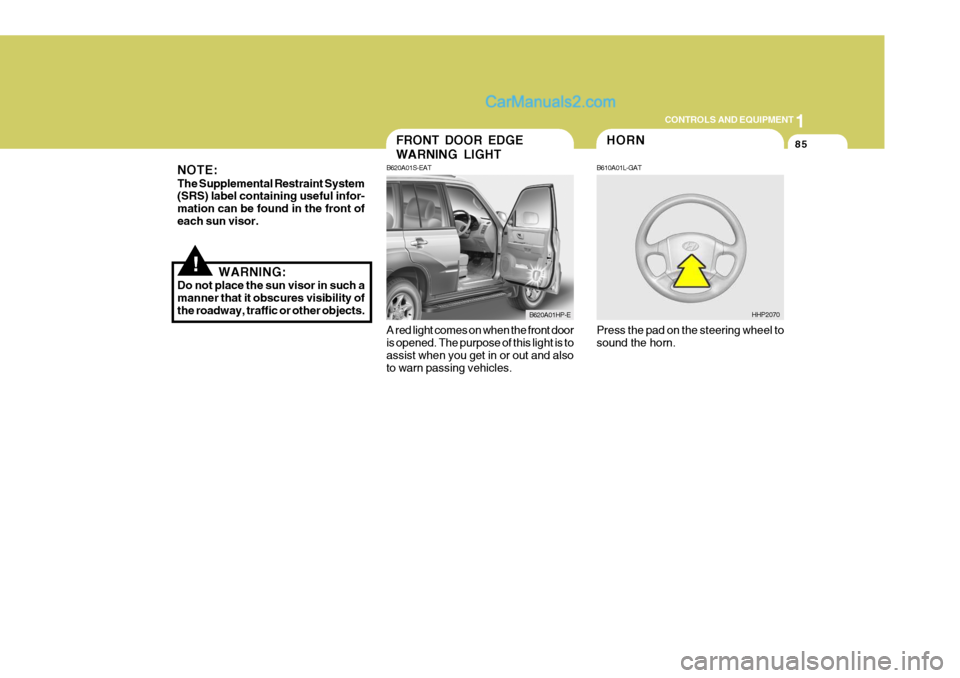
A red light comes on when the front door is opened. The purpose of this light is to assist when you get in or out and also to warn passing vehicles.FRONT DOOR EDGE WARNING LIGHT
B620A01S-EAT
B620A01HP-E
!
NOTE: The Supplemental Restraint System (SRS) label containing useful infor- mation can be found in the front ofeach sun visor.
WARNING:
Do not place the sun visor in such amanner that it obscures visibility ofthe roadway, traffic or other objects.
Press the pad on the steering wheel tosound the horn.
HHP2070
HORN
B610A01L-GAT
Page 394 of 539
1CONTROLS AND EQUIPMENT
86
!
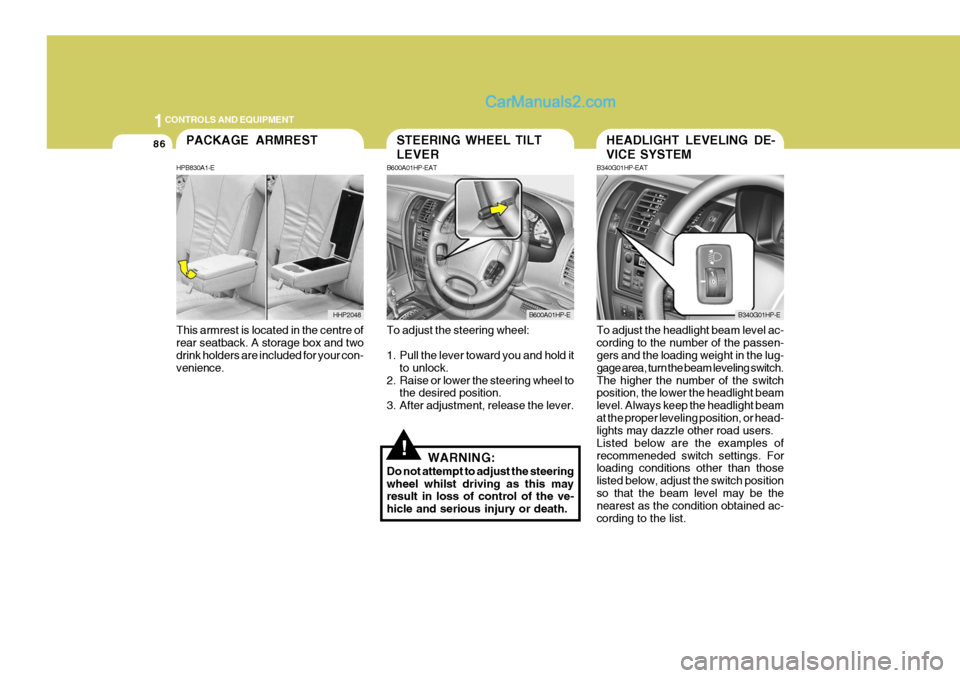
To adjust the steering wheel:
1. Pull the lever toward you and hold it
to unlock.
2. Raise or lower the steering wheel to the desired position.
3. After adjustment, release the lever.
WARNING:
Do not attempt to adjust the steering wheel whilst driving as this may result in loss of control of the ve- hicle and serious injury or death. To adjust the headlight beam level ac-cording to the number of the passen- gers and the loading weight in the lug- gage area, turn the beam leveling switch.The higher the number of the switch position, the lower the headlight beam level. Always keep the headlight beamat the proper leveling position, or head- lights may dazzle other road users. Listed below are the examples ofrecommeneded switch settings. For loading conditions other than those listed below, adjust the switch positionso that the beam level may be the nearest as the condition obtained ac- cording to the list.
STEERING WHEEL TILT LEVER
B600A01HP-EAT
B600A01HP-E
HEADLIGHT LEVELING DE- VICE SYSTEM
B340G01HP-EAT
B340G01HP-E
This armrest is located in the centre of rear seatback. A storage box and two drink holders are included for your con- venience.
PACKAGE ARMREST
HPB830A1-E
HHP2048
Page 417 of 539
2
Engine Exhaust Can Be Dangerous! ............................ 2-2
Before Starting the Engine ............................................ 2-4
Key Positions ................................................................ 2-4Starting ......................................................................... 2-6
Manual Transmission ................................................... 2-8
Automatic Transmission .............................................. 2-10
Four-Wheel Drive (4WD) ............................................. 2-14
Anti-Lock Brake System (ABS) ................................... 2-21
Limited-Slip Differential (LSD) ......................................2-22
Effective Braking ......................................................... 2-22
Driving for Economy .................................................... 2-23
Smooth Cornering ........................................................ 2-24
Winter Motoring ............................................................ 2-24
Trailer and Vehicle Towi ng .......................................... 2-26
DRIVING YOUR HYUNDAI
2
Page 419 of 539
2
DRIVING YOUR HYUNDAI
3
!WARNING:
Your vehicle is equipped with tyres designed to provide for safe ride and handling capability.Do not use a size and type of tyre and wheel that is different from the one that was originally installed on yourvehicle. It can affect the safety and performance of your vehicle, which could lead to handling failure orrollover and serious injury. When replacing the tyres, be sure to equip all four tyres with the tyre andwheel of the same size, type, tread, brand and load-carrying capacity. If you nevertheless decide to equipyour vehicle with any tyre/wheel com- bination not recommended by Hyundai for off-road driving, youshould not use these tyres for high- way driving.
BEFORE STARTING THE ENGINE
C020A02A-EAT Before you start the engine, you should always:
1. Look around the vehicle to be sure
there are no flat tyres, puddles of oil or water or other indications of pos- sible trouble.
2. After entering the car, check to be
sure the parking brake is engaged.
3. Check that all windows, and lights
are clean.
4. Check that the interior and exterior mirrors are clean and in position.
5. Check your seat, seatback and headrest to be sure they are in theirproper positions.
6. Close all the doors.
7. Fasten your seat belt and be sure that all other occupants have fas-tened theirs.
8. Turn off all lights and accessories that are not needed.
9. When you turn the ignition switch to "ON" check that all appropriate warning lights are operating and that you have sufficient fuel.
10.Check the operation of warning lights and all bulbs when key is inthe "ON" position. WARNING:
Always wear appropriate shoes when operating your vehicle. Unsuitable shoes (high heels, skiboots, etc.) may interfere with your ability to use the brake and accelera- tor pedal, and the clutch (Not allmodels).
!
Page 421 of 539
2
DRIVING YOUR HYUNDAI
5
!
YC030A2-E STEERING WHEEL LOCK When the ignition key is removed, the steering wheel lock will be activated.The lock only engages at one position of the steering wheel and therefore it will be necessary to turn the wheel untilthis position is reached. It is not, how- ever, necessary for the lock to be en- gaged before leaving the vehicle sincein the event of attempted unauthorised removal, the lock will engage when attempts are made to steer the vehicle.
CAUTION:
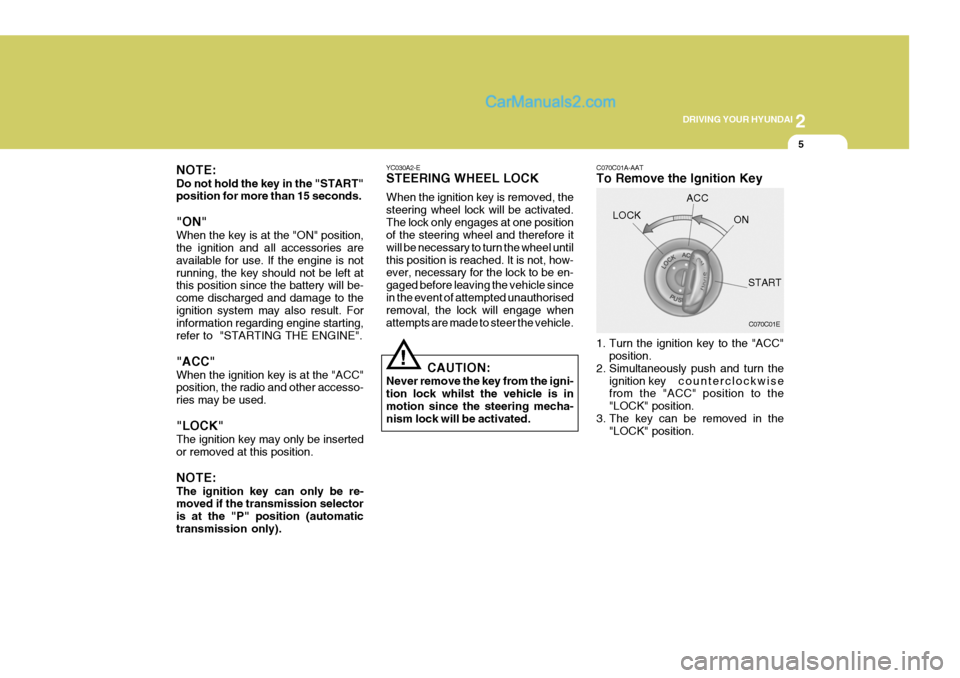
Never remove the key from the igni-tion lock whilst the vehicle is inmotion since the steering mecha- nism lock will be activated. C070C01A-AAT To Remove the Ignition Key
1. Turn the ignition key to the "ACC"
position.
2. Simultaneously push and turn the
ignition key counterclockwise
from the "ACC" position to the "LOCK" position.
3. The key can be removed in the "LOCK" position.
LOCK
C070C01E
ACC
ON
START
NOTE: Do not hold the key in the "START" position for more than 15 seconds. "ON" When the key is at the "ON" position, the ignition and all accessories are available for use. If the engine is notrunning, the key should not be left at this position since the battery will be- come discharged and damage to theignition system may also result. For information regarding engine starting, refer to "STARTING THE ENGINE". "ACC" When the ignition key is at the "ACC" position, the radio and other accesso- ries may be used. "LOCK" The ignition key may only be inserted or removed at this position. NOTE: The ignition key can only be re- moved if the transmission selector is at the "P" position (automatictransmission only).
Page 425 of 539
2
DRIVING YOUR HYUNDAI
9
o When slippery conditions are en-
countered, increased caution should be exercised when gear changing, braking or accelerat- ing. Abrupt changes in speed maycause a loss of traction or control of the vehicle.
o During cold weather, shifting may be difficult until the transmis-sion lubricant has warmed up. This is normal and not harmful tothe transmission.
o If you've come to a complete stop
and it's hard to shift into 1st orR(Reverse), put the gearshift lever in N(Neutral) position and release the clutch. Press the clutch pedalback down, and then shift into 1st or R(Reverse) gear position.
o Do not use the gearshift lever as a handrest during driving, as thiscan result in premature wear of the transmission shift forks. C070B01A-EAT Using the Clutch The clutch should be pressed all the way to the floor before shifting, then released slowly. The clutch pedal should aways be used after fully re-turning to the original position. Do not rest your foot on the clutch pedal whilst driving. This can cause unnecessarywear. Do not partially engage the clutch to hold the car on an incline. This causesunnecessary wear. Use the parking brake to hold the car on an incline. Do not operate the clutch pedal rapidlyand repeatedly.
!WARNING:
o Avoid high cornering speeds.
o Do not make quick steering wheel movements, such as sharp lane changes or fast, sharp turns.
o Always wear your seat belts.
In a collision crash, an unbeltedperson is significantly more likely to die than a person wearing a seatbelt.
o The risk of rollover is greatly in- creased if you lose control of yourvehicle at motorway speeds.
o Loss of control often occurs if two or more wheels drop off the road-way and the driver oversteers toreenter the roadway.
o In the event your vehicle leaves
the roadway, do not steer sharply.Instead, slow down before pulling back into the travel lanes.
o Never exceed posted speed limits.
Page 427 of 539
2
DRIVING YOUR HYUNDAI
11
!
HPC090A1-E SELECTOR POSITIONS o P (Park): With the selector lever in this position, no drive is transmitted from the engine and the transmission output and there- fore the front wheels locked. The en-gine may be started with the selector lever in this position.
CAUTION:
The selector lever must NEVER be shifted to the "P" position whilst thevehicle is in motion, otherwise seri- ous transmission damage will re- sult.
!
!
!
DC110C1-E o R (Reverse): With the selector lever in this position, reverse gear will be engaged. The en-gine may not be started with the selec- tor lever in this position.
CAUTION:
The selector lever must NEVER beshifted to the "R" position whilst the vehicle is in motion. DC110D1-E o N (Neutral): With the selector lever in this position, no gear is selected and no drive is transmitted from the engine. The en- gine may be started with the selectorlever in this position.
CAUTION:
Do not coast with the selector lever at the "N" position. C090E01O-AAT
o D (Drive): Use for normal driving. The transmis- sion will automatically shift through afour gear sequence. DC110F1-E o 2 (Second Gear): With the selector in this position, first gear will be engaged from rest. The transmission will upshift to second geardepending upon the vehicle speed and throttle position. No upshift to third or fourth will occur. The engine may notbe started with the selector in this position.
CAUTION:
Do not move the selector to the 2 position when the vehicle speed is in excess of 60 m.p.h.