Page 186 of 539

2
DRIVING YOUR HYUNDAI
31
C190F01HP-GAT Trailer or Vehicle Towing Tips
1. Before towing, check hitch and safety chain connections as well as proper operation of the trailer running lights, brake lights, and turn signals.
2. Always drive your vehicle at a mod- erate speed (Less than 100 km/h).
3. Trailer towing requires more fuel than normal conditions.
4. To maintain engine braking effi-
ciency, do not tow a trailer with thetransmission in fifth gear (manual transmission) or an overdrive gear (automatic transmission).
5. Always secure items in the trailer to prevent load shift while driving.
6. Check the condition and air pres- sure of all tires on the trailer and your car. Low tire pressure can seriously affect the handling. Alsocheck the spare tire.
Tongue
75 (165)
112(246)
75(165)
28(61.7)
Engine
2.5
2.5, 2.9, 3.5
!WARNING:
o Improperly loading your car and trailer can seriously affect its steering and braking perfor-mance causing a crash which could cause injury or death.
o When a trailer is used, the opera- tion speed is restricted to 100km/h or less.
With
Brake
Without BrakeE.C only Except E.C
2.9,3.5
Maximum Towable Weight
Trailer
1800(3,968) 2800(6,173) 1800(3,968)
700(1,543)
7. The vehicle/trailer combination is more affected by crosswind and buffeting. When being passed by a large vehicle, keep a constant speed and steer straight ahead. Ifthere is too much wind buffeting slow down to get out of the other vehicle's air turbulence.
8. When parking your car and trailer, especially on a hill, be sure to fol-low all the normal precautions. Turnyour front wheel into the curb, set the parking brake firmly, and put the transmission in 1st or Reverse(manual) or Park (automatic). In addition, place wheel chocks at each of the trailer's tires.
9. If the trailer has electric brakes, start your vehicle and trailer mov-ing, and then apply the trailer brakecontroller by hand to be sure the brakes are working. This lets you check your electrical connection atthe same time.
10. During your trip, check occasion-
ally to be sure that the load issecure, and that the lights and any trailer brakes are still working.
kg.(Lbs)
Page 193 of 539
3 WHAT TO DO IN AN EMERGENCY
6
!
D040B03HP-GAT Handling the Spare Tire
1. Obtain the spare wheel rod (Jack
handle) after folding up the seat cushion of the second seat . To fold up the seat cushion, refer to the page 1-25. 2. Insert the spare wheel rod into the
hole in the upper pad of the rearbumper.
3. Connect the wheel nut wrench to
the spare wheel rod.
4. Turn the wheel nut wrench counter- clockwise and the spare tire willlower.
5. Remove the lift plate from the cen- ter of the spare tire after the spare tire is lowered completely. CAUTION:
When installing, turn the wheel nut wrench clockwise till you hear the crackle once or twice(Tightening torque : 3.87 kg.m). And make surethe spare tire is secured in the proper location.
HHP4015
HHP4025 HHP4026Installation is the reverse order of re- moval.
Page 194 of 539

3
WHAT TO DO IN AN EMERGENCY
7
!
CHANGING A FLAT TIREIF YOU HAVE A FLAT TIRE
D050A01HP-GAT If a tire goes flat while you are driving:
1. Take your foot off the accelerator pedal and let the car slow down while driving straight ahead. Do not apply the brakes immediately or at- tempt to pull off the road as this maycause a loss of control. When the car has slowed to such a speed that it is safe to do so, brake carefullyand pull off the road. Drive off the road as far as possible and park on firm, level ground. If you are on adivided highway, do not park in the median area between the two traffic lanes.
2. When the car is stopped, turn on your emergency hazard flashers,set the parking brake and put thetransmission in "P" (automatic trans- mission) or reverse (manual trans- mission).
3. Have all passengers get out of the car. Be sure they all get out on theside of the car that is away fromtraffic.
4. Change the tire according to the
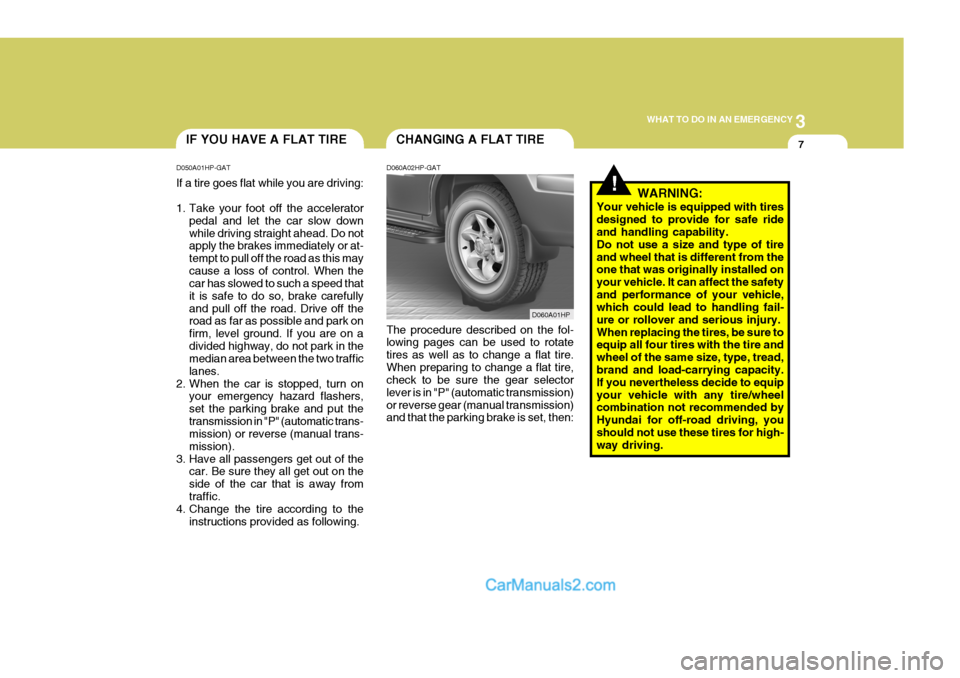
instructions provided as following. D060A02HP-GAT The procedure described on the fol- lowing pages can be used to rotate tires as well as to change a flat tire.When preparing to change a flat tire, check to be sure the gear selector lever is in "P" (automatic transmission)or reverse gear (manual transmission) and that the parking brake is set, then:
D060A01HPWARNING:
Your vehicle is equipped with tires designed to provide for safe ride and handling capability. Do not use a size and type of tireand wheel that is different from the one that was originally installed on your vehicle. It can affect the safetyand performance of your vehicle, which could lead to handling fail- ure or rollover and serious injury.When replacing the tires, be sure to equip all four tires with the tire and wheel of the same size, type, tread, brand and load-carrying capacity. If you nevertheless decide to equipyour vehicle with any tire/wheel combination not recommended by Hyundai for off-road driving, youshould not use these tires for high- way driving.
Page 195 of 539
3 WHAT TO DO IN AN EMERGENCY
8
o Remove the spare tire and take out
the jack and tool bag.
NOTE: The spare tire is located underneath the car. D060C01A-AAT 2. Block the Wheel Block the wheel that is diagonally op- posite from the flat tire to keep thevehicle from rolling when the car is raised on the jack.
HHP4011
Flat tireHHP4022
D060B01HP-GAT 1. Obtain Spare Tire and Tool
o Obtain the spare wheel rod (Jack
handle) after folding up the seat cushion of the second seat . To fold up the seat cushion, refer to the page 1-25. HHP4015
Page 196 of 539
3
WHAT TO DO IN AN EMERGENCY
9
D060D01A-AAT 4. Loosen Wheel Nuts
D065C02HP-GAT
3. Removing the Spare Wheel
Cap
Pry off the wheel cap, using the bar as shown in the illustration.
o Alloy Wheel Cap type
The wheel nuts should be loosened slightly before raising the car. To loosenthe nuts, turn the wrench handle coun- terclockwise. When doing this, be sure that the socket is seated completelyover the nut so it cannot slip off. For maximum leverage, position the wrench so the handle is to the right asshown in the illustration. Then, while holding the wrench near the end of the handle, pull up on it with steady pres-sure. Do not remove the nuts at this time. Just loosen them about one-half turn.D060E01A-AAT 5. Put the Jack in Place The base of the jack should be placed on firm, level ground. The jack should be positioned as shown in the illustra- tion.
Front
HHP4027 HHP4028
HHP4023
HHP4024
Rear
Page 198 of 539

3
WHAT TO DO IN AN EMERGENCY
11
!
!
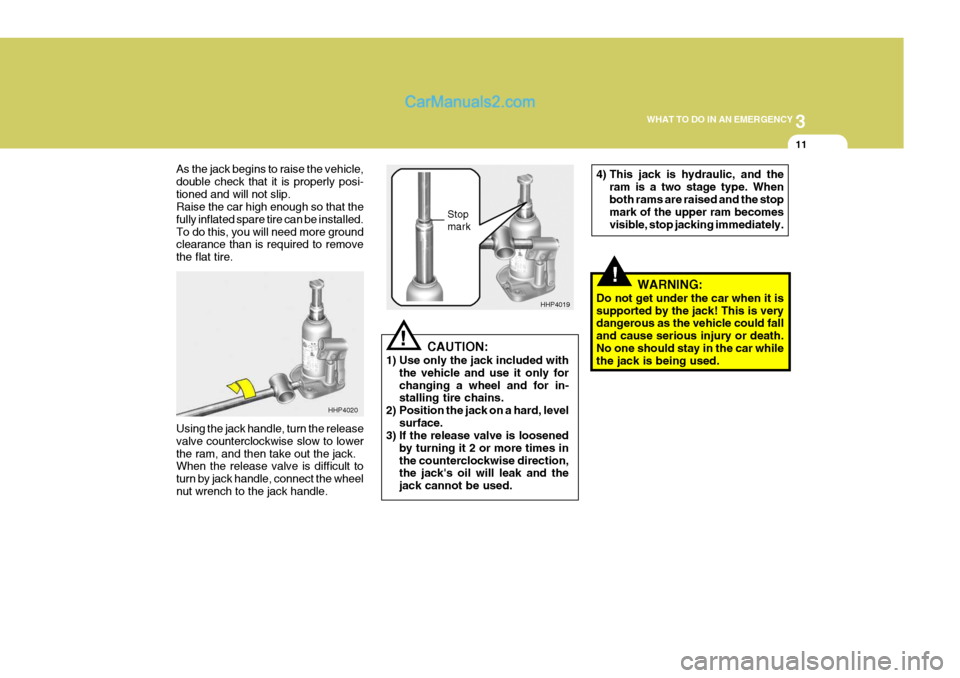
As the jack begins to raise the vehicle, double check that it is properly posi-tioned and will not slip. Raise the car high enough so that the fully inflated spare tire can be installed.To do this, you will need more ground clearance than is required to remove the flat tire. Using the jack handle, turn the release valve counterclockwise slow to lowerthe ram, and then take out the jack. When the release valve is difficult to turn by jack handle, connect the wheelnut wrench to the jack handle. CAUTION:
1) Use only the jack included with the vehicle and use it only forchanging a wheel and for in- stalling tire chains.
2) Position the jack on a hard, level surface.
3) If the release valve is loosened
by turning it 2 or more times in the counterclockwise direction, the jack's oil will leak and the jack cannot be used. Stop mark
HHP4020 HHP4019
WARNING:
Do not get under the car when it is supported by the jack! This is very dangerous as the vehicle could fall and cause serious injury or death.No one should stay in the car while the jack is being used.
4) This jack is hydraulic, and the
ram is a two stage type. When both rams are raised and the stop mark of the upper ram becomes visible, stop jacking immediately.
Page 199 of 539

3 WHAT TO DO IN AN EMERGENCY
12
!WARNING:
Wheel may have sharp edges. Handle them carefully to avoid possible se- vere injury.Before putting the wheel into place, be sure that there is nothing on the hub or wheel (such as mud, tar, gravel,etc.) that interferes with the wheel from fitting solidly against the hub. If there is, remove it. If there is not goodcontact on the mounting surface be- tween the wheel and hub, the wheel nuts could come loose and cause theloss of a wheel. Loss of a wheel may result in loss of control of the vehicle. This may cause serious injury or death. D060H02O-AAT 8. Reinstall Wheel Nuts To reinstall the wheel, hold it on the studs, put the wheel nuts on the studsand tighten them finger tight. The nuts should be installed with their small diameter ends directed inward. Jigglethe tire to be sure it is completely seated, then tighten the nuts as much as possible with your fingers again.
D060G02HP
D060H01HP
D060G02Y-AAT 7. Changing Wheels Use the wrench to loosen the wheel nuts, then remove them with your fin-gers. Slide the wheel off the studs and lay it flat so it cannot roll away. To put the wheel on the hub, pick up the sparetire, line up the holes with the studs and slide the wheel onto them. If this is difficult, tip the wheel slightly and getthe top hole in the wheel lined up with the top stud. Then jiggle the wheel back and forth until the wheel can beslid over the other studs.
D060G01HP
Page 200 of 539

3
WHAT TO DO IN AN EMERGENCY
13
D060I02HP-GAT 9. Lower Vehicle and Tighten
Nuts
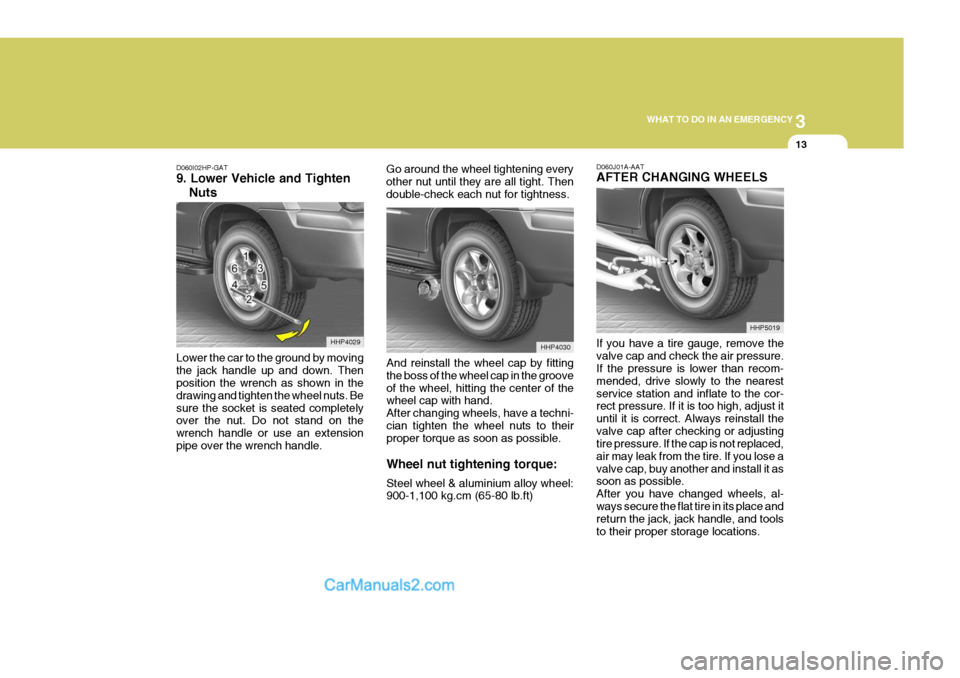
Lower the car to the ground by moving the jack handle up and down. Then position the wrench as shown in the drawing and tighten the wheel nuts. Besure the socket is seated completely over the nut. Do not stand on the wrench handle or use an extensionpipe over the wrench handle. Go around the wheel tightening everyother nut until they are all tight. Thendouble-check each nut for tightness.
D060J01A-AAT AFTER CHANGING WHEELS If you have a tire gauge, remove the valve cap and check the air pressure. If the pressure is lower than recom- mended, drive slowly to the nearestservice station and inflate to the cor- rect pressure. If it is too high, adjust it until it is correct. Always reinstall thevalve cap after checking or adjusting tire pressure. If the cap is not replaced, air may leak from the tire. If you lose avalve cap, buy another and install it as soon as possible. After you have changed wheels, al-ways secure the flat tire in its place and return the jack, jack handle, and tools to their proper storage locations.
HHP4029
HHP5019
And reinstall the wheel cap by fittingthe boss of the wheel cap in the grooveof the wheel, hitting the center of the wheel cap with hand. After changing wheels, have a techni-cian tighten the wheel nuts to their proper torque as soon as possible. Wheel nut tightening torque: Steel wheel & aluminium alloy wheel: 900-1,100 kg.cm (65-80 lb.ft) HHP4030