Page 335 of 539
1
CONTROLS AND EQUIPMENT
27
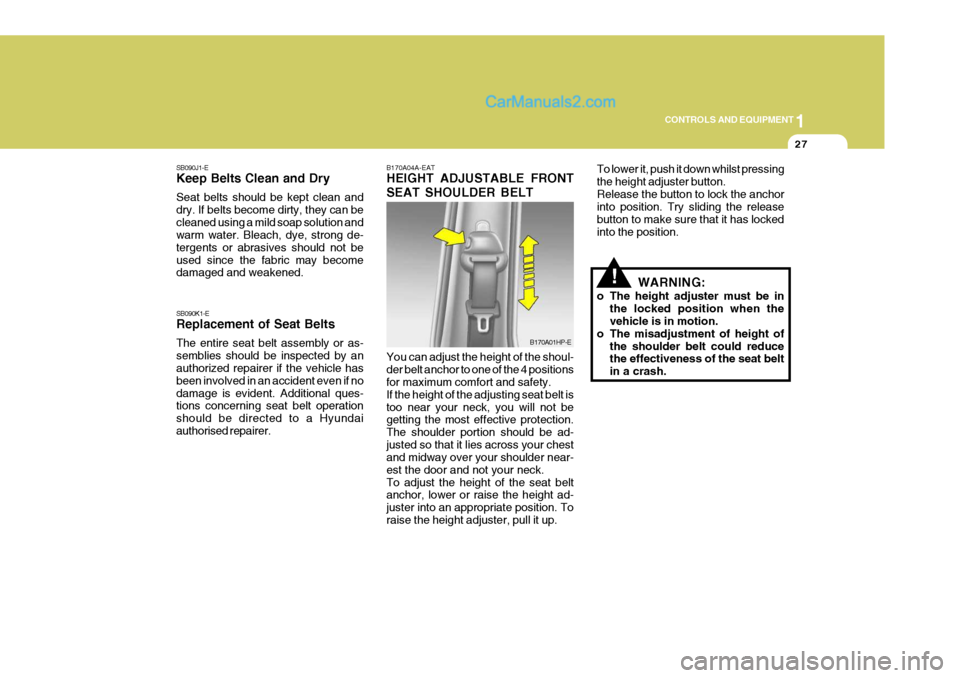
SB090J1-E Keep Belts Clean and Dry Seat belts should be kept clean and dry. If belts become dirty, they can becleaned using a mild soap solution and warm water. Bleach, dye, strong de- tergents or abrasives should not beused since the fabric may become damaged and weakened. SB090K1-E Replacement of Seat Belts The entire seat belt assembly or as- semblies should be inspected by an authorized repairer if the vehicle has been involved in an accident even if nodamage is evident. Additional ques- tions concerning seat belt operation should be directed to a Hyundaiauthorised repairer. B170A04A-EAT HEIGHT ADJUSTABLE FRONT SEAT SHOULDER BELT You can adjust the height of the shoul- der belt anchor to one of the 4 positions for maximum comfort and safety. If the height of the adjusting seat belt istoo near your neck, you will not be getting the most effective protection. The shoulder portion should be ad-justed so that it lies across your chest and midway over your shoulder near- est the door and not your neck.To adjust the height of the seat belt anchor, lower or raise the height ad- juster into an appropriate position. Toraise the height adjuster, pull it up.
B170A01HP-E
!
To lower it, push it down whilst pressing the height adjuster button.Release the button to lock the anchor into position. Try sliding the release button to make sure that it has lockedinto the position.
WARNING:
o The height adjuster must be in the locked position when the vehicle is in motion.
o The misadjustment of height of the shoulder belt could reducethe effectiveness of the seat belt in a crash.
Page 336 of 539
1CONTROLS AND EQUIPMENT
28
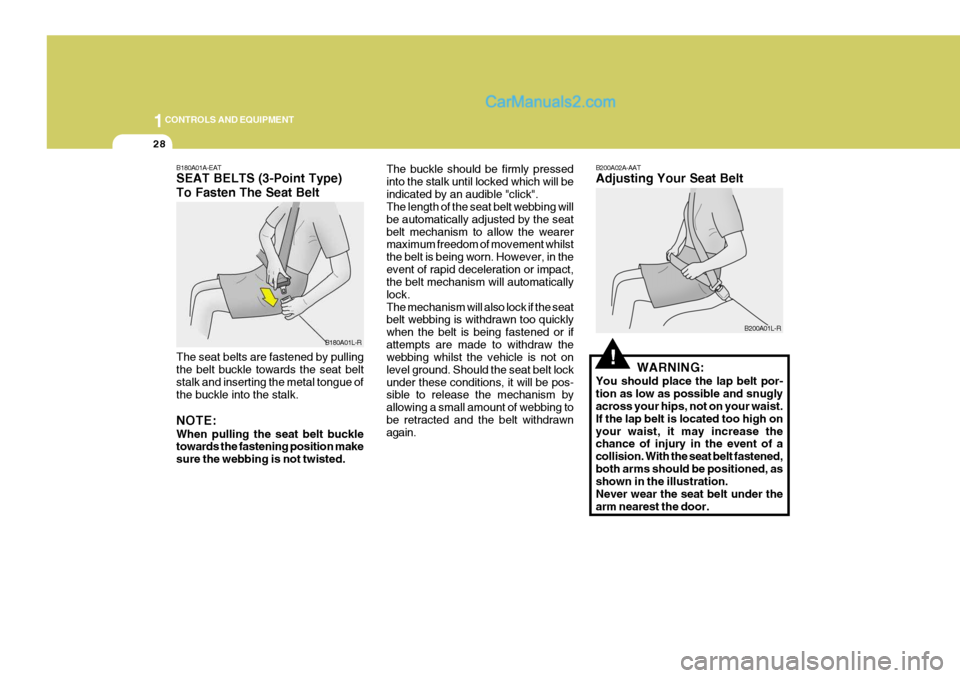
B180A01A-EAT SEAT BELTS (3-Point Type) To Fasten The Seat Belt The seat belts are fastened by pulling the belt buckle towards the seat belt stalk and inserting the metal tongue of the buckle into the stalk. NOTE: When pulling the seat belt buckle towards the fastening position make sure the webbing is not twisted. The buckle should be firmly pressedinto the stalk until locked which will beindicated by an audible "click". The length of the seat belt webbing will be automatically adjusted by the seatbelt mechanism to allow the wearer maximum freedom of movement whilst the belt is being worn. However, in theevent of rapid deceleration or impact, the belt mechanism will automatically lock.The mechanism will also lock if the seat belt webbing is withdrawn too quickly when the belt is being fastened or ifattempts are made to withdraw the webbing whilst the vehicle is not on level ground. Should the seat belt lockunder these conditions, it will be pos- sible to release the mechanism by allowing a small amount of webbing tobe retracted and the belt withdrawn again.
B180A01L-R
!
B200A02A-AAT Adjusting Your Seat Belt
WARNING:
You should place the lap belt por- tion as low as possible and snugly across your hips, not on your waist. If the lap belt is located too high onyour waist, it may increase the chance of injury in the event of a collision. With the seat belt fastened,both arms should be positioned, as shown in the illustration. Never wear the seat belt under thearm nearest the door. B200A01L-R
Page 337 of 539
1
CONTROLS AND EQUIPMENT
29
B210A01A-AAT To Release the Seat Belt The seat belt is released by pressing the release button in the locking buckle. When it is released, the belt should automatically draw back into the re-tractor. If this does not happen, check the belt to be sure it is not twisted, then tryagain.
B210A01L-R B220D02HP-EAT SEAT BELTS - Centre Rear Seat 3-Point System With EmergencyLocking Retractor
1. Pull the seatbelt out of the roof panel.
2. Before fastening the rear seat centre
belt, confirm the metal tab (a) andbuckle (b) are latched together.
B220D01HP
(a)
(b) (c)
(d)
B220D02HP
(c)
(d)
3. After confirming that (a) and (b) are latched, pull the seat belt out of the retractor and insert the metal tab (c) into the buckle (d).
Page 338 of 539
1CONTROLS AND EQUIPMENT
30
!
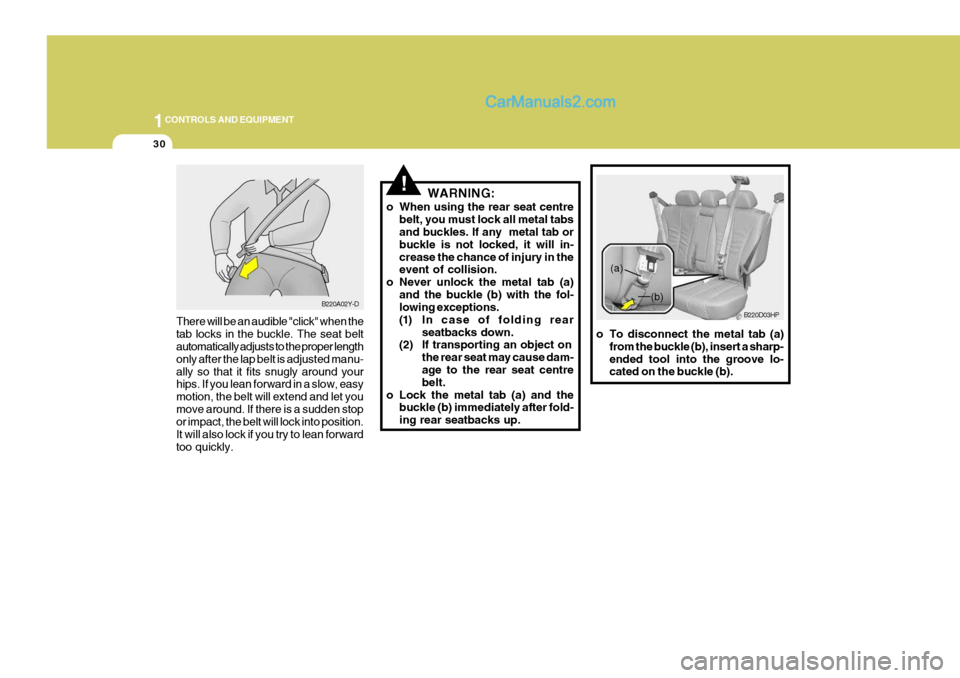
There will be an audible "click" when the tab locks in the buckle. The seat belt automatically adjusts to the proper length only after the lap belt is adjusted manu-ally so that it fits snugly around your hips. If you lean forward in a slow, easy motion, the belt will extend and let youmove around. If there is a sudden stop or impact, the belt will lock into position. It will also lock if you try to lean forwardtoo quickly. WARNING:
o When using the rear seat centre belt, you must lock all metal tabs and buckles. If any metal tab or buckle is not locked, it will in-crease the chance of injury in the event of collision.
o Never unlock the metal tab (a)
and the buckle (b) with the fol-lowing exceptions.
(1) In case of folding rear seatbacks down.
(2) If transporting an object on
the rear seat may cause dam- age to the rear seat centre belt.
o Lock the metal tab (a) and the buckle (b) immediately after fold-ing rear seatbacks up.
B220A02Y-DB220D03HP
o To disconnect the metal tab (a) from the buckle (b), insert a sharp- ended tool into the groove lo- cated on the buckle (b).(a)
(b)
Page 339 of 539
1
CONTROLS AND EQUIPMENT
31
!
B220D04HP
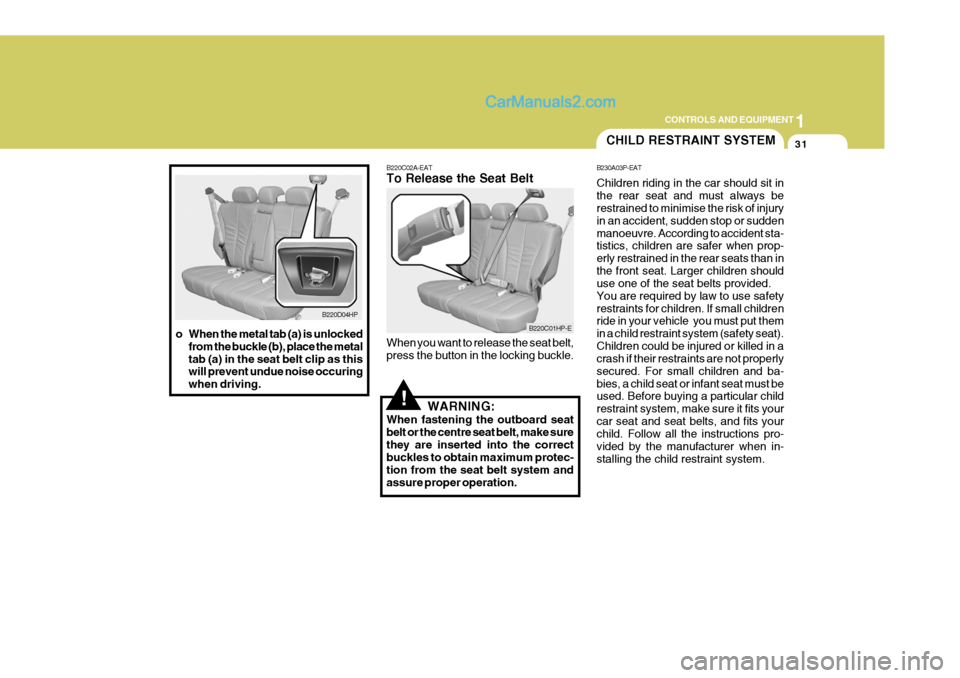
o When the metal tab (a) is unlocked from the buckle (b), place the metal tab (a) in the seat belt clip as this will prevent undue noise occuring when driving. B220C02A-EAT To Release the Seat Belt When you want to release the seat belt, press the button in the locking buckle.
WARNING:
When fastening the outboard seatbelt or the centre seat belt, make surethey are inserted into the correct buckles to obtain maximum protec- tion from the seat belt system andassure proper operation.
B220C01HP-E
CHILD RESTRAINT SYSTEM
B230A03P-EAT Children riding in the car should sit in the rear seat and must always be restrained to minimise the risk of injury in an accident, sudden stop or suddenmanoeuvre. According to accident sta- tistics, children are safer when prop- erly restrained in the rear seats than inthe front seat. Larger children should use one of the seat belts provided. You are required by law to use safetyrestraints for children. If small children ride in your vehicle you must put them in a child restraint system (safety seat).Children could be injured or killed in a crash if their restraints are not properly secured. For small children and ba-bies, a child seat or infant seat must be used. Before buying a particular child restraint system, make sure it fits yourcar seat and seat belts, and fits your child. Follow all the instructions pro- vided by the manufacturer when in-stalling the child restraint system.
Page 341 of 539
1
CONTROLS AND EQUIPMENT
33
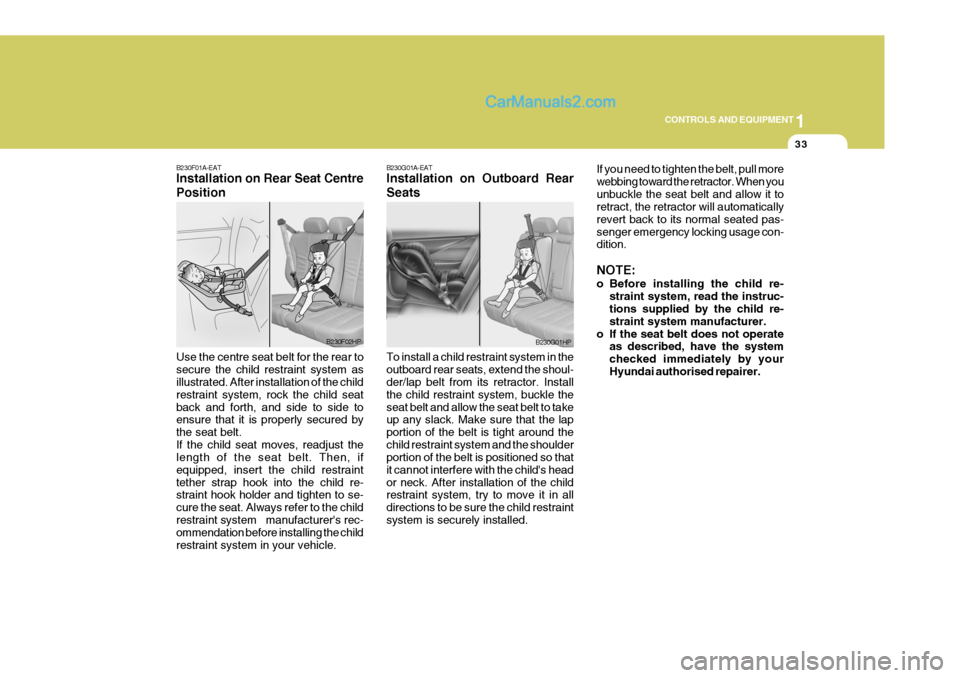
B230F01A-EAT Installation on Rear Seat Centre Position Use the centre seat belt for the rear to secure the child restraint system as illustrated. After installation of the child restraint system, rock the child seatback and forth, and side to side to ensure that it is properly secured by the seat belt.If the child seat moves, readjust the length of the seat belt. Then, if equipped, insert the child restrainttether strap hook into the child re- straint hook holder and tighten to se- cure the seat. Always refer to the childrestraint system manufacturer's rec- ommendation before installing the child restraint system in your vehicle.
B230F02HP
B230G01A-EAT Installation on Outboard Rear Seats To install a child restraint system in the outboard rear seats, extend the shoul- der/lap belt from its retractor. Install the child restraint system, buckle theseat belt and allow the seat belt to take up any slack. Make sure that the lap portion of the belt is tight around thechild restraint system and the shoulder portion of the belt is positioned so that it cannot interfere with the child's heador neck. After installation of the child restraint system, try to move it in all directions to be sure the child restraintsystem is securely installed. If you need to tighten the belt, pull morewebbing toward the retractor. When youunbuckle the seat belt and allow it to retract, the retractor will automatically revert back to its normal seated pas-senger emergency locking usage con- dition. NOTE:
o Before installing the child re-
straint system, read the instruc- tions supplied by the child re- straint system manufacturer.
o If the seat belt does not operate as described, have the systemchecked immediately by yourHyundai authorised repairer.
B230G01HP
Page 346 of 539
1CONTROLS AND EQUIPMENT
38
!
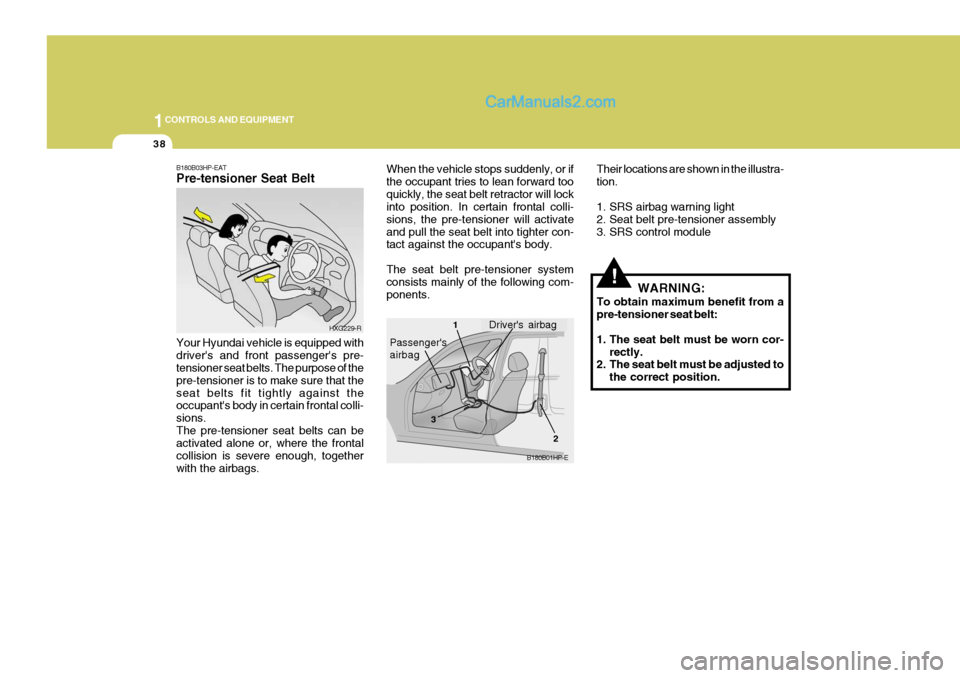
B180B03HP-EAT Pre-tensioner Seat Belt Your Hyundai vehicle is equipped with driver's and front passenger's pre- tensioner seat belts. The purpose of the pre-tensioner is to make sure that theseat belts fit tightly against the occupant's body in certain frontal colli- sions.The pre-tensioner seat belts can be activated alone or, where the frontal collision is severe enough, togetherwith the airbags. When the vehicle stops suddenly, or ifthe occupant tries to lean forward tooquickly, the seat belt retractor will lock into position. In certain frontal colli- sions, the pre-tensioner will activateand pull the seat belt into tighter con- tact against the occupant's body. The seat belt pre-tensioner system consists mainly of the following com- ponents.
WARNING:
To obtain maximum benefit from apre-tensioner seat belt:
1. The seat belt must be worn cor- rectly.
2. The seat belt must be adjusted to
the correct position.
HXG229-R
B180B01HP-E
Driver's airbag1
2
3
Passenger's airbag Their locations are shown in the illustra- tion.
1. SRS airbag warning light
2. Seat belt pre-tensioner assembly
3. SRS control module
Page 351 of 539
1
CONTROLS AND EQUIPMENT
43
!WARNING:
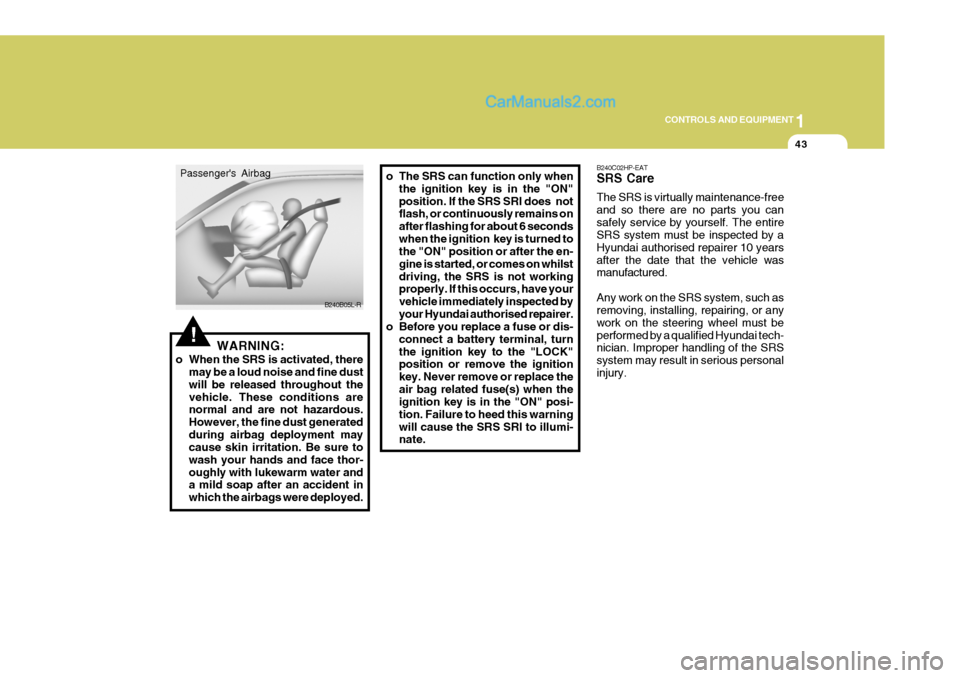
o When the SRS is activated, there may be a loud noise and fine dust will be released throughout thevehicle. These conditions are normal and are not hazardous. However, the fine dust generatedduring airbag deployment may cause skin irritation. Be sure to wash your hands and face thor-oughly with lukewarm water and a mild soap after an accident in which the airbags were deployed. o The SRS can function only when
the ignition key is in the "ON"position. If the SRS SRI does not flash, or continuously remains on after flashing for about 6 secondswhen the ignition key is turned to the "ON" position or after the en- gine is started, or comes on whilstdriving, the SRS is not working properly. If this occurs, have your vehicle immediately inspected byyour Hyundai authorised repairer.
o Before you replace a fuse or dis-
connect a battery terminal, turnthe ignition key to the "LOCK" position or remove the ignition key. Never remove or replace theair bag related fuse(s) when the ignition key is in the "ON" posi- tion. Failure to heed this warningwill cause the SRS SRI to illumi- nate. B240C02HP-EAT SRS Care The SRS is virtually maintenance-free and so there are no parts you cansafely service by yourself. The entire SRS system must be inspected by a Hyundai authorised repairer 10 yearsafter the date that the vehicle was manufactured. Any work on the SRS system, such as removing, installing, repairing, or any work on the steering wheel must beperformed by a qualified Hyundai tech- nician. Improper handling of the SRS system may result in serious personalinjury.
B240B05L-R
Passenger's Airbag