2006 FORD SUPER DUTY lock
[x] Cancel search: lockPage 101 of 312
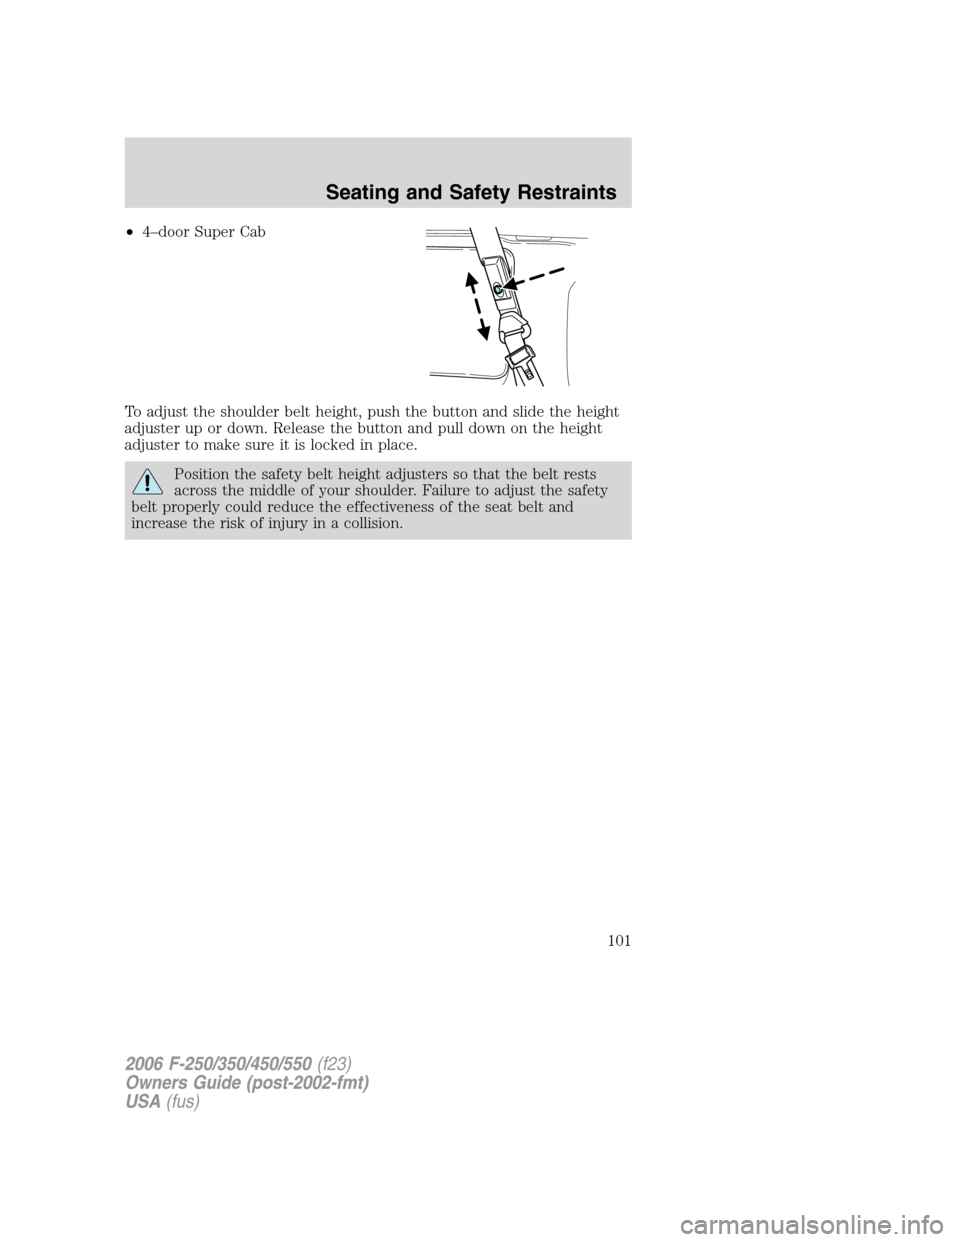
•4–door Super Cab
To adjust the shoulder belt height, push the button and slide the height
adjuster up or down. Release the button and pull down on the height
adjuster to make sure it is locked in place.
Position the safety belt height adjusters so that the belt rests
across the middle of your shoulder. Failure to adjust the safety
belt properly could reduce the effectiveness of the seat belt and
increase the risk of injury in a collision.
2006 F-250/350/450/550(f23)
Owners Guide (post-2002-fmt)
USA(fus)
Seating and Safety Restraints
101
Page 109 of 312
Do not attempt to service, repair, or modify the airbag
supplemental restraint systems or its fuses. See your authorized
dealer.
The front passenger air bag is not designed to offer protection to
an occupant in the center front seating position.
Modifying or adding equipment to the front end of the vehicle
(including frame, bumper, front end body structure and tow
hooks) may affect the performance of the airbag system, increasing the
risk of injury. Do not modify the front end of the vehicle.
Additional equipment such as snowplow equipment may effect
the performance of the airbag sensors increasing the risk of
injury. Please refer to theBody Builders Layout Bookfor instructions
about the appropriate installation of additional equipment.
Removing the blocker beam without installing snow plow
attachment hardware may effect airbag deployment in a crash.
Do not operate the truck unless either the blocker beam or snow plow
attachment hardware is installed on the vehicle.
Children and airbags
For additional important safety information, read all information on
safety restraints in this guide.
Children must always be properly restrained. Failure to follow these
instructions may increase the risk of injury in a collision.
An infant in a rear-facing seat faces a high risk of serious or fatal
injuries from a deploying passenger airbag. Rear facing infant
seats should NEVER be placed in the front seats, unless the passenger
airbag is turned off. SeePassenger airbag ON/OFF switch.
2006 F-250/350/450/550(f23)
Owners Guide (post-2002-fmt)
USA(fus)
Seating and Safety Restraints
109
Page 120 of 312
•Review and follow the information
presented in theAirbag
supplemental restraint system
(SRS) section in this chapter.
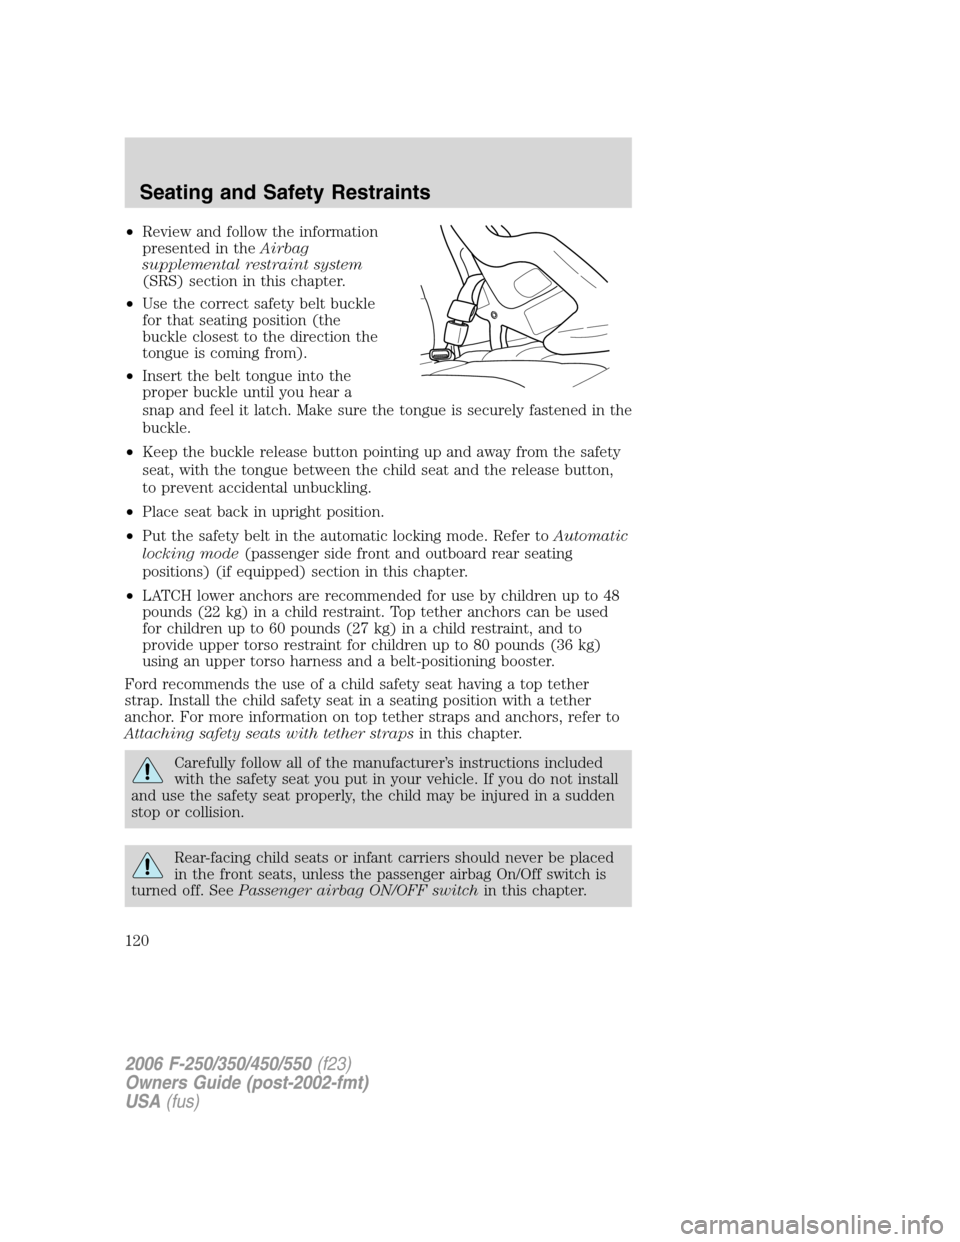
•Use the correct safety belt buckle
for that seating position (the
buckle closest to the direction the
tongue is coming from).
•Insert the belt tongue into the
proper buckle until you hear a
snap and feel it latch. Make sure the tongue is securely fastened in the
buckle.
•Keep the buckle release button pointing up and away from the safety
seat, with the tongue between the child seat and the release button,
to prevent accidental unbuckling.
•Place seat back in upright position.
•Put the safety belt in the automatic locking mode. Refer toAutomatic
locking mode(passenger side front and outboard rear seating
positions) (if equipped) section in this chapter.
•LATCH lower anchors are recommended for use by children up to 48
pounds (22 kg) in a child restraint. Top tether anchors can be used
for children up to 60 pounds (27 kg) in a child restraint, and to
provide upper torso restraint for children up to 80 pounds (36 kg)
using an upper torso harness and a belt-positioning booster.
Ford recommends the use of a child safety seat having a top tether
strap. Install the child safety seat in a seating position with a tether
anchor. For more information on top tether straps and anchors, refer to
Attaching safety seats with tether strapsin this chapter.
Carefully follow all of the manufacturer’s instructions included
with the safety seat you put in your vehicle. If you do not install
and use the safety seat properly, the child may be injured in a sudden
stop or collision.
Rear-facing child seats or infant carriers should never be placed
in the front seats, unless the passenger airbag On/Off switch is
turned off. SeePassenger airbag ON/OFF switchin this chapter.
2006 F-250/350/450/550(f23)
Owners Guide (post-2002-fmt)
USA(fus)
Seating and Safety Restraints
120
Page 122 of 312
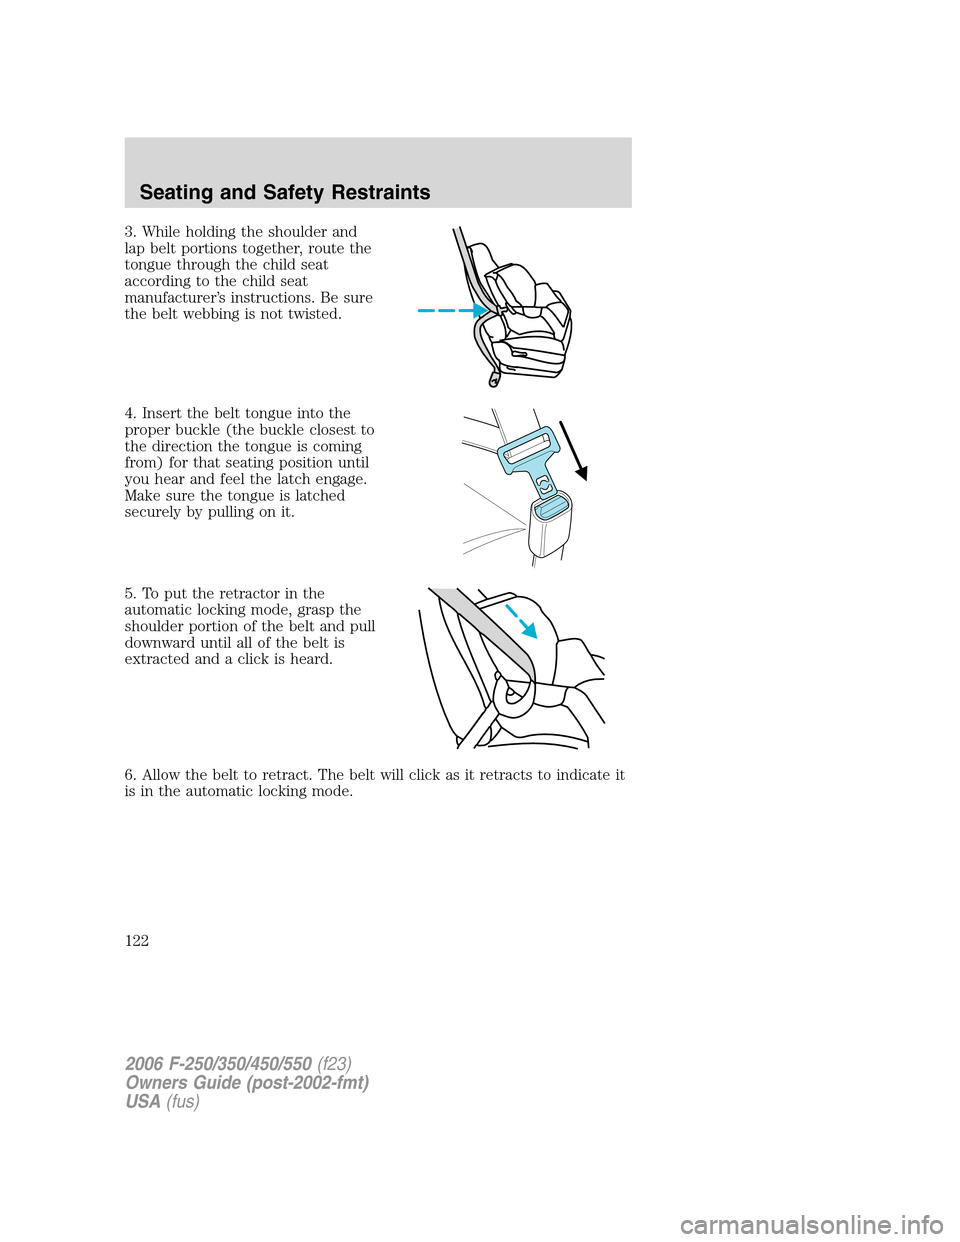
3. While holding the shoulder and
lap belt portions together, route the
tongue through the child seat
according to the child seat
manufacturer’s instructions. Be sure
the belt webbing is not twisted.
4. Insert the belt tongue into the
proper buckle (the buckle closest to
the direction the tongue is coming
from) for that seating position until
you hear and feel the latch engage.
Make sure the tongue is latched
securely by pulling on it.
5. To put the retractor in the
automatic locking mode, grasp the
shoulder portion of the belt and pull
downward until all of the belt is
extracted and a click is heard.
6. Allow the belt to retract. The belt will click as it retracts to indicate it
is in the automatic locking mode.
2006 F-250/350/450/550(f23)
Owners Guide (post-2002-fmt)
USA(fus)
Seating and Safety Restraints
122
Page 123 of 312
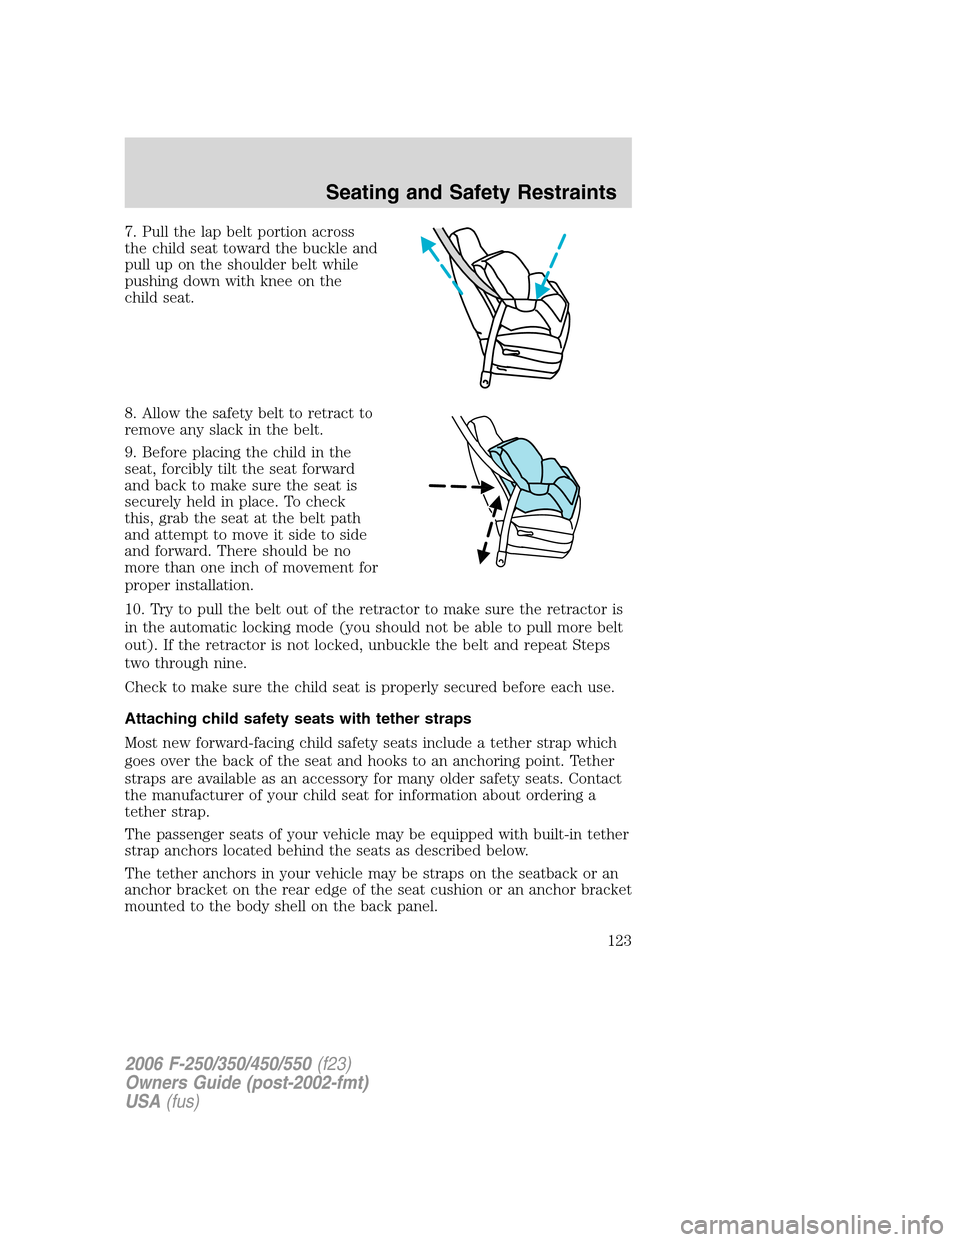
7. Pull the lap belt portion across
the child seat toward the buckle and
pull up on the shoulder belt while
pushing down with knee on the
child seat.
8. Allow the safety belt to retract to
remove any slack in the belt.
9. Before placing the child in the
seat, forcibly tilt the seat forward
and back to make sure the seat is
securely held in place. To check
this, grab the seat at the belt path
and attempt to move it side to side
and forward. There should be no
more than one inch of movement for
proper installation.
10. Try to pull the belt out of the retractor to make sure the retractor is
in the automatic locking mode (you should not be able to pull more belt
out). If the retractor is not locked, unbuckle the belt and repeat Steps
two through nine.
Check to make sure the child seat is properly secured before each use.
Attaching child safety seats with tether straps
Most new forward-facing child safety seats include a tether strap which
goes over the back of the seat and hooks to an anchoring point. Tether
straps are available as an accessory for many older safety seats. Contact
the manufacturer of your child seat for information about ordering a
tether strap.
The passenger seats of your vehicle may be equipped with built-in tether
strap anchors located behind the seats as described below.
The tether anchors in your vehicle may be straps on the seatback or an
anchor bracket on the rear edge of the seat cushion or an anchor bracket
mounted to the body shell on the back panel.
2006 F-250/350/450/550(f23)
Owners Guide (post-2002-fmt)
USA(fus)
Seating and Safety Restraints
123
Page 124 of 312
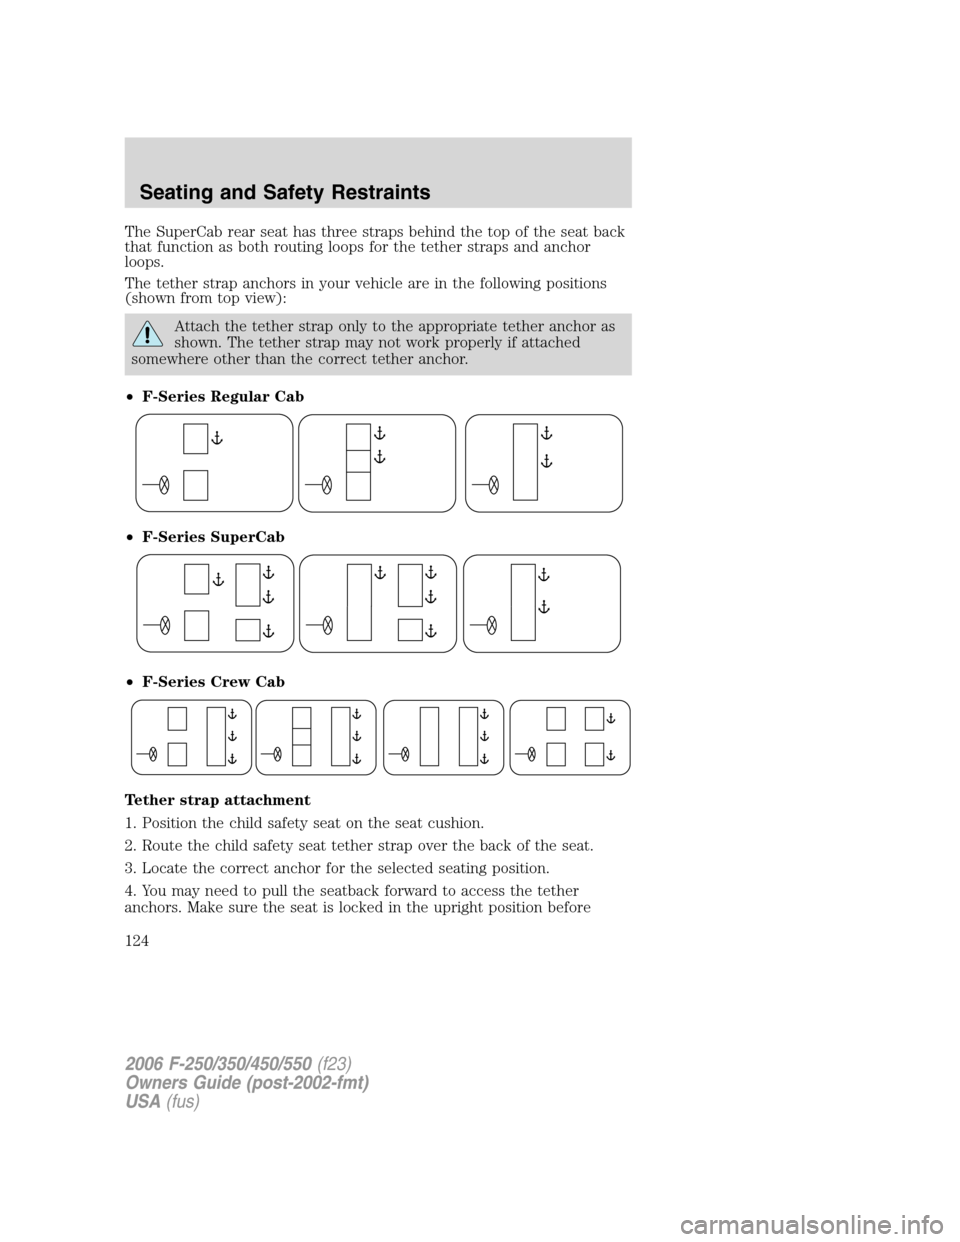
The SuperCab rear seat has three straps behind the top of the seat back
that function as both routing loops for the tether straps and anchor
loops.
The tether strap anchors in your vehicle are in the following positions
(shown from top view):
Attach the tether strap only to the appropriate tether anchor as
shown. The tether strap may not work properly if attached
somewhere other than the correct tether anchor.
•F-Series Regular Cab
•F-Series SuperCab
•F-Series Crew Cab
Tether strap attachment
1. Position the child safety seat on the seat cushion.
2. Route the child safety seat tether strap over the back of the seat.
3. Locate the correct anchor for the selected seating position.
4. You may need to pull the seatback forward to access the tether
anchors. Make sure the seat is locked in the upright position before
2006 F-250/350/450/550(f23)
Owners Guide (post-2002-fmt)
USA(fus)
Seating and Safety Restraints
124
Page 158 of 312

3.GAIN setting display:Shows the current GAIN setting. This will
illuminate when a trailer is connected, flash if the trailer becomes
disconnected, or remain off if no trailer is connected.
4.OUTPUT bar graph:When the vehicle’s brake pedal is pushed, or
when the manual control is activated, green bar indicators will illuminate
to indicate the amount of power going to the trailer brakes relative to
the brake pedal or manual control input.
5.Manual control lever:Slide the control lever to the left to activate
power to the trailer’s electric brakes independent of the tow vehicle’s
brakes (see the followingProcedure for adjusting GAINsection for
instructions on proper use of this feature). If the manual control is
activated while the brake is also applied, the greater of the two inputs
determines the power sent to the trailer brakes.
•Stop Lamps:Activating the TBC manual control lever will illuminate
both the trailer brake lamps and the tow vehicle brake lamps
(presuming proper trailer electrical connection). Pressing the vehicle
brake pedal will also illuminate both trailer and vehicle brake lamps.
GAIN
The GAIN setting is used to set the TBC for the specific towing
condition and should be changed as towing conditions change. Changes
to towing conditions include trailer load, vehicle load, road conditions
and weather.
The GAIN should be set to provide the maximum trailer braking
assistance while ensuring the trailer wheels do not lock when braking.
Locked trailer wheels may lead to trailer instability.
Procedure for adjusting GAIN:
Note:This should only be performed in a traffic free environment at
speeds of approximately 20 – 25 mph (30 – 40 km/h).
1. Make sure the trailer brakes are in good working condition,
functioning normally, and properly adjusted. See your trailer dealer if
necessary.
2. Hook-up the trailer and make the electrical connections according to
the trailer manufacturer’s instructions.
3. When a trailer with electric brakes is plugged in, the trailer connection
indicator will illuminate green on the TBC and the GAIN setting display
will illuminate.
4. Use the GAIN adjustment (+/-) buttons to increase or decrease the
GAIN setting to the desired starting point. (A GAIN setting of 6.0 is a
good starting point for heavier loads.)
2006 F-250/350/450/550(f23)
Owners Guide (post-2002-fmt)
USA(fus)
Tires, Wheels and Loading
158
Page 159 of 312
5. In a traffic-free environment, tow the trailer on a dry, level surface at
a speed of 20 – 25 mph (30 – 40 km/h) and squeeze the manual control
lever completely.
6. If the trailer wheels lock-up (indicated by squealing tires), reduce the
GAIN setting; if the trailer wheels turn freely, increase the GAIN setting.
Repeat Steps 5 and 6 until the GAIN setting is at a point just below
trailer wheel lock-up. If towing a heavier trailer, trailer wheel lockup may
not be attainable even with the maximum GAIN setting of 10.
Explanation of instrument cluster messages:
The TBC interacts with the instrument cluster message center. These
messages, accompanied by a single chime, will be displayed when the
TBC determines a malfunction in the trailer connection, TBC system, or
in the trailer. These messages are listed below:
TRAILER DISCONNECTED (if equipped with message center) or
CHECK TRAILER (if equipped with mini message center):This
message is displayed when a trailer connection was determined and then
a disconnection, either intentionally or unintentionally, has been sensed
during a given ignition cycle. This message is also displayed during
manual activation without a trailer connected.
TBC FAULT:This message is displayed in response to faults sensed by
the TBC. In the event this message is seen, please take your vehicle to
an authorized dealer for diagnosis and repair. The TBC may still function,
but performance may be degraded.
TRAILER FAULT:The TBC is capable of determining certain faults in
the vehicle wiring and trailer wiring/brake system. These faults do not
mean there is anything wrong with the TBC. This message is displayed
when one of the following faults has occurred:
•
Short circuit on the electric brake output wire:If the TRAILER FAULT
message is displayed with no trailer connected, the problem is with the
vehicle wiring from the TBC to the 7–pin connector in the bumper. If the
message is only displayed with a trailer connected, the problem is related
to the trailer wiring; consult your trailer dealer for assistance.
•Trailer brake overload:The trailer’s brakes are drawing too much
current; consult your trailer dealer for assistance.
Note:Your TBC can be diagnosed by your authorized dealer to determine
exactly which trailer fault has occurred; however, if the fault is with the
trailer this diagnosis isnotcovered under your Ford warranty.
2006 F-250/350/450/550(f23)
Owners Guide (post-2002-fmt)
USA(fus)
Tires, Wheels and Loading
159