Page 51 of 312
Replacing tail lamp/turn/backup lamp bulbs — F–250/F–350 only
1. Make sure the headlamp switch is
in the OFF position and then open
the tailgate to expose the lamp
assemblies.
2. Remove the two bolts from the
tail lamp assembly and carefully pull
the lamp assembly from the tailgate
pillar by releasing the two retaining
tabs.
3. Rotate the bulb socket counterclockwise and remove from lamp
assembly.
4. Pull the bulb straight out of the socket.
Install the new bulb(s) in reverse order.
Replacing brake/tail/backup lamp bulbs — F–450/F–550 only
1. Make sure the headlamp switch is
in the OFF position.
2. Remove the four screws and the
lamp lens from lamp assembly.
3. Carefully pull the bulb straight
out of the socket and push in the
new bulb.
2006 F-250/350/450/550(f23)
Owners Guide (post-2002-fmt)
USA(fus)
Lights
51
Page 52 of 312
Replacing cargo lamp and high-mount brakelamp bulbs
1. Make sure the headlamp switch is
in the OFF position.
2. Remove the two screws and lamp
assembly from vehicle as wiring
permits.
3. Remove the bulb socket by
rotating counterclockwise.
4. Pull the bulb straight out of the
socket.
Front clearance and identification lamp bulbs
1. Make sure the headlamp switch is
in the OFF position.
2. Remove the screw and lens from
the lamp assembly.
3. Pull the bulb straight out of the
socket.
Install the bulb(s) in reverse order.
Replacing foglamp bulbs (if equipped)
1. Make sure the headlamp switch is
in the OFF position.
2. Remove the bulb socket from the
foglamp by turning
counterclockwise.
3. Disconnect the electrical connector from the foglamp bulb.
Install the new bulb(s) in reverse order.
2006 F-250/350/450/550(f23)
Owners Guide (post-2002-fmt)
USA(fus)
Lights
52
Page 53 of 312
Replacing license plate lamp bulbs
The license plate bulbs are located
behind the rear bumper. To change
the license plate lamp bulbs:
1. Reach behind the rear bumper to
locate the bulb.
2. Twist the bulb socket
counterclockwise and carefully pull
to remove it from the lamp
assembly.
3. Pull out the old bulb from the
socket and push in the new bulb.
4. Install the bulb socket in lamp assembly by turning it clockwise.
2006 F-250/350/450/550(f23)
Owners Guide (post-2002-fmt)
USA(fus)
Lights
53
Page 54 of 312
MULTI-FUNCTION LEVER
Windshield wiper:Rotate the end
of the control away from you to
increase the speed of the wipers;
rotate towards you to decrease the
speed of the wipers.
Windshield washer:Push the end
of the stalk:
•briefly: causes a single swipe of
the wipers without washer fluid.
•a quick push and hold: the wipers
will swipe three times with
washer fluid.
•a long push and hold: the wipers
and washer fluid will be activated for up to ten seconds.
TILT STEERING WHEEL (IF EQUIPPED)
To adjust the steering wheel:
1. Pull and hold the steering wheel
release control toward you.
2. Move the steering wheel up or
down until you find the desired
location.
3. Release the steering wheel
release control. This will lock the
steering wheel in position.
Never adjust the steering wheel when the vehicle is moving.
2006 F-250/350/450/550(f23)
Owners Guide (post-2002-fmt)
USA(fus)
Driver Controls
54
Page 57 of 312

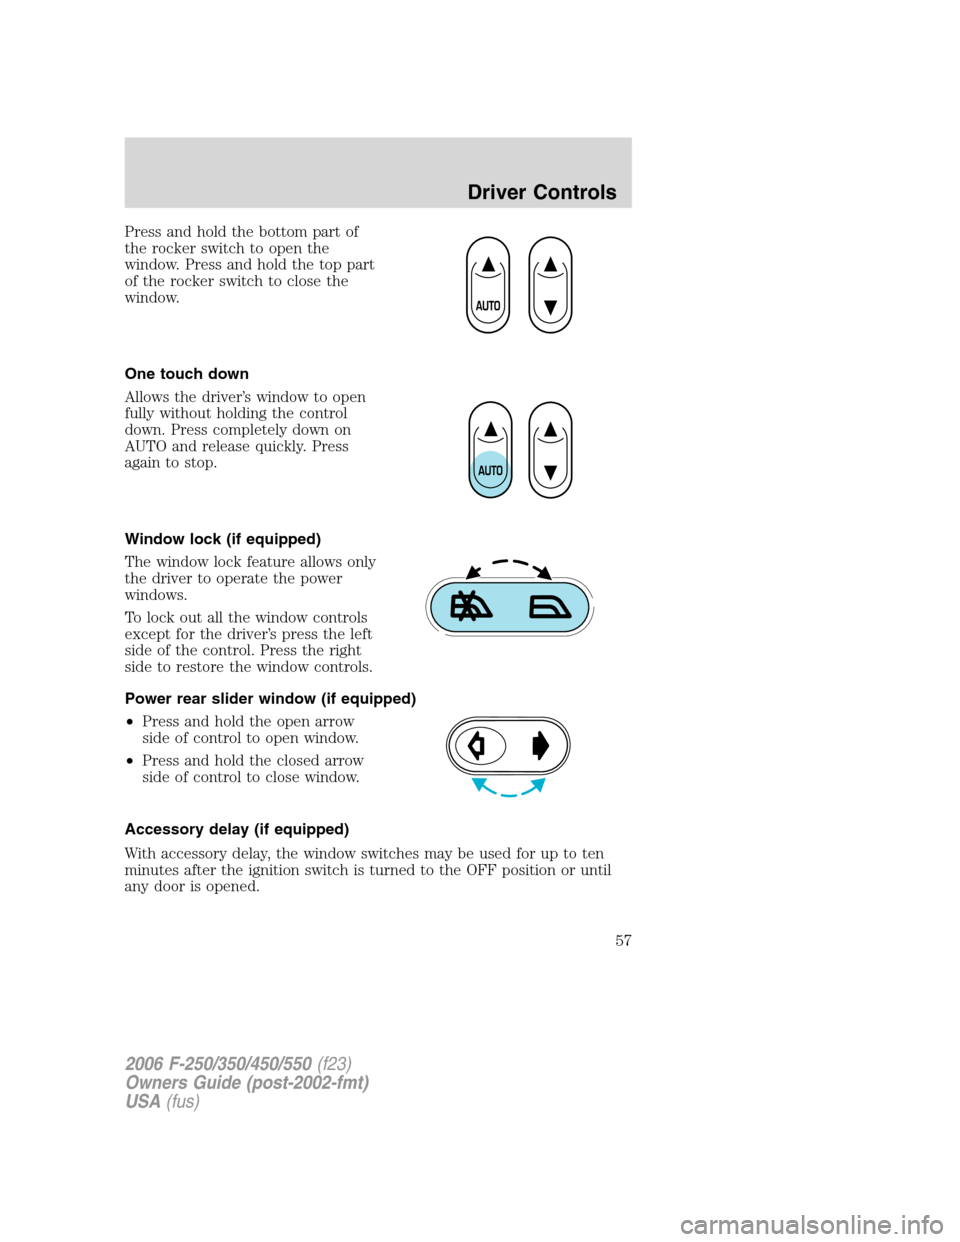
Press and hold the bottom part of
the rocker switch to open the
window. Press and hold the top part
of the rocker switch to close the
window.
One touch down
Allows the driver’s window to open
fully without holding the control
down. Press completely down on
AUTO and release quickly. Press
again to stop.
Window lock (if equipped)
The window lock feature allows only
the driver to operate the power
windows.
To lock out all the window controls
except for the driver’s press the left
side of the control. Press the right
side to restore the window controls.
Power rear slider window (if equipped)
•Press and hold the open arrow
side of control to open window.
•Press and hold the closed arrow
side of control to close window.
Accessory delay (if equipped)
With accessory delay, the window switches may be used for up to ten
minutes after the ignition switch is turned to the OFF position or until
any door is opened.
2006 F-250/350/450/550(f23)
Owners Guide (post-2002-fmt)
USA(fus)
Driver Controls
57
Page 58 of 312

AUTOMATIC DIMMING INSIDE REAR VIEW MIRROR (IF EQUIPPED)
Your vehicle is equipped with an inside rear view mirror with an
auto-dimming function. The electronic day/night mirror will change from
the normal state to the non-glare state when bright lights (glare) reach
the mirror. When the mirror detects bright light from front or behind, it
will automatically adjust to minimize glare.
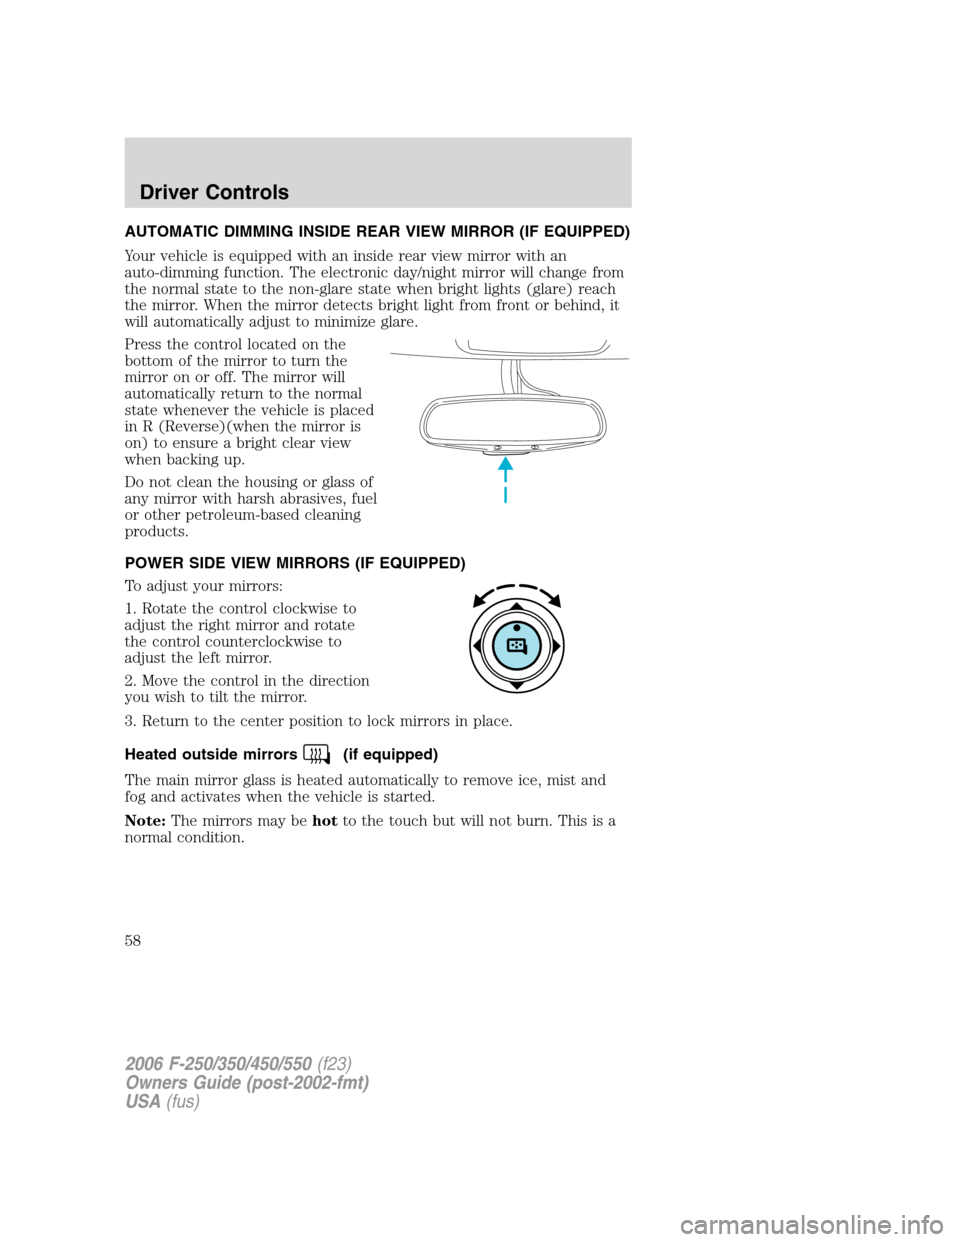
Press the control located on the
bottom of the mirror to turn the
mirror on or off. The mirror will
automatically return to the normal
state whenever the vehicle is placed
in R (Reverse)(when the mirror is
on) to ensure a bright clear view
when backing up.
Do not clean the housing or glass of
any mirror with harsh abrasives, fuel
or other petroleum-based cleaning
products.
POWER SIDE VIEW MIRRORS (IF EQUIPPED)
To adjust your mirrors:
1. Rotate the control clockwise to
adjust the right mirror and rotate
the control counterclockwise to
adjust the left mirror.
2. Move the control in the direction
you wish to tilt the mirror.
3. Return to the center position to lock mirrors in place.
Heated outside mirrors
(if equipped)
The main mirror glass is heated automatically to remove ice, mist and
fog and activates when the vehicle is started.
Note:The mirrors may behotto the touch but will not burn. This is a
normal condition.
2006 F-250/350/450/550(f23)
Owners Guide (post-2002-fmt)
USA(fus)
Driver Controls
58
Page 71 of 312

degrees between adjacent zones and will become noticeable as the
vehicle crosses multiple zones. A correct zone setting will eliminate this
error. Refer toCompass zone/calibration adjustment.
Compass zone/calibration adjustment
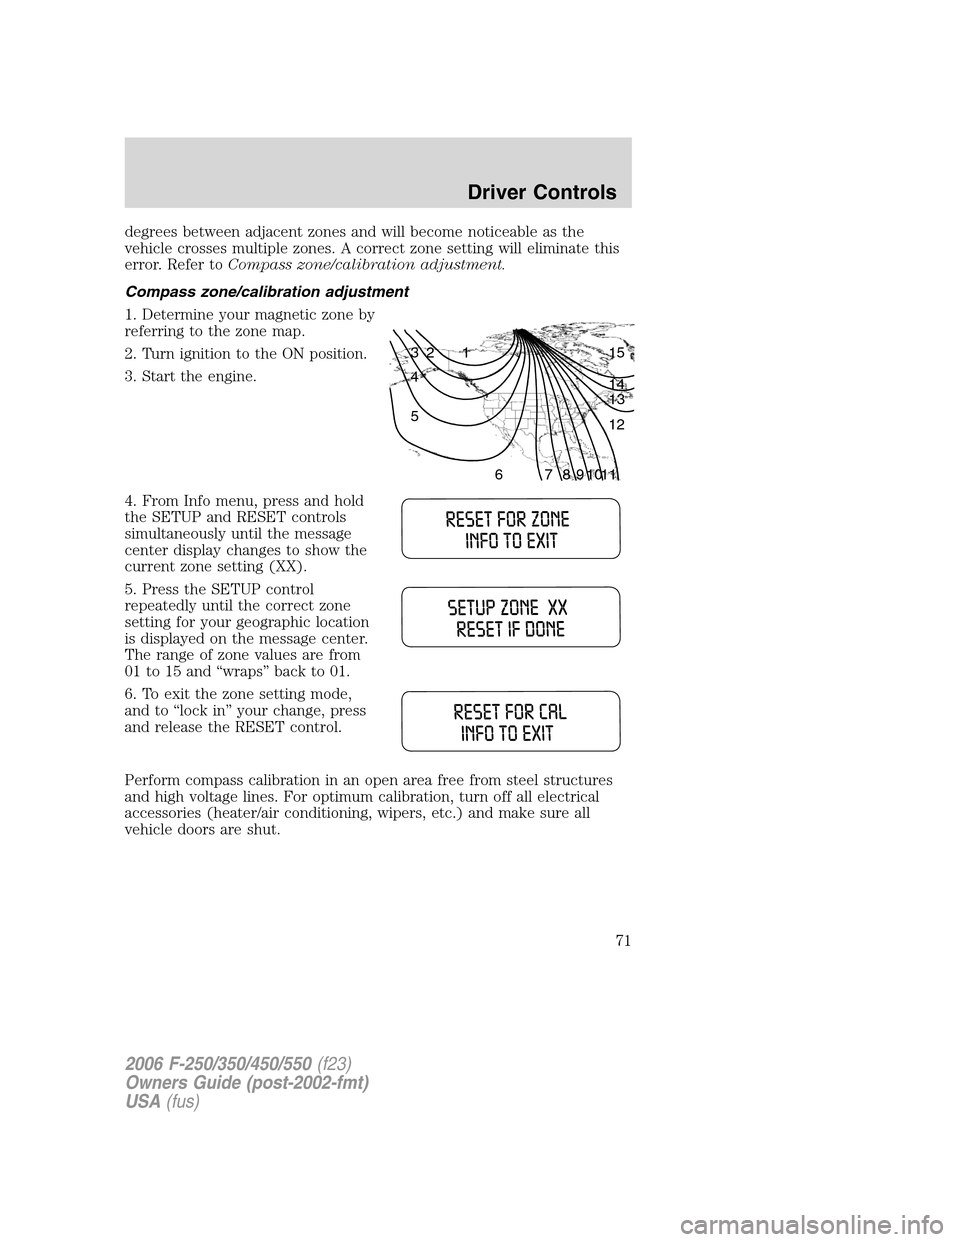
1. Determine your magnetic zone by
referring to the zone map.
2. Turn ignition to the ON position.
3. Start the engine.
4. From Info menu, press and hold
the SETUP and RESET controls
simultaneously until the message
center display changes to show the
current zone setting (XX).
5. Press the SETUP control
repeatedly until the correct zone
setting for your geographic location
is displayed on the message center.
The range of zone values are from
01 to 15 and “wraps” back to 01.
6. To exit the zone setting mode,
and to “lock in” your change, press
and release the RESET control.
Perform compass calibration in an open area free from steel structures
and high voltage lines. For optimum calibration, turn off all electrical
accessories (heater/air conditioning, wipers, etc.) and make sure all
vehicle doors are shut.
1 2 3
4
5
6 7 8 9 101112 13 14 15
2006 F-250/350/450/550(f23)
Owners Guide (post-2002-fmt)
USA(fus)
Driver Controls
71
Page 73 of 312

•Differences in the automatic shut-off points on the fuel pumps at
service stations
•Variations in top-off procedure from one fill-up to another
•Rounding of the displayed values to the nearest 0.1 gallon (liter)
1. Drive the vehicle at least 5 miles (8 km) with the speed control
system engaged to display a stabilized average.
2. Record the highway fuel economy for future reference.
It is important to press the RESET control after setting the speed
control to get accurate highway fuel economy readings.
Engine hour meter
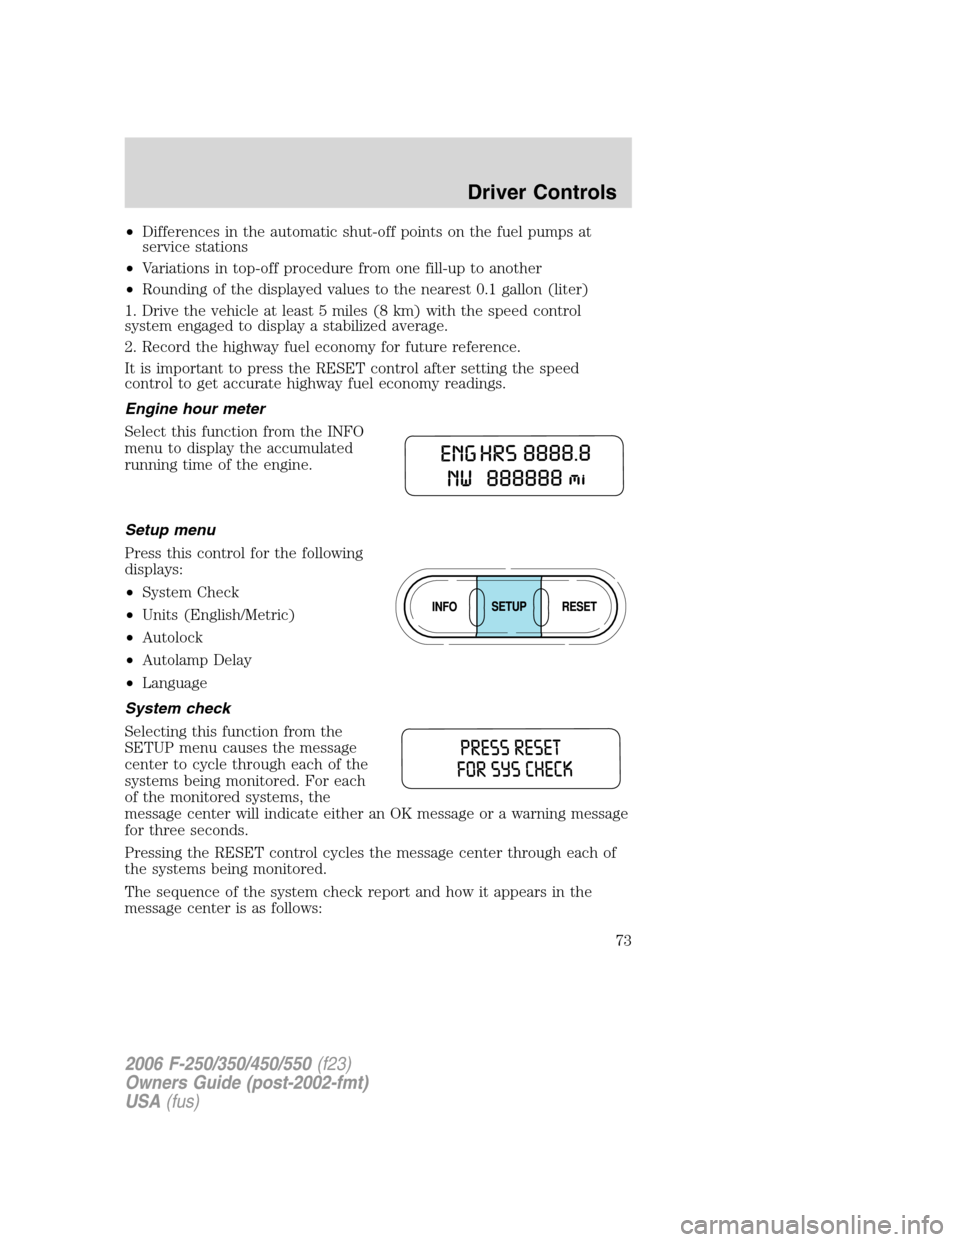
Select this function from the INFO
menu to display the accumulated
running time of the engine.
Setup menu
Press this control for the following
displays:
•System Check
•Units (English/Metric)
•Autolock
•Autolamp Delay
•Language
System check
Selecting this function from the
SETUP menu causes the message
center to cycle through each of the
systems being monitored. For each
of the monitored systems, the
message center will indicate either an OK message or a warning message
for three seconds.
Pressing the RESET control cycles the message center through each of
the systems being monitored.
The sequence of the system check report and how it appears in the
message center is as follows:
2006 F-250/350/450/550(f23)
Owners Guide (post-2002-fmt)
USA(fus)
Driver Controls
73