Page 86 of 312
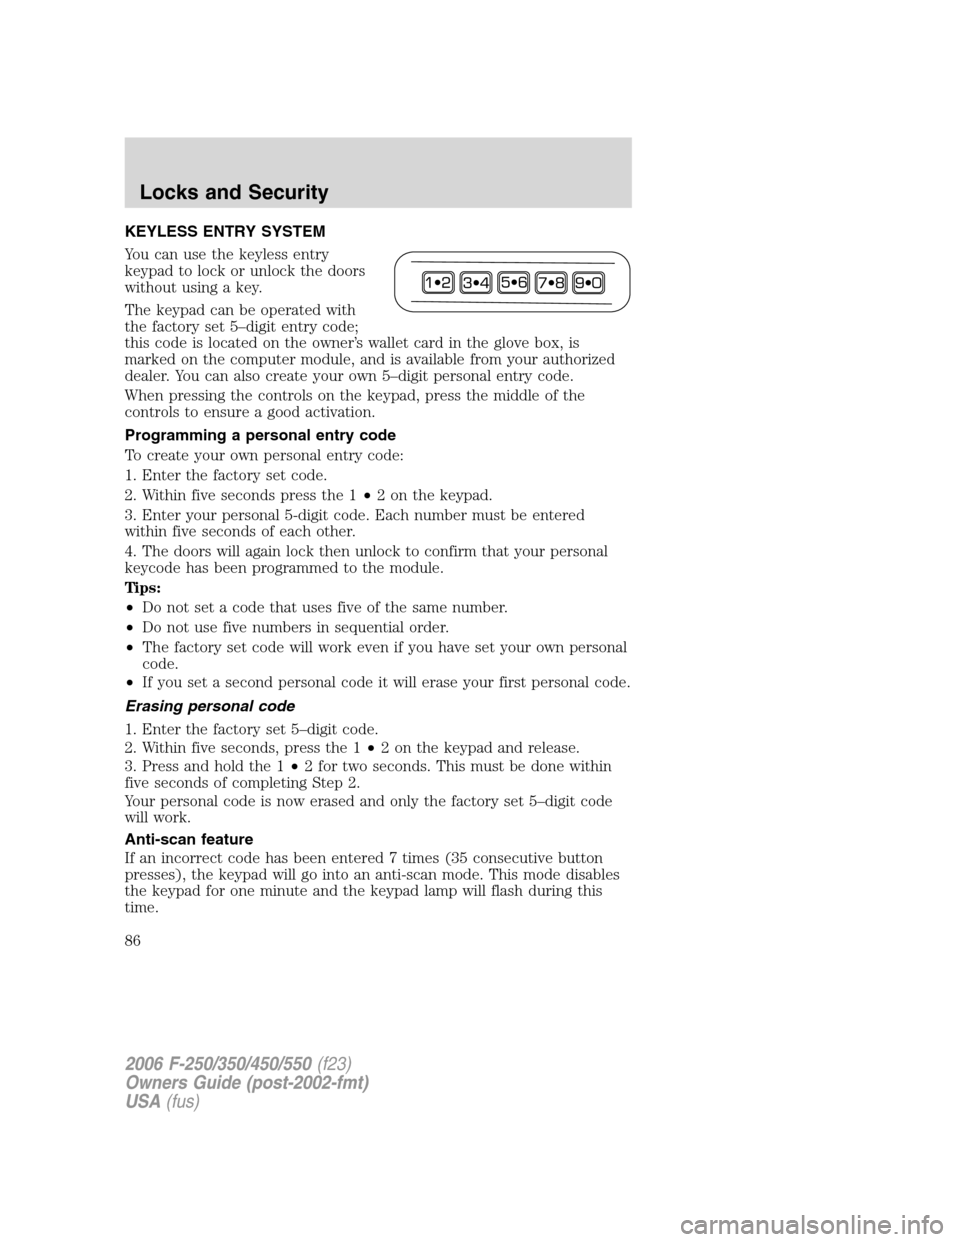
KEYLESS ENTRY SYSTEM
You can use the keyless entry
keypad to lock or unlock the doors
without using a key.
The keypad can be operated with
the factory set 5–digit entry code;
this code is located on the owner’s wallet card in the glove box, is
marked on the computer module, and is available from your authorized
dealer. You can also create your own 5–digit personal entry code.
When pressing the controls on the keypad, press the middle of the
controls to ensure a good activation.
Programming a personal entry code
To create your own personal entry code:
1. Enter the factory set code.
2. Within five seconds press the 1•2 on the keypad.
3. Enter your personal 5-digit code. Each number must be entered
within five seconds of each other.
4. The doors will again lock then unlock to confirm that your personal
keycode has been programmed to the module.
Tips:
•Do not set a code that uses five of the same number.
•Do not use five numbers in sequential order.
•The factory set code will work even if you have set your own personal
code.
•If you set a second personal code it will erase your first personal code.
Erasing personal code
1. Enter the factory set 5–digit code.
2. Within five seconds, press the 1•2 on the keypad and release.
3. Press and hold the 1•2 for two seconds. This must be done within
five seconds of completing Step 2.
Your personal code is now erased and only the factory set 5–digit code
will work.
Anti-scan feature
If an incorrect code has been entered 7 times (35 consecutive button
presses), the keypad will go into an anti-scan mode. This mode disables
the keypad for one minute and the keypad lamp will flash during this
time.
2006 F-250/350/450/550(f23)
Owners Guide (post-2002-fmt)
USA(fus)
Locks and Security
86
Page 87 of 312
The anti-scan feature will turn off after:
•one minute of keypad inactivity.
•pressing the
control on the remote entry transmitter.
•the ignition is turned to the 4 (ON) position.
Unlocking and locking the doors using keyless entry
To unlock the driver’s door,enter the factory set 5-digit code or your
personal code. Each number must be pressed within five seconds of each
other. The interior lamps will illuminate after entering a valid keypad
entry code.
To unlock all doors,press the 3•4 control within five seconds.
To lock all doors,press the 7•8 and the 9•0 at the same time. You
do notneed to enter the keypad code first.Note:The interior lamps
will turn off.
Autolock (if equipped)
This feature automatically locks all vehicle doors when the following
conditions are met:
•the ignition key is in the 4 (ON) position,
•all the doors are closed,
•the brake is pressed before reaching 5 mph (8 km/h), and
•the vehicle is traveling more than 5 mph (8 km/h).
Relock
The autolock feature repeats when the following conditions are met:
•the vehicle’s speed is less than 5 mph (8 km/h),
•any door is opened then closed while the ignition is in the 4 (ON)
position,
•the brake is pressed before reaching 5 mph (8 km/h), and
•the vehicle is traveling more than 5 mph (8 km/h).
To deactivate/reactivate the autolock feature using the keypad
Your vehicle comes with the autolock feature activated. To
deactivate/reactivate this feature:
1. Ensure that the anti-theft system is not armed.
2. Turn the ignition to the 3 (OFF) position.
2006 F-250/350/450/550(f23)
Owners Guide (post-2002-fmt)
USA(fus)
Locks and Security
87
Page 88 of 312
3. Close all the doors, liftgate and cargo doors.
4. Enter the 5-digit entry code.
5. Press and hold the 7•8. While holding the 7•8, press and release
the 3•4.
6. Release the 7•8.
The horn will chirp once when the system has been successfully
deactivated.
The horn will chirp twice (one short and one long chirp) when the
system has been successfully reactivated.
To deactivate/reactivate the autolock feature using the power door
unlock control
You must complete Steps 1-7 within 30 seconds or the procedure will
have to be repeated. If the procedure needs to be repeated, you must
wait 30 seconds.
1. Insert the key and turn the ignition to the 4 (ON) position.
2. Press the power door unlock control three times.
3. Turn the ignition from the 4 (ON) position to the 3 (OFF) position.
4. Press the power door unlock control three times.
5. Turn the ignition back to the 4 (ON) position. The horn will chirp.
6. Press the unlock control, then press the lock control. The horn will
chirp once if autolock was deactivated or twice (one short and one long
chirp) if autolock was activated.Note:Pressing the power door
UNLOCK/LOCK button again will toggle between activating and
deactivating the autolock feature.
7. Turn the ignition to the 3 (OFF) position. The horn will chirp once to
confirm the procedure is complete.
2006 F-250/350/450/550(f23)
Owners Guide (post-2002-fmt)
USA(fus)
Locks and Security
88
Page 95 of 312
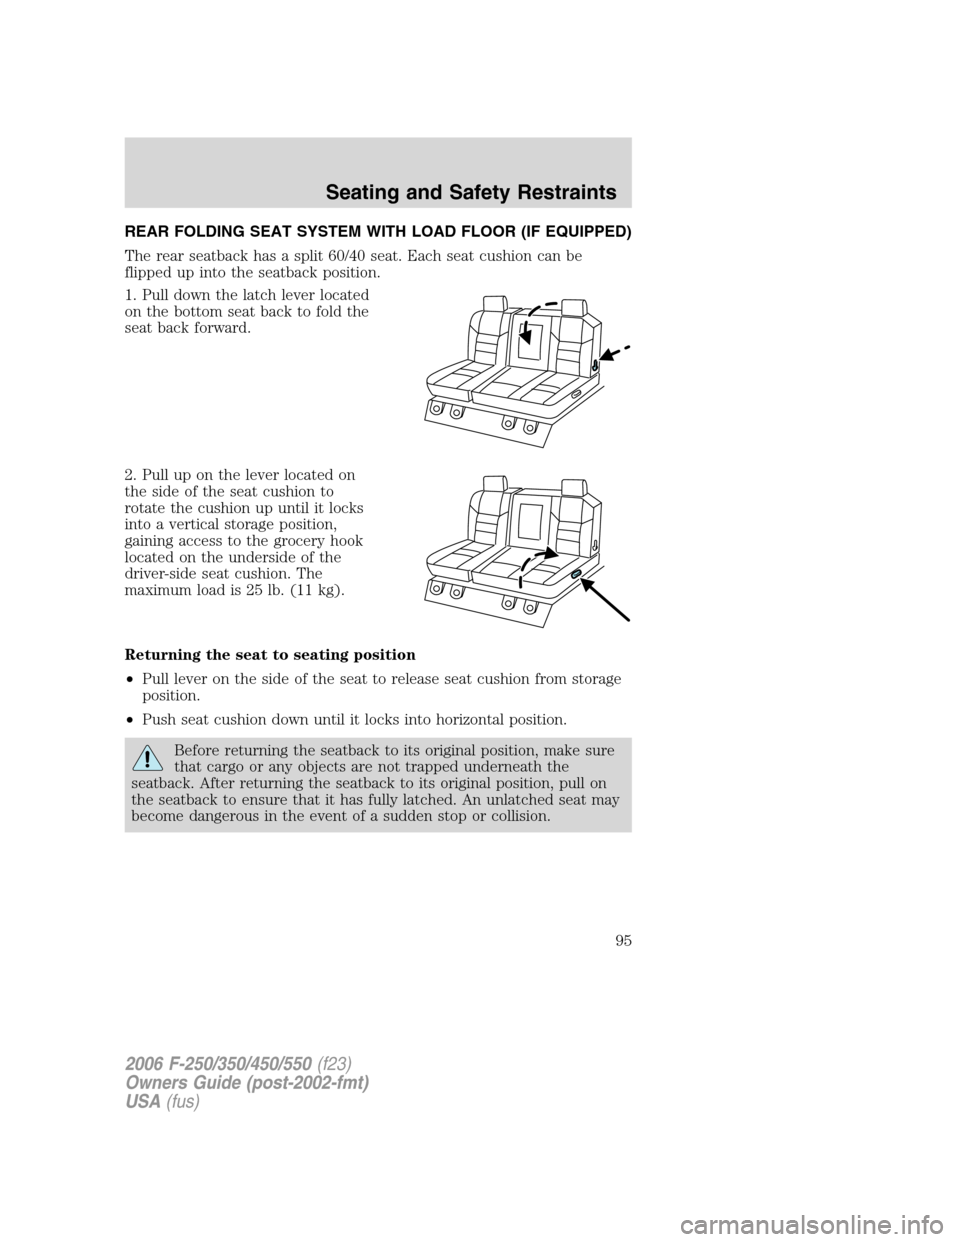
REAR FOLDING SEAT SYSTEM WITH LOAD FLOOR (IF EQUIPPED)
The rear seatback has a split 60/40 seat. Each seat cushion can be
flipped up into the seatback position.
1. Pull down the latch lever located
on the bottom seat back to fold the
seat back forward.
2. Pull up on the lever located on
the side of the seat cushion to
rotate the cushion up until it locks
into a vertical storage position,
gaining access to the grocery hook
located on the underside of the
driver-side seat cushion. The
maximum load is 25 lb. (11 kg).
Returning the seat to seating position
•Pull lever on the side of the seat to release seat cushion from storage
position.
•Push seat cushion down until it locks into horizontal position.
Before returning the seatback to its original position, make sure
that cargo or any objects are not trapped underneath the
seatback. After returning the seatback to its original position, pull on
the seatback to ensure that it has fully latched. An unlatched seat may
become dangerous in the event of a sudden stop or collision.
2006 F-250/350/450/550(f23)
Owners Guide (post-2002-fmt)
USA(fus)
Seating and Safety Restraints
95
Page 96 of 312
To gain access to the cupholders
and tray, pull down on the armrest.
To gain access to the 60/40 load
floor, store the cushion in the
upright locked position. Pull up on
the straps located at the sides of the
load floor, and rotate forward until
resting on the carpet.
SAFETY RESTRAINTS
Safety restraints precautions
Always drive and ride with your seatback upright and the lap
belt snug and low across the hips.
To reduce the risk of injury, make sure children sit in the back
seat where they can be properly restrained.
Never let a passenger hold a child on his or her lap while the
vehicle is moving. The passenger cannot protect the child from
injury in a collision.
All occupants of the vehicle, including the driver, should always
properly wear their safety belts, even when an air bag
supplemental restraint system (SRS) is provided.
2006 F-250/350/450/550(f23)
Owners Guide (post-2002-fmt)
USA(fus)
Seating and Safety Restraints
96
Page 98 of 312
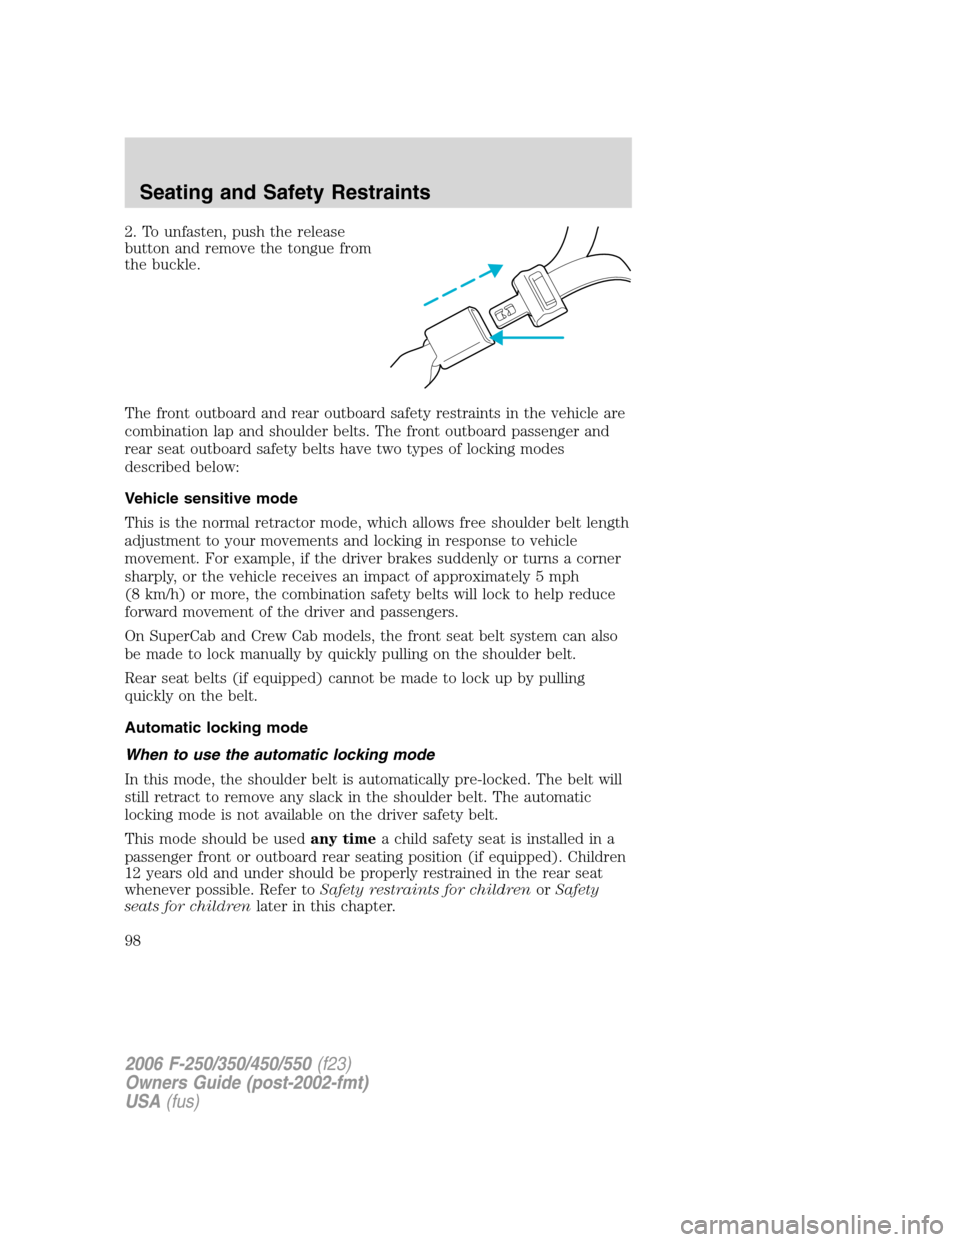
2. To unfasten, push the release
button and remove the tongue from
the buckle.
The front outboard and rear outboard safety restraints in the vehicle are
combination lap and shoulder belts. The front outboard passenger and
rear seat outboard safety belts have two types of locking modes
described below:
Vehicle sensitive mode
This is the normal retractor mode, which allows free shoulder belt length
adjustment to your movements and locking in response to vehicle
movement. For example, if the driver brakes suddenly or turns a corner
sharply, or the vehicle receives an impact of approximately 5 mph
(8 km/h) or more, the combination safety belts will lock to help reduce
forward movement of the driver and passengers.
On SuperCab and Crew Cab models, the front seat belt system can also
be made to lock manually by quickly pulling on the shoulder belt.
Rear seat belts (if equipped) cannot be made to lock up by pulling
quickly on the belt.
Automatic locking mode
When to use the automatic locking mode
In this mode, the shoulder belt is automatically pre-locked. The belt will
still retract to remove any slack in the shoulder belt. The automatic
locking mode is not available on the driver safety belt.
This mode should be usedany timea child safety seat is installed in a
passenger front or outboard rear seating position (if equipped). Children
12 years old and under should be properly restrained in the rear seat
whenever possible. Refer toSafety restraints for childrenorSafety
seats for childrenlater in this chapter.
2006 F-250/350/450/550(f23)
Owners Guide (post-2002-fmt)
USA(fus)
Seating and Safety Restraints
98
Page 99 of 312
How to use the automatic locking mode
•Buckle the combination lap and
shoulder belt.
•Grasp the shoulder portion and
pull downward until the entire
belt is pulled out.
•Allow the belt to retract. As the belt retracts, you will hear a clicking
sound. This indicates the safety belt is now in the automatic locking
mode.
How to disengage the automatic locking mode
Disconnect the combination lap/shoulder belt and allow it to retract
completely to disengage the automatic locking mode and activate the
vehicle sensitive (emergency) locking mode.
After any vehicle collision, the front passenger and rear outboard
seat belt systems must be checked by your authorized dealer to
verify that the “automatic locking retractor” feature for child seats is
still functioning properly. In addition, all seat belts should be checked
for proper function.
2006 F-250/350/450/550(f23)
Owners Guide (post-2002-fmt)
USA(fus)
Seating and Safety Restraints
99
Page 100 of 312
BELT AND RETRACTOR ASSEMBLY MUST BE REPLACED if
the seat belt assembly “automatic locking retractor” feature or
any other seat belt function is not operating properly when checked
according to the procedures in theWorkshop Manual. Failure to
replace the belt and retractor assembly could increase the risk of
injury in collisions.
Energy Management Feature
•This vehicle has a seat belt system with an energy management
feature at the front outboard seating positions to help further reduce
the risk of injury in the event of a head-on collision.
•The front outboard seat belt systems have a retractor assembly that is
designed to pay out webbing in a controlled manner. This feature is
designed to help reduce the belt force acting on the occupant’s chest.
Front safety belt height adjustment
The front outboard seats are equipped with belt height adjusters.
If your vehicle is equipped with seat integrated restraints (SIR), you will
not have a safety belt height adjuster.
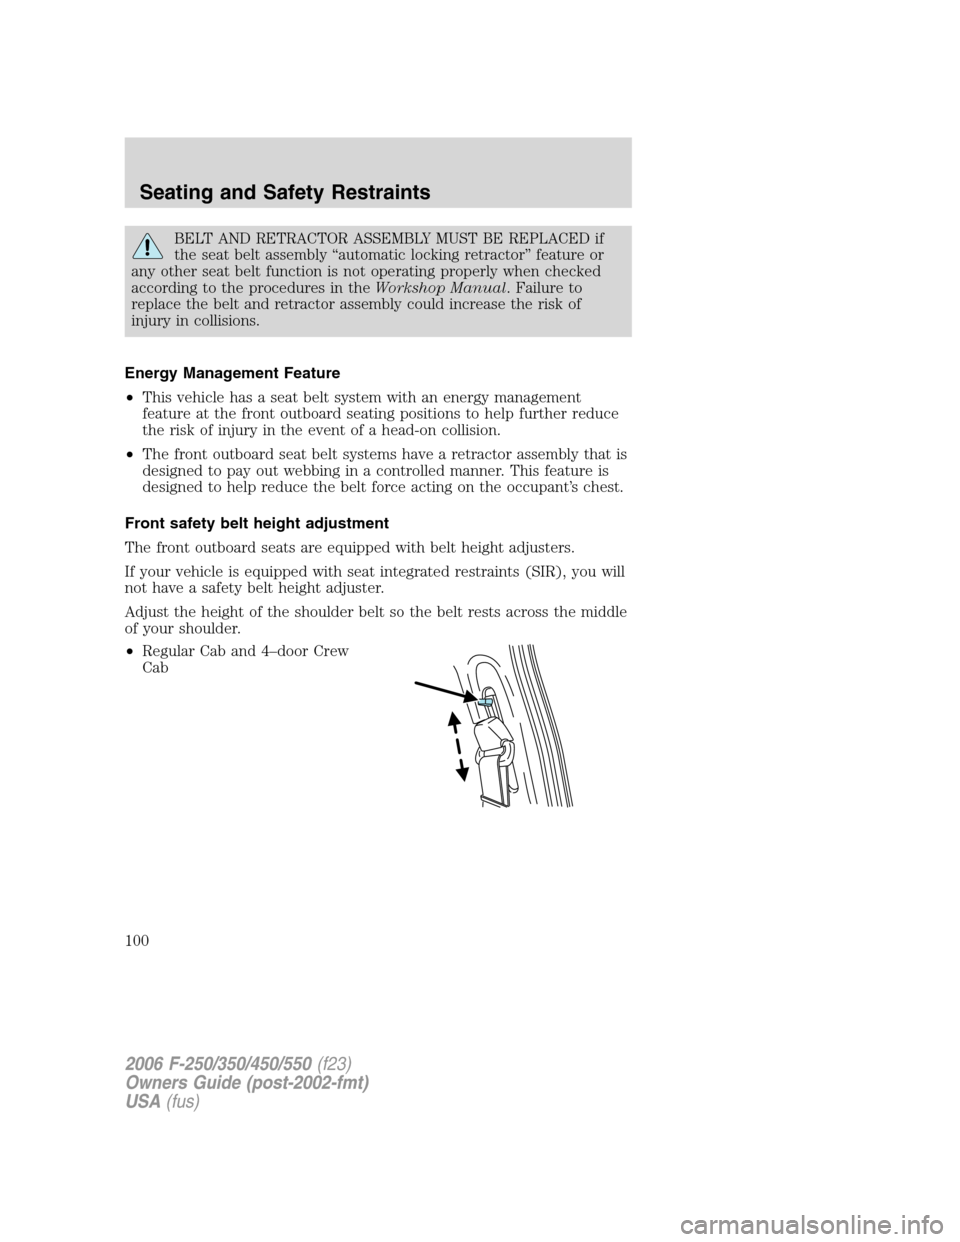
Adjust the height of the shoulder belt so the belt rests across the middle
of your shoulder.
•Regular Cab and 4–door Crew
Cab
2006 F-250/350/450/550(f23)
Owners Guide (post-2002-fmt)
USA(fus)
Seating and Safety Restraints
100