Page 144 of 198
Downloaded from www.Manualslib.com manuals search engine Mount for rear towing eye(vehicles without a sportsbumper)A
Mount for rear towing eye(vehicles with a sportsbumper)B
To use the rear towing eye on4/5-door ST models, remove thecentre rear grille. Insert a screwdriver,or suitable equivalent, into the grilleand pull it off. Replace the grille whenthe rear towing eye is not in use.
TRANSPORTING THE
VEHICLE
Vehicles with an automatictransmission
WARNING
Never tow a vehicle with anautomatic transmission fasterthan 50 km/h (30 mph) or furtherthan 50 kilometres (30 miles).
If it is necessary to tow the vehicle agreater distance, the drive wheelsmust be lifted clear off the ground.
142
Vehicle recoveryE73301 E73304
Page 145 of 198

Downloaded from www.Manualslib.com manuals search engine TOWING THE VEHICLE
ON FOUR WHEELS
All vehicles
WARNING
The ignition key must be set toposition II when the vehicle isbeing towed so that the steering,direction indicator lamps and brakelamps are fully operational. Since thebrake servo and the power steeringdo not operate with the engineswitched off, you will need to exertgreater force to the brake pedal andsteering wheel. Make allowances forthe increased braking distance andheavier steering.
Note: Observe the safetyregulations that are valid for towinga vehicle depending on country.
When towing always drive off slowlyand smoothly without jerking thetowing vehicle. Excessive tow ropetension could result in damage toeither vehicle.
Vehicles with an automatictransmission
WARNINGS
Never tow a vehicle with anautomatic transmission fasterthan 50 km/h (30 mph) or furtherthan 50 kilometres (30 miles). SeeTransporting the vehicle (page 142).
Never tow a vehicle backwardswith the drive wheels turning. Ifthis instruction is not adhered to, itcould cause damage to theautomatic transmission.
When a vehicle with an automatictransmission is towed, the selectorlever must be in position N (neutral).
143
Vehicle recovery
Page 162 of 198

Downloaded from www.Manualslib.com manuals search engine CHANGING A ROAD
WHEEL
Spare wheel
All vehicles
WARNING
Use only approved wheel andtyre sizes. Using other sizescould damage the vehicle and willmake the National Type Approvalinvalid.
Vehicles with a temporaryspare wheel
WARNINGS
If the spare wheel differs fromthe other fitted wheels, theserules must be followed:
Do not exceed 80 km/h (50mph).
Drive the shortest possibledistances.
Do not fit more than one sparewheel on your vehicle at anyone time.
Do not use snow chains on thistype of wheel.
Do not drive through anautomatic car wash.
Vehicles with stability assist
Vehicles with ESP may exhibit someunusual driving characteristics. Switchthe ESP off. See Using stabilitycontrol (page 120).
4-door and 5-door
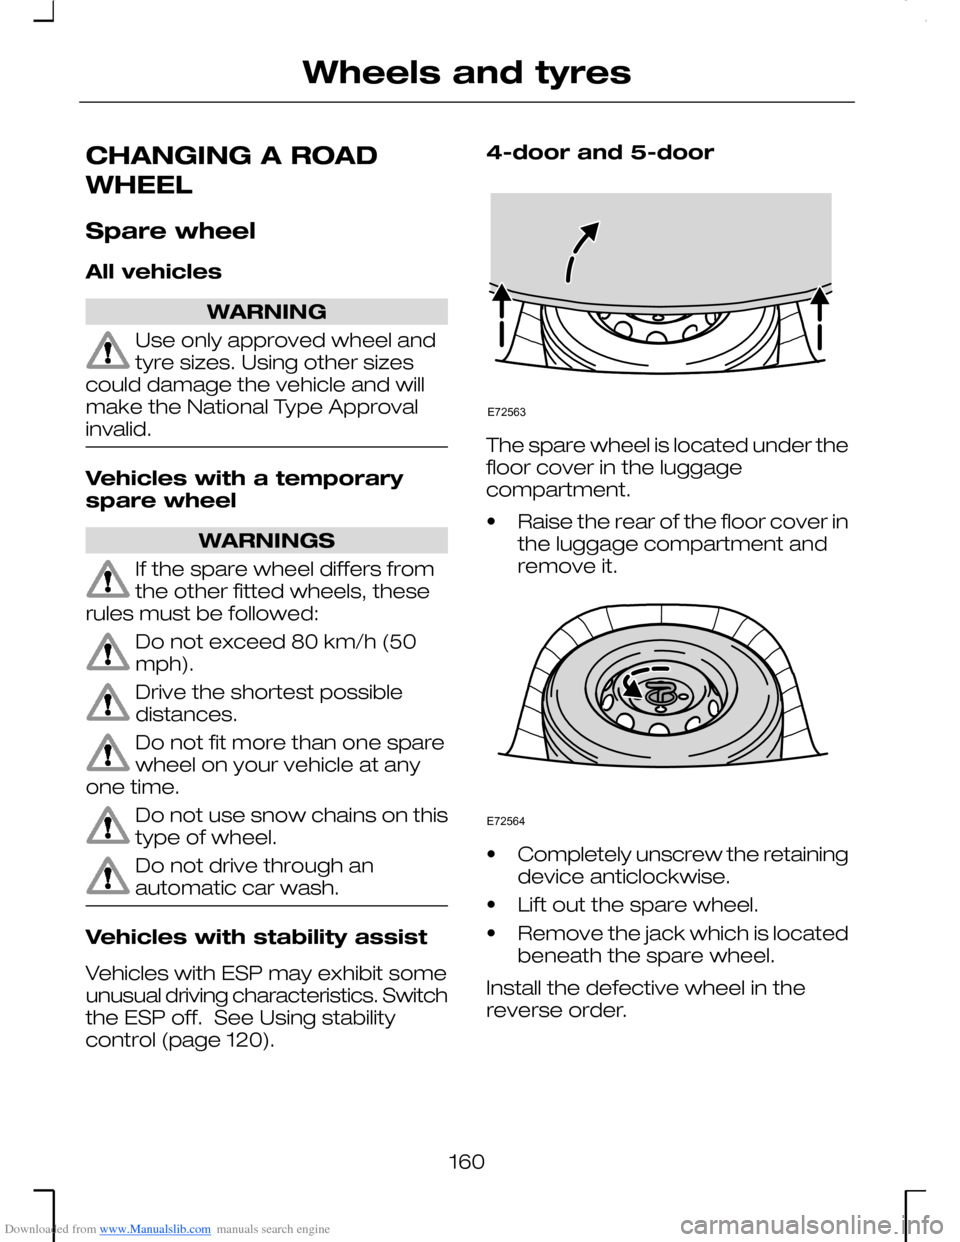
The spare wheel is located under thefloor cover in the luggagecompartment.
•Raise the rear of the floor cover inthe luggage compartment andremove it.
•Completely unscrew the retainingdevice anticlockwise.
•Lift out the spare wheel.
•Remove the jack which is locatedbeneath the spare wheel.
Install the defective wheel in thereverse order.
160
Wheels and tyresE72563 E72564
Page 163 of 198
Downloaded from www.Manualslib.com manuals search engine Estate
The spare wheel is located under thefloor cover in the luggagecompartment.
•Roll up the carpet in the luggagecompartment, raise the floorcover and remove it.
•Completely unscrew the retainingdevice anticlockwise.
•Lift out the spare wheel.
•Remove the jack which is locatedbeneath the spare wheel.
Install the defective wheel in thereverse order.
Vehicle jack
Note: When reinstalling, use the righthole in the jack for the jack retainingdevice and the left hole for the sparewheel retaining device.
The jack and wheelbrace are locatedin the spare wheel well. Unscrew theretaining device by turninganticlockwise, and remove the jackwith the wheelbrace.
Jacking points
All vehicles
161
Wheels and tyresE72565 E72566 E72567 E72568
Page 164 of 198
Downloaded from www.Manualslib.com manuals search engine WARNING
The jack must only be used onthe jacking points specifiedbelow.
The front jacking point 1 is locatedapproximately 27 cm from the frontend of the sill. If you open up theOwner’s handbook, it isapproximately 27 cm wide.
The rear jacking point 2 is locatedapproximately 10 cm from the rearend of the sill.
Vehicles with side skirts
On vehicles with side skirts, the covermust be removed before placing thejack under the vehicle.
To remove pull the lower edge of thecover and rotate upwards, then pullit off.
Additional jacking points
WARNINGS
Positioning at other points maycause considerable damage tothe body, steering, suspension,engine, braking system and fuel lines.
Vehicles with side skirts requirespecial rubber pads to avoiddamaging the side skirts or thevehicle.
Points 1 and 2 can be used for trolleyjacks, workshop hoists or jack stands.
162
Wheels and tyresE72569 E72570
Page 165 of 198

Downloaded from www.Manualslib.com manuals search engine Removing a wheel
All vehicles
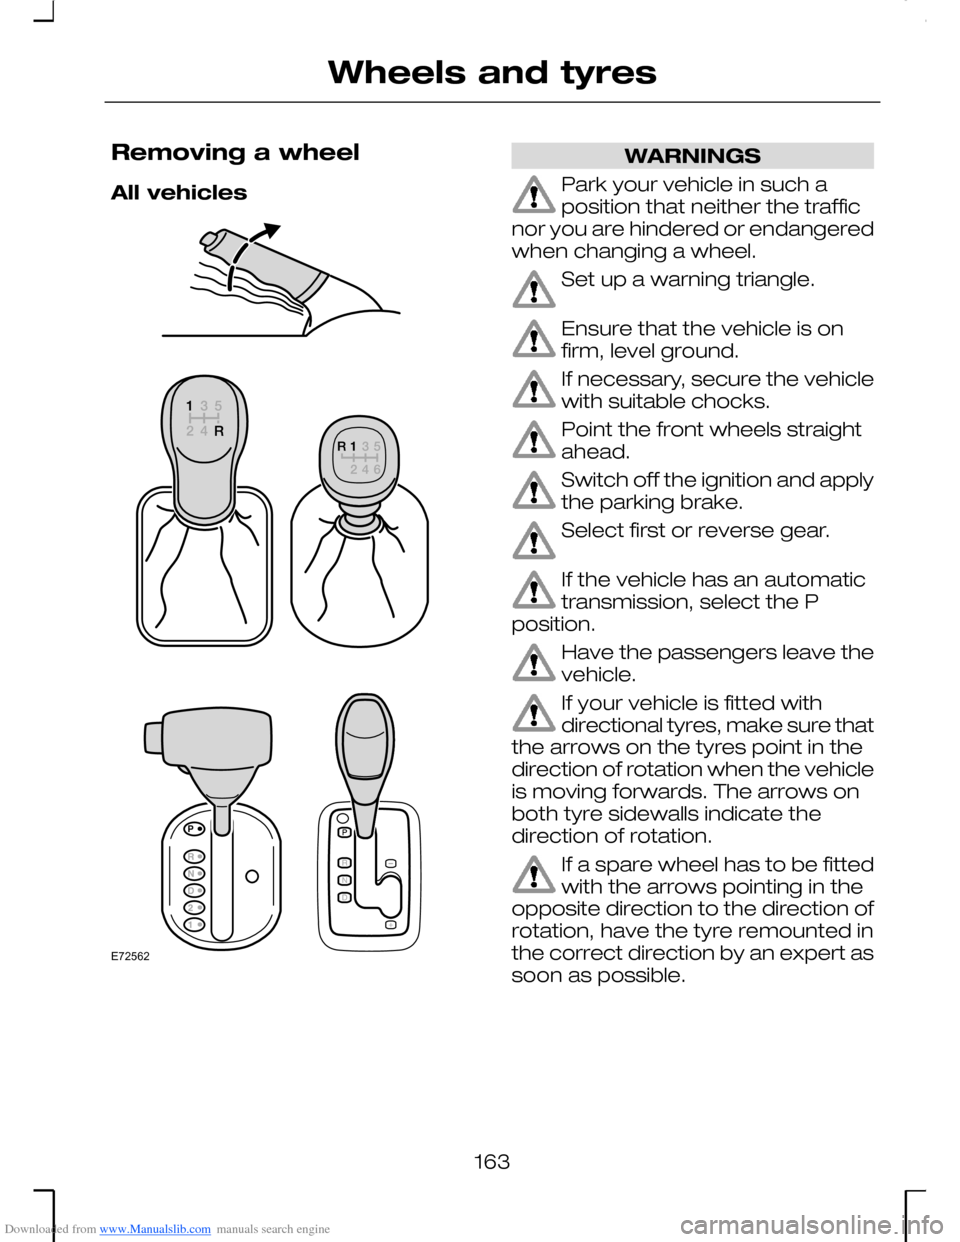
WARNINGS
Park your vehicle in such aposition that neither the trafficnor you are hindered or endangeredwhen changing a wheel.
Set up a warning triangle.
Ensure that the vehicle is onfirm, level ground.
If necessary, secure the vehiclewith suitable chocks.
Point the front wheels straightahead.
Switch off the ignition and applythe parking brake.
Select first or reverse gear.
If the vehicle has an automatictransmission, select the Pposition.
Have the passengers leave thevehicle.
If your vehicle is fitted withdirectional tyres, make sure thatthe arrows on the tyres point in thedirection of rotation when the vehicleis moving forwards. The arrows onboth tyre sidewalls indicate thedirection of rotation.
If a spare wheel has to be fittedwith the arrows pointing in theopposite direction to the direction ofrotation, have the tyre remounted inthe correct direction by an expert assoon as possible.
163
Wheels and tyresE72562
Page 166 of 198
Downloaded from www.Manualslib.com manuals search engine The vehicle jack must only beused to carry out wheelchanges. Do not work underneaththe vehicle when it is supported onlyby the jack.
•Insert the flat end of thewheelbrace between the rim andthe hub cover and twist carefullyto remove the cover.
Vehicles with locking wheelnuts
Note: Replacement locks and wheelnuts can be obtained using the wheelnut reference number certificate.
•Insert the nut key onto the lockingnut.
All vehicles
WARNING
The jack must be appliedvertically to the jacking point.
•Slacken the wheel nuts.
•Place the jack with the whole footarea on firm ground.
164
Wheels and tyresE72571 E72572
Page 167 of 198

Downloaded from www.Manualslib.com manuals search engine •Jack up the vehicle until the wheelis clear of the ground.
•Unscrew and remove the wheelnuts and take off the wheel.
Fitting a wheel
Vehicles with alloy wheels
WARNING
Alloy wheels must never besecured using wheel nuts forsteel wheels.
Note: The wheel nuts of alloy wheelscan also be used for the steel sparewheel for a short time (maximum twoweeks).
All vehicles
•Push the wheel onto the wheelstuds. Screw on the wheel nutsand secure in a clockwisedirection ensuring that thetapered end of the wheel nuts isfacing the wheel.
•Lower the vehicle and remove thejack.
Vehicles with locking wheelnuts
•Insert the nut key onto the lockingnut.
All vehicles
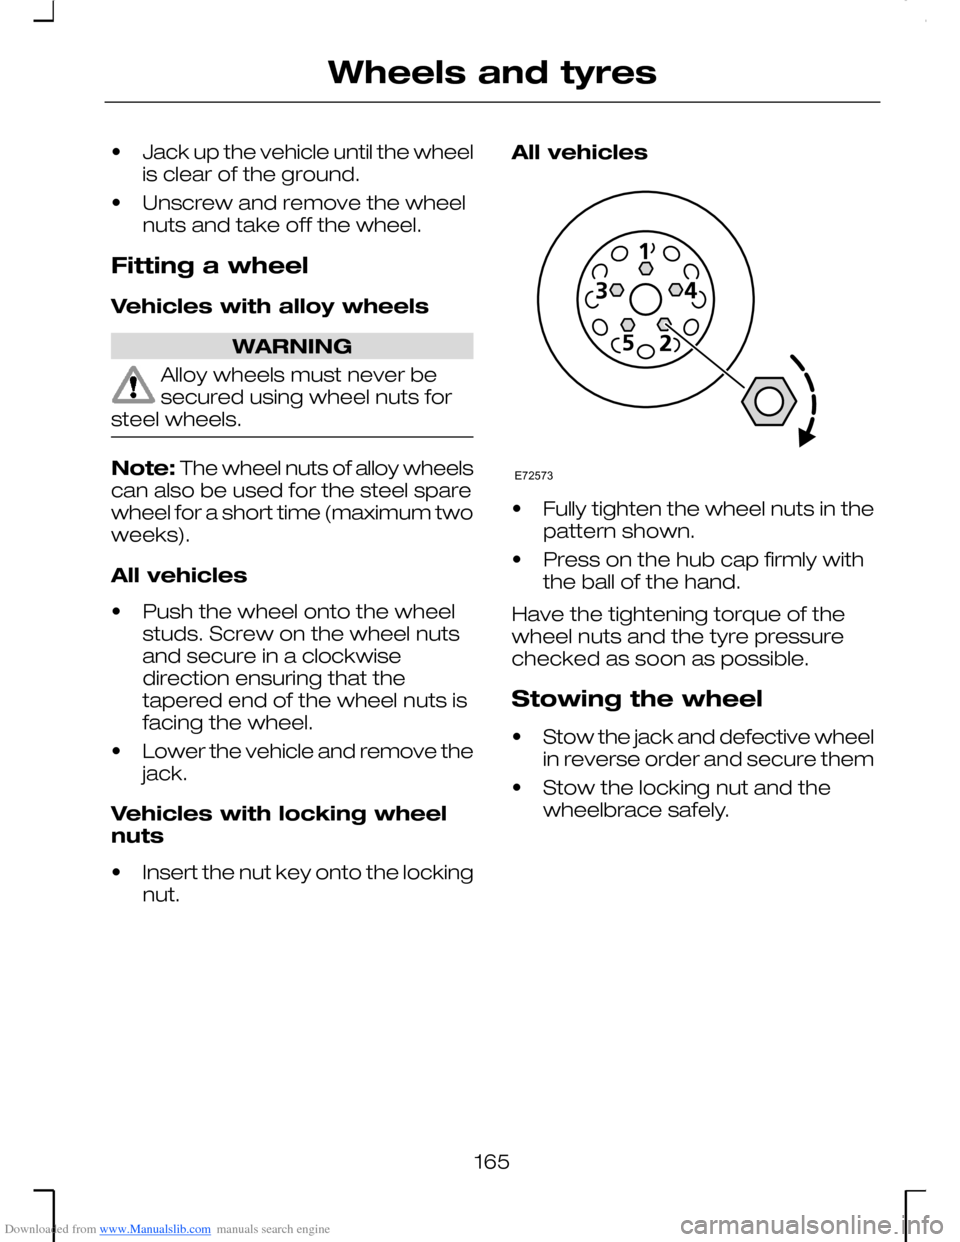
•Fully tighten the wheel nuts in thepattern shown.
•Press on the hub cap firmly withthe ball of the hand.
Have the tightening torque of thewheel nuts and the tyre pressurechecked as soon as possible.
Stowing the wheel
•Stow the jack and defective wheelin reverse order and secure them
•Stow the locking nut and thewheelbrace safely.
165
Wheels and tyresE72573