2006 CHEVROLET MALIBU ECO mode
[x] Cancel search: ECO modePage 97 of 442
The system will arm either:
Thirty seconds after all the doors and the
liftgate (MAXX) are closed or,
Sixty seconds with any door open
If you press the lock button on the remote keyless
entry transmitter a second time while all the doors and
liftgate are closed, the system will arm immediately.
The system will still arm in sixty seconds if a door
or liftgate is open. When the opened door or liftgate
is closed, it will also become armed.
The security light, located on the instrument panel
cluster, will turn on to indicate that arming has been
initiated. Once the system is armed, the security light
will �ash once every three seconds.
If the security light is �ashing twice per second, this
means that a door or the liftgate is open.
If you do not want to arm the system, you may lock
the car with the lock knob on the doors.
Disarming the System
You can disarm the system by doing any one of the
following:
Press the remote keyless entry transmitter unlock
button.
Turn the ignition on.
Turn the driver’s door key lock cylinder
counterclockwise.
Once the system is disarmed, the security light will
stop �ashing.
How the System Alarm is Activated
If the system is armed, it can be activated by either:
Opening the driver’s door or liftgate (MAXX model).
This will cause a ten second pre-alarm chirp followed
by a thirty second full alarm of horn and lights.
Opening any other door. This will immediately cause
a full alarm of horn and lights for thirty seconds.
When an alarm event has �nished, the system will
re-arm itself automatically.
2-19
Page 107 of 442
Electronic Range Select Mode
This feature allows you to limit higher gears by
selecting a maximum gear range when the shift lever
is in LOW (L). The button for this mode is located on the
left of the shift lever knob.
When the shift lever is �rst moved into LOW (L),
the display in the instrument panel shows L3. Press
the (−) end of the button on the shift lever once for
L2 and once more for L1. Press the plus (+) end of
the button once each to return to L2, L3 and L4. The
shift lever must be moved back to DRIVE (D) to turn
off the electronic range select mode.
L4 (LOW 4):This position does not limit gears, but
provides more engine braking, and lower fuel economy,
than DRIVE (D). The actual gear is determined by
throttle and vehicle speed.
L3 (LOW 3/DRIVE 3):This position prevents fourth gear
operation. Actual gear is determined by throttle and
vehicle speed.L2 (LOW 2/DRIVE 2):This position prevents third and
fourth gear operation. Actual gear is determined by
throttle and vehicle speed. If you shift from L3 to L2 at
vehicle speeds exceeding 80 mph (110 km/h), the
transaxle will not shift into L2 gear until the vehicle is
going slow enough.
L1 (LOW 1/DRIVE 1):This position prevents
SECOND (2), THIRD (3), and FOURTH (4) gear
operation. If you shift from L2 to the L1 position at
vehicle speeds exceeding 40 mph (65 km/h), the
transaxle will not shift into L1 gear until the vehicle
is going slow enough.
2-29
Page 111 of 442
SECOND (2) Gear Start Feature
When accelerating your vehicle from a stop in
snowy and icy conditions, you may want to shift
into SECOND (2) gear. A higher gear allows you
to gain more traction on slippery surfaces.
With the DSC feature, the vehicle can be set to pull
away in SECOND (2) gear.
1. Move the shift lever from AUTOMATIC
OVERDRIVE (D) into the MANUAL MODE (M).
2. With the vehicle stopped, press (+) end of the
button to select SECOND (2) gear. The vehicle
will start from a stop position in SECOND (2) gear.
3. Once moving select the desired drive gear.
Parking Brake
To set the parking brake, push down the parking
brake pedal with your left foot. If the ignition is on, the
brake system warning light will come on. SeeBrake
System Warning Light on page 3-36.
To release the parking brake, hold the regular brake
pedal down with your right foot. Push down momentarily
on the parking brake pedal with your left foot until you
feel the pedal release. If the parking brake is not
released when you begin to drive, the brake system
warning light will be on and a chime will sound warning
you that the parking brake is still on.
The PUSH PARK PEDAL message will also appear in
the Driver Information Center (DIC) to remind you
to release the parking brake. SeeDIC Warnings
and Messages on page 3-50.
Notice:Driving with the parking brake on can
overheat the brake system and cause premature
wear or damage to brake system parts. Verify that
the parking brake is fully released and the brake
warning light is off before driving.
If you are towing a trailer and are parking on a hill,
seeTowing a Trailer on page 4-42.
2-33
Page 125 of 442
Universal Home Remote System
Operation
Do not use the Universal Home Remote with any garage
door opener that does not have the stop and reverse
feature. This includes any garage door opener model
manufactured before April 1, 1982. If you have a newer
garage door opener with rolling codes, please be sure to
follow Steps 6 through 8 to complete the programming of
your Universal Home Remote Transmitter.
Read the instructions completely before attempting to
program the Universal Home Remote. Because of
the steps involved, it may be helpful to have another
person available to assist you in the programming steps.
Keep the original hand-held transmitter for use in
other vehicles as well as for future Universal Home
Remote programming. It is also recommended that
upon the sale of the vehicle, the programmed Universal
Home Remote buttons should be erased for security
purposes. See “Erasing Universal Home Remote
Buttons” later in this section or, for assistance, see
Customer Assistance Offices on page 7-4.
Be sure that people and objects are clear of the garage
door or gate operator you are programming. When
programming a garage door, it is advised to park outside
of the garage.It is recommended that a new battery be installed in
your hand-held transmitter for quicker and more
accurate transmission of the radio-frequency signal.Programming Universal Home Remote
Follow these steps to program up to three channels:
1. Press and hold down the two outside Universal
Home Remote buttons, releasing only when the
Universal Home Remote indicator light begins
to �ash, after 20 seconds. Do not hold down the
buttons for longer than 30 seconds and do not
repeat this step to program a second and/or
third hand-held transmitter to the remaining
two Universal Home Remote buttons.
2. Position the end of your hand-held transmitter
about 1 to 3 inches (3 to 8 cm) away from the
Universal Home Remote buttons while keeping
the indicator light in view.
3. Simultaneously press and hold both the desired
Universal Home Remote button and the hand-held
transmitter button. Do not release the buttons
until Step 4 has been completed.
Some entry gates and garage door openers
may require you to substitute Step 3 with the
procedure noted in “Gate Operator and Canadian
Programming” later in this section.
2-47
Page 127 of 442
Gate Operator and Canadian
Programming
Canadian radio-frequency laws require transmitter
signals to time out or quit after several seconds of
transmission. This may not be long enough for Universal
Home Remote to pick up the signal during programming.
Similarly, some U.S. gate operators are manufactured
to time out in the same manner.
If you live in Canada, or you are having difficulty
programming a gate operator or garage door opener
by using the “Programming Universal Home Remote”
procedures, regardless of where you live, replace
Step 3 under “Programming Universal Home Remote”
with the following:
Continue to press and hold the Universal Home Remote
button while you press and release every two seconds
(cycle) the hand-held transmitter button until the
frequency signal has been successfully accepted by the
Universal Home Remote. The Universal Home Remote
indicator light will �ash slowly at �rst and then rapidly.
Proceed with Step 4 under “Programming Universal
Home Remote” to complete.
Using Universal Home Remote
Press and hold the appropriate Universal Home Remote
button for at least half of a second. The indicator light
will come on while the signal is being transmitted.
Erasing Universal Home Remote
Buttons
To erase programming from the three Universal Home
Remote buttons do the following:
1. Press and hold down the two outside buttons until
the indicator light begins to �ash, after 20 seconds.
Do not hold the two outside buttons for longer
than 30 seconds.
2. Release both buttons.
The Universal Home Remote is now in the training
(learning) mode and can be programmed at any time
beginning with Step 2 under “Programming Universal
Home Remote” shown earlier in this section.
Individual buttons cannot be erased, but they can be
reprogrammed. See “Reprogramming a Single Universal
Home Remote Button” following this section.
2-49
Page 142 of 442
If the wiper blades are frozen to the windshield, carefully
loosen or thaw them. If your blades do become damaged,
get new blades or blade inserts.
Heavy snow or ice can overload your wiper motor.
A circuit breaker will stop the motor until it cools. Clear
away snow or ice to prevent an overload. If the
motor gets stuck, turn the wipers off, clear away the
snow or ice, and then turn the wipers back on.
As an added safety feature, if the wipers are on for
more than 15 seconds, the vehicle’s headlamps will turn
on automatically. They will turn off 15 seconds after
the wipers are turned off.
Windshield Washer
To wash your windshield, push in the button at the end
of the stalk until the washers begin.
{CAUTION:
In freezing weather, do not use your washer
until the windshield is warmed. Otherwise the
washer �uid can form ice on the windshield,
blocking your vision.When you release the button, the washers will stop, but
the wipers will continue to wipe for about three cycles
and will either stop or will resume the speed you
were using before.
Rear Window Wiper/Washer
(MAXX Model)
{CAUTION:
In freezing weather, do not use your washer
until the windshield is warmed. Otherwise the
washer �uid can form ice on the windshield,
blocking your vision.
3-10
Page 151 of 442
Instrument Panel Brightness
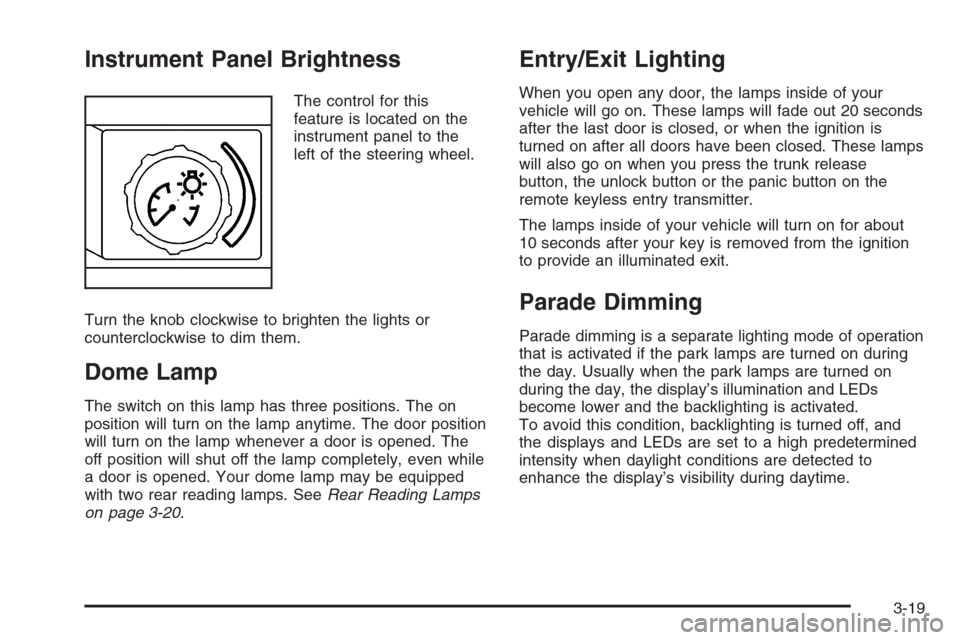
The control for this
feature is located on the
instrument panel to the
left of the steering wheel.
Turn the knob clockwise to brighten the lights or
counterclockwise to dim them.
Dome Lamp
The switch on this lamp has three positions. The on
position will turn on the lamp anytime. The door position
will turn on the lamp whenever a door is opened. The
off position will shut off the lamp completely, even while
a door is opened. Your dome lamp may be equipped
with two rear reading lamps. SeeRear Reading Lamps
on page 3-20.
Entry/Exit Lighting
When you open any door, the lamps inside of your
vehicle will go on. These lamps will fade out 20 seconds
after the last door is closed, or when the ignition is
turned on after all doors have been closed. These lamps
will also go on when you press the trunk release
button, the unlock button or the panic button on the
remote keyless entry transmitter.
The lamps inside of your vehicle will turn on for about
10 seconds after your key is removed from the ignition
to provide an illuminated exit.
Parade Dimming
Parade dimming is a separate lighting mode of operation
that is activated if the park lamps are turned on during
the day. Usually when the park lamps are turned on
during the day, the display’s illumination and LEDs
become lower and the backlighting is activated.
To avoid this condition, backlighting is turned off, and
the displays and LEDs are set to a high predetermined
intensity when daylight conditions are detected to
enhance the display’s visibility during daytime.
3-19
Page 156 of 442
Temperature Control:Turn the center knob clockwise
or counterclockwise to increase or decrease the
temperature inside your vehicle.
When it’s cold outside 0°F (−18°C) or lower, use the
engine coolant heater, if equipped, to provide warmer air
faster to your vehicle. An engine coolant heater warms
the coolant that the engine uses to provide heat to
warm the inside of your vehicle. For more information,
seeEngine Coolant Heater on page 2-26.
#(Air Conditioning):Press this button to turn the air
conditioning system on or off. When the air conditioning
button is pressed, an indicator light will come on to
let you know that air conditioning is activated.
On hot days, open the windows to let hot inside air
escape; then close them. This helps to reduce the
time it takes for your vehicle to cool down. It also
helps the system to operate more efficiently.For quick cool down on hot days, do the following:
1. Select the vent mode.
2. Select the highest fan speed.
3. Select air conditioning.
4. Select the recirculation mode.
5. Select the coolest temperature.
Using these settings together for long periods of time
may cause the air inside of your vehicle to become too
dry. To prevent this from happening, after the air in
your vehicle has cooled, turn the recirculation mode off.
The air-conditioning system removes moisture from
the air, so you may sometimes notice a small amount
of water dripping underneath your vehicle while idling
or after turning off the engine. This is normal.
3-24