2006 CHEVROLET MALIBU buttons
[x] Cancel search: buttonsPage 10 of 442
Heated Seats
Your vehicle may have heated front seats.
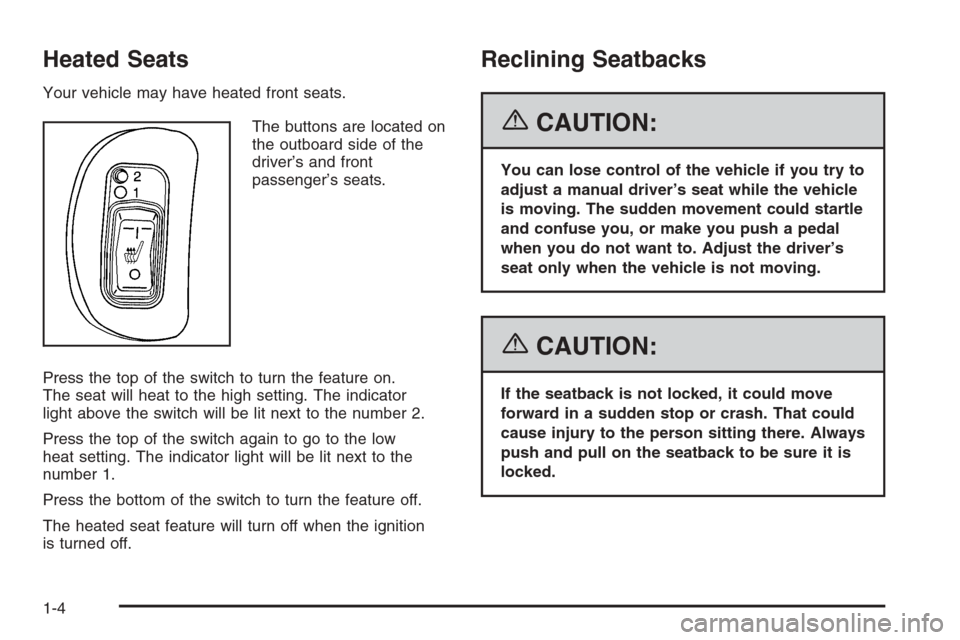
The buttons are located on
the outboard side of the
driver’s and front
passenger’s seats.
Press the top of the switch to turn the feature on.
The seat will heat to the high setting. The indicator
light above the switch will be lit next to the number 2.
Press the top of the switch again to go to the low
heat setting. The indicator light will be lit next to the
number 1.
Press the bottom of the switch to turn the feature off.
The heated seat feature will turn off when the ignition
is turned off.
Reclining Seatbacks
{CAUTION:
You can lose control of the vehicle if you try to
adjust a manual driver’s seat while the vehicle
is moving. The sudden movement could startle
and confuse you, or make you push a pedal
when you do not want to. Adjust the driver’s
seat only when the vehicle is not moving.
{CAUTION:
If the seatback is not locked, it could move
forward in a sudden stop or crash. That could
cause injury to the person sitting there. Always
push and pull on the seatback to be sure it is
locked.
1-4
Page 98 of 442
How to Turn Off the System Alarm
To turn off the system alarm, do one of the following:
Press the lock button on the remote keyless
entry transmitter. The system will then re-arm itself.
Press the unlock button on the remote keyless entry
transmitter. This will also disarm the system.
Insert the key in the driver’s door key lock cylinder
and turn it counterclockwise. This will also disarm
the system.
Insert the key in the ignition and turn it on. This will
also disarm the system.
How to Detect a Tamper Condition
If you hear three chirps when you press the unlock or
lock buttons on the remote keyless entry transmitter,
it means that the content theft security system
alarm was triggered previously.
PASS-Key®III+
The PASS-Key®III+ system operates on a radio
frequency subject to Federal Communications
Commission (FCC) Rules and with Industry Canada.
This device complies with Part 15 of the FCC Rules.
Operation is subject to the following two conditions:
1. This device may not cause harmful interference.
2. This device must accept any interference received,
including interference that may cause undesired
operation.
This device complies with RSS-210 of Industry Canada.
Operation is subject to the following two conditions:
1. This device may not cause interference.
2. This device must accept any interference received,
including interference that may cause undesired
operation of the device.
Changes or modi�cations to this system by other than
an authorized service facility could void authorization to
use this equipment.
PASS-Key
®III+ uses a radio frequency transponder
in the key that matches a decoder in your vehicle.
2-20
Page 116 of 442
Mirrors
Manual Rearview Mirror
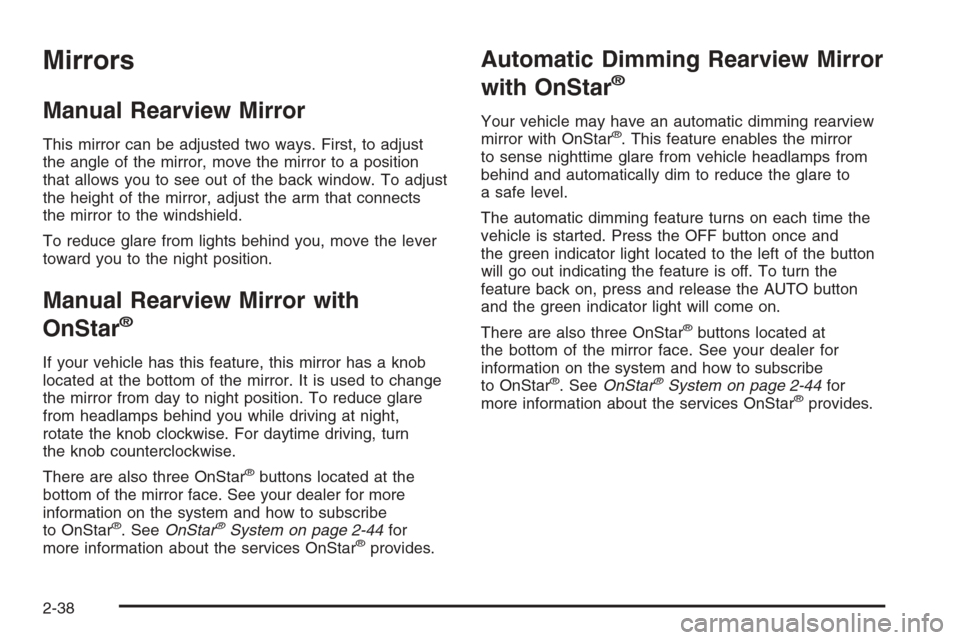
This mirror can be adjusted two ways. First, to adjust
the angle of the mirror, move the mirror to a position
that allows you to see out of the back window. To adjust
the height of the mirror, adjust the arm that connects
the mirror to the windshield.
To reduce glare from lights behind you, move the lever
toward you to the night position.
Manual Rearview Mirror with
OnStar
®
If your vehicle has this feature, this mirror has a knob
located at the bottom of the mirror. It is used to change
the mirror from day to night position. To reduce glare
from headlamps behind you while driving at night,
rotate the knob clockwise. For daytime driving, turn
the knob counterclockwise.
There are also three OnStar
®buttons located at the
bottom of the mirror face. See your dealer for more
information on the system and how to subscribe
to OnStar
®. SeeOnStar®System on page 2-44for
more information about the services OnStar®provides.
Automatic Dimming Rearview Mirror
with OnStar
®
Your vehicle may have an automatic dimming rearview
mirror with OnStar®. This feature enables the mirror
to sense nighttime glare from vehicle headlamps from
behind and automatically dim to reduce the glare to
a safe level.
The automatic dimming feature turns on each time the
vehicle is started. Press the OFF button once and
the green indicator light located to the left of the button
will go out indicating the feature is off. To turn the
feature back on, press and release the AUTO button
and the green indicator light will come on.
There are also three OnStar
®buttons located at
the bottom of the mirror face. See your dealer for
information on the system and how to subscribe
to OnStar
®. SeeOnStar®System on page 2-44for
more information about the services OnStar®provides.
2-38
Page 117 of 442
Automatic Dimming Rearview Mirror
with OnStar
®and Compass
Your vehicle may have an automatic dimming rearview
mirror with a compass and OnStar®controls. For
more information about OnStar®, seeOnStar®System
on page 2-44.
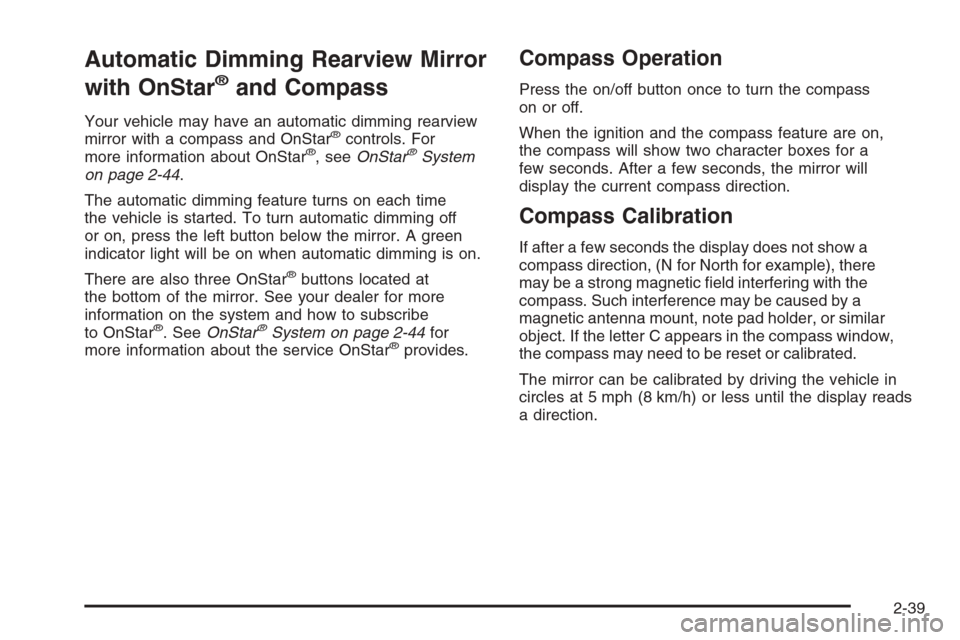
The automatic dimming feature turns on each time
the vehicle is started. To turn automatic dimming off
or on, press the left button below the mirror. A green
indicator light will be on when automatic dimming is on.
There are also three OnStar
®buttons located at
the bottom of the mirror. See your dealer for more
information on the system and how to subscribe
to OnStar
®. SeeOnStar®System on page 2-44for
more information about the service OnStar®provides.
Compass Operation
Press the on/off button once to turn the compass
on or off.
When the ignition and the compass feature are on,
the compass will show two character boxes for a
few seconds. After a few seconds, the mirror will
display the current compass direction.
Compass Calibration
If after a few seconds the display does not show a
compass direction, (N for North for example), there
may be a strong magnetic �eld interfering with the
compass. Such interference may be caused by a
magnetic antenna mount, note pad holder, or similar
object. If the letter C appears in the compass window,
the compass may need to be reset or calibrated.
The mirror can be calibrated by driving the vehicle in
circles at 5 mph (8 km/h) or less until the display reads
a direction.
2-39
Page 125 of 442
Universal Home Remote System
Operation
Do not use the Universal Home Remote with any garage
door opener that does not have the stop and reverse
feature. This includes any garage door opener model
manufactured before April 1, 1982. If you have a newer
garage door opener with rolling codes, please be sure to
follow Steps 6 through 8 to complete the programming of
your Universal Home Remote Transmitter.
Read the instructions completely before attempting to
program the Universal Home Remote. Because of
the steps involved, it may be helpful to have another
person available to assist you in the programming steps.
Keep the original hand-held transmitter for use in
other vehicles as well as for future Universal Home
Remote programming. It is also recommended that
upon the sale of the vehicle, the programmed Universal
Home Remote buttons should be erased for security
purposes. See “Erasing Universal Home Remote
Buttons” later in this section or, for assistance, see
Customer Assistance Offices on page 7-4.
Be sure that people and objects are clear of the garage
door or gate operator you are programming. When
programming a garage door, it is advised to park outside
of the garage.It is recommended that a new battery be installed in
your hand-held transmitter for quicker and more
accurate transmission of the radio-frequency signal.Programming Universal Home Remote
Follow these steps to program up to three channels:
1. Press and hold down the two outside Universal
Home Remote buttons, releasing only when the
Universal Home Remote indicator light begins
to �ash, after 20 seconds. Do not hold down the
buttons for longer than 30 seconds and do not
repeat this step to program a second and/or
third hand-held transmitter to the remaining
two Universal Home Remote buttons.
2. Position the end of your hand-held transmitter
about 1 to 3 inches (3 to 8 cm) away from the
Universal Home Remote buttons while keeping
the indicator light in view.
3. Simultaneously press and hold both the desired
Universal Home Remote button and the hand-held
transmitter button. Do not release the buttons
until Step 4 has been completed.
Some entry gates and garage door openers
may require you to substitute Step 3 with the
procedure noted in “Gate Operator and Canadian
Programming” later in this section.
2-47
Page 126 of 442
4. The indicator light will �ash slowly at �rst and then
rapidly after Universal Home Remote successfully
receives the frequency signal from the hand-held
transmitter. Release both buttons.
5. Press and hold the newly-trained Universal Home
Remote button and observe the indicator light.
If the indicator light stays on constantly,
programming is complete and your device should
activate when the Universal Home Remote button
is pressed and released.
To program the remaining two Universal Home
Remote buttons, begin with Step 2 under
“Programming Universal Home Remote.”
Do not repeat Step 1 as this will erase all of
the programmed channels.
If the indicator light blinks rapidly for two seconds
and then turns to a constant light, continue with
Steps 6 through 8 following to complete the
programming of a rolling-code equipped device,
most commonly, a garage door opener.
6. Locate in the garage, the garage door opener
receiver (motor-head unit). Locate the “Learn”
or “Smart” button. This can usually be found
where the hanging antenna wire is attached to
the motor-head unit.7. Firmly press and release the “Learn” or “Smart”
button. The name and color of the button may
vary by manufacturer.
You will have 30 seconds to start Step 8.
8. Return to the vehicle. Firmly press and hold the
programmed Universal Home Remote button
for two seconds, then release. Repeat the
press/hold/release sequence a second time, and
depending on the brand of the garage door opener,
or other rolling code device, repeat this sequence
a third time to complete the programming.
The Universal Home Remote should now activate
your rolling-code equipped device.
To program the remaining two Universal Home
Remote buttons, begin with Step 2 of “Programming
Universal Home Remote.” You do not want to repeat
Step 1, as this will erase all previous programming
from the Universal Home Remote buttons.
2-48
Page 127 of 442
Gate Operator and Canadian
Programming
Canadian radio-frequency laws require transmitter
signals to time out or quit after several seconds of
transmission. This may not be long enough for Universal
Home Remote to pick up the signal during programming.
Similarly, some U.S. gate operators are manufactured
to time out in the same manner.
If you live in Canada, or you are having difficulty
programming a gate operator or garage door opener
by using the “Programming Universal Home Remote”
procedures, regardless of where you live, replace
Step 3 under “Programming Universal Home Remote”
with the following:
Continue to press and hold the Universal Home Remote
button while you press and release every two seconds
(cycle) the hand-held transmitter button until the
frequency signal has been successfully accepted by the
Universal Home Remote. The Universal Home Remote
indicator light will �ash slowly at �rst and then rapidly.
Proceed with Step 4 under “Programming Universal
Home Remote” to complete.
Using Universal Home Remote
Press and hold the appropriate Universal Home Remote
button for at least half of a second. The indicator light
will come on while the signal is being transmitted.
Erasing Universal Home Remote
Buttons
To erase programming from the three Universal Home
Remote buttons do the following:
1. Press and hold down the two outside buttons until
the indicator light begins to �ash, after 20 seconds.
Do not hold the two outside buttons for longer
than 30 seconds.
2. Release both buttons.
The Universal Home Remote is now in the training
(learning) mode and can be programmed at any time
beginning with Step 2 under “Programming Universal
Home Remote” shown earlier in this section.
Individual buttons cannot be erased, but they can be
reprogrammed. See “Reprogramming a Single Universal
Home Remote Button” following this section.
2-49
Page 137 of 442
The main components of your instrument panel are the following:
A. Side Window Outlets. SeeClimate Control System
on page 3-22.
B. Turn Signal/Multifunction Lever. SeeTurn
Signal/Multifunction Lever on page 3-7.
C. Cruise Controls (If Equipped). SeeCruise Control
on page 3-11.
D. Instrument Panel Cluster. SeeInstrument Panel
Cluster on page 3-33.
E. Windshield Wiper/Washer Lever. SeeWindshield
Wipers on page 3-9.
F. Ignition Switch. SeeIgnition Positions on page 2-23.
G. Hazard Warning Flasher. SeeHazard Warning
Flashers on page 3-6.
H. Center Air Outlets. SeeClimate Control System
on page 3-22.
I. Audio System. SeeAudio System(s) on page 3-54.
J. Climate Control System. SeeClimate Control
System on page 3-22.
K. Glove Box. SeeGlove Box on page 2-50.
L. Side Air Outlets. SeeClimate Control System
on page 3-22.
M. Adjustable Pedal Buttons (If Equipped). See
Adjustable Throttle and Brake Pedal on page 2-25.N. Instrument Panel Brightness Control. SeeInstrument
Panel Brightness on page 3-19.
O. Storage Compartment.
P. Fog Lamps (If Equipped). SeeFog Lamps on
page 3-18.
Q. Hood Release. SeeHood Release on page 5-11.
R. Parking Brake. SeeParking Brake on page 2-33.
S. Horn. SeeHorn on page 3-6.
T. Audio Steering Wheel Controls. SeeAudio Steering
Wheel Controls (Three Spoke) on page 3-105or
Audio Steering Wheel Controls (Four Spoke)
on page 3-106.
U. Accessory Power Outlet. SeeAccessory Power
Outlet(s) on page 3-21.
V. Shift Lever. SeeShifting Into Park (P) on page 2-34.
W. Center Console Storage Compartment. See
Center Console Storage Area on page 2-50.
X. Traction Control Button or Enhanced Traction
System Button (If Equipped). SeeTraction Control
System (TCS) on page 4-9 Enhanced Traction
System (ETS) on page 4-11.
Y. Rear Wiper/Washer Controls (If Equipped).
SeeWindshield Washer on page 3-10.
3-5