2006 CHEVROLET MALIBU ignition
[x] Cancel search: ignitionPage 100 of 442
To program the new key do the following:
1. Verify that the new key has “+” stamped on it.
2. Insert the already programmed key in the ignition
and start the engine. If the engine will not start,
see your dealer for service.
3. After the engine has started, turn the key to off,
and remove the key.
4. Insert the key to be programmed and turn it to on
within �ve seconds of removing the original key.
5. The security light will turn off once the key has
been programmed. It may not be apparent that
the security light went on due to how quickly
the key is programmed.
6. Repeat Steps 1 through 5 if additional keys are
to be programmed.
If you are ever driving and the security light comes on
and stays on, you may be able to restart your engine if
you turn it off. Your PASS-Key
®III + system, however,
is not working properly and must be serviced by
your dealer. Your vehicle is not protected by the
PASS-Key
®III + system at this time.
If you lose or damage your PASS-Key
®III + key,
see your GM dealer or a locksmith who can service
PASS-Key
®III + to have a new key made.
Starting and Operating Your
Vehicle
New Vehicle Break-In
Notice:Your vehicle does not need an elaborate
break-in. But it will perform better in the long run if
you follow these guidelines:
Do not drive at any one constant speed, fast or
slow, for the �rst 500 miles (805 km). Do not
make full-throttle starts. Avoid downshifting to
brake, or slow, the vehicle.
Avoid making hard stops for the �rst 200 miles
(322 km) or so. During this time your new brake
linings are not yet broken in. Hard stops with new
linings can mean premature wear and earlier
replacement. Follow this breaking-in guideline
every time you get new brake linings.
Do not tow a trailer during break-in. SeeTowing
a Trailer on page 4-42for the trailer towing
capabilities of your vehicle and more
information.
Following break-in, engine speed and load can be
gradually increased.
2-22
Page 101 of 442
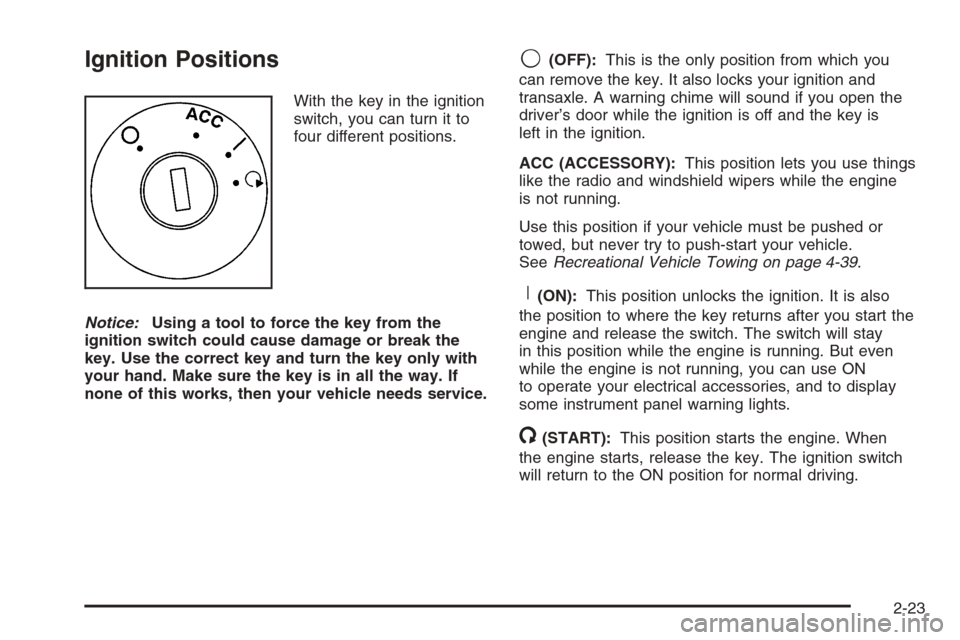
Ignition Positions
With the key in the ignition
switch, you can turn it to
four different positions.
Notice:Using a tool to force the key from the
ignition switch could cause damage or break the
key. Use the correct key and turn the key only with
your hand. Make sure the key is in all the way. If
none of this works, then your vehicle needs service.
9(OFF):This is the only position from which you
can remove the key. It also locks your ignition and
transaxle. A warning chime will sound if you open the
driver’s door while the ignition is off and the key is
left in the ignition.
ACC (ACCESSORY):This position lets you use things
like the radio and windshield wipers while the engine
is not running.
Use this position if your vehicle must be pushed or
towed, but never try to push-start your vehicle.
SeeRecreational Vehicle Towing on page 4-39.
R(ON):This position unlocks the ignition. It is also
the position to where the key returns after you start the
engine and release the switch. The switch will stay
in this position while the engine is running. But even
while the engine is not running, you can use ON
to operate your electrical accessories, and to display
some instrument panel warning lights.
/(START):This position starts the engine. When
the engine starts, release the key. The ignition switch
will return to the ON position for normal driving.
2-23
Page 102 of 442
Retained Accessory Power (RAP)
Your vehicle is equipped with a Retained Accessory
Power (RAP) feature which will allow the radio to
continue to work up to 10 minutes after the ignition is
turned to OFF.
Your radio will work when the ignition key is in ON or
ACC. Once the key is turned from ON to OFF, the radio
will continue to work for up to 10 minutes or until the
driver’s door is opened.
Your vehicle’s sunroof and heated seats, if equipped,
and the power windows also work this way. They
will turn off after 10 minutes or if any door is opened.
Starting the Engine
Move your shift lever to PARK (P) or NEUTRAL (N).
Your engine will not start in any other position — that
is a safety feature. To restart when you are already
moving, use NEUTRAL (N) only.
Notice:Shifting into PARK (P) with the vehicle
moving could damage the transaxle. Shift into
PARK (P) only when your vehicle is stopped.
1. With your foot off the accelerator pedal, turn the
ignition key to START. When the engine starts,
let go of the key. The idle speed will go down as
your engine gets warm.Your vehicle has a Computer-Controlled Cranking
System. This feature assists in starting the engine
and protects the electrical system. If the ignition key
is turned to the START position, and then released
when the engine begins cranking, the engine will
continue cranking until the vehicle starts or until it
exceeds the maximum cranking time allowed,
approximately 15 seconds to prevent cranking motor
damage. To prevent starter-motor gear damage,
this system also prevents cranking if the engine is
already running. The engine cranking can be stopped
by turning the ignition switch to the ACC or OFF.
Notice:Repeated attempts to start your engine, will
cause your battery to drain much sooner. Excessive
heat can damage your starter motor. Wait about
15 seconds between each try to help avoid draining
your battery or damaging your starter.
2. If it does not start within 10 seconds, turn the key
back from START to ON. Holding the key in START
will not cause the vehicle to keep cranking. Then
push the accelerator pedal all the way to the �oor,
while you turn the ignition key to START. When the
engine starts, let go of the key and let up on the
accelerator pedal. Wait about 15 seconds between
each try.
2-24
Page 103 of 442
Use the same instructions as stated earlier, when
starting your engine in very cold weather. It is
recommended that you use the engine block heater,
if equipped, to assist in starting your engine in very
cold weather.
Notice:Your engine is designed to work with the
electronics in your vehicle. If you add electrical
parts or accessories, you could change the way the
engine operates. Before adding electrical equipment,
check with your dealer. If you do not, your engine
might not perform properly. Any resulting damage
would not be covered by your vehicle’s warranty.
Adjustable Throttle and Brake Pedal
If your vehicle has this feature, you can change the
position of the throttle and brake pedals. This feature is
designed for shorter drivers, since the pedals cannot
move farther away from the standard position, but can
move rearward for better pedal reach.
The vehicle must be in PARK (P) or have the ignition off
for this feature to operate. If the system senses unusually
high resistance while the pedals are being adjusted, such
as a driver’s foot pushing the brake pedal, it is designed
to disable the switch. Simply remove the obstruction and
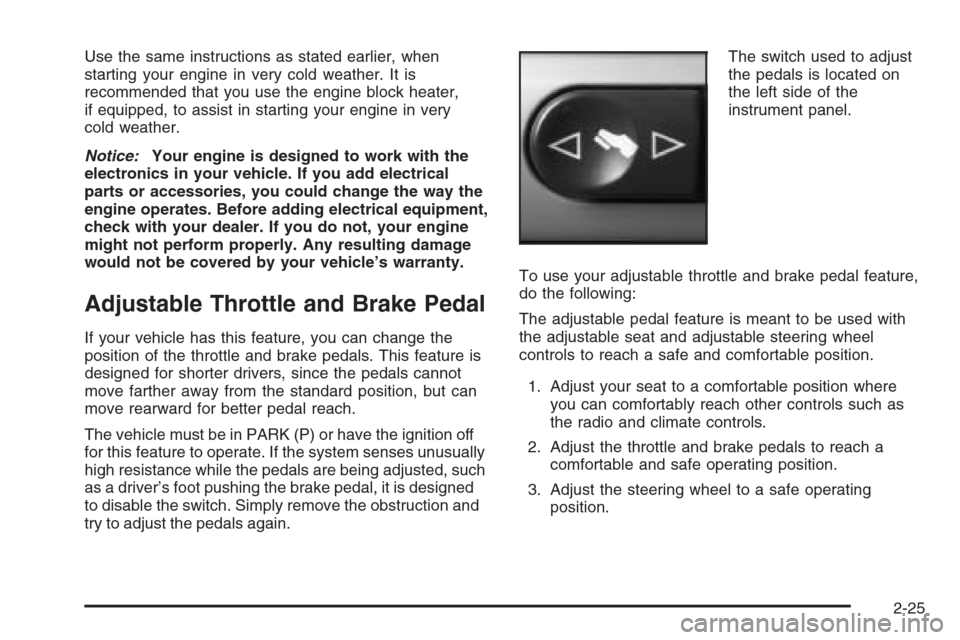
try to adjust the pedals again.The switch used to adjust
the pedals is located on
the left side of the
instrument panel.
To use your adjustable throttle and brake pedal feature,
do the following:
The adjustable pedal feature is meant to be used with
the adjustable seat and adjustable steering wheel
controls to reach a safe and comfortable position.
1. Adjust your seat to a comfortable position where
you can comfortably reach other controls such as
the radio and climate controls.
2. Adjust the throttle and brake pedals to reach a
comfortable and safe operating position.
3. Adjust the steering wheel to a safe operating
position.
2-25
Page 109 of 442
Make sure the shift lever is fully in PARK (P) before
starting the engine. Your vehicle has an automatic
transaxle shift lock control system. You have to apply
your regular brake and press the shift lever button
before you can shift from PARK (P) while the ignition
key is in ON. If you cannot shift out of PARK (P), ease
pressure on the shift lever and push the shift lever
all the way into PARK (P) as you maintain brake
application. Then move the shift lever into another gear.
SeeShifting Out of Park (P) on page 2-35later in
this section.
REVERSE (R):Use this gear to back up.
Notice:Shifting to REVERSE (R) while your vehicle
is moving forward could damage the transaxle.
The repairs would not be covered by your warranty.
Shift to REVERSE (R) only after your vehicle is
stopped.
To rock your vehicle back and forth to get out of snow,
ice, or sand without damaging your transaxle, see
If Your Vehicle is Stuck in Sand, Mud, Ice, or Snow on
page 4-32.
NEUTRAL (N):In this position, your engine does not
connect with the wheels. To restart when you are
already moving, use NEUTRAL (N) only. Also, use
NEUTRAL (N) when your vehicle is being towed.
{CAUTION:
Shifting into a drive gear while your engine is
running at high speed is dangerous. Unless
your foot is �rmly on the brake pedal, your
vehicle could move very rapidly. You could
lose control and hit people or objects. Do not
shift into a drive gear while your engine is
running at high speed.
Notice:Shifting out of PARK (P) or NEUTRAL (N)
while the engine is running at high speed may
damage the transaxle. The repairs would not be
covered by your warranty. Be sure the engine is not
running at high speeds when shifting your vehicle.
AUTOMATIC OVERDRIVE (D):This position is for
normal driving. If you need more power for passing,
and you are:
Going less than 35 mph (55 km/h), push your
accelerator pedal about halfway down.
Going about 35 mph (55 km/h) or more, push
the accelerator all the way down.
MANUAL MODE (M):This position, allows you to
change gears similar to a manual transaxle. If your
vehicle has this feature, see Driver Shift Control (DSC).
2-31
Page 111 of 442
SECOND (2) Gear Start Feature
When accelerating your vehicle from a stop in
snowy and icy conditions, you may want to shift
into SECOND (2) gear. A higher gear allows you
to gain more traction on slippery surfaces.
With the DSC feature, the vehicle can be set to pull
away in SECOND (2) gear.
1. Move the shift lever from AUTOMATIC
OVERDRIVE (D) into the MANUAL MODE (M).
2. With the vehicle stopped, press (+) end of the
button to select SECOND (2) gear. The vehicle
will start from a stop position in SECOND (2) gear.
3. Once moving select the desired drive gear.
Parking Brake
To set the parking brake, push down the parking
brake pedal with your left foot. If the ignition is on, the
brake system warning light will come on. SeeBrake
System Warning Light on page 3-36.
To release the parking brake, hold the regular brake
pedal down with your right foot. Push down momentarily
on the parking brake pedal with your left foot until you
feel the pedal release. If the parking brake is not
released when you begin to drive, the brake system
warning light will be on and a chime will sound warning
you that the parking brake is still on.
The PUSH PARK PEDAL message will also appear in
the Driver Information Center (DIC) to remind you
to release the parking brake. SeeDIC Warnings
and Messages on page 3-50.
Notice:Driving with the parking brake on can
overheat the brake system and cause premature
wear or damage to brake system parts. Verify that
the parking brake is fully released and the brake
warning light is off before driving.
If you are towing a trailer and are parking on a hill,
seeTowing a Trailer on page 4-42.
2-33
Page 112 of 442
Shifting Into Park (P)
{CAUTION:
It can be dangerous to get out of your vehicle
if the shift lever is not fully in PARK (P) with
the parking brake �rmly set. Your vehicle can
roll. If you have left the engine running, the
vehicle can move suddenly. You or others
could be injured. To be sure your vehicle will
not move, even when you are on fairly level
ground, use the steps that follow. If you are
pulling a trailer, seeTowing a Trailer on
page 4-42.
1. Hold the brake pedal down with your right foot and
set the parking brake.
2. Move the shift lever into PARK (P) by holding in the
button on the shift lever and pushing the shift lever
all the way toward the front of the vehicle.
3. Turn the ignition key to OFF.
4. Remove the key and take it with you. If you can
leave your vehicle with the ignition key in your
hand, your vehicle is in PARK (P).
Leaving Your Vehicle With the Engine
Running
{CAUTION:
It can be dangerous to leave your vehicle
with the engine running. Your vehicle could
move suddenly if the shift lever is not fully in
PARK (P) with the parking brake �rmly set.
And, if you leave the vehicle with the engine
running, it could overheat and even catch �re.
You or others could be injured. Do not leave
your vehicle with the engine running.
If you have to leave your vehicle with the engine
running, be sure your vehicle is in PARK (P) and your
parking brake is �rmly set before you leave it. After
you have moved the shift lever into PARK (P), hold
the regular brake pedal down. Then, see if you
can move the shift lever away from PARK (P) without
�rst pushing the button.
If you can, it means that the shift lever was not fully
locked in PARK (P).
2-34
Page 117 of 442
Automatic Dimming Rearview Mirror
with OnStar
®and Compass
Your vehicle may have an automatic dimming rearview
mirror with a compass and OnStar®controls. For
more information about OnStar®, seeOnStar®System
on page 2-44.
The automatic dimming feature turns on each time
the vehicle is started. To turn automatic dimming off
or on, press the left button below the mirror. A green
indicator light will be on when automatic dimming is on.
There are also three OnStar
®buttons located at
the bottom of the mirror. See your dealer for more
information on the system and how to subscribe
to OnStar
®. SeeOnStar®System on page 2-44for
more information about the service OnStar®provides.
Compass Operation
Press the on/off button once to turn the compass
on or off.
When the ignition and the compass feature are on,
the compass will show two character boxes for a
few seconds. After a few seconds, the mirror will
display the current compass direction.
Compass Calibration
If after a few seconds the display does not show a
compass direction, (N for North for example), there
may be a strong magnetic �eld interfering with the
compass. Such interference may be caused by a
magnetic antenna mount, note pad holder, or similar
object. If the letter C appears in the compass window,
the compass may need to be reset or calibrated.
The mirror can be calibrated by driving the vehicle in
circles at 5 mph (8 km/h) or less until the display reads
a direction.
2-39