Page 115 of 163
Turn cover1clockwise to
install.Replacing parking-light
bulb
If it is not standing firmly,
the motorcycle could
topple in the course of the
operations described below.
Always make sure that the
motorcycle is stable and
firmly supported.
Make sure the ground is
level and firm and place the
motorcycle on its stand. Switch off the ignition.
Pull off the connector
1be-
neath the headlight.
Remove bulb holder 2from
the headlight housing by
turning it counter-clockwise.
Remove bulb 3from the
bulb holder.
Replace the defective bulb.
Parking-light bulb
W5W / 12 V / 5 W Install bulb
3in bulb sock-
et 2.
Turn the bulb socket clock-
wise to install it in the head-
light housing.
Connect plug 1beneath the
headlight.
Replacing brake light
and rear light bulb
If it is not standing firmly,
the motorcycle could
topple in the course of the
operations described below.
Always make sure that the
7113zMaintenance
Page 116 of 163
motorcycle is stable and
firmly supported.Make sure the ground is
level and firm and place the
motorcycle on its stand.
Switch off the ignition.
Removing the seat ( 53)
Remove screw 1. Pull the bulb housing to the
rear until it is clear of hold-
ers
2.
Turn bulb holder 3counter-
clockwise to remove it from
the bulb housing. Press bulb
4into socket 5
and remove by turning it
counter-clockwise.
Replace the defective bulb.
Bulb of tail light/brake
light
P21W / 12 V / 21 W
7114zMaintenance
Page 117 of 163
Press bulb4into socket 5
and turn it clockwise to in-
stall.
Turn bulb socket 3clock-
wise to install it in the bulb
housing. Seat the bulb housing in
holders
2.
Install screw 1.
Installing the seat ( 54)
Replacing front turn
indicator bulbs
If it is not standing firmly,
the motorcycle could
topple in the course of the
operations described below.
Always make sure that the
motorcycle is stable and
firmly supported.
Make sure the ground is
level and firm and place the
motorcycle on its stand.
Switch off the ignition.
Remove screw 1.
7115zMaintenance
Page 119 of 163
Replacing rear turn
indicator bulbs
If it is not standing firmly,
the motorcycle could
topple in the course of the
operations described below.
Always make sure that the
motorcycle is stable and
firmly supported.
Make sure the ground is
level and firm and place the
motorcycle on its stand.
Switch off the ignition.
Remove screw 1. Pull the glass out of the
turn-indicator housing at the
threaded-fastener side.
Press bulb
2into fitting 3
and remove by turning it
counter-clockwise. Replace the defective bulb.
Rear flashing turn in-
dicator bulbs
R10W / 12 V / 10 W
Press bulb 2into socket 3
and turn it clockwise to in-
stall.
7117zMaintenance
Page 120 of 163

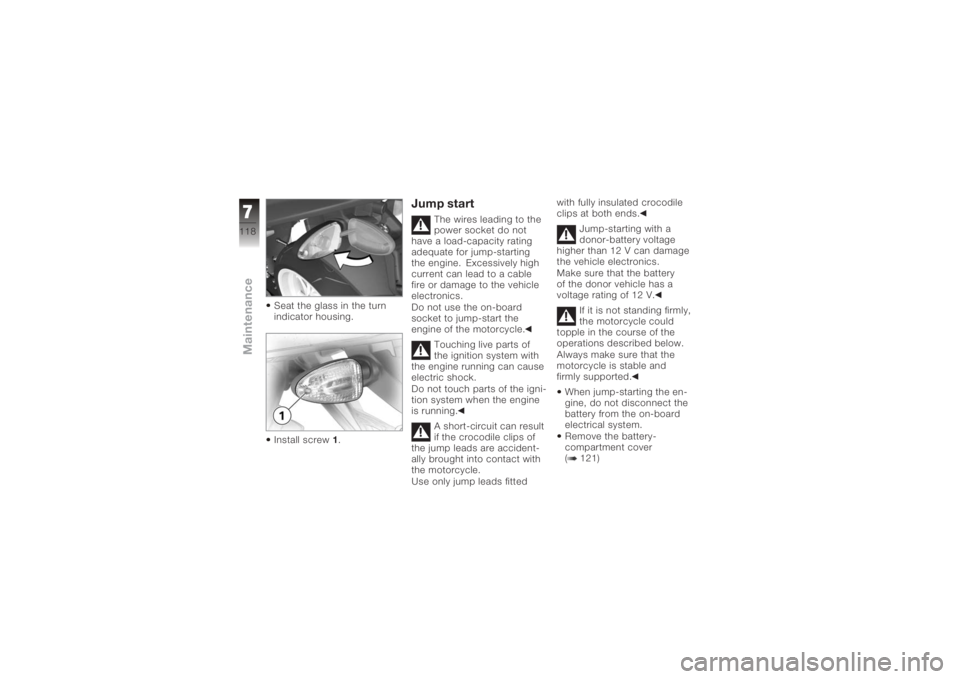
Seat the glass in the turn
indicator housing.
Install screw1.
Jump start
The wires leading to the
power socket do not
have a load-capacity rating
adequate for jump-starting
the engine. Excessively high
current can lead to a cable
fire or damage to the vehicle
electronics.
Do not use the on-board
socket to jump-start the
engine of the motorcycle.
Touching live parts of
the ignition system with
the engine running can cause
electric shock.
Do not touch parts of the igni-
tion system when the engine
is running.
A short-circuit can result
if the crocodile clips of
the jump leads are accident-
ally brought into contact with
the motorcycle.
Use only jump leads fitted with fully insulated crocodile
clips at both ends.
Jump-starting with a
donor-battery voltage
higher than 12 V can damage
the vehicle electronics.
Make sure that the battery
of the donor vehicle has a
voltage rating of 12 V.
If it is not standing firmly,
the motorcycle could
topple in the course of the
operations described below.
Always make sure that the
motorcycle is stable and
firmly supported.
When jump-starting the en-
gine, do not disconnect the
battery from the on-board
electrical system.
Remove the battery-
compartment cover
( 121)
7118zMaintenance
Page 124 of 163
Install screws1.
Installing the seat ( 54)Removing batteryRemove the battery-
compartment cover
( 121)
Disconnection in
the wrong sequence
increases the risk of
short-circuits.
Always proceed in the correct
sequence.
Disconnect negative lead 1
first. Then disconnect positive
lead
2.
Remove screws 3and pull
the retainer to the rear.
Lift the battery up and out;
work it slightly back and
forth if it is difficult to re-
move.
Installing batterySwitch off the ignition.
Place the battery in the bat-
tery compartment, positive
terminal on the right in the
forward direction of travel. Slip the battery retainer
over the battery and install
screws
3.
Installation in the wrong
sequence increases the
risk of short-circuits.
Always proceed in the correct
sequence.
Never install the battery
without the protective cap.
Connect battery positive
lead 2first.
The connect battery negat-
ive lead 1.
7122zMaintenance
Page 125 of 163
Installing battery-
compartment cover
( 121)
Switch on the ignition.
Fully open the throttle once
or twice.
The engine management
system registers the
throttle-valve position.
Set the clock ( 42)
7123zMaintenance
Page 134 of 163
Troubleshooting chartEngine does not start at all or is difficult to start.Possible causeRemedyKill switch activated. Kill switch in operating position (run).
Side stand extended and gear engaged. Retract the side stand ( 66).
Gear engaged and clutch not disengaged Select neutral or pull clutch lever ( 66).
Clutch pulled when ignition was OFF Switch on the ignition, then pull the clutch
lever.
No fuel in tank. Refuelling ( 71)
Battery not adequately charged. Charging battery when connected ( 120)
9132zTechnical data