Page 36 of 163
Warnings, overview
Mode of presentation Meaning
FlashesSelf-diagnosis not completed
( 35)
Lights up ABS fault ( 35)
334zStatus indicators
Page 39 of 163

Operation
Ignition switch and steering
lock . . . . . . . . . . . . . . . . . . . . . . . . . . . 38
Electronic immobiliser . . . . . . . . . 39
Hazard warning flashers . . . . . . . 40
Odometer and tripmeters . . . . . . 41
Clock . . . . . . . . . . . . . . . . . . . . . . . . . 42
Tyre pressure control RDC
OE
.. 44
On-board computer
OE
......... 44
Emergency off switch (kill
switch) . . . . . . . . . . . . . . . . . . . . . . . . 48
Grip heating
OE
................ 48
Clutch . . . . . . . . . . . . . . . . . . . . . . . . 49
Brakes . . . . . . . . . . . . . . . . . . . . . . . . 49
Lights . . . . . . . . . . . . . . . . . . . . . . . . . 50
Headlight . . . . . . . . . . . . . . . . . . . . . 51
Turn indicators . . . . . . . . . . . . . . . . 52 Seat . . . . . . . . . . . . . . . . . . . . . . . . . . 53
Helmet holder . . . . . . . . . . . . . . . . . 55
Luggage loops . . . . . . . . . . . . . . . . 56
Mirrors . . . . . . . . . . . . . . . . . . . . . . . . 56
Spring preload . . . . . . . . . . . . . . . . 56
Shock absorbers . . . . . . . . . . . . . . 57
Electronic Suspension
Adjustment ESA
OE
............ 59
Tyres . . . . . . . . . . . . . . . . . . . . . . . . . 60
437zOperation
Page 42 of 163

enabling signal for starting is
not issued. The
EWS
warning
appears in the multifunction
display.
Always keep the spare key
separately from the ignition
key.
Replacement and extra
keysYou can obtain replace-
ment/extra keys only through
an authorised BMW Motorrad
dealer. The keys are part
of an integrated security
system, so the dealer is under
an obligation to check the
legitimacy of all applications
for replacement/extra keys. If
you want to have a lost key
barred, you have to bring with
you all the other keys that
belong to the motorcycle. A
key that has been barred can
subsequently be cleared and
reactivated for use.
Hazard warning
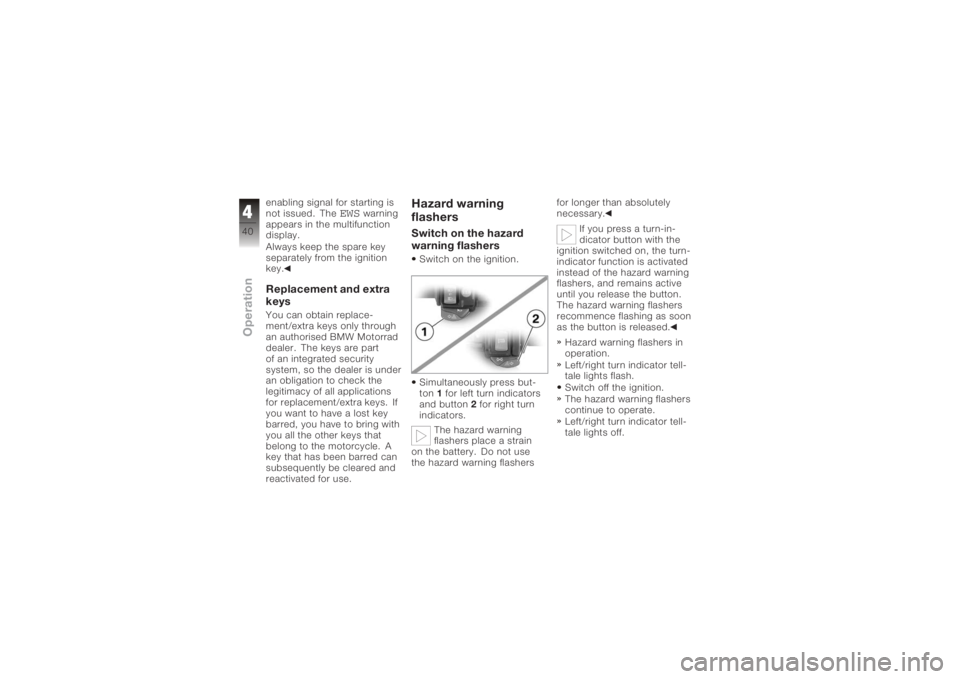
flashersSwitch on the hazard
warning flashersSwitch on the ignition.
Simultaneously press but-
ton 1for left turn indicators
and button 2for right turn
indicators.
The hazard warning
flashers place a strain
on the battery. Do not use
the hazard warning flashers for longer than absolutely
necessary.
If you press a turn-in-
dicator button with the
ignition switched on, the turn-
indicator function is activated
instead of the hazard warning
flashers, and remains active
until you release the button.
The hazard warning flashers
recommence flashing as soon
as the button is released.
Hazard warning flashers in
operation.
Left/right turn indicator tell-
tale lights flash.
Switch off the ignition.
The hazard warning flashers
continue to operate.
Left/right turn indicator tell-
tale lights off.
440zOperation
Page 69 of 163

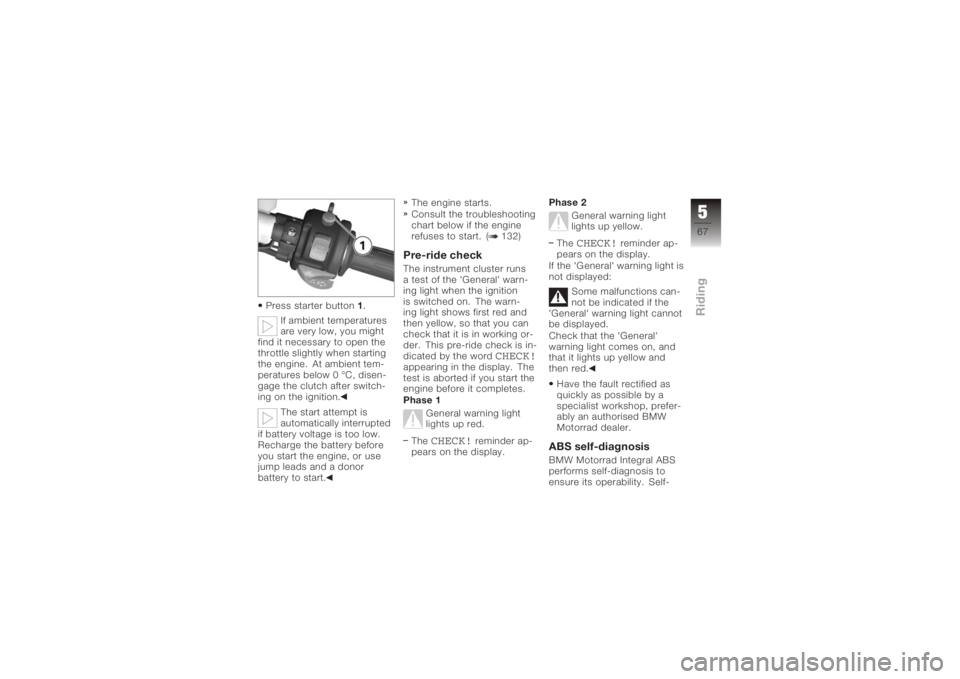
Press starter button1.
If ambient temperatures
are very low, you might
find it necessary to open the
throttle slightly when starting
the engine. At ambient tem-
peratures below 0 °C, disen-
gage the clutch after switch-
ing on the ignition.
The start attempt is
automatically interrupted
if battery voltage is too low.
Recharge the battery before
you start the engine, or use
jump leads and a donor
battery to start. The engine starts.
Consult the troubleshooting
chart below if the engine
refuses to start. ( 132)
Pre-ride checkThe instrument cluster runs
a test of the 'General' warn-
ing light when the ignition
is switched on. The warn-
ing light shows first red and
then yellow, so that you can
check that it is in working or-
der. This pre-ride check is in-
dicated by the word
CHECK!
appearing in the display. The
test is aborted if you start the
engine before it completes.
Phase 1
General warning light
lights up red.
The
CHECK!
reminder ap-
pears on the display. Phase 2
General warning light
lights up yellow.
The
CHECK!
reminder ap-
pears on the display.
If the 'General' warning light is
not displayed:
Some malfunctions can-
not be indicated if the
'General' warning light cannot
be displayed.
Check that the 'General'
warning light comes on, and
that it lights up yellow and
then red.
Have the fault rectified as
quickly as possible by a
specialist workshop, prefer-
ably an authorised BMW
Motorrad dealer.
ABS self-diagnosisBMW Motorrad Integral ABS
performs self-diagnosis to
ensure its operability. Self-
567zRiding
Page 110 of 163
Push the rear wheel stand
from the left into the rear
axle.
Install the retaining disc
from the right; to do so,
press the unlock button.
Place your left hand on the
left grab handle of the mo-
torcycle4, and your right
hand on the lever of the rear
wheel stand 5. Lift the motorcycle upright,
simultaneously pressing the
lever down until the stand
supports the motorcycle in
the upright position.
Press the lever down to the
ground.
BulbsGeneral instructionsThe 'bulb defect' symbol ap-
pears in the display if a bulb
is defective. If the brake or
rear light fails, the symbol is
accompanied by the general
warning light, which lights up
yellow. If the rear light fails
the second filament of the
brake light shines at reduced
brightness to double as a rear
light. Even though you have
7108zMaintenance
Page 159 of 163

Topping up, 90
Warning, engine oil level, 26
Warning, engine oil pres-
sure, 25
ESA, 59 Adjust spring preload, 60
Adjust suspension damp-
ing, 59
Call up settings, 59
EWS Warning, 24
F
Final drive Technical data, 139
Frame Technical data, 143
Front-wheel stand Installing, 106
Fuel Quantity reading, 20
Refuelling, 71
Technical data, 135
Warning, fuel down to
reserve, 24
Fuses, 141 G
Gear indicator, 20
Grip heating, 16, 48
H
Handlebar fittings
General view, left side, 15
General view, right side, 16
Hazard warning flashers, 15, 16
Switching off, 41
Switching on, 40
Headlight Adjusting headlight beam
throw, 51
High-beam headlight, 18
Low-beam headlight, 18
Side lights, 18
Headlight flasher, 15
High-beam headlight, 15
Horn, 15
I
Ignition Switching off, 38
Switching on, 38 Immobiliser
Warning, 24
Instrument cluster Overview, 17
Sensor for lighting, 17
J
Jump start, 118
L
Laying up, 128
Lights Switch on the high-beam
headlight, 50
Switching off parking
lights, 51
Switching on parking
lights, 51
Switching on the low-beam
headlight, 50
Switching on the side
lights, 50
11157zIndex
Page 161 of 163
Transmission, 137
Wheels and tyres, 140
Telltale lights, 17
Toolkit Service kit, 88
Standard kit, 88
Torques, 131
Transmission Starting the engine, 66
Technical data, 137
Troubleshooting chart, 132
Turn indicators Left, 15, 52
Right, 16, 52
Switching off, 16, 53
Tyre pressure control (ReifenDruck-Control)
Label on wheel rim, 98
Operation, 44
Reading, 20
Tyres Approved, 97
Checking tread depth, 97
Checking tyre pressures, 60
Technical data, 140 V
Vehicle
General view, left side, 11
General view, right side, 13
Laying up, 128
Restoring to use, 129
W
Warning lights, 17
Warnings, 20 Mode of presentation, 21
Warnings, overview, 22, 30, 34
Wheels Installing front wheel, 100
Installing rear wheel, 103
Remove the front wheel, 98
Removing rear wheel, 102
Technical data, 140
11159zIndex
Page:
< prev 1-8 9-16 17-24