2006 BMW MOTORRAD K 1200 R brake
[x] Cancel search: brakePage 4 of 160

Table of ContentsYou can also consult the in-
dex at the end of this Rider's
Manual if you want to find a
particular topic or item of in-
formation.
1 General instructions . . . 5
Overview . ................ 6
Abbreviations and
symbols . . . ............... 6
Equipment ............... 7
Technical data ........... 7
Currency . . ............... 7
2 General views . . . . . .... 9
General view, left side . . . 11
General view, right
side ..................... 13
Underneath the seat . . . . . 15
Handlebar fitting, left . . . . . 16
Handlebar fitting, right . . . 17
Instrument cluster . . . . . . . 18
Headlight . .............. 19 3 Status indicators . . . . . 21
Multifunction display . . . . . 22
Warning and telltale
lights . . . . .
.............. 22
ABS warning light
OE
..... 22
Function indicators . . . . . . 22
Warnings, general . . . . . . . 23
Warnings issued by the
tyre pressure monitoring
system (RDC)
OE
......... 31
ABS warnings
OE
......... 35
4 Operation . . . .......... 39
Ignition switch and
steering lock . . .......... 40
Electronic immobiliser
(EWS) . . . . . .............. 41
Hazard warning
flashers . . . .............. 42
Odometer and
tripmeters . .............. 43
Clock . . . . . .............. 44
Tyre pressure control
RDC
OE
.................. 46 On-board computer
OE
... 46
Emergency off switch (kill
switch) . . . . .............. 50
Grip heating
OE
........... 50
Clutch . . . . .............. 51
Brakes . . . . .............. 51
Lights . . . . . .............. 52
Headlight . .............. 53
Turn indicators .......... 53
Seat . . . . . . .............. 54
Helmet holder . .......... 56
Luggage loops .......... 57
Mirrors . . . . .............. 57
Spring preload .......... 58
Shock absorbers . . . . . . . . 59
Electronic Suspension
Adjustment ESAOE
....... 60
Tyres . . . . . .............. 62
5 Riding . . .............. 63
Safety instructions . . . . . . . 64
Checklist . . .............. 66
Starting . . . .............. 66
Running in .............. 68
Page 5 of 160

Parking your
motorcycle . . . ........... 69
Refuelling . . . . . .......... 71
Tyre pressure control
RDC
OE
.................. 72
Brake system, general . . . 73
Brake system with BMW
Motorrad Integral
ABS
OE
.................. 74
6 Accessories .......... 79
General instructions . . . . . 80
Power socket . .......... 80
Luggage . . . . . . .......... 81
CaseOA
................. 81
7 Maintenance . . . . . . . . . 85
General instructions . . . . . 86
Toolkit . ................. 86
Engine oil . . . . . .......... 87
Brake system, general . . . 89
Brake pads . . . . .......... 90
Brake fluid . . . . .......... 91
Clutch . ................. 94
Tyres . . ................. 95
Rims . . . ................. 95
Wheels . ................. 95 Front-wheel stand .
..... 104
Rear-wheel stand . . ..... 105
Bulbs . . ................ 107
Jump start . . . . ......... 114
Battery . ................ 115
8 Care . ................ 121
Care products . ......... 122
Washing motorcycle . . . . 122
Cleaning easily damaged
components . . . ......... 123
Paint care . . . . . ......... 124
Protective wax
coating ................ 124
Laying up the
motorcycle . . . . ......... 124
Restoring motorcycle to
use .................... 125
9 Technical data . . ..... 127
Troubleshooting
chart . . . ................ 128
Threaded fasteners ..... 129
Engine . ................ 130
Riding specifications . . . . 133
Clutch . ................ 133
Transmission . . ......... 133 Final drive . . . . .
......... 135
Running gear . . ......... 135
Brakes . ................ 136
Wheels and tyres . . ..... 136
Electrics . . . . . . ......... 137
Frame . . ................ 139
Dimensions . . . ......... 139
Weights ................ 140
10 Service . . . . ......... 141
BMW Motorrad
service . ................ 142
BMW Motorrad service
quality . ................ 142
BMW Motorrad Service
Card - On-the-spot
breakdown
assistance . . . . ......... 143
BMW Motorrad service
network ................ 143
Maintenance work . ..... 143
Maintenance
schedules . . . . . ......... 144
Confirmation of
maintenance work . ..... 145
Page 9 of 160

ESA Electronic SuspensionAdjustment
Electronic Suspension
Adjustment.
DWA Anti-theft alarm (Diebs-
tahlwarnanlage)
ABS Anti-lock brake system
RDC Tyre pressure control
(ReifenDruck-Control)EquipmentWhen you ordered your BMW
motorcycle, you chose vari-
ous items of custom equip-
ment. This Rider's Manual
describes optional extras (OE)
offered by BMW and selec-
ted optional accessories (OA).
This explains why the manual
may also contain descriptions
of equipment which you have
not ordered. Please note, too,
that your motorcycle might not be exactly as illustrated
in this manual on account of
country-specific differences.
If your BMW was supplied
with equipment not described
in this Rider's Manual, you will
find these features described
in separate manuals.
Technical dataAll dimensions, weights and
power ratings stated in the
Rider's Manual are quoted
to the standards and comply
with the tolerance require-
ments of the Deutsche Institut
für Normung e.V. (DIN). Ver-
sions for individual countries
may differ.CurrencyThe high safety and quality
standards of BMW motor-
cycles are maintained by con-
stant development work on
designs, equipment and ac-cessories. Because of this,
your motorcycle may differ
from the information supplied
in the Rider's Manual. Nor
can errors and omissions be
entirely ruled out. We hope
you will appreciate that no
claims can be entertained on
the basis of the data, illustra-
tions or descriptions in this
manual.
17zGeneral instructions
Page 15 of 160
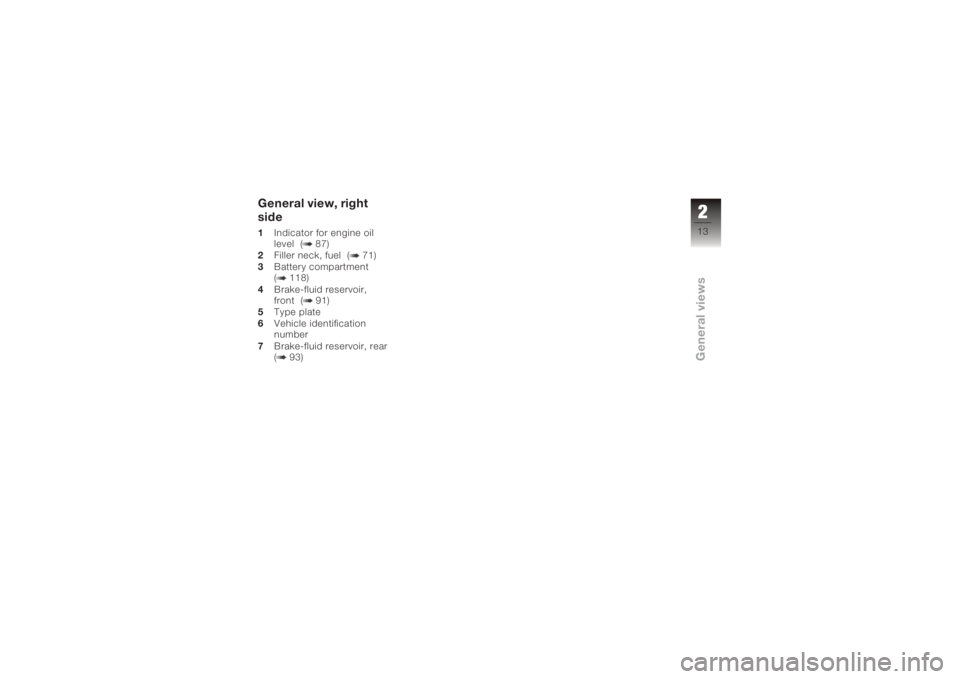
General view, right
side1Indicator for engine oil
level ( 87)
2 Filler neck, fuel ( 71)
3 Battery compartment
( 118)
4 Brake-fluid reservoir,
front ( 91)
5 Type plate
6 Vehicle identification
number
7 Brake-fluid reservoir, rear
( 93)
213zGeneral views
Page 31 of 160
have suffered irreparable
damage.
Have the fault rectified as
quickly as possible by a
specialist workshop, prefer-
ably an authorised BMW
Motorrad dealer.
Rear light bulb defective General warning light
lights up yellow.
The
LAMPR!
warning ap-
pears on the display.
A defective bulb places
your safety at risk be-
cause it is easier for other
users to oversee you and
your motorcycle.
Replace defective bulbs as
soon as possible; always
carry a complete set of spare
bulbs if possible. Rear light or brake light bulb
defective.
Replacing brake light and
rear light bulb ( 111)
Front light bulb defective
The
LAMPF!
warning ap-
pears on the display.
A defective bulb places
your safety at risk be-
cause it is easier for other
users to oversee you and
your motorcycle.
Replace defective bulbs as
soon as possible; always
carry a complete set of spare
bulbs if possible.
Low-beam headlight, high-
beam headlight, side-light or
turn-indicator bulb defective.
Replacing low-beam and
high-beam headlight bulb
( 107)
Replacing parking-light bulb
( 109) Replacing turn indicator
bulbs, front and rear
( 113)
Bulbs defective General warning light
lights up yellow.
The
LAMPS!
warning ap-
pears on the display.
A defective bulb places
your safety at risk be-
cause it is easier for other
users to oversee you and
your motorcycle.
Replace defective bulbs as
soon as possible; always
carry a complete set of spare
bulbs if possible.
A combination of the bulb de-
fects described above has
occurred.
See the fault descriptions
above.
329zStatus indicators
Page 41 of 160
Operation
Ignition switch and steering
lock . . . . . . . . . . . . . . . . . . . . . . . . . . . 40
Electronic immobiliser (EWS) . . . 41
Hazard warning flashers . . . . . . . 42
Odometer and tripmeters . . . . . . 43
Clock . . . . . . . . . . . . . . . . . . . . . . . . . 44
Tyre pressure control RDC
OE
.. 46
On-board computer
OE
......... 46
Emergency off switch (kill
switch) . . . . . . . . . . . . . . . . . . . . . . . . 50
Grip heating
OE
................ 50
Clutch . . . . . . . . . . . . . . . . . . . . . . . . 51
Brakes . . . . . . . . . . . . . . . . . . . . . . . . 51
Lights . . . . . . . . . . . . . . . . . . . . . . . . . 52
Headlight . . . . . . . . . . . . . . . . . . . . . 53
Turn indicators . . . . . . . . . . . . . . . . 53 Seat . . . . . . . . . . . . . . . . . . . . . . . . . . 54
Helmet holder . . . . . . . . . . . . . . . . . 56
Luggage loops . . . . . . . . . . . . . . . . 57
Mirrors . . . . . . . . . . . . . . . . . . . . . . . . 57
Spring preload . . . . . . . . . . . . . . . . 58
Shock absorbers . . . . . . . . . . . . . . 59
Electronic Suspension
Adjustment ESA
OE
............ 60
Tyres . . . . . . . . . . . . . . . . . . . . . . . . . 62
439zOperation
Page 53 of 160
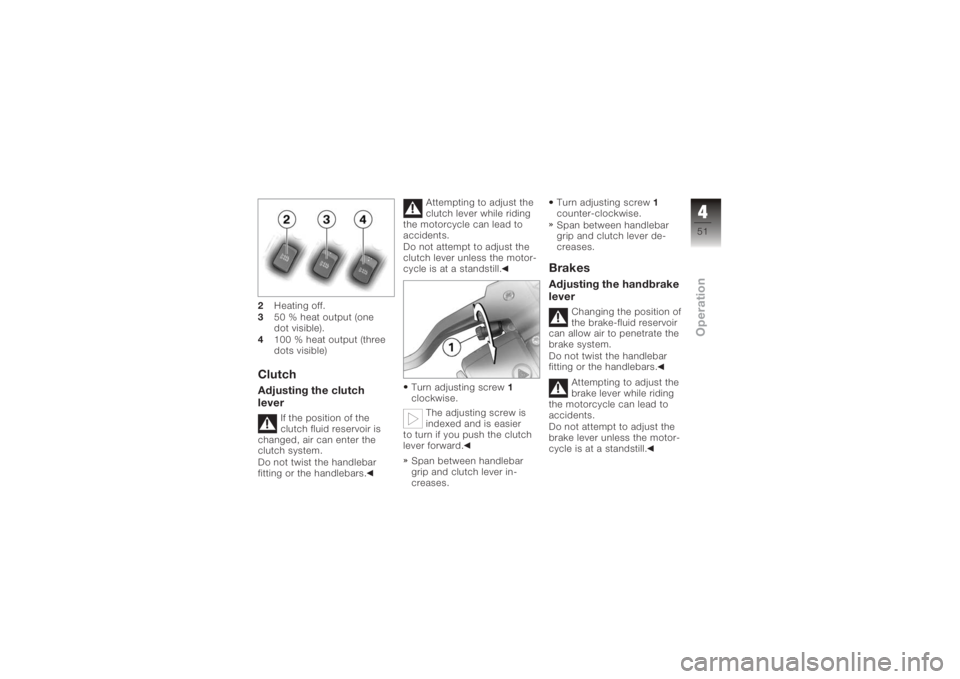
2Heating off.
3 50 % heat output (one
dot visible).
4 100 % heat output (three
dots visible)ClutchAdjusting the clutch
lever
If the position of the
clutch fluid reservoir is
changed, air can enter the
clutch system.
Do not twist the handlebar
fitting or the handlebars. Attempting to adjust the
clutch lever while riding
the motorcycle can lead to
accidents.
Do not attempt to adjust the
clutch lever unless the motor-
cycle is at a standstill.
Turn adjusting screw 1
clockwise.
The adjusting screw is
indexed and is easier
to turn if you push the clutch
lever forward.
Span between handlebar
grip and clutch lever in-
creases. Turn adjusting screw
1
counter-clockwise.
Span between handlebar
grip and clutch lever de-
creases.
BrakesAdjusting the handbrake
lever
Changing the position of
the brake-fluid reservoir
can allow air to penetrate the
brake system.
Do not twist the handlebar
fitting or the handlebars.
Attempting to adjust the
brake lever while riding
the motorcycle can lead to
accidents.
Do not attempt to adjust the
brake lever unless the motor-
cycle is at a standstill.
451zOperation
Page 54 of 160
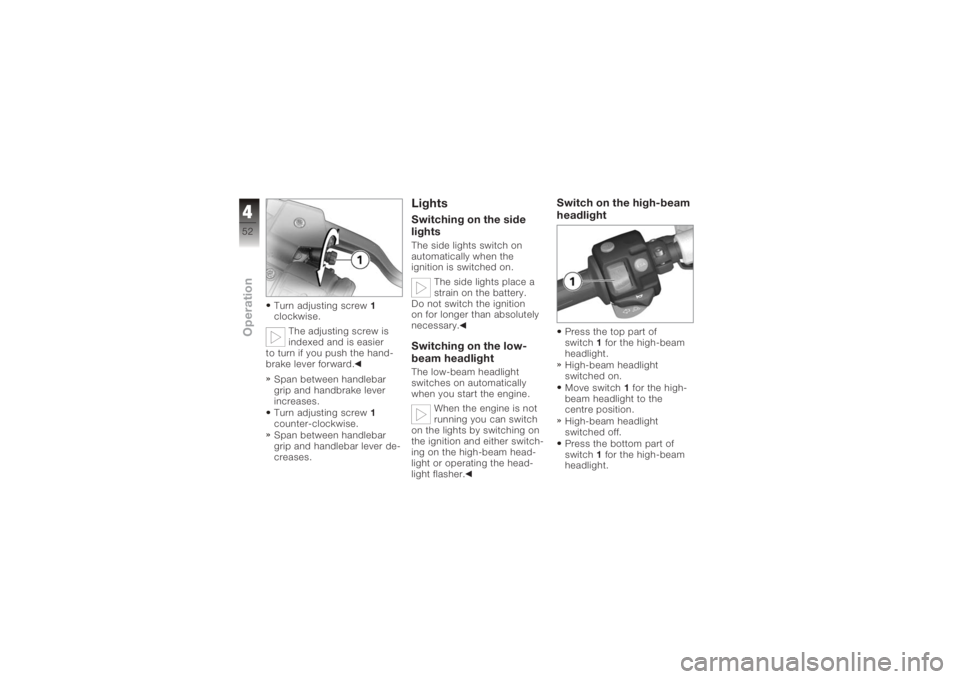
Turn adjusting screw1
clockwise.
The adjusting screw is
indexed and is easier
to turn if you push the hand-
brake lever forward.
Span between handlebar
grip and handbrake lever
increases.
Turn adjusting screw 1
counter-clockwise.
Span between handlebar
grip and handlebar lever de-
creases.
LightsSwitching on the side
lightsThe side lights switch on
automatically when the
ignition is switched on.
The side lights place a
strain on the battery.
Do not switch the ignition
on for longer than absolutely
necessary.Switching on the low-
beam headlightThe low-beam headlight
switches on automatically
when you start the engine.
When the engine is not
running you can switch
on the lights by switching on
the ignition and either switch-
ing on the high-beam head-
light or operating the head-
light flasher.
Switch on the high-beam
headlightPress the top part of
switch 1for the high-beam
headlight.
High-beam headlight
switched on.
Move switch 1for the high-
beam headlight to the
centre position.
High-beam headlight
switched off.
Press the bottom part of
switch 1for the high-beam
headlight.
452zOperation