Page 101 of 160

with OE BMW Motorrad
Integral ABS:There is a risk of dam-
aging parts of the front
brake, particularly the BMW
Motorrad Integral ABS, in the
course of the procedure de-
scribed below.
Take care not to damage the
brake system, in particular the
ABS sensor with cable and
the ABS sensor ring.
Take care not to damage
the ABS sensor when
rolling in the front wheel.
Note the ABS sensor when
rolling in the front wheel.
Roll the front wheel into
position between the front
forks. Raise the front wheel, insert
quick-release axle
7and
tighten to specified torque.
Quick-release axle in
threaded bush
50 Nm
Tighten right axle clamp-
ing screw 6to the specified
tightening torque.
Clamping screw for
quick-release axle in
wheel carrier
19 Nm Remove the front wheel
stand.
Ease the brake calipers on
to the brake discs.
with OE BMW Motorrad
Integral ABS:
The cable of the ABS
sensor could chafe
through if it comes into
contact with the brake disc.
Make sure that the ABS
sensor cable is routed
correctly.
Carefully route the ABS
cable. Make sure that the
799zMaintenance
Page 102 of 160
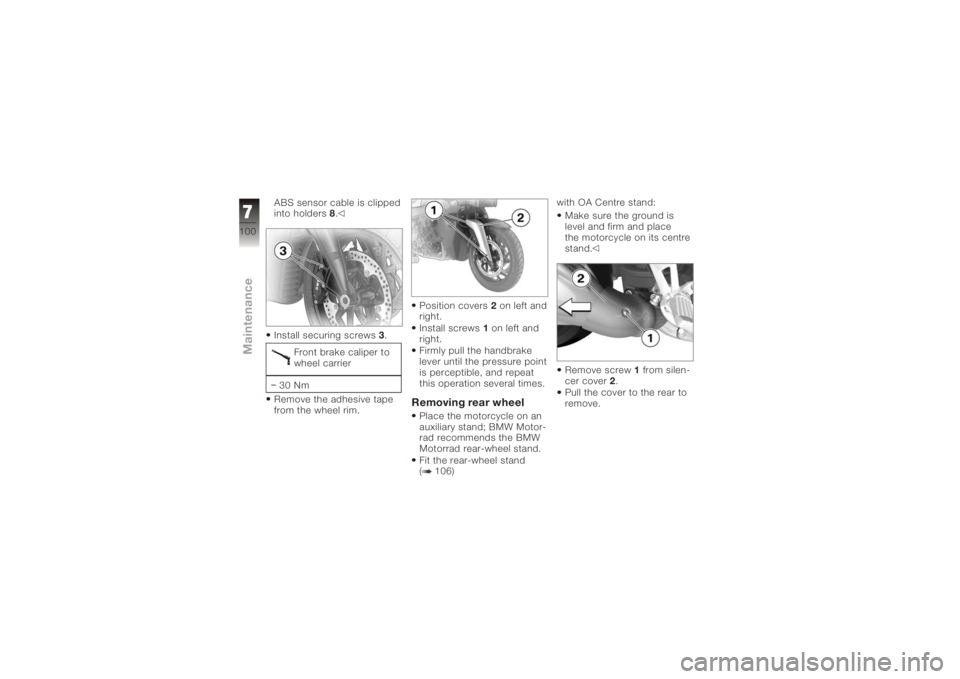
ABS sensor cable is clipped
into holders8.
Install securing screws 3.
Front brake caliper to
wheel carrier
30 Nm
Remove the adhesive tape
from the wheel rim. Position covers
2on left and
right.
Install screws 1on left and
right.
Firmly pull the handbrake
lever until the pressure point
is perceptible, and repeat
this operation several times.
Removing rear wheelPlace the motorcycle on an
auxiliary stand; BMW Motor-
rad recommends the BMW
Motorrad rear-wheel stand.
Fit the rear-wheel stand
( 106) with OA Centre stand:
Make sure the ground is
level and firm and place
the motorcycle on its centre
stand.
Remove screw 1from silen-
cer cover 2.
Pull the cover to the rear to
remove.
7100zMaintenance
Page 107 of 160
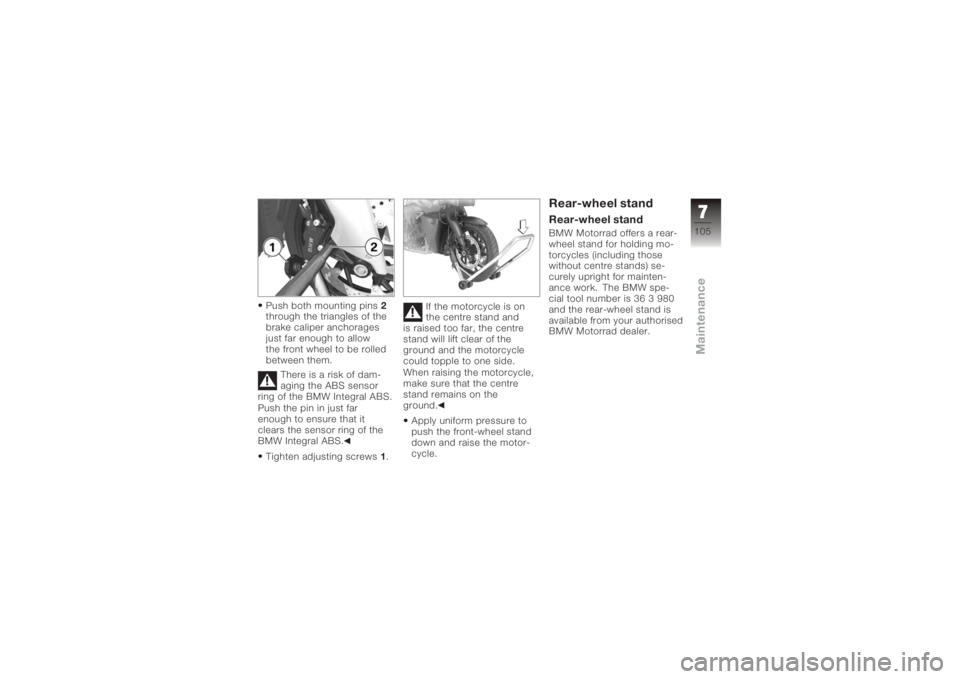
Push both mounting pins2
through the triangles of the
brake caliper anchorages
just far enough to allow
the front wheel to be rolled
between them.
There is a risk of dam-
aging the ABS sensor
ring of the BMW Integral ABS.
Push the pin in just far
enough to ensure that it
clears the sensor ring of the
BMW Integral ABS.
Tighten adjusting screws 1. If the motorcycle is on
the centre stand and
is raised too far, the centre
stand will lift clear of the
ground and the motorcycle
could topple to one side.
When raising the motorcycle,
make sure that the centre
stand remains on the
ground.
Apply uniform pressure to
push the front-wheel stand
down and raise the motor-
cycle.
Rear-wheel standRear-wheel standBMW Motorrad offers a rear-
wheel stand for holding mo-
torcycles (including those
without centre stands) se-
curely upright for mainten-
ance work. The BMW spe-
cial tool number is 36 3 980
and the rear-wheel stand is
available from your authorised
BMW Motorrad dealer.
7105zMaintenance
Page 109 of 160

Press the lever down to the
ground.BulbsGeneral instructionsThe 'bulb defect' symbol ap-
pears in the display if a bulb
is defective. If the brake or
rear light fails, the symbol is
accompanied by the general
warning light, which lights up
yellow. If the rear light fails
the second filament of the
brake light shines at reduced
brightness to double as a rear
light. Even though you havethis substitute rear light, the
indicators in the display tell
you that a bulb defect has oc-
curred.
A defective bulb places
your safety at risk be-
cause it is easier for other
users to oversee you and
your motorcycle.
Replace defective bulbs as
soon as possible; always
carry a complete set of spare
bulbs if possible.
The bulb is pressurised
and can cause injury if
damaged.
Wear protective goggles
and gloves when changing
bulbs.
The types of bulb fitted
to your motorcycle are
listed in the section entitled
"Technical data". Do not touch the glass
of new bulbs with your
fingers. Use a clean, dry cloth
to hold the bulbs when hand-
ling them. Dirt deposits, in
particular oil and grease, in-
terfere with heat radiation
from the bulb. This leads to
overheating and shortens the
bulb's operating life.
Replacing low-beam and
high-beam headlight
bulb
If it is not standing firmly,
the motorcycle could
topple in the course of the
operations described below.
Always make sure that the
motorcycle is stable and
firmly supported.
Turn the handlebars
to the left to facilitate
access.
7107zMaintenance
Page 113 of 160
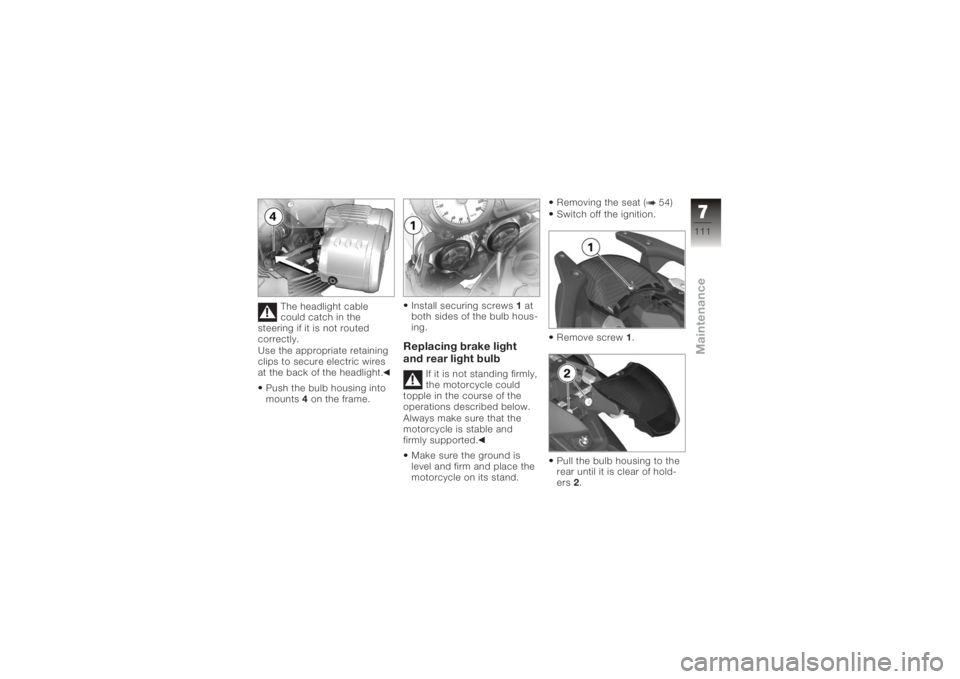
The headlight cable
could catch in the
steering if it is not routed
correctly.
Use the appropriate retaining
clips to secure electric wires
at the back of the headlight.
Push the bulb housing into
mounts 4on the frame. Install securing screws
1at
both sides of the bulb hous-
ing.
Replacing brake light
and rear light bulb
If it is not standing firmly,
the motorcycle could
topple in the course of the
operations described below.
Always make sure that the
motorcycle is stable and
firmly supported.
Make sure the ground is
level and firm and place the
motorcycle on its stand. Removing the seat ( 54)
Switch off the ignition.
Remove screw
1.
Pull the bulb housing to the
rear until it is clear of hold-
ers 2.
7111zMaintenance
Page 114 of 160
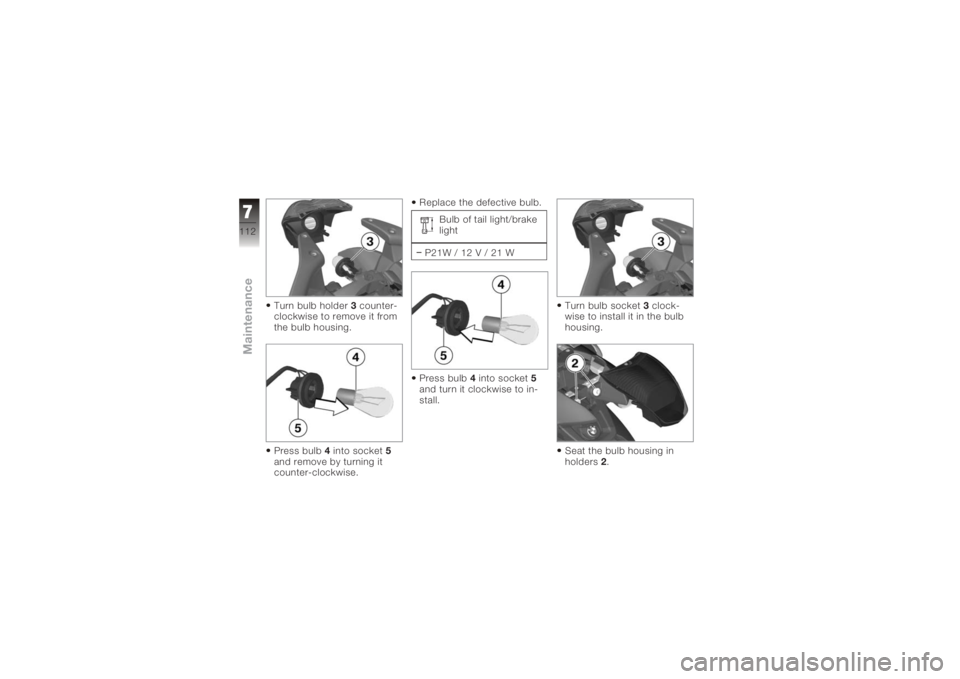
Turn bulb holder3counter-
clockwise to remove it from
the bulb housing.
Press bulb 4into socket 5
and remove by turning it
counter-clockwise. Replace the defective bulb.
Bulb of tail light/brake
light
P21W / 12 V / 21 W
Press bulb 4into socket 5
and turn it clockwise to in-
stall. Turn bulb socket
3clock-
wise to install it in the bulb
housing.
Seat the bulb housing in
holders 2.
7112zMaintenance
Page 124 of 160
Care productsWe recommend that you
use the cleaning and care
products you can obtain
from your authorised BMW
Motorrad dealer. The
substances in BMW Care
Products have been tested in
laboratories and in practice;
they provide optimised
care and protection for the
materials used in your vehicle.The use of unsuitable
cleaning and care
products can damage vehicle
components.
Do not use solvents such as
cellulose thinners, cold clean-
ers, fuel or the like, and do
not use cleaning products
that contain alcohol.
Washing motorcycleWe recommend that you
use BMW insect remover to
soften and wash off insects
and resilient dirt on painted
parts prior to washing the
motorcycle.
To prevent stains, do
not wash the motorcycle
immediately after it has been
exposed to strong sunlight
and do not wash it in the sun.
Make sure that the motor-
cycle is washed frequently,
especially during the winter
months.
To remove road salt, clean
the motorcycle with cold wa-
ter immediately after every
trip.
After the motorcycle has
been washed, ridden
through water or ridden in
the rain, the brake discs and
pads might be wet and the brakes might not take effect
immediately.
Apply the brakes in good time
until the brakes have dried
out.
Warm water intensifies
the effect of salt.
Use only cold water to wash
off road salt.
The high pressure of
steam cleaners can
damage seals, the hydraulic
brake system, the electrical
system, and the seat.
Do not use a steam jet or
high-pressure cleaning
equipment.
8122zCare
Page 126 of 160
Paint careWashing the motorcycle
regularly will help counteract
the long-term effects of
substances that damage
the paint, especially if your
motorcycle is ridden in areas
with high air pollution or
natural sources of dirt, for
example tree resin or pollen.
Remove particularly
aggressive substances
immediately, however, as
otherwise the paint can
be affected or become
discoloured. Substances
of this nature include spilt
fuel, oil, grease, brake fluid
and bird droppings. We
recommend BMW vehicle
polish or BMW paint cleaner
for this purpose.
Marks on the paintwork are
particularly easy to see after
the motorcycle has been
washed. Remove stains ofthis kind immediately, using
cleaning-grade benzene or
petroleum spirit on a clean
cloth or ball of cotton wool.
We recommend that specks
of tar be removed with BMW
tar remover. Remember to
wax the parts treated in this
way.
Protective wax
coatingFor the protective wax coating
of paint, we recommend that
you use only BMW vehicle
wax or agents that contain
carnauba wax or synthetic
waxes.
It is time to rewax the paint-
work when water "puddles"
on the surface, instead of
forming beads.
Laying up the
motorcycleClean the motorcycle.
Remove the battery.
Spray the brake and clutch
lever pivots and the main
and side stand pivots with a
suitable lubricant.
Coat bright metal and
chrome-plated parts with
an acid-free grease (e.g.
Vaseline).
Stand the motorcycle in a
dry room in such a way that
there is no load on either
wheel.
Before laying the vehicle
up out of use, have the
engine oil and the oil filter ele-
ment changed by a special-
ist workshop, preferably an
authorised BMW Motorrad
dealer. Combine work for lay-
ing up/restoring to use with a
BMW service or inspection.
8124zCare