Page 8 of 172
OverviewChapter 2 of this Rider's
Manual will provide you with
an initial overview of your
motorcycle. All maintenance
and servicing work on the
motorcycle is documented in
Chapter 10. This record of
the maintenance work you
have had performed on your
motorcycle is a precondition
for generous treatment of
goodwill claims.
When the time comes to sell
your BMW, please remem-
ber to hand over this Rider's
Manual; it is an important part
of the motorcycle.Abbreviations and
symbols
Indicates warnings that
you must comply with for
reasons of your safety and the
safety of others, and to pro- tect your motorcycle against
damage.
Specific instructions on
how to operate, control,
adjust or look after items of
equipment on the motorcycle.
Indicates the end of an
item of information.
Instruction.
Result of an activity.
Reference to a page
with more detailed in-
formation.
Indicates the end of
a passage relating to
specific accessories or
items of equipment.
Tightening torque. Item of technical data.
OE Optional extra Your motorcycle was
assembled complete
with all the BMW
optional extras you
ordered.
OA Optional accessory You can obtain option-
al accessories through
your authorised BMW
Motorrad dealer; op-
tional accessories
have to be retrofitted
to the motorcycle.
EWS Electronic immobiliser
(Elektronische Weg-
fahrsicherung).
16zGeneral instructions
Page 26 of 172
gree of instability at the rear
wheel and has intervened to
reduce torque. The warning
light flashes for one second
longer than ASC intervention
lasts. This affords the rider
visual feedback on control in-
tervention even after the crit-
ical situation has been dealt
with.Warnings, generalMode of presentation
General warnings are dis-
played by means of warning
lights or by texts and symbols
in the multifunction display.
In some cases, they are ac-
companied by the 'General'
warning light showing red or
yellow. If two or more warn-
ings occur at the same time,
all the appropriate warning
lights and warning symbols
appear.
324zStatus indicators
Page 92 of 172
Take care when cornering.
When you apply the brakes
on a corner, the motorcycle's
weight and momentum take
over and even BMW Motor-
rad Integral ABS is unable to
counteract their effects.Electronic engine
management with
BMW Motorrad ASC
OE
How does BMW
Motorrad ASC work?The BMW Motorrad ASC
compares the speed of rota-
tion of the front wheel and the
rear wheel. The differential
is used to compute slip as
a measure of the reserves
of stability available at the
rear wheel. If slip exceeds
a certain limit the electronic
engine management system
intervenes, adapting engine
torque accordingly.
What is the design
baseline for BMW
Motorrad ASC?BMW Motorrad ASC is de-
signed as an assistant system
for the rider and for use on
public roads. The extent to
which the rider affects ASC
control can be considerable
(weight shifts when cornering,
items of luggage loose on the
motorcycle), especially when
style of riding takes rider and
machine close to the limits
imposed by physics. The sys-
tem is not optimised for spe-
cial requirements that apply
under extreme competitive
situations off-road or on the
track. You have the option
of deactivating the BMW Mo-
torrad ASC for these circum-
stances.
Special situationsIn accordance with the laws
of physics, the ability to ac-
celerate is restricted more
and more as the angle of heel
increases. Consequently,
there can be a perceptible
lag in acceleration out of very
tight bends.
The speeds of the front and
rear wheels are compared
as one means of detecting a
wheel's incipient tendency to
lock. If the system registers
implausible values for a
lengthy period the ASC
function is deactivated
for safety reasons and
an ASC fault message is
issued. Self-diagnosis has
to complete before fault
messages can be issued.
The BMW Motorrad ASC can
shut down automatically un-
590zRiding
Page 93 of 172
der the exceptional riding
conditions outlined below.
Exceptional riding
conditions:Riding for a lengthy period
with the front wheel lifted off
the ground (wheelie).
Rear wheel rotating with the
motorcycle held stationary
by applying the front brake
(burn-out).
Heating up with the motor-
cycle on the centre stand
or an auxiliary stand, en-
gine idling or with a gear
engaged.
Accelerating the motorcycle
to a speed in excess of 10
km/h after switching the ig-
nition off and then on again
reactivates the ASC. If the front wheel lifts clear of
the ground under severe ac-
celeration, the ASC reduces
engine torque until the front
wheel regains contact with
the ground.
Under these circumstances,
BMW Motorrad recommends
rolling the throttle slightly
closed so as to restore
stability with the least
possible delay.
When riding on a slippery
surface, never snap the
throttle twistgrip fully closed
without pulling the clutch
at the same time. Engine
braking torque can cause
the rear wheel to lock, with
a corresponding loss of
stability. The BWM Motorrad
ASC is unable to control a
situation of this nature.
591zRiding
Page 104 of 172
General instructionsThe 'Maintenance' chapter
describes work involving the
replacement of wear parts
that can be performed with
minimum effort.
Special tightening torques are
listed as applicable.
If you are interested in inform-
ation on more extensive work,
we recommend the repair
manual on CD-ROM which
applies to your particular mo-
torcycle. You can obtain a
copy from your authorised
BMW Motorrad dealer.
Some of the work calls for
special tools and a thorough
knowledge of motorcycles.
If you are in doubt consult a
specialist workshop, prefer-
ably your authorised BMW
Motorrad dealer.
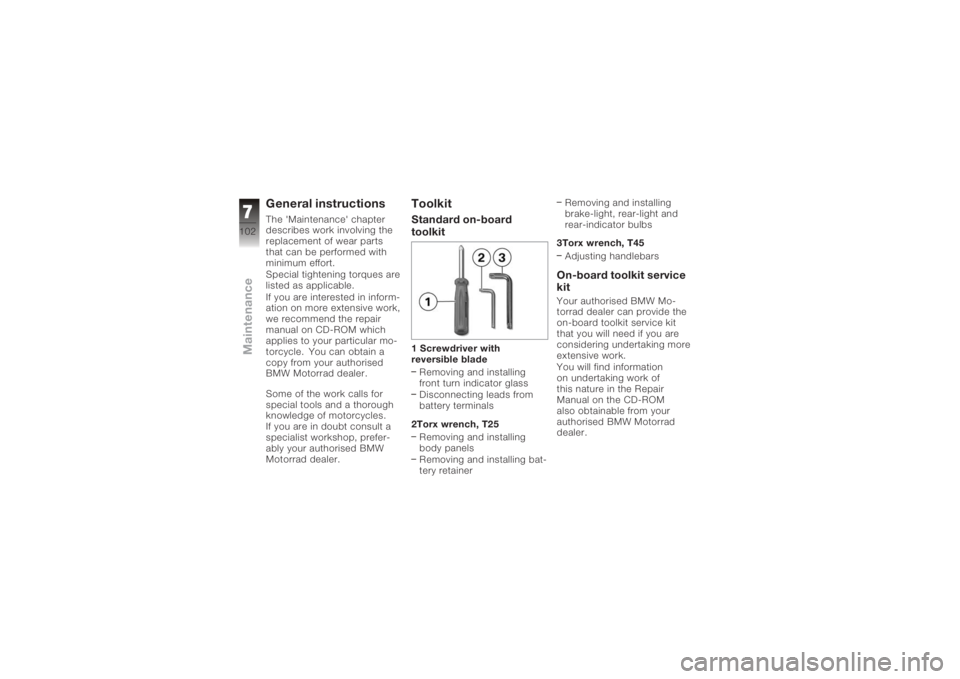
ToolkitStandard on-board
toolkit1 Screwdriver with
reversible bladeRemoving and installing
front turn indicator glass
Disconnecting leads from
battery terminals
2Torx wrench, T25 Removing and installing
body panels
Removing and installing bat-
tery retainer Removing and installing
brake-light, rear-light and
rear-indicator bulbs
3Torx wrench, T45 Adjusting handlebars
On-board toolkit service
kitYour authorised BMW Mo-
torrad dealer can provide the
on-board toolkit service kit
that you will need if you are
considering undertaking more
extensive work.
You will find information
on undertaking work of
this nature in the Repair
Manual on the CD-ROM
also obtainable from your
authorised BMW Motorrad
dealer.
7102zMaintenance
Page 114 of 172
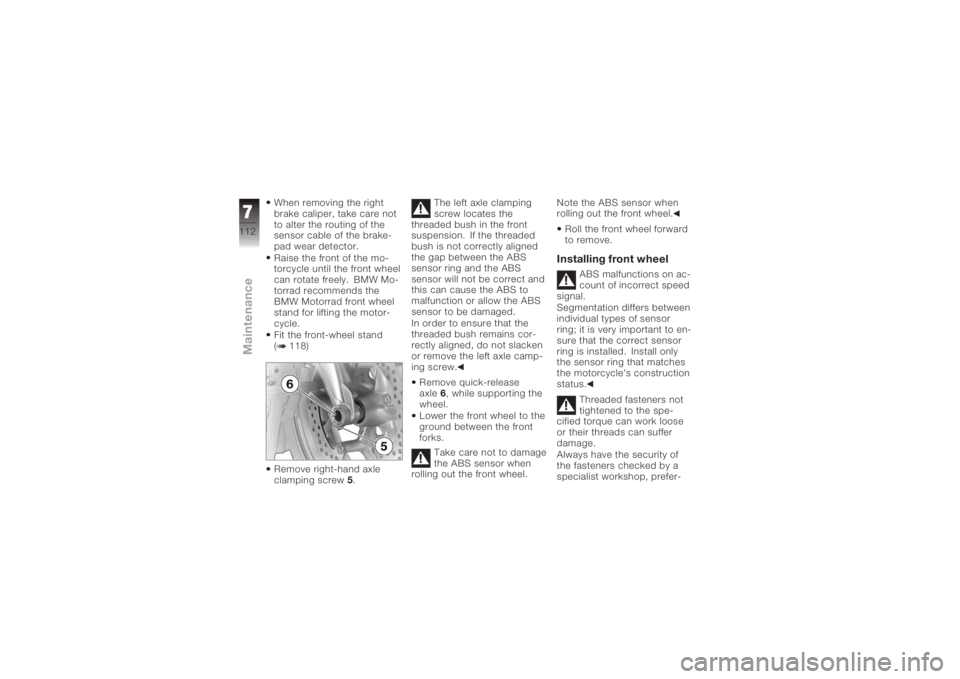
When removing the right
brake caliper, take care not
to alter the routing of the
sensor cable of the brake-
pad wear detector.
Raise the front of the mo-
torcycle until the front wheel
can rotate freely. BMW Mo-
torrad recommends the
BMW Motorrad front wheel
stand for lifting the motor-
cycle.
Fit the front-wheel stand
( 118)
Remove right-hand axle
clamping screw5. The left axle clamping
screw locates the
threaded bush in the front
suspension. If the threaded
bush is not correctly aligned
the gap between the ABS
sensor ring and the ABS
sensor will not be correct and
this can cause the ABS to
malfunction or allow the ABS
sensor to be damaged.
In order to ensure that the
threaded bush remains cor-
rectly aligned, do not slacken
or remove the left axle camp-
ing screw.
Remove quick-release
axle 6, while supporting the
wheel.
Lower the front wheel to the
ground between the front
forks.
Take care not to damage
the ABS sensor when
rolling out the front wheel. Note the ABS sensor when
rolling out the front wheel.
Roll the front wheel forward
to remove.
Installing front wheel
ABS malfunctions on ac-
count of incorrect speed
signal.
Segmentation differs between
individual types of sensor
ring; it is very important to en-
sure that the correct sensor
ring is installed. Install only
the sensor ring that matches
the motorcycle's construction
status.
Threaded fasteners not
tightened to the spe-
cified torque can work loose
or their threads can suffer
damage.
Always have the security of
the fasteners checked by a
specialist workshop, prefer-
7112zMaintenance
Page 115 of 172
ably an authorised BMW Mo-
torrad dealer.The front wheel must be
installed right way round
to rotate in the correct direc-
tion.
Note the direction-of-rotation
arrows on the tyre or the
wheel rim.
There is a risk of dam-
aging parts of the front
brake, particularly the BMW
Motorrad Integral ABS, in the
course of the procedure de-
scribed below.
Take care not to damage the
brake system, in particular the
ABS sensor with cable and
the ABS sensor ring.
Take care not to damage
the ABS sensor when
rolling in the front wheel.
Note the ABS sensor when
rolling in the front wheel. Roll the front wheel into
position between the front
forks.
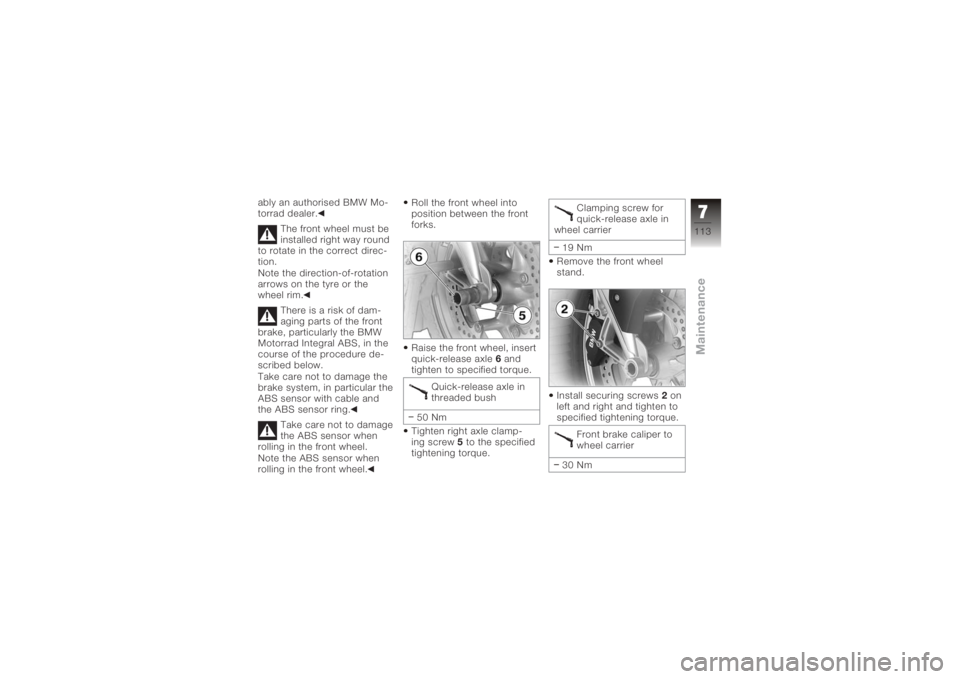
Raise the front wheel, insert
quick-release axle
6and
tighten to specified torque.
Quick-release axle in
threaded bush
50 Nm
Tighten right axle clamp-
ing screw 5to the specified
tightening torque. Clamping screw for
quick-release axle in
wheel carrier
19 Nm
Remove the front wheel
stand.
Install securing screws 2on
left and right and tighten to
specified tightening torque.
Front brake caliper to
wheel carrier
30 Nm
7113zMaintenance
Page 117 of 172
Remove screw1from silen-
cer cover 2.
Pull the cover to the rear to
remove.
Remove clamp 3from the
silencer. Do not remove the sealing
grease from the clamp.
Remove screw
4for the
bracket of the end silencer
from the rear footrest.
Turn the end silencer down.
Engage first gear. Remove studs
5from the
rear wheel, holding the
wheel as you do so.
Lower the rear wheel to the
ground.
Roll the rear wheel out to-
ward the rear.
Installing rear wheel
Threaded fasteners not
tightened to the spe-
cified torque can work loose
or their threads can suffer
damage.
Always have the security of
the fasteners checked by a
specialist workshop, prefer-
7115zMaintenance