Page 27 of 172
Warnings, overview
Mode of presentation Meaning
Lights up yellowThe
EWS
warning
appears on the
display. Electronic immobiliser active ( 27)
Lights up yellow Flashes Fuel down to reserve ( 27)
Lights up red Temperature reading flashesCoolant temperature too high
( 27)
Lights up yellow Appears on the displayEngine electronics ( 28)
Flashes red Appears on the displayInsufficient engine oil pressure
( 28)
Shows accom-
panied by the
Oil
warning Engine-oil level too low ( 29)
Lights up red Appears on the displayInsufficient battery charge current
( 29)
Lights up Brake pads worn down to the wear
limit ( 30)
Lights up yellow Appears on the
display Rear light bulb defective ( 30)
325zStatus indicators
Page 30 of 172

the fault rectified as soon
as possible by a special-
ist workshop, preferably an
authorised BMW Motorrad
dealer.
Engine electronics General warning light
lights up yellow.
Engine electronics sym-
bol appears on the dis-
play.
The engine is running
in emergency operating
mode. Engine power might
be reduced and this can
cause hazardous situations,
particularly if you attempt to
overtake other road users.
Engine power level might be
lower than normal: adapt your
style of riding accordingly. The engine electronics control
unit has diagnosed a fault. In
exceptional cases, the engine
stops and refuses to start.
Otherwise, the engine runs in
emergency operating mode.
You can continue to ride,
but bear in mind that the
usual engine power might
not be available.
Have the fault rectified as
quickly as possible by a
specialist workshop, prefer-
ably an authorised BMW
Motorrad dealer.
Insufficient engine oil
pressure General warning light
flashes red.
Engine oil pressure sym-
bol appears on the dis-
play.
The oil pressure in the lube-
oil system is too low. Stop immediately and switch off
the engine if the warning light
shows.
The insufficient oil
pressure warning does
not fulfil the function of an
oil gauge. The only way of
checking whether the oil level
is correct is to check the oil
level indicator.
A low oil level is one reason
why a warning indicating in-
sufficient oil pressure is is-
sued.
Checking engine oil level
( 103)
If the oil level is too low: Top up the engine oil
( 105)
If the warning indicating in-
sufficient engine oil level is
issued and a check indicates
that the engine oil level is cor-
rect:
328zStatus indicators
Page 31 of 172

Other engine problems
besides a low oil level
can cause the insufficient en-
gine oil pressure warning to
be issued. Continuing to ride
in these cases can cause en-
gine damage.
If this warning is issued even
though the engine oil level is
correct: do not continue to
ride.
Do not continue your jour-
ney.
Have the fault rectified as
quickly as possible by a
specialist workshop, prefer-
ably an authorised BMW
Motorrad dealer.
Engine-oil level too low Shows accompanied by
the
Oil
warning
The electronic oil-level sensor
has registered an excessively
low oil level. Dipping the oil with the dip-
stick is the only way of ascer-
taining the exact engine-oil
level. The next time you stop
for fuel:
Checking engine oil level
( 103)
If the oil level is too low:
Top up the engine oil
( 105)
The oil sensor might be
defective if the "Check oil
level" message appears even
though a check with the
dipstick reveals that the oil
level is correct. Seek the advice of a spe-
cialist workshop, preferably
an authorised BMW Motor-
rad dealer. Insufficient battery charge
current
General warning light
lights up red.
Battery charge current
symbol is displayed.
A discharged battery can
cause the engine to die
suddenly, and this could res-
ult in a dangerous situation in
traffic.
Have faults rectified as soon
as possible.
If the battery is not char-
ging, continuing to ride
can cause it to discharge
completely, in which case it
will suffer irreparable damage.
If possible, do not continue
your journey.
Battery is not being charged.
You can continue to
ride until the battery is
discharged. Bear in mind,
329zStatus indicators
Page 52 of 172
Range
Average speed
Average consumption
Oil level
Tyre pressures (OE)Ambient temperatureAmbient-temperature dis-
play1is active only when
the engine is running; at other
times the display shows
--
.
An ice warning
appears if the ambient-
temperature reading drops
below 3 °C. The display
automatically switches from any other mode to the
temperature reading when the
temperature drops below this
threshold for the first time.
The reading flashes until you
select some other display
mode.
RangeThe description of the
residual-range function
( 49) also covers the
residual-range readout.
You can also view range
1
before the fuel level drops
to reserve. A special
average-consumption figure is used to calculate range;
this figure is not necessarily
the same as the value you
can call up for viewing on the
display.
The calculated range
is only an approximate
reading. Consequently, BMW
Motorrad recommends that
you should not try to use the
full range before refuelling.
450zOperation
Page 54 of 172
Reset average
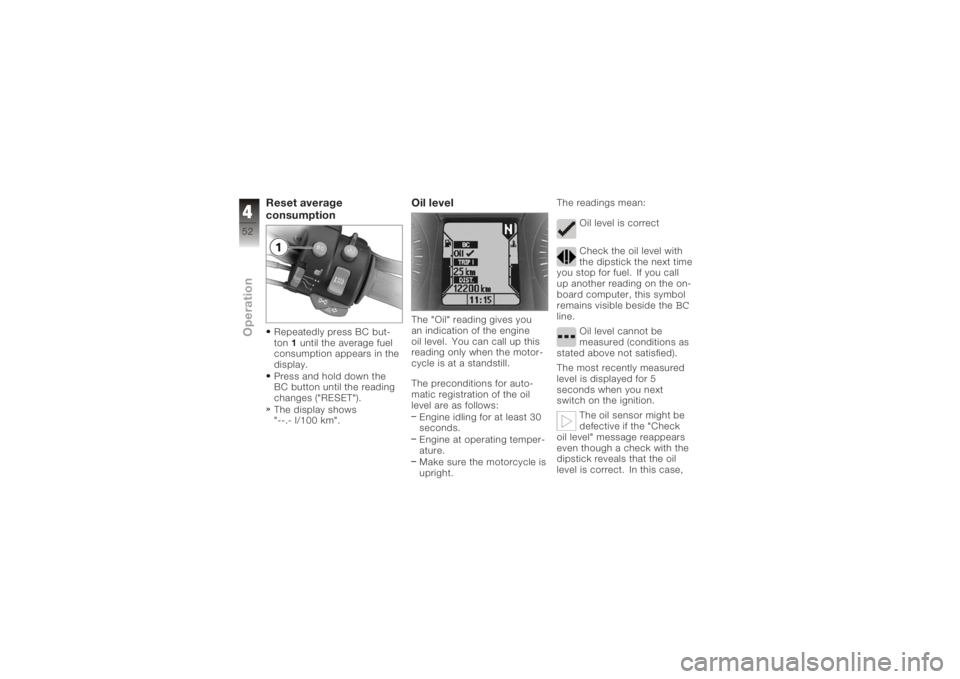
consumptionRepeatedly press BC but-
ton1until the average fuel
consumption appears in the
display.
Press and hold down the
BC button until the reading
changes ("RESET").
The display shows
"--.- l/100 km".
Oil levelThe "Oil" reading gives you
an indication of the engine
oil level. You can call up this
reading only when the motor-
cycle is at a standstill.
The preconditions for auto-
matic registration of the oil
level are as follows:
Engine idling for at least 30
seconds.
Engine at operating temper-
ature.
Make sure the motorcycle is
upright. The readings mean:
Oil level is correct
Check the oil level with
the dipstick the next time
you stop for fuel. If you call
up another reading on the on-
board computer, this symbol
remains visible beside the
BC
line.
Oil level cannot be
measured (conditions as
stated above not satisfied).
The most recently measured
level is displayed for 5
seconds when you next
switch on the ignition.
The oil sensor might be
defective if the "Check
oil level" message reappears
even though a check with the
dipstick reveals that the oil
level is correct. In this case,
452zOperation
Page 80 of 172
ponents are not designed to
withstand. Damage caused in
this way is not covered by the
warranty.
Do not tamper with the
control unit of the electronic
engine-management
system.ChecklistUse the following checklist
to check important functions,
settings and wear limits be-
fore you ride off.Brakes
Brake-fluid levels, front and
rear
Clutch
Clutch fluid level
Shock absorber setting and
spring preload
Tyre-tread depth and tyre
pressures Cases correctly installed
and luggage secured
At regular intervals: Engine oil level (every refuel-
ling stop)
StartingSide standYou cannot start the motor-
cycle with the side stand ex-
tended and a gear engaged.
The engine will switch itself off
if you start it with the gearbox
in neutral and then engage a
gear before retracting the side
stand.GearboxYou can start the engine
when the gearbox is in neutral
or if you pull the clutch with
a gear engaged. Do not pull
the clutch until after you have
switched on the ignition, as
otherwise the engine will refuse to start. When the
gearbox is in neutral, the
green neutral telltale light is
on and the gear indicator
in the multifunction display
shows N.
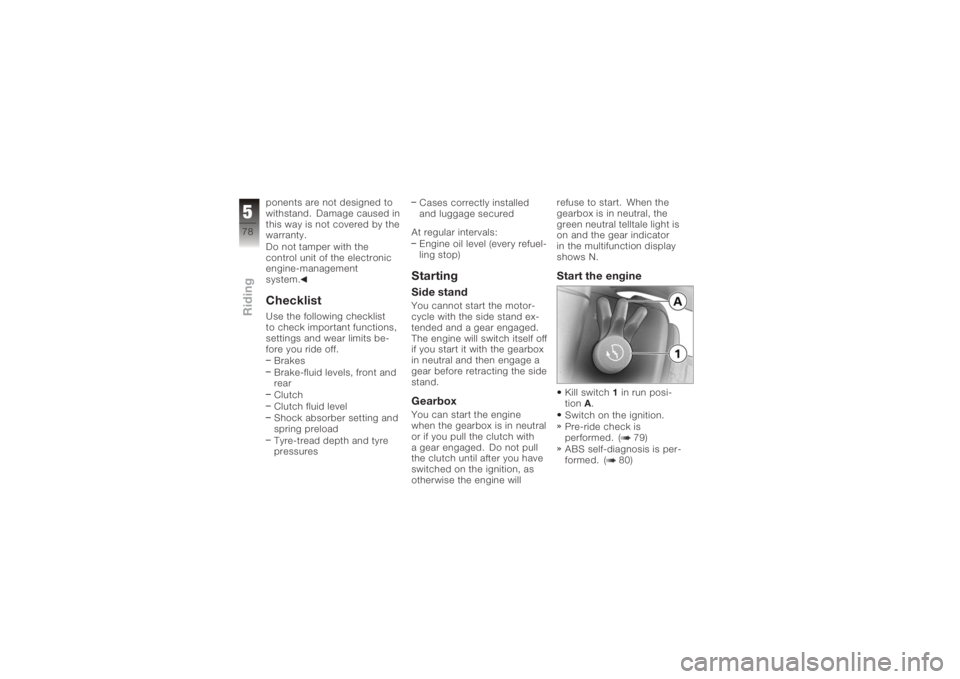
Start the engineKill switch
1in run posi-
tion A.
Switch on the ignition.
Pre-ride check is
performed. ( 79)
ABS self-diagnosis is per-
formed. ( 80)
578zRiding
Page 105 of 172

1 extending tool holderAdapters to accommodate
all tools
2 1/4" bits 5x Torx bits
2x cross-head bits
1x plain screwdriver bit
3 3/8" adapter for socket-
head screws, w/f 22 Removing and installing
front wheel
4 Electric torch LED bulb 5 Set of spanners
3x open-ended spanners,
various sizes
6 Bit adapter Adapter for 1/4" bits
9x12 mm and 3/8" swivel
adapters
Engine oilChecking engine oil level
The engine can seize if
the oil level is low, and
this can lead to accidents.
Always make sure that the oil
level is correct.
Oil can collect in the
sump if the motorcycle
is out of use for an extended
period of time; this oil has to
be pumped into the oil tank
before the level is read. The
engine oil must be at oper-
ating temperature to do this.
Checking the oil level with the engine cold or after no more
than a short ride will lead to
misinterpretation; this in turn,
means that the engine will be
operated with the incorrect
quantity of oil.
In order to ensure that the en-
gine oil level is read correctly,
check the oil level only after a
lengthy trip.
The oil level varies with
the temperature of the
oil. The higher the temperat-
ure the higher the oil level in
the oil tank. Check the engine
oil level immediately after a
lengthy journey.
Make sure the ground is
level and firm and place
the motorcycle on its centre
stand.
Allow the engine to idle for
one minute.
Switch off the ignition.
7103zMaintenance
Page 106 of 172
Remove the front seat
( 65)
Wipe the area around the oil
filler neck clean.
Remove oil filler cap1by
turning it counter-clockwise. Use a dry cloth to wipe oil
dipstick
2clean
Seat the oil dipstick on the
oil filler neck, but do not
engage the threads. Make sure that the dipstick is
seated in guide
3.
Remove the oil dipstick and
check the oil level.
Engine oil, specified
level
Between MIN and MAX
marks
If the oil level is below the
MIN mark: Top up the engine oil.
7104zMaintenance


