Page 2876 of 5135

������D30335
Inward
Outward
������D30336
C70126
C53369
Service Bolt
± POWER STEERINGVANE PUMP ASSY (AZ Series)
51±15
AVENSIS REPAIR MANUAL (RM1018E)
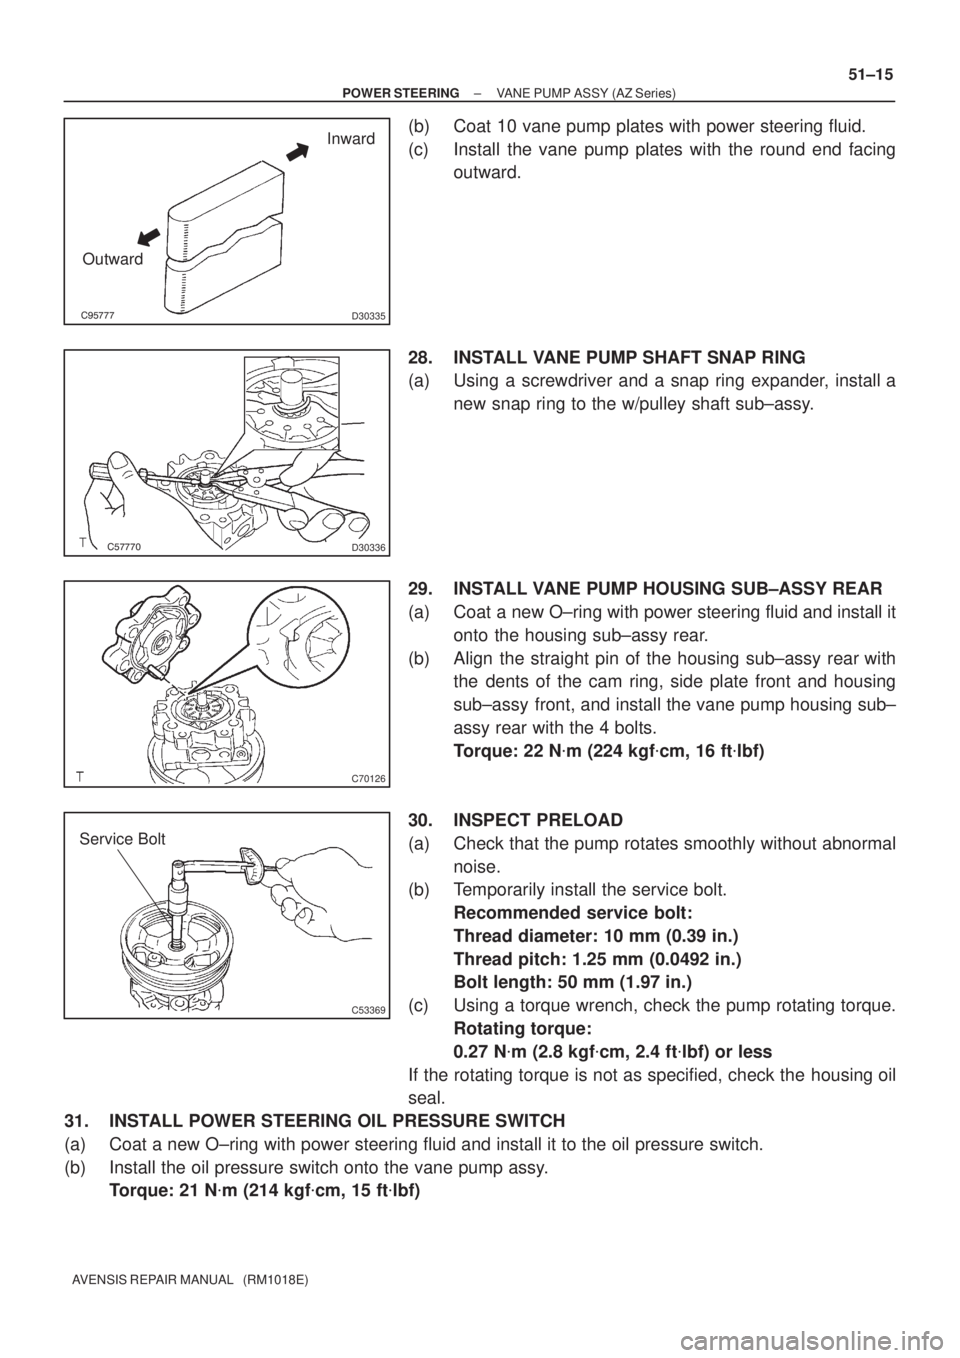
(b) Coat 10 vane pump plates with power steering fluid.
(c) Install the vane pump plates with the round end facing
outward.
28. INSTALL VANE PUMP SHAFT SNAP RING
(a) Using a screwdriver and a snap ring expander, install a
new snap ring to the w/pulley shaft sub±assy.
29. INSTALL VANE PUMP HOUSING SUB±ASSY REAR
(a) Coat a new O±ring with power steering fluid and install it
onto the housing sub±assy rear.
(b) Align the straight pin of the housing sub±assy rear with
the dents of the cam ring, side plate front and housing
sub±assy front, and install the vane pump housing sub±
assy rear with the 4 bolts.
Torque: 22 N�m (224 kgf�cm, 16 ft�lbf)
30. INSPECT PRELOAD
(a) Check that the pump rotates smoothly without abnormal
noise.
(b) Temporarily install the service bolt.
Recommended service bolt:
Thread diameter: 10 mm (0.39 in.)
Thread pitch: 1.25 mm (0.0492 in.)
Bolt length: 50 mm (1.97 in.)
(c) Using a torque wrench, check the pump rotating torque.
Rotating torque:
0.27 N�m (2.8 kgf�cm, 2.4 ft�lbf) or less
If the rotating torque is not as specified, check the housing oil
seal.
31. INSTALL POWER STEERING OIL PRESSURE SWITCH
(a) Coat a new O±ring with power steering fluid and install it to the oil pressure switch.
(b) Install the oil pressure switch onto the vane pump assy.
Torque: 21 N�m (214 kgf�cm, 15 ft�lbf)
Page 3937 of 5135

A78640
1.0 to 1.1 mm
(0.039 to 0.043 in.)
±
DIAGNOSTICS SFI SYSTEM(1AZ±FSE)
05±423
AVENSIS REPAIR MANUAL (RM1018E)
5CHECK SPARK PLUG AND SPARK OF MISFIRING CYLINDER
(a)Remove the ignition coil with igniter assy.
(b)Remove the spark plug.
(c)Check the spark plug type.
Recommended spark plug:
DENSO madeSK20BR11
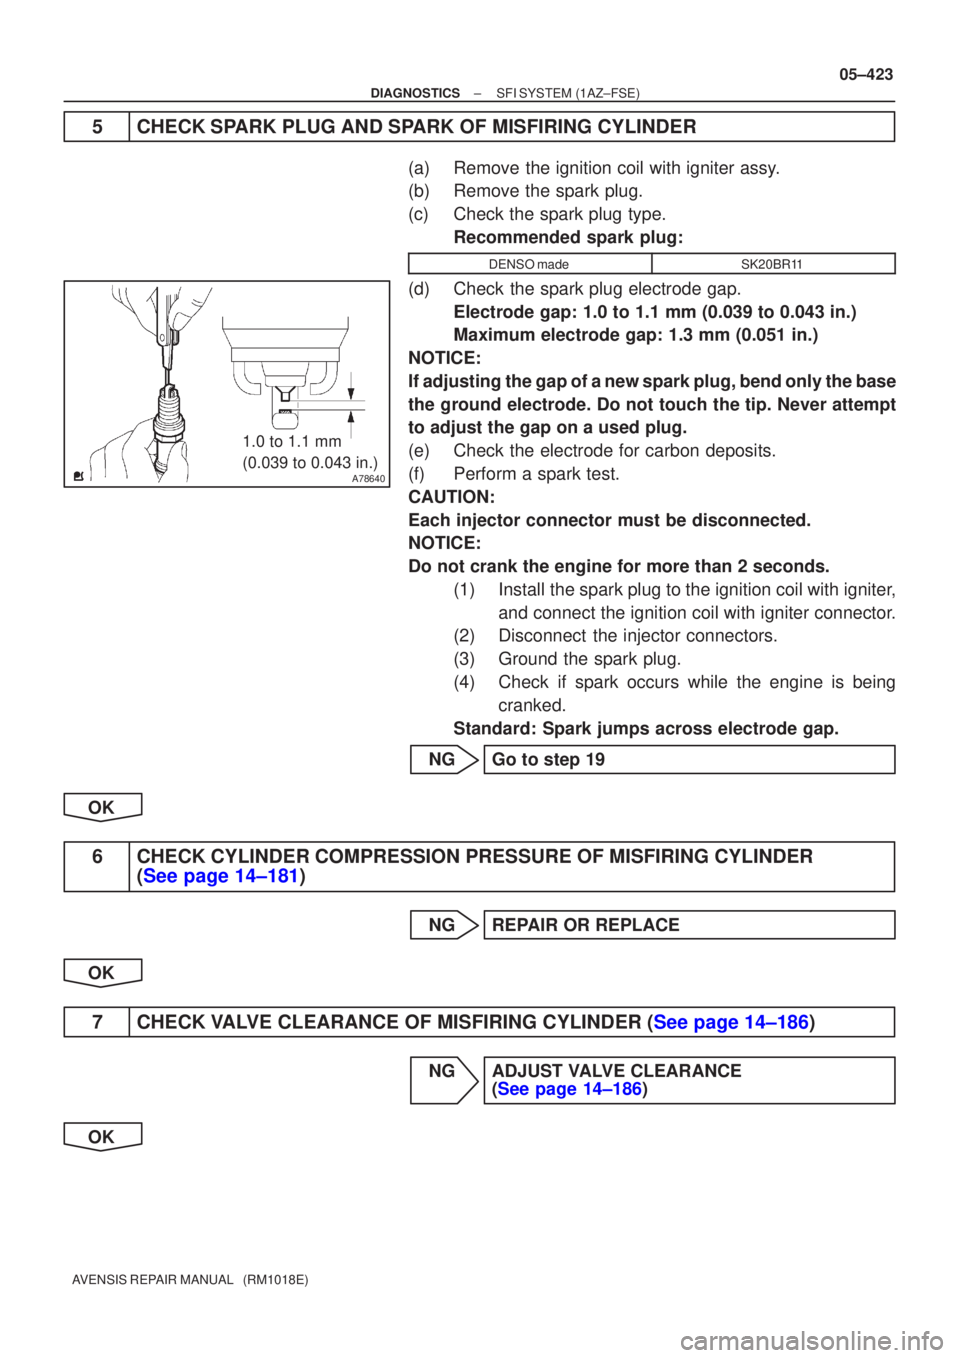
(d)Check the spark plug electrode gap.Electrode gap: 1.0 to 1.1 mm (0.039 to 0.043 in.)
Maximum electrode gap: 1.3 mm (0.051 in.)
NOTICE:
If adjusting the gap of a new spark plug, bend only the base
the ground electrode. Do not touch the tip. Never attempt
to adjust the gap on a used plug.
(e)Check the electrode for carbon deposits.
(f)Perform a spark test.
CAUTION:
Each injector connector must be disconnected.
NOTICE:
Do not crank the engine for more than 2 seconds. (1)Install the spark plug to the ignition coil with igniter,and connect the ignition coil with igniter connector.
(2)Disconnect the injector connectors.
(3)Ground the spark plug.
(4)Check if spark occurs while the engine is being
cranked.
Standard: Spark jumps across electrode gap.
NGGo to step 19
OK
6CHECK CYLINDER COMPRESSION PRESSURE OF MISFIRING CYLINDER (See page 14±181)
NGREPAIR OR REPLACE
OK
7CHECK VALVE CLEARANCE OF MISFIRING CYLINDER (See page 14±186)
NG ADJUST VALVE CLEARANCE (See page 14±186)
OK
Page 4211 of 5135

A78640
1.0 to1.1mm
(0.039 to 0.043 in.)
05−150
− DIAGNOSTICSSFI SYSTEM (2AZ−FSE)
AVENSIS Supplement (RM1045E)
4 READ VALUE OF HAND−HELD TESTER(NUMBER OF MISFIRE)
(a) Connect the hand−held tester to the DLC3.
(b) Turn the ignition switch to ON and turn the hand−held tester ON.
(c) Start the engine.
(d) Select each item: DIAGNOSIS / OBD/MOBD / DATA LIST / ALL / CYL#1to CYL#4.
(e) Read the number of misfire on each cylinder on the hand−held tester.
HINT:
When a misfire is not reproduced, be sure to branch below based on the stored DTC.
Result:
High Misfire Rate CylinderProceed to
1or 2 cylindersA
More than 3 cylindersB
B Go to step12
A
5 CHECK SPARK PLUG AND SPARK OF MISFIRING CYLINDER
(a) Remove the ignition coil with igniter assembly.
(b) Remove the spark plug.
(c) Check the spark plug type.
Recommended spark plug:
DENSO madeSK20BR11
(d) Check the spark plug electrode gap.
Electrode gap:1.0 to1.1mm (0.039 to 0.043 in.)
Maximum electrode gap:1.3 mm (0.051in.)
NOTICE:
If adjusting the gap of a new spark plug, bend only the base
the ground electrode. Do not touch the tip. Never attempt
to adjust the gap on a used plug.
(e) Check the electrode for carbon deposits.
(f) Perform a spark test.
CAUTION:
Each injector connector must be disconnected.
NOTICE:
Do not crank the engine for more than 2 seconds.
(1) Install the spark plug to the ignition coil with igniter,
and connect the ignition coil with igniter connector.
(2) Disconnect the injector connectors.
(3) Ground the spark plug.
(4) Check if spark occurs while the engine is being
cranked.
Standard: Spark jumps across electrode gap.
(g) Reinstall the spark plug.
(h) Reinstall the ignition coil with igniter.
NG Go to step19
OK
Page 4756 of 5135

170IY−01
A56466
20 W−50
15 W−40
10 W−30
5W−30 PREFERRED
Before Next Oil Change Temperatuer Range Anticipated416 2738
0 20 40 60 80 100 −29
−20−18−7 _C
_F
Recommended Viscosity (SAE)
B14332
Oil Pressure Switch
B14333
Oil Pressure Gauge
− LUBRICATIONLUBRICATION SYSTEM (1CD−FTV)(From September,
2003)17−9
AVENSIS Supplement (RM1045E)
LUBRICATION SYSTEM (1CD−FTV)(From September, 2003)
ON−VEHICLE INSPECTION
1. CHECK ENGINE OIL LEVEL
(a) Warm up the engine. Stop the engine, then wait for 5 minutes.
(b) Check that the engine oil level is between the 2 marks on the oil level gage.
If low, check for leakage and add oil up to the upper mark.
NOTICE:
Do not fill with engine oil above the upper mark.
2. CHECK ENGINE OIL QUALITY
(a) Check the oil for deterioration, water intrusion, discoloring
or thinning.
If the quality is visibly poor, replace the oil.
Oil grade:
Use ACEA B1, API grade CF−4, CF or G−DLD−1.
(You may also use API CE or CD.)
SAE 5W−30 is the best choice for your vehicle in
terms of good fuel economy and good starting in cold
weather.
3. REMOVE OIL PRESSURE SWITCH ASSY
(a) Disconnect the oil pressure switch connector.
(b) Using a deep socket wrench 24mm, remove the oil pres-
sure switch.
4. INSTALL OIL PRESSURE GAUGE
(a) Install the oil pressure gauge.
5. WARM UP ENGINE
6. CHECK OIL PRESSURE
Oil pressure:
At idle29 kPa (0.3 kgf/cm2, 4.3 psi) or more
At 4,500 rpm245 to 588 kPa (2.5 to 6.0 kgf/cm2, 36 to 85 psi) or more
7. REMOVE OIL PRESSURE GAUGE
Page 4982 of 5135

A81912
1.0 to 1.1 mm
(0.039 to 0.043 in.)
05–124
– DIAGNOSTICSSFI SYSTEM (1ZZ–FE/3ZZ–FE)(From February, 2004)
AVENSIS REPAIR MANUAL SUPPLEMENT
(RM1098E)
5 CHECK SPARK PLUG AND SPARK OF MISFIRING CYLINDER
(a) Remove the ignition coil assembly.
(b) Remove the spark plug.
(c) Check the spark plug type.
Recommended spark plug:
SupplierType
DENSOK16R–U11
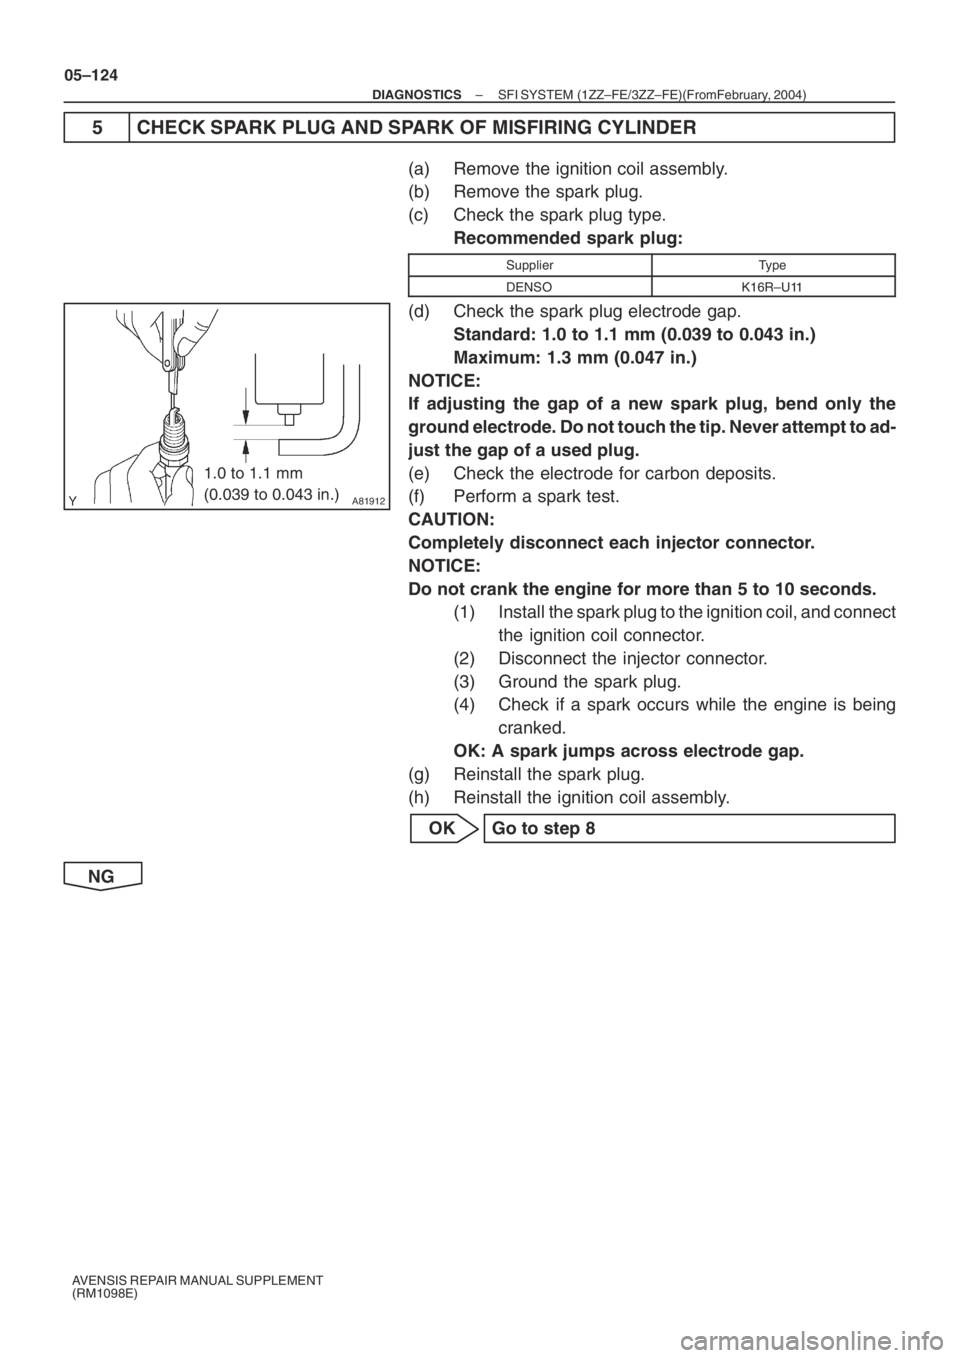
(d) Check the spark plug electrode gap.
Standard: 1.0 to 1.1 mm (0.039 to 0.043 in.)
Maximum: 1.3 mm (0.047 in.)
NOTICE:
If adjusting the gap of a new spark plug, bend only the
ground electrode. Do not touch the tip. Never attempt to ad-
just the gap of a used plug.
(e) Check the electrode for carbon deposits.
(f) Perform a spark test.
CAUTION:
Completely disconnect each injector connector.
NOTICE:
Do not crank the engine for more than 5 to 10 seconds.
(1) Install the spark plug to the ignition coil, and connect
the ignition coil connector.
(2) Disconnect the injector connector.
(3) Ground the spark plug.
(4) Check if a spark occurs while the engine is being
cranked.
OK: A spark jumps across electrode gap.
(g) Reinstall the spark plug.
(h) Reinstall the ignition coil assembly.
OK Go to step 8
NG