2005 PONTIAC BONNEVILLE window
[x] Cancel search: windowPage 183 of 438
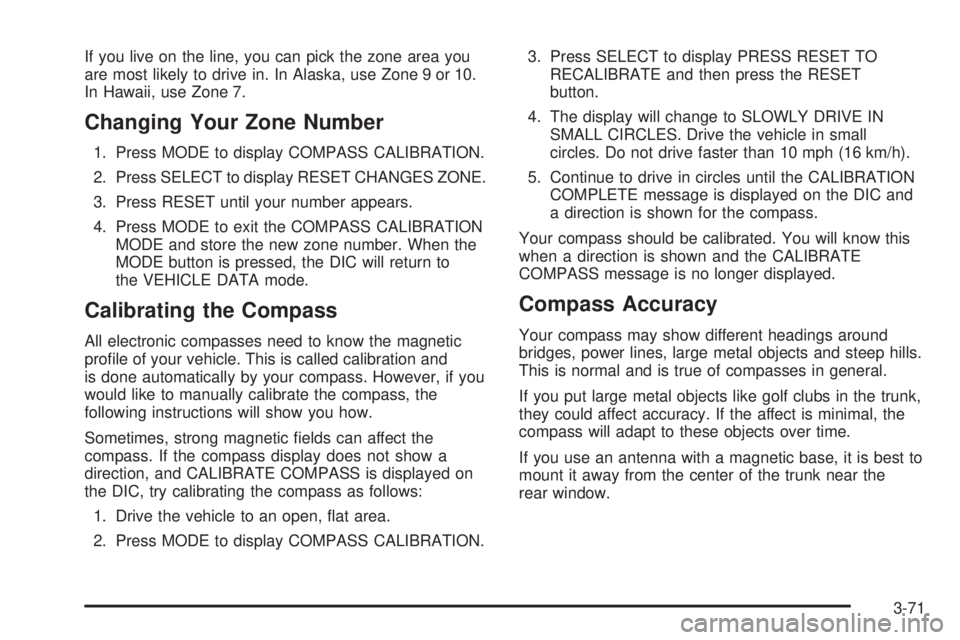
If you live on the line, you can pick the zone area you
are most likely to drive in. In Alaska, use Zone 9 or 10.
In Hawaii, use Zone 7.
Changing Your Zone Number
1. Press MODE to display COMPASS CALIBRATION.
2. Press SELECT to display RESET CHANGES ZONE.
3. Press RESET until your number appears.
4. Press MODE to exit the COMPASS CALIBRATION
MODE and store the new zone number. When the
MODE button is pressed, the DIC will return to
the VEHICLE DATA mode.
Calibrating the Compass
All electronic compasses need to know the magnetic
pro�le of your vehicle. This is called calibration and
is done automatically by your compass. However, if you
would like to manually calibrate the compass, the
following instructions will show you how.
Sometimes, strong magnetic �elds can affect the
compass. If the compass display does not show a
direction, and CALIBRATE COMPASS is displayed on
the DIC, try calibrating the compass as follows:
1. Drive the vehicle to an open, �at area.
2. Press MODE to display COMPASS CALIBRATION.3. Press SELECT to display PRESS RESET TO
RECALIBRATE and then press the RESET
button.
4. The display will change to SLOWLY DRIVE IN
SMALL CIRCLES. Drive the vehicle in small
circles. Do not drive faster than 10 mph (16 km/h).
5. Continue to drive in circles until the CALIBRATION
COMPLETE message is displayed on the DIC and
a direction is shown for the compass.
Your compass should be calibrated. You will know this
when a direction is shown and the CALIBRATE
COMPASS message is no longer displayed.
Compass Accuracy
Your compass may show different headings around
bridges, power lines, large metal objects and steep hills.
This is normal and is true of compasses in general.
If you put large metal objects like golf clubs in the trunk,
they could affect accuracy. If the affect is minimal, the
compass will adapt to these objects over time.
If you use an antenna with a magnetic base, it is best to
mount it away from the center of the trunk near the
rear window.
3-71
Page 214 of 438
Care of Your CDs
Handle CDs carefully. Store them in their original cases
or other protective cases and away from direct
sunlight and dust. If the surface of a CD is soiled,
dampen a clean, soft cloth in a mild, neutral detergent
solution and clean it, wiping from the center to the edge.
Be sure never to touch the side without writing when
handling CDs. Pick up CDs by grasping the outer edges
or the edge of the hole and the outer edge.
Care of Your CD Player
The use of CD lens cleaners for CD players is not
advised, due to the risk of contaminating the lens of the
CD optics with lubricants internal to the CD mechanism.
Diversity Antenna System
The AM-FM antennas are located in the windshield and
rear window. Make sure that the inside surfaces of
the windshield and rear window are not scratched and
that the grid lines on the glass are not damaged. If
the inside surfaces are damaged, they could interfere
with radio reception.Notice:Do not apply aftermarket glass tinting with
metallic �lm. The metallic �lm in some tinting
materials will interfere with or distort the incoming
radio reception. Any damage caused to your
backglass antenna due to metallic tinting materials
will not be covered by your warranty.
Notice:Using a razor blade or sharp object to clear
the inside rear window may damage the rear
window antenna and/or the rear window defogger.
Repairs would not be covered by your warranty. Do
not clear the inside rear window with sharp
objects.
If static is heard on the radio, when the rear window
defogger is turned on, it could mean that a defogger grid
line has been damaged. If this is true, the grid line
must be repaired.
If adding an aftermarket cellular telephone to your
vehicle, and the antenna needs to be attached to the
glass, make sure that the grid lines for the AM-FM
antennas are not damaged. Make sure the cellular
telephone antenna does not touch a grid line.
3-102
Page 237 of 438
The exit ramp can be curved, sometimes quite sharply.
The exit speed is usually posted. Reduce your speed
according to your speedometer, not to your sense
of motion. After driving for any distance at higher
speeds, you may tend to think you are going slower
than you actually are.
Before Leaving on a Long Trip
Make sure you are ready. Try to be well rested. If you
must start when you are not fresh — such as after
a day’s work — do not plan to make too many miles that
�rst part of the journey. Wear comfortable clothing
and shoes you can easily drive in.
Is your vehicle ready for a long trip? If you keep it
serviced and maintained, it is ready to go. If it needs
service, have it done before starting out. Of course, you
will �nd experienced and able service experts in GM
dealerships all across North America. They will be ready
and willing to help if you need it.Here are some things you can check before a trip:
Windshield Washer Fluid:Is the reservoir full? Are
all windows clean inside and outside?
Wiper Blades:Are they in good shape?
Fuel, Engine Oil, Other Fluids:Have you checked
all levels?
Lamps:Are they all working? Are the lenses clean?
Tires:They are vitally important to a safe,
trouble-free trip. Is the tread good enough for
long-distance driving? Are the tires all in�ated to the
recommended pressure?
Weather Forecasts:What is the weather outlook
along your route? Should you delay your trip a
short time to avoid a major storm system?
Maps:Do you have up-to-date maps?
4-21
Page 243 of 438
Put on extra clothing or wrap a blanket around you.
If you have no blankets or extra clothing, make
body insulators from newspapers, burlap bags, rags,
�oor mats — anything you can wrap around
yourself or tuck under your clothing to keep warm.
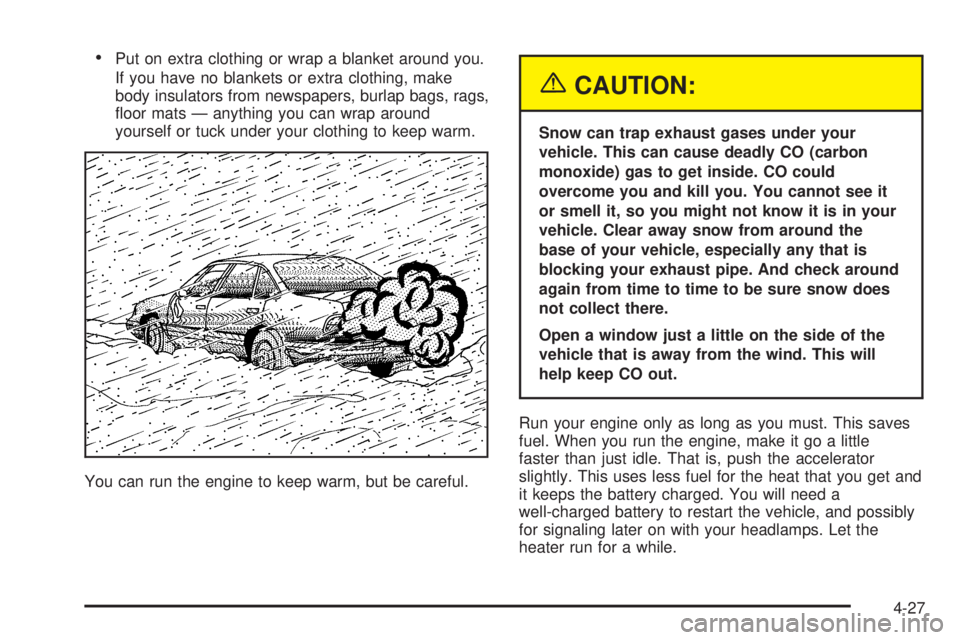
You can run the engine to keep warm, but be careful.
{CAUTION:
Snow can trap exhaust gases under your
vehicle. This can cause deadly CO (carbon
monoxide) gas to get inside. CO could
overcome you and kill you. You cannot see it
or smell it, so you might not know it is in your
vehicle. Clear away snow from around the
base of your vehicle, especially any that is
blocking your exhaust pipe. And check around
again from time to time to be sure snow does
not collect there.
Open a window just a little on the side of the
vehicle that is away from the wind. This will
help keep CO out.
Run your engine only as long as you must. This saves
fuel. When you run the engine, make it go a little
faster than just idle. That is, push the accelerator
slightly. This uses less fuel for the heat that you get and
it keeps the battery charged. You will need a
well-charged battery to restart the vehicle, and possibly
for signaling later on with your headlamps. Let the
heater run for a while.
4-27
Page 244 of 438
Then, shut the engine off and close the window almost
all the way to preserve the heat. Start the engine
again and repeat this only when you feel really
uncomfortable from the cold. But do it as little as
possible. Preserve the fuel as long as you can. To help
keep warm, you can get out of the vehicle and do
some fairly vigorous exercises every half hour or so until
help comes.
If You Are Stuck: In Sand, Mud, Ice
or Snow
In order to free your vehicle when it is stuck, you will
need to spin the wheels, but you do not want to
spin your wheels too fast. The method known as rocking
can help you get out when you are stuck, but you
must use caution.
{CAUTION:
If you let your tires spin at high speed, they
can explode, and you or others could be
injured. And, the transaxle or other parts of the
vehicle can overheat. That could cause an
engine compartment �re or other damage.
When you are stuck, spin the wheels as little
as possible. Do not spin the wheels above
35 mph (55 km/h) as shown on the
speedometer.
Notice:Spinning your wheels can destroy parts of
your vehicle as well as the tires. If you spin the
wheels too fast while shifting your transaxle back
and forth, you can destroy your transaxle. See
Rocking Your Vehicle to Get It Out on page 4-29.
For information about using tire chains on your vehicle,
seeTire Chains on page 5-90.
4-28
Page 262 of 438
When It Is Time for New Tires.......................5-86
Buying New Tires.........................................5-86
Uniform Tire Quality Grading..........................5-87
Wheel Alignment and Tire Balance..................5-89
Wheel Replacement......................................5-89
Tire Chains..................................................5-90
Accessory In�ator.........................................5-91
If a Tire Goes Flat........................................5-92
Changing a Flat Tire.....................................5-93
Removing the Spare Tire and Tools................5-94
Removing the Flat Tire and Installing the
Spare Tire................................................5-95
Storing a Flat or Spare Tire and Tools...........5-100
Compact Spare Tire....................................5-100
Appearance Care..........................................5-101
Fabric/Carpet..............................................5-102
Vinyl.........................................................5-103
Leather......................................................5-104
Instrument Panel.........................................5-104
Interior Plastic Components..........................5-104
Glass Surfaces...........................................5-104
Care of Safety Belts....................................5-104
Weatherstrips.............................................5-105
Washing Your Vehicle..................................5-105
Cleaning Exterior Lamps/Lenses....................5-105
Finish Care................................................5-106Windshield and Wiper Blades.......................5-106
Aluminum or Chrome-Plated Wheels..............5-107
Tires.........................................................5-107
Sheet Metal Damage...................................5-108
Finish Damage...........................................5-108
Underbody Maintenance...............................5-108
Chemical Paint Spotting...............................5-108
Vehicle Care/Appearance Materials................5-109
Vehicle Identi�cation.....................................5-110
Vehicle Identi�cation Number (VIN)................5-110
Service Parts Identi�cation Label...................5-110
Electrical System..........................................5-111
Add-On Electrical Equipment.........................5-111
Headlamp Wiring........................................5-111
Windshield Wiper Fuses...............................5-111
Power Windows and Other
Power Options........................................5-111
Fuses and Circuit Breakers..........................5-111
Engine Compartment Fuse Block
(3.8L V6 Engine).....................................5-112
Engine Compartment Fuse Block
(4.6L V8 Engine).....................................5-114
Rear Underseat Fuse Block..........................5-116
Capacities and Speci�cations........................5-121
Normal Maintenance Replacement Parts.........5-122
Section 5 Service and Appearance Care
5-2
Page 297 of 438
If Steam Is Coming From Your Engine
{CAUTION:
Steam from an overheated engine can burn
you badly, even if you just open the hood.
Stay away from the engine if you see or hear
steam coming from it. Just turn it off and get
everyone away from the vehicle until it cools
down. Wait until there is no sign of steam or
coolant before you open the hood.
If you keep driving when your engine is
overheated, the liquids in it can catch �re.
You or others could be badly burned. Stop
your engine if it overheats, and get out of the
vehicle until the engine is cool.
Notice:If your engine catches �re because you
keep driving with no coolant, your vehicle can
be badly damaged. The costly repairs would not be
covered by your warranty.
If No Steam Is Coming From
Your Engine
If you get an engine overheat warning but see or hear
no steam, the problem may not be too serious.
Sometimes the engine can get a little too hot when you:
Climb a long hill on a hot day.
Stop after high-speed driving.
Idle for long periods in traffic.
Tow a trailer.
If you get the overheat warning with no sign of steam,
try this for a minute or so:
1. In heavy traffic, let the engine idle in NEUTRAL (N)
while stopped. If it is safe to do so, pull off the road,
shift to PARK (P) or NEUTRAL (N) and let the
engine idle.
2. Turn on your heater to full hot at the highest fan
speed and open the windows as necessary.
If you no longer have the overheat warning, you can
drive. Just to be safe, drive slower for about 10 minutes.
If the warning does not come back on, you can drive
normally.
5-37
Page 299 of 438
Notice:If your engine catches �re because you
keep driving with no coolant, your vehicle can
be badly damaged. The costly repairs would not be
covered by your warranty. SeeOverheated Engine
Protection Operating Mode (4.6L V8 Engine) on
page 5-40for information on driving to a safe place
in an emergency.
If No Steam Is Coming From Your
Engine
An overheat warning, along with a low coolant message,
can indicate a serious problem. SeeDIC Warnings
and Messages on page 3-62.
If you get an engine overheat warning with no low
coolant message, but see or hear no steam, the problem
may not be too serious. Sometimes the engine can
get a little too hot when you:
Climb a long hill on a hot day.
Stop after high-speed driving.
Idle for long periods in traffic.If you get the overheat warning with no sign of steam,
try this for a minute or so:
1. In heavy traffic, let the engine idle in NEUTRAL (N)
while stopped. If it safe to do so, pull off the road,
shift to PARK (P) or NEUTRAL (N) and let the
engine idle.
2. Set the climate controls to the highest heat setting
and fan speed and open the windows as necessary.
If you no longer have the overheat warning, you
can drive. Just to be safe, drive slower for about
10 minutes. If the warning does not come back on,
you can drive normally.
If the warning continues, pull over, stop, and park your
vehicle right away.
If there is still no sign of steam, idle the engine for
three minutes while you are parked. If you still have the
warning,turn off the engine and get everyone out of
the vehicleuntil it cools down. Also, see “Overheated
Engine Protection Operating Mode” later in this section.
You may decide not to lift the hood but to get service
help right away.
5-39