Page 136 of 227
134 NavigationDestination input�
Press the
Parking
soft key.
The Parking Lot Selection menu is
displayed.
Selecting a parking lot
The map is displayed and shows the
destination and the available parkings lots.
�
Use the
Next
or
Prev.
soft key to
select a parking lot on the map.
The parking lot selected is marked in
color. The name and distance from the
current position are shown on the
status bar.
�
Press the
Details
soft key to see
more information about the parking lot.
�
Press E.
Route guidance will begin.
iIf there is no parking lot near
the destination, the message
No
Parking
Found
will appear.
Page 137 of 227

135 Navigation
Destination input
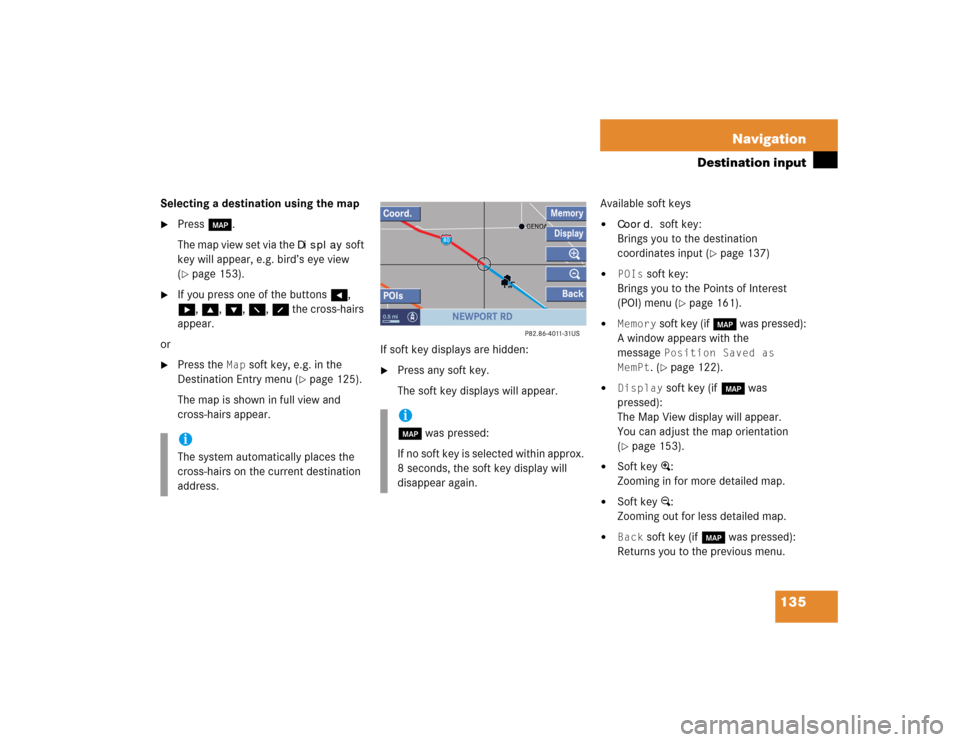
Selecting a destination using the map�
Press c.
The map view set via the
Display
soft
key will appear, e.g. bird’s eye view
(
�page 153).
�
If you press one of the buttons H,
h, g, G, F, f the cross-hairs
appear.
or
�
Press the
Map
soft key, e.g. in the
Destination Entry menu (
�page 125).
The map is shown in full view and
cross-hairs appear.If soft key displays are hidden:
�
Press any soft key.
The soft key displays will appear.Available soft keys
�
Coord.
soft key
:
Brings you to the destination
coordinates input (
�page 137)
�
POIs
soft key:
Brings you to the Points of Interest
(POI) menu (
�page 161).
�
Memory
soft key (if c was pressed):
A window appears with the
message Position Saved as
MemPt
. (�page 122).
�
Display
soft key (if c was
pressed):
The Map View display will appear.
You can adjust the map orientation
(
�page 153).
�
Soft key +:
Zooming in for more detailed map.
�
Soft key ):
Zooming out for less detailed map.
�
Back
soft key (if c was pressed):
Returns you to the previous menu.
iThe system automatically places the
cross-hairs on the current destination
address.
ic was pressed:
If no soft key is selected within approx.
8 seconds, the soft key display will
disappear again.
Page 138 of 227
136 NavigationDestination input�
Press H, h, g, G, F, f to
move the cross-hairs.
The direction of movement of the
buttons depends on the map direction
selected (
�page 153).
�
2D North Up, 2D Heading Up:
Press F and f to move the
cross-hairs diagonally.
�
Bird’s-Eye View:
Use H and h to turn the map
round the vertical axis of the cross-
hairs.
Press g or G to move your
position on the map forward or
backward.This allows you to select your destination.
�
Release the button.
If the system is able to assign a street
name to the selected location, it is
displayed on the status bar.
In this example:
NEWPORT
RD
�
Press E.
The system uses the point at the center
of the cross-hairs as destination.
Route guidance will begin.
iIf you press the
Back
soft key, your
selection will be discarded. The system
then uses the data of the previous
destination.
Page 139 of 227
137 Navigation
Destination input
Selecting a destination using coordi-
nates�
With either the map type (
�page 135)
or (
�page 144) displayed, press the
Coord.
soft key.
The
Coord.Entry
menu will appear.
The menu displays either
�
the coordinates of the current ve-
hicle position
or
�
the position of the cross-hairs on
the map.
�
Use h or H to select one of the
items degree, minute or second.
�
Press g or G.
Depending on the selection, set the
desired value.
�
Press E.
The setting is saved. The map with the
cross-hairs is displayed. The cross
hairs are positioned on the previously
input coordinates.iThe values which can be set for latitude
(NORTH, SOUTH) and longitude (EAST,
WEST) are dependent on map data
available on the DVD.
iChange-over between NORTH and
SOUTH (latitude) and between EAST
and WEST (longitude) is effected auto-
matically in accordance with the input.
Page 140 of 227
138 NavigationDestination input�
Activate the Navigation main menu
(�page 118).
�
Press the
Home
soft key.
The home address is shown.
�
Start route guidance (
�page 139).Editing home address
�
Press the
Change
soft key.
The Change Home Addr. menu will
appear.
You can use the following functions
�
selecting a destination from the
destination memory (
�page 158)
�
entering destination address
(�page 125)
�
selecting a destination from the last
destinations memory (
�page 155)
�
selecting a Point of Interest
(�page 162)
�
choosing the current position
�
Press g or G to select an option.
�
Press E.
�
Select the address.
�
Press E when the Save as home
address menu will appear.
The new home address is shown.
�
Start route guidance (
�page 139).
Selecting home address
Page 141 of 227

139 Navigation
Route guidance
� Route guidance
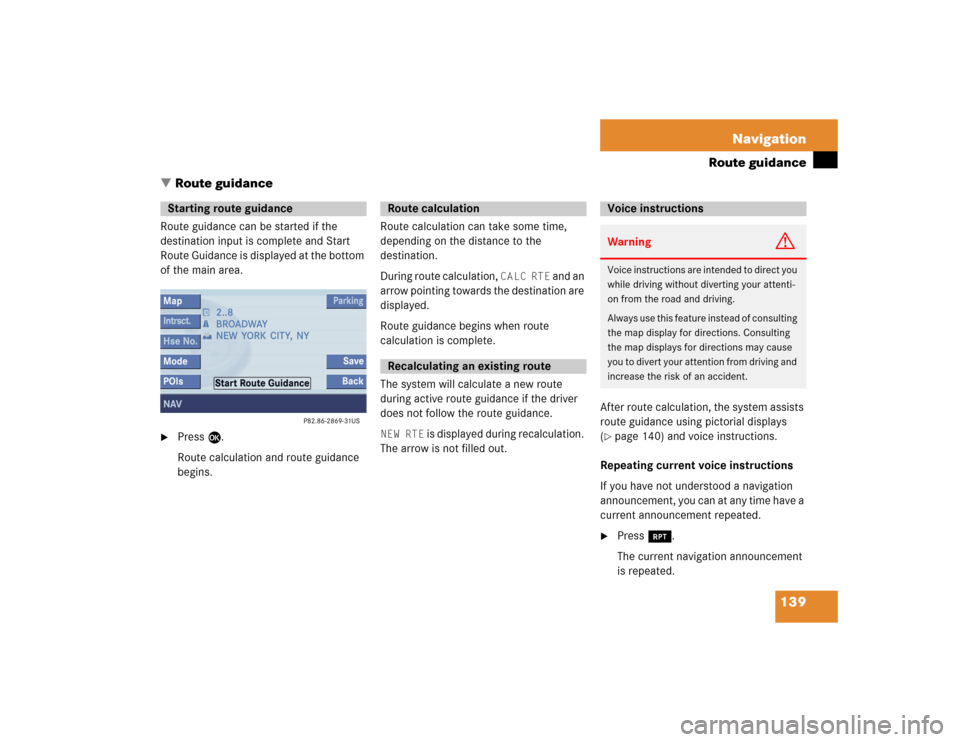
Route guidance can be started if the
destination input is complete and Start
Route Guidance is displayed at the bottom
of the main area. �
Press E.
Route calculation and route guidance
begins. Route calculation can take some time,
depending on the distance to the
destination.
During route calculation,
CALC RTE
and an
arrow pointing towards the destination are
displayed.
Route guidance begins when route
calculation is complete.
The system will calculate a new route
during active route guidance if the driver
does not follow the route guidance.
NEW RTE
is displayed during recalculation.
The arrow is not filled out.After route calculation, the system assists
route guidance using pictorial displays
(
�page 140) and voice instructions.
Repeating current voice instructions
If you have not understood a navigation
announcement, you can at any time have a
current announcement repeated.
�
Press j.
The current navigation announcement
is repeated.
Starting route guidance
Route calculationRecalculating an existing route
Voice instructionsWarning
G
Voice instructions are intended to direct you
while driving without diverting your attenti-
on from the road and driving.
Always use this feature instead of consulting
the map display for directions. Consulting
the map displays for directions may cause
you to divert your attention from driving and
increase the risk of an accident.
Page 142 of 227

140 NavigationRoute guidanceMuting current voice instructions�
Press J.
The current announcement is stopped.
You will hear the next navigation
announcement normally.
Switching voice instructions On/Off
Switching off
�
During a navigation announcement
press J for 2 seconds.
You will hear a confirmation beep if the
beep tones option was activated in the
system settings (
�page 201).
The message
Voice Announcements
Muted
will appear briefly. Further route
guidance takes place using only the
symbols in the display. If a new route
guidance cycle is started, the
announcements are automatically
switched on again.
Switching on again
�
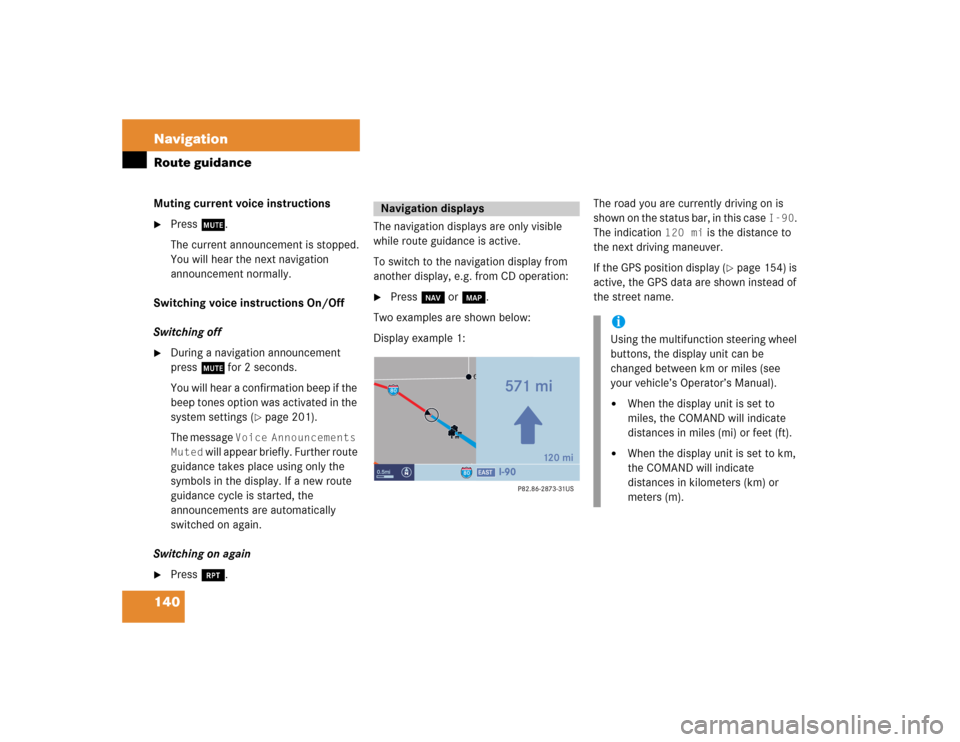
Press j.The navigation displays are only visible
while route guidance is active.
To switch to the navigation display from
another display, e.g. from CD operation:
�
Press b or c.
Two examples are shown below:
Display example 1:The road you are currently driving on is
shown on the status bar, in this case
I-90
.
The indication
120 mi
is the distance to
the next driving maneuver.
If the GPS position display (
�page 154) is
active, the GPS data are shown instead of
the street name.
Navigation displays
iUsing the multifunction steering wheel
buttons, the display unit can be
changed between km or miles (see
your vehicle’s Operator’s Manual). �
When the display unit is set to
miles, the COMAND will indicate
distances in miles (mi) or feet (ft).
�
When the display unit is set to km,
the COMAND will indicate
distances in kilometers (km) or
meters (m).
Page 143 of 227

141 Navigation
Route guidance
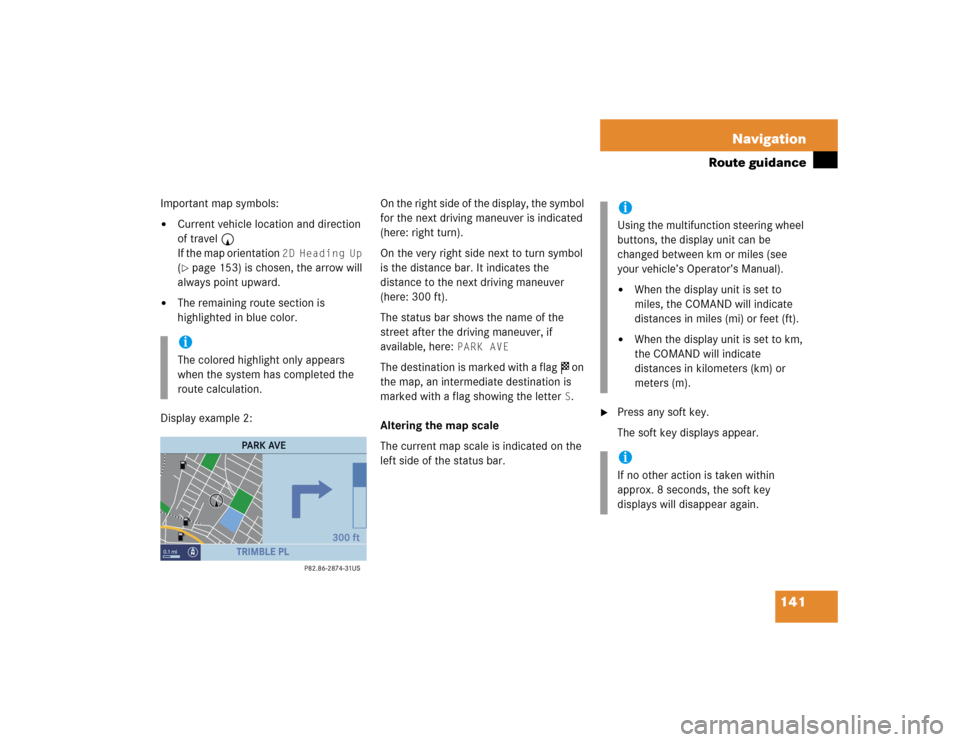
Important map symbols:�
Current vehicle location and direction
of travel y
If the map orientation
2D Heading Up
(�page 153) is chosen, the arrow will
always point upward.
�
The remaining route section is
highlighted in blue color.
Display example 2:On the right side of the display, the symbol
for the next driving maneuver is indicated
(here: right turn).
On the very right side next to turn symbol
is the distance bar. It indicates the
distance to the next driving maneuver
(here: 300 ft).
The status bar shows the name of the
street after the driving maneuver, if
available, here:
PARK AVE
The destination is marked with a flag $ on
the map, an intermediate destination is
marked with a flag showing the letter
S.
Altering the map scale
The current map scale is indicated on the
left side of the status bar.
�
Press any soft key.
The soft key displays appear.
iThe colored highlight only appears
when the system has completed the
route calculation.
iUsing the multifunction steering wheel
buttons, the display unit can be
changed between km or miles (see
your vehicle’s Operator’s Manual). �
When the display unit is set to
miles, the COMAND will indicate
distances in miles (mi) or feet (ft).
�
When the display unit is set to km,
the COMAND will indicate
distances in kilometers (km) or
meters (m).
iIf no other action is taken within
approx. 8 seconds, the soft key
displays will disappear again.