Page 519 of 969

1419K-03
A78770
SST
A78772
SST
- ENGINE MECHANICALCYLINDER HEAD ASSY (3MZ-FE)
14-143
2235 Author�: Date�:
2005 LEXUS ES330 REPAIR MANUAL (RM1124U)
OVERHAUL
1. REMOVE W/HEAD STRAIGHT SCREW PLUG NO.1 (RH CYLINDER)
(a) Using a straight hexagon wrench 14, remove the 2 screw plugs.
2. REMOVE W/HEAD STRAIGHT SCREW PLUG NO.2 (LH CYLINDER)
(a) Using a straight hexagon wrench 14, remove the 2 screw plugs.
3. REMOVE VALVE LIFTER
HINT:
Store the lifters in the correct order so that they can be returned to the original locations when reassembling.
4. REMOVE INTAKE VALVE
(a) Using SST, compress the spring, then remove the 2 re-
tainer locks, retainer, spring and valve.
SST 09202-70020 (09202-00010)
HINT:
Store the valves, springs, seats and retainers in the correct or-
der so that they can be returned to the original locations when
reassembling.
5. REMOVE EXHAUST VALVE
(a) Using SST, compress the spring, then remove the 2 re-
tainer locks, retainer, spring and valve.
SST 09202-70020 (09202-00010)
HINT:
Store the valves, springs, seats and retainers in the correct or-
der so that they can be returned to the original locations when
reassembling.
6. REMOVE VALVE STEM OIL O SEAL OR RING
(a) Using needle-nose pliers, remove the oil seal.
7. REMOVE VALVE SPRING SEAT
8. REMOVE SEMICIRCULAR PLUG
Page 708 of 969

2605T-05
C91608
B Front:A
C91609
C Rear:
D
SA3213
A
DB
Front
C
F40165
- FRONT SUSPENSIONFRONT WHEEL ALIGNMENT (From July, 2003)
26-5
2368 Author�: Date�:
2005 LEXUS ES330 REPAIR MANUAL (RM1124U)
FRONT WHEEL ALIGNMENT (From July, 2003)
ADJUSTMENT
1. INSPECT TIRE (See page 26-5)
2. MEASURE VEHICLE HEIGHT
Vehicle height:
FrontA - B: 120 mm (4.72 in.)
RearD - C: 52 mm (2.05 in.)
Measuring points:
A: Ground clearance of front wheel center
B: Ground clearance of lower suspension arm No. 2 set bolt
center
C: Ground clearance of strut rod set bolt center
D: Ground clearance of rear wheel center
NOTICE:
Before inspecting the wheel alignment, adjust the vehicle
height to the specified value.
HINT:
Bounce the vehicle at the corners up and down to stabilize the
suspension and inspect the vehicle height.
3. INSPECT TOE-IN
Toe-in:
Toe-in
(total)A + B: 0° ± 12' (0° ± 0.2°)
C - D: 0 ± 2 mm (0 ± 0.08 in.)
If the toe-in is not within the specified value, adjust it at the rack
ends.
4. ADJUST TOE-IN
(a) Remove the rack boot set clips.
(b) Loosen the tie rod end lock nuts.
(c) Turn the right and left rack ends by an equal amount to
adjust the toe-in.
HINT:
Try to adjust the toe-in to the center of the specified value.
(d) Make sure that the lengths of the right and left rack ends
are the same.
(e) Torque the tie rod end lock nuts.
Torque: 74 N´m (755 kgf´cm, 55 ft´lbf)
(f) Place the boots on the seats and install the clips.
HINT:
Make sure that the boots are not twisted.
(g) Perform VSC system calibration. (See page 05-471)
Page 845 of 969

Page 5 of 6
Failure to follow the recommendations indicated below could result in reduced
effectiveness of the seat belt restraint system in case of vehicle collision, causing
personal injury.
If your seat belt cannot be fastened securely because it is not long enough, a
personalized Seat Belt Extender is available from your Lexus dealer free of charge.
Please visit your local Lexus dealer so that the dealer can order the proper required
length extender. Bring the heaviest coat you expect to wear for proper measurement and
selection of length. Additional ordering information is available at your Lexus dealer.
When the Seat Belt Extender is provided for rear seat positions (with automatic locking
retractor), make sure that the retractor is locked when in use.
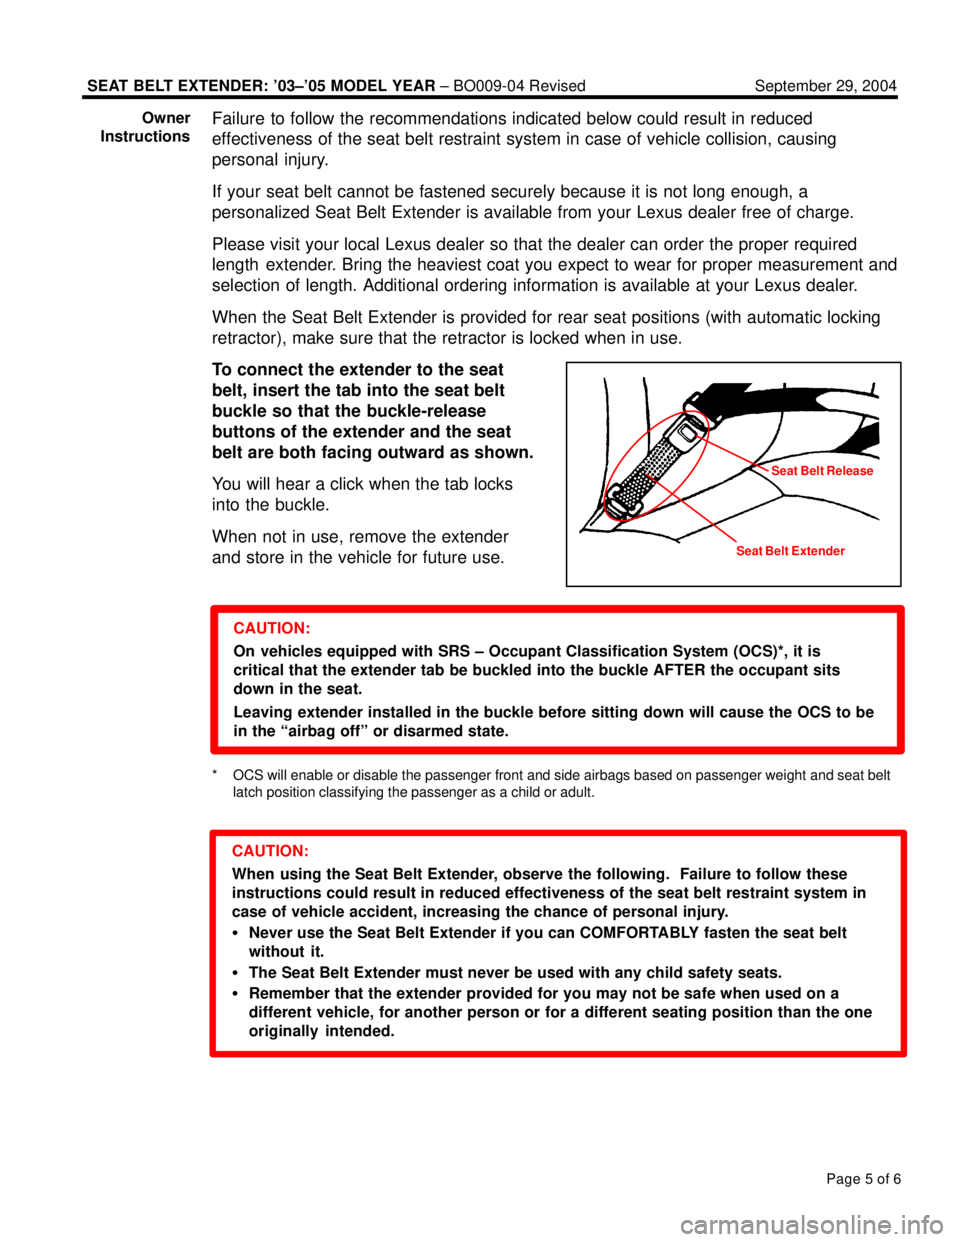
To connect the extender to the seat
belt, insert the tab into the seat belt
buckle so that the buckle-release
buttons of the extender and the seat
belt are both facing outward as shown.
You will hear a click when the tab locks
into the buckle.
When not in use, remove the extender
and store in the vehicle for future use.
CAUTION:
On vehicles equipped with SRS ± Occupant Classification System (OCS)*, it is
critical that the extender tab be buckled into the buckle AFTER the occupant sits
down in the seat.
Leaving extender installed in the buckle before sitting down will cause the OCS to be
in the ªairbag offº or disarmed state.
* OCS will enable or disable the passenger front and side airbags based on passenger weight and seat belt
latch position classifying the passenger as a child or adult.
CAUTION:
When using the Seat Belt Extender, observe the following. Failure to follow these
instructions could result in reduced effectiveness of the seat belt restraint system in
case of vehicle accident, increasing the chance of personal injury.
�Never use the Seat Belt Extender if you can COMFORTABLY fasten the seat belt
without it.
�The Seat Belt Extender must never be used with any child safety seats.
�Remember that the extender provided for you may not be safe when used on a
different vehicle, for another person or for a different seating position than the one
originally intended.September 29, 2004
SEAT BELT EXTENDER: '03±'05 MODEL YEAR ± BO009-04 Revised
Owner
Instructions
Seat Belt ExtenderSeat Belt Release