2005 Hyundai H-1 (Grand Starex) lock
[x] Cancel search: lockPage 57 of 205

1
BEFORE DRIVING YOUR VEHICLE
43
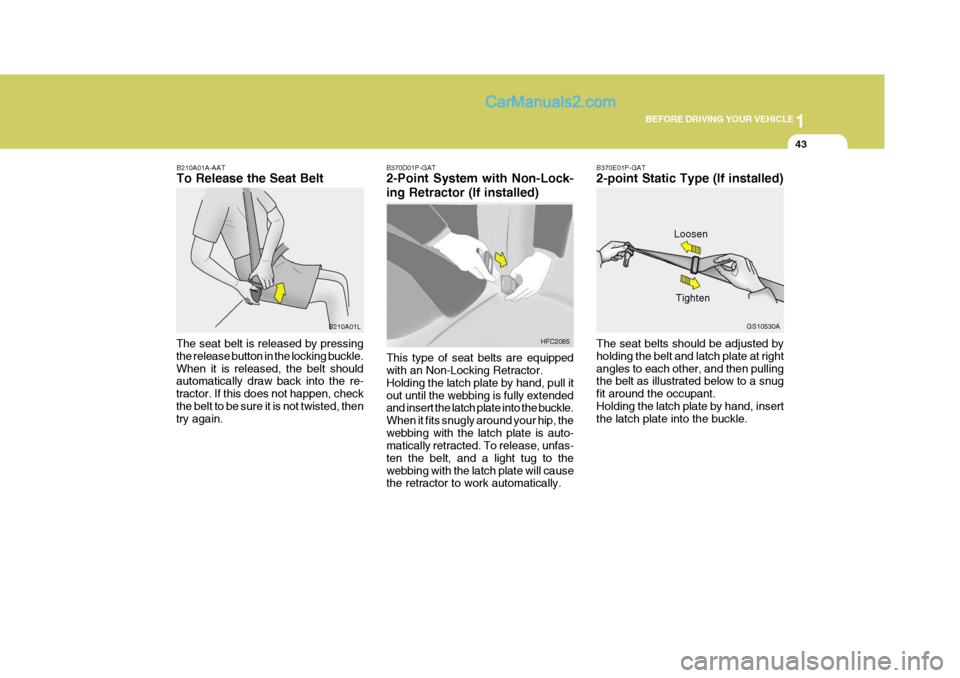
B210A01A-AAT To Release the Seat Belt
The seat belt is released by pressing the release button in the locking buckle.When it is released, the belt should automatically draw back into the re- tractor. If this does not happen, checkthe belt to be sure it is not twisted, then try again. B210A01LB370D01P-GAT 2-Point System with Non-Lock- ing Retractor (If installed) This type of seat belts are equipped with an Non-Locking Retractor. Holding the latch plate by hand, pull itout until the webbing is fully extended and insert the latch plate into the buckle. When it fits snugly around your hip, thewebbing with the latch plate is auto- matically retracted. To release, unfas- ten the belt, and a light tug to thewebbing with the latch plate will cause the retractor to work automatically. HFC2085B370E01P-GAT 2-point Static Type (If installed) The seat belts should be adjusted by holding the belt and latch plate at rightangles to each other, and then pulling the belt as illustrated below to a snug fit around the occupant.Holding the latch plate by hand, insert the latch plate into the buckle. Loosen
GS10530A
Tighten
Page 58 of 205

1BEFORE DRIVING YOUR VEHICLE
44CHILD RESTRAINT SYSTEM
B230A03A-GAT (Minibus/Van) (If installed) Children riding in the car should sit in the rear seat and must always berestrained to minimize the risk of injury in an accident, sudden stop or sudden maneuver. According to accident sta-tistics, children are safer when prop- erly restrained in the rear seats than in the front seat. Larger children shoulduse one of the seat belts provided. You are required by law to use safety restraints for children. If small childrenride in your vehicle you must put them in a child restraint system (safety seat). Children could be injured in a crash iftheir restraints are not properly se- cured. For small children and babies, a child seat or infant seat must be used.Before buying a particular child re- straint system, make sure it fits your car seat and seat belts, and fits yourchild. Follow all the instructions pro- vided by the manufacturer when in- stalling the child restraint system.
!
NOTE:
o When the pre-tensioner seat belt is activated, there may be an ex- plosion noise. This noise is nor-mal and is not hazardous.
o Pre-tensioner seat belt is de-
signed to operate only when asufficiently severe impact occurs and it will be only operated once.
WARNING:
If the pre-tensioner seat belt was activated, never attempt to replace it by yourself. It must be replaced by an authorized Hyundai Dealer.B180B02X-GAT Pre-tensioner Seat Belt (If installed) Ordinarily the pre-tensioner seat belt operates in the same way as E.L.R (Emergency Locking Retractor) type (When vehicles stop suddenly, thebelt will lock into the position. It will also lock if you try to lean forward too quickly.) .
However, when vehicles crash, the retractor rewinds the belt webbing. This will restrain the passenger move-ment quickly and also reduce the slack between passenger and belt webbing. B180B02A
Page 60 of 205

1BEFORE DRIVING YOUR VEHICLE
46
B230G01P-GAT Installation on Outboard Rear Seats To install a child restraint system in the outboard rear seats, extend the shoul- der/lap belt from its retractor. Install the child restraint system, buckle theseat belt and allow the seat belt to take up any slack. Make sure that the lap portion of the belt is tight around thechild restraint system and the shoulder portion of the belt is positioned so that it cannot interfere with the child's heador neck. After installation of the child restraint system, try to move it in all directions to be sure the child restraintsystem is securely installed. B230G01L-1
To install a child restraint system in thecenter rear seat, extend the shoulder/lap belt entirely from its retractor until a "click" is felt. This will engage the seat belt retractor automatic lockingfeature, which allows the seat belt to retract but not extend. Install the child restraint system, buckle the seat beltand allow the seat belt to take up any slack. Make sure that the lap portion of the belt is tight around the child re-straint system and the shoulder por- tion of the belt is positioned so that it can not interfere with the child's heador neck. Also, double check to be sure that the retractor has engaged the Automatic Locking feature by trying toextend webbing out of the retractor. If the retractor is in the Automatic Lock- ing mode, the belt will be locked.B230F02P-AAT Installation on Rear Seat Center Position
2 point static type
B235G02Y
B235G01Y-1
3 point type
Page 61 of 205

1
BEFORE DRIVING YOUR VEHICLE
47
!
If you need to tighten the belt, pull more webbing toward the retractor.When you unbuckle the seat belt and allow it to retract, the retractor will automatically revert back to its normalseated passenger emergency locking usage condition. NOTE:
o Before installing the child re-
straint system, read the instruc- tions supplied by the child re- straint system manufacturer.
o If the seat belt does not operate as described, have the systemchecked immediately by yourauthorized Hyundai dealer.
WARNING:
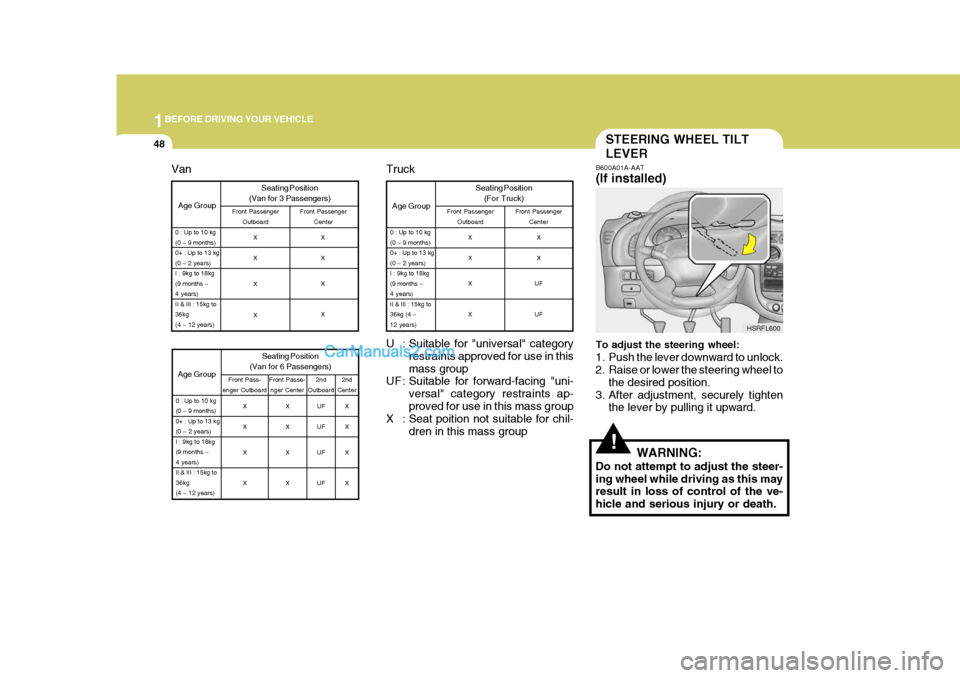
Do not install any child restraintsystem in the front passenger seat.Should an accident occur and cause the passenger side airbag to de- ploy, it could severely injure or killan infant or child seated in an infant or child seat. Therefore, install a child restraint system only in therear seat of your vehicle. G230G05P-GAT Child Seat Restraint Suitability For Seat Position Use child safety seats that have been officially approved and are appropriatefor your children. When using the child safety seats, refer to the following table.
UF UF UF UF
0 : Up to 10 kg (0 ~ 9 months)0+ : Up to 13 kg(0 ~ 2 years)I : 9kg to 18kg(9 months ~4 years)II & III : 15kg to36kg(4 ~ 12 years) 3rd
Center
3rd
Outboard
Age Group Seating Position
(Minibus for 7 Passengers)2nd
Left Seat2nd
Right Seat
U U U
UF U U U
UF X X X X
Front
Passenger
X X X
UF
3rd SeatAge Group Seating Position
(Minibus for 9 Passengers)Front Passenger 2nd Seat
0 : Up to 10 kg (0 ~ 9 months)0+ : Up to 13 kg(0 ~ 2 years)I : 9kg to 18kg(9 months ~4 years)II & III : 15kg to36kg(4 ~12 years)Out-
board Center Left
Seat Right
Seat
Center Out-
board Center
X X X X X X X XU U U
UF UF UF UF UF X X X XX X X XUF UF UF UF
Minibus
Page 62 of 205

1BEFORE DRIVING YOUR VEHICLE
48STEERING WHEEL TILT LEVER
!
B600A01A-AAT (If installed) To adjust the steering wheel:
1. Push the lever downward to unlock.
2. Raise or lower the steering wheel to the desired position.
3. After adjustment, securely tighten the lever by pulling it upward.
WARNING:
Do not attempt to adjust the steer- ing wheel while driving as this may result in loss of control of the ve- hicle and serious injury or death. HSRFL600
U : Suitable for "universal" category restraints approved for use in thismass group
UF : Suitable for forward-facing "uni-
versal" category restraints ap-proved for use in this mass group
X : Seat poition not suitable for chil-
dren in this mass group
Age Group
0 : Up to 10 kg (0 ~ 9 months)0+ : Up to 13 kg(0 ~ 2 years)I : 9kg to 18kg(9 months ~4 years)II & III : 15kg to36kg (4 ~12 years)
Truck Seating Position(For Truck)
Front Passenger Outboard Front Passenger
Center
X X X X X X
UF UF
Age Group Seating Position
(Van for 3 Passengers)Front Passenger Outboard Front Passenger
Center
0 : Up to 10 kg (0 ~ 9 months)0+ : Up to 13 kg(0 ~ 2 years)I : 9kg to 18kg(9 months ~4 years)II & III : 15kg to36kg(4 ~ 12 years)
X X X X X X X X
Age Group
0 : Up to 10 kg (0 ~ 9 months)0+ : Up to 13 kg(0 ~ 2 years)I : 9kg to 18kg(9 months ~4 years)II & III : 15kg to36kg(4 ~ 12 years)
Van
2nd
Center
2nd
Outboard
Seating Position
(Van for 6 Passengers)
Front Pass-
enger Outboard Front Passe-
nger Center
X X X X X X X XUF UF UF UFX X X X
Page 65 of 205

1
BEFORE DRIVING YOUR VEHICLE
51
CAUTION:
When installing the container of liquid air refresher inside a vehicle, do not place it near the instrumentcluster nor on the crash pad sur- face. If there is any leakage from the air refresher onto these areas (In-strument cluster, crash pad or air ventilator), it may damage these parts. If the liquid from air refresherdoes leak onto these areas, wash them with water immediately.!
Passenger's Airbag
B240B04P!WARNING:
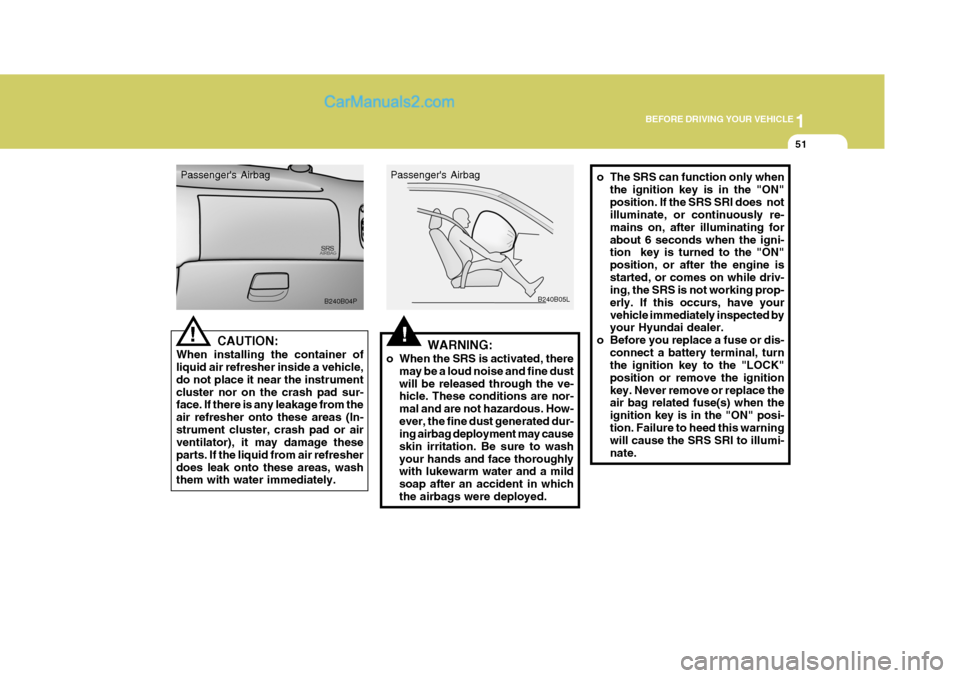
o When the SRS is activated, there may be a loud noise and fine dust will be released through the ve- hicle. These conditions are nor- mal and are not hazardous. How-ever, the fine dust generated dur- ing airbag deployment may cause skin irritation. Be sure to washyour hands and face thoroughly with lukewarm water and a mild soap after an accident in whichthe airbags were deployed. B240B05L
Passenger's Airbag
o The SRS can function only when
the ignition key is in the "ON" position. If the SRS SRI does not illuminate, or continuously re- mains on, after illuminating forabout 6 seconds when the igni- tion key is turned to the "ON" position, or after the engine isstarted, or comes on while driv- ing, the SRS is not working prop- erly. If this occurs, have yourvehicle immediately inspected by your Hyundai dealer.
o Before you replace a fuse or dis-
connect a battery terminal, turnthe ignition key to the "LOCK" position or remove the ignitionkey. Never remove or replace the air bag related fuse(s) when the ignition key is in the "ON" posi-tion. Failure to heed this warning will cause the SRS SRI to illumi- nate.
Page 69 of 205

3
Before starting the Engine .......................................... 3-2 Precaution for Exhaust Fumes While
Starting and Driving .................................................... 3-2
To Start the Engine ..................................................... 3-3
Key Positions ............................................................... 3-3Starting........................................................................ 3-4
Manual Transmission .................................................. 3-7
Automatic Transmission .............................................. 3-9Driving with Electronic Dual-Range Automatic
Transmission ............................................................ 3-13
Four-Wheel Drive (4WD) ........................................... 3-15
Brake System ............................................................ 3-19
Anti-Lock Brake System (ABS) ................................. 3-23
Back Warning System ............................................... 3-24
Driving for Economy .................................................. 3-25
Smooth Cornering ..................................................... 3-28
Winter Driving ............................................................ 3-28
Additional Equipment ................................................ 3-31
Locking Differential .................................................... 3-31
STARTING AND OPERATING
3
Page 70 of 205

3 STARTING AND OPERATING
2PRECAUTION FOR EX- HAUST FUMES WHILESTARTING AND DRIVING
D010A01P-GAT
1. Do not breathe exhaust fumes con- taining carbons monoxide when starting or driving. Carbon monox- ide is a colorless, odorless gas and can cause unconsciousness ordeath by asphyxiation.
2. Open all the windows fully and get
the back door closed if you smellexhaust fumes inside the vehicle. Have the cause immediately located and corrected.
3. Check the exhaust system, from time to time, for holes or loose con-nections if you hear a change in theexhaust sound, or if something has hit the exhaust system.
4. Do not race the engine in a garage
or enclosed area any longer than ittakes to start the engine and drive the vehicle in or out. The sealedexhaust fume may make a particu- larly dangerous situation.
!
BEFORE STARTING THE ENGINE
C020A01O-GAT Before you start the engine, you should always:
1. Look around the vehicle to be sure
there are no flat tires, puddles of oil, water or other indications of pos- sible trouble.
2. After entering the car, check to be sure the parking brake is engaged.
3. Check that all windows, and lights are clean.
4. Check that the interior and exterior
mirrors are clean and in position.
5. Check your seat, seatback and headrest to be sure they are in theirproper positions.
6. Lock all the doors.
7. Fasten your seat belt and be sure
that all other occupants have fas- tened theirs.
8. Turn off all lights and accessories
that are not needed. WARNING (DIESEL ENGINE):
To ensure that sufficient vacuum exists within the brake system dur- ing cold weather start-up condi-tions, it is necessary to run the engine at idle for several seconds after starting the engine.
9. When you turn the ignition switch to
"ON", check that all appropriatewarning lights are operating andthat you have sufficient fuel.
10.Check the operation of warning
lights and all bulbs when key is inthe "ON" position.