2005 Hyundai H-1 (Grand Starex) fluid
[x] Cancel search: fluidPage 14 of 205

YOUR VEHICLE AT A GLANCE
B255A01P-GAT INDICATOR SYMBOLS ON THE INSTRUMENT CLUSTER * More detailed explanations of these items will be found beginning on page 2-8.
O/D OFF Indicator Light (Automatic Transmission Only)
Fuel Filter Warning Light (Diesel only)
Diesel Pre-heat Indicator Light (Diesel only)
Immobilizer Warning Light (If installed)
SRS (Airbag) Service Reminder Indicator Light (If installed)
ABS Service Reminder Indicator Light(If installed)
Turn Signal Indicator Lights High Beam Indicator LightLow Oil Pressure Warning Light Parking Brake/Low Brake Fluid Level Warning Light Charging System Warning Light Seat Belt Warning Light (If installed) Door Ajar Warning Light Low Fuel Level Warning Light
POWER/HOLD Indicator Light (If installed) Malfunction Indicator Light (If installed)
4WD HIGH/LOW Indicator Light (If installed)
Page 16 of 205

1BEFORE DRIVING YOUR VEHICLE
2RUNNING-IN RECOMMEN- DATIONSBEFORE DRIVING YOUR VEHICLE SAFETY CHECKS
Drive range1st
2nd 3rd
4th 5th
!
B010A01P-GAT Be sure you know your vehicle and its equipment and how to use it safely. B010B01P-GAT Before entering the vehicle
o Check that windows, mirrors and lights are clean.
o Check if any tire is low or flat.
o Look for fluid leaks.
o Check that area is clear if you're about to back up.
B010C03P-GAT After entering the vehicle
o Lock all doors.
o The driver and passengers are wear- ing properly adjusted seat belts.
o The head restraints are properly adjusted, if so equipped.
o Adjust inside and outside mirrors.
o Check warning lights for correct
operation, with the ignition key in the position "ON".
o Check all gauges, for normal opera- tion. WARNING: (Diesel only)
To ensure that sufficient vacuum exists within the brake system dur-ing cold weather start-up condi- tions, it is necessary to run the engine at idle after starting the en-gine. NOTE: Fluid levels, such as engine oil, engine coolant, brake fluid, and windshield washer fluid, should be checked daily and/or weekly, orwhenever you refuel. Further details are described in the "CONSUMER INFORMATION" sec-tion. B020A01P-GAT During the running-in period for the first 1,000km(600miles), it is advisable to drive your new vehicle using the following precautions as a guideline toaid long life as well as future economy and performance.
1. Do not race the engine at high
speeds.
2. Avoid rapid starting, acceleration,
braking and prolonged high-speedrunning.
3. Keep to the running-in speed limit
shown below.
Please note that the legal speed limitsdisplayed must be adhered to.
4. Do not exceed loading limits.
5. Refrain from towing a trailer.
km/h (mph)
Running-in speed 0~25(0~16)
20~50(13~31) 30~80(19~50)
40~(25~) 50~(32~)
Page 38 of 205

1BEFORE DRIVING YOUR VEHICLE
24
B200B01P-GAT Refueling (Minibus/Van) Use the fuel best suited to the engine of your vehicle. Excessively low cetane fuel may causeignition pinging and consequently dam- age engine. Please find the cetane number mostappropriate to your engine.
NOTE: If the fuel-filler lid will not open because ice has formed around it, tap lightly or push on the lid tobreak the ice and release the lid. Do not pry on the lid. If necessary, spray around the lid with an ap-proved de-icer fluid (do not use radiator anti-freeze) or move the vehicle to a warm place and allowthe ice to melt.
!WARNING:
o Always double check to be sure that the hood is firmly latched before driving away. If it is not latched, the hood could fly openwhile the vehicle is being driven, causing a total loss of visibility, which might result in an acci-dent.
o The support rod must be inserted
completely into the hole providedin the hood whenever you in- spect the engine compartment. This will prevent the hood fromfalling and possibly injuring you.
o Do not move the vehicle with the
hood in the raised position, asvision is obstructed and the hood could fall or be damaged.
REMOTE FUEL-FILLER LID RELEASE
B200A01P-GAT (Minibus/Van) The fuel-filler lid may be opened from inside the vehicle by pulling up on thefuel-filler lid opener located on the dash- board at the left side of the car. B200A02P
GT10230A
Page 80 of 205

3 STARTING AND OPERATING
12
If you need to accelerate rapidly, press the accelerator pedal all the way to thefloor. The transmission will automati- cally shift to a lower gear, depending on the speed. NOTE: Turn the overdrive switch on for good fuel economy and smooth driving. If engine braking is neededin the "D" range or if repeated up- shifting and downshifting between the 3rd and 4th gear is needed whenclimbing a gentle slope, it is recom- mended that the overdrive switch be turned off. Turn the overdriveswitch back on immediately after- ward.
CAUTION:
o Shift into "R" and "P" only when the vehicle has completelystopped.
o Do not accelerate the engine in
the reverse or any of the forwardpositions with the brakes applied.
o Always apply the footbrake when
shifting from "P" or "N" to "R","D", "2" or "L" position.
o Do not use the "P" position in
place of the parking brake. Al-ways set the parking brake, shift the transmission into "P" and turn off the ignition when you leave the vehicle, even momen-tarily. Never leave the vehicle unat- tended while the engine is run-ning.
o Check the automatic transmis-
sion fluid level regularly, and addfluid as necessary. See the maintenance schedule for the proper fluid recommen-dation.
! D080A01P-GAT OVERDRIVE SWITCH (If installed) When the overdrive switch is turned on, the transmission will automatically upshift to the second, third and over- drive gears. When the overdrive switchis turned off, the transmission will not upshift to the overdrive gear at all. For normal driving, the selector levershould be left in the "D" position and the overdrive switch turned on. To move the selector lever, the push but-ton on the selector lever handle may have to be depressed first.HSR3039
Page 87 of 205

3
STARTING AND OPERATING
19BRAKE SYSTEM
D150A01P-GAT All the parts of the brake system are critical to safety. Have the vehicle ser- viced by an authorized HYUNDAI dealer at regular intervals according tothe service standards.
(1) The service brake is divided into two brake circuits so that when one brake circuit fails, the other is avail- able to stop the vehicle. If this oc-curs, however, the brake pedal must be depressed further than usual; stop driving as soon as possibleand have the brake system ser- viced at the nearest authorized HYUNDAI dealer.
(2) Do not place a thick floor mat around the brake pedal; doing so couldprevent the full pedal stroke thatwould be necessary in an emer- gency. Make sure that the pedal can be operated freely at all times.
(3) If the vehicle is equipped with a brake warning lamp, the lamp willlight up if the brake fluid level isabnormally low.
o Do not grip the inside or spokes of
the steering wheel when driving off-road. The steering wheel could jerk and injure your hands. Always firmly hold the outer steering wheel whenyou are driving off-road.
o Drive at lower speeds in strong
crosswinds. Because of yourvehicle’s high center of gravity, its stability will be affected in cross- winds. Slower speeds ensure bettervehicle control.
o Whenever you drive off-road through
sand, mud or water as deep as thewheel hub, more frequent mainte- nance may be required.
o Do not drive in water if the level is higher than the bottom of the wheelhubs.
o Check your brake condition once you are out of mud or water. Pressthe brake several times as you move slowly until your feel normal brakingforces return.
o Four-wheel driving on flat and nor-
mal roads can result in a severebinding condition when turning the steering wheel. Driving on dry paved road and highway Select 2H(2WD) to drive on dry paved roads. Especially on dry highway, neverselect the 4H or 4L(4WD). Driving on snowy or icy roads Select the 4H or 4L in accordance with the road conditions, and then gradu- ally depress the accelerator pedal for a smooth start. Driving on sandy or muddy roads Select the 4H or 4L and then gradually depress the accelerator pedal for a smooth start. Keep the pressure on the accelerator pedal constant as pos-sible, and drive at low speed. Climbing sharp grades Select the 4L to maximize use the engine torque. Descending sharp grades Select 4L, use the engine brake and descend slowly.
Page 97 of 205

3
STARTING AND OPERATING
29
D180C01P-GAT Battery The capacity of the battery is reduced at low temperatutes.This is an inevitable result of its chemi- cal and physical properties. This is why a very cold battery, particularlyone that is not fully charged anyway, will only deliver a fraction of the starter current which is normally available.It is recommended that you have the battery checked by an authorized HYUNDAI dealer before the start ofcold weather and, if necessary, have it charged. This not only ensures reliable starting,but a battery which is kept fully charged also has a longer life. C160G02A-AAT To Keep Locks from Freezing To keep the locks from freezing, squirt an approved de-icer fluid or glycerineinto the key opening. If a lock is cov- ered with ice, squirt it with an approved de-icing fluid to remove the ice. If thelock is frozen internally, you may be able to thaw it out by using a heated key. Handle the heated key with careto avoid burning your fingers. NOTE: The proper temperature for using the immobilizer key is from -40°C to 80°C. If you heat the immobilizer key over 80°C to open the frozenlock, it may cause damage to the transponder in its head.
D180G01P-GAT Door locks To prevent the door locks from freez- ing up, the lock cylinders should be masked with tape, etc., when washingthe vehicle in cold weather to prevent the entrance of water.
D180D01P-GAT Washer fluid To ensure proper operation of the wind- shield or rear window at low tempera-tures, anti-freeze should be added to the washer fluid at a rate of one part antifreeze to one part water. D180E01P-GAT Wiper blades Before operating the wipers, check the wiper blades to confirm that they arenot frozen to the windshield or tailgate. If the blades are frozen to the wind- shield or tailgate, do not operate thewipers until the ice has melted and the blades are freed. D180F01P-GAT Ventilation slots The ventilation slots in the headlight housing on the assistant seat side should be brushed clear after a heavysnowfall so that the operation of the heating and ventilation systems will not be impaired.
Page 115 of 205

44IN CASE OF EMERGENCY
14
!
!
1) If any of the loaded wheels or sus-
pension components are damaged or the vehicle is being towed with the rear wheels on the ground, use a towing dolly under the rear wheels.
o Manual Transmission: If you do not use a towing dolly,place the ignition key in the "ACC"position and put the transaxle in "N (Neutral)".
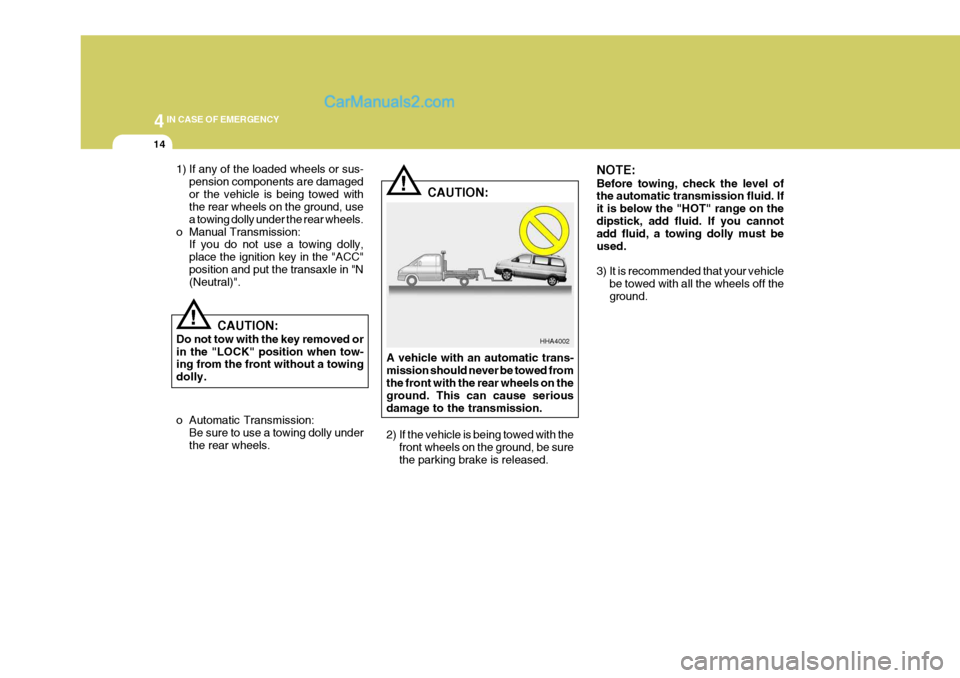
HHA4002
CAUTION:
Do not tow with the key removed or in the "LOCK" position when tow- ing from the front without a towing dolly. A vehicle with an automatic trans-mission should never be towed from the front with the rear wheels on the ground. This can cause seriousdamage to the transmission.
2) If the vehicle is being towed with the
front wheels on the ground, be sure the parking brake is released.
o Automatic Transmission:
Be sure to use a towing dolly under the rear wheels. CAUTION:
NOTE: Before towing, check the level of the automatic transmission fluid. If it is below the "HOT" range on thedipstick, add fluid. If you cannot add fluid, a towing dolly must be used.
3) It is recommended that your vehicle
be towed with all the wheels off the ground.
Page 117 of 205

44IN CASE OF EMERGENCY
16
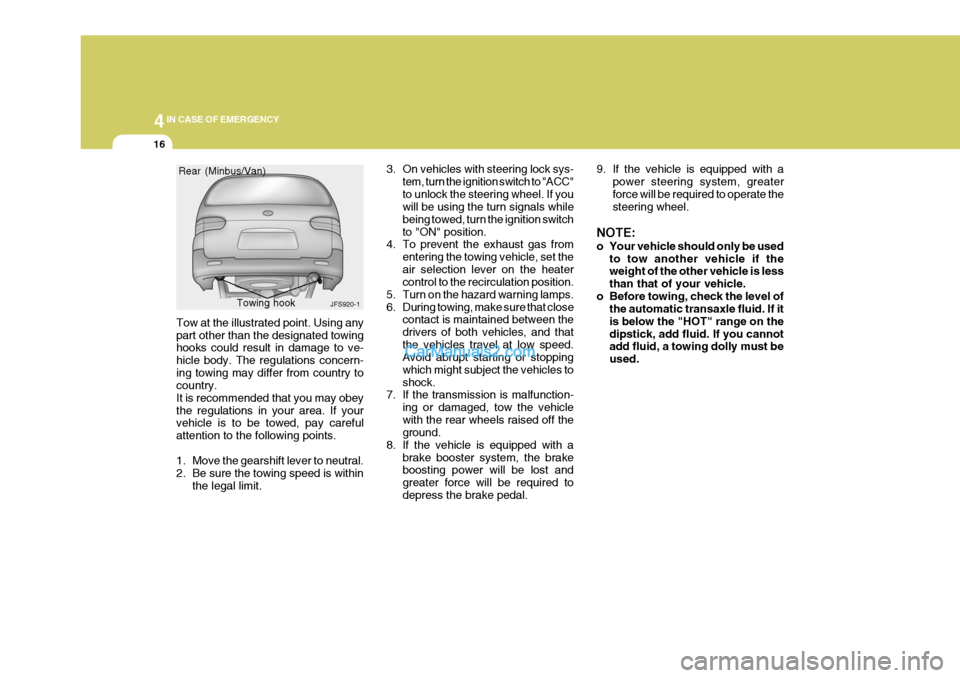
Tow at the illustrated point. Using any part other than the designated towing hooks could result in damage to ve- hicle body. The regulations concern-ing towing may differ from country to country. It is recommended that you may obeythe regulations in your area. If your vehicle is to be towed, pay careful attention to the following points.
1. Move the gearshift lever to neutral.
2. Be sure the towing speed is within
the legal limit. 3. On vehicles with steering lock sys-
tem, turn the ignition switch to "ACC"to unlock the steering wheel. If you will be using the turn signals while being towed, turn the ignition switchto "ON" position.
4. To prevent the exhaust gas from
entering the towing vehicle, set theair selection lever on the heater control to the recirculation position.
5. Turn on the hazard warning lamps.
6. During towing, make sure that close contact is maintained between thedrivers of both vehicles, and thatthe vehicles travel at low speed. Avoid abrupt starting or stopping which might subject the vehicles toshock.
7. If the transmission is malfunction-
ing or damaged, tow the vehiclewith the rear wheels raised off the ground.
8. If the vehicle is equipped with a brake booster system, the brakeboosting power will be lost and greater force will be required todepress the brake pedal.
JFS920-1
Rear (Minbus/Van)
Towing hook
9. If the vehicle is equipped with apower steering system, greater force will be required to operate the steering wheel.
NOTE:
o Your vehicle should only be used to tow another vehicle if the weight of the other vehicle is less than that of your vehicle.
o Before towing, check the level of the automatic transaxle fluid. If itis below the "HOT" range on thedipstick, add fluid. If you cannot add fluid, a towing dolly must be used.