Page 17 of 297
YOUR VEHICLE AT A GLANCE
B255A01TG-GAT INDICATOR SYMBOLS ON THE INSTRUMENT CLUSTER
High Beam Indicator Light Door Ajar Warning Light
Seat Belt Warning Light
Turn Signal Indicator LightsPassenger's Front Airbag OFF Indicator Light (If Installed)
ABS Service Reminder Indicator (SRI)
Low Oil Pressure Warning Light Parking Brake/Low Brake Fluid Level Warning Light Charging System Warning Light
SRS (Airbag) Service Reminder Indicator (SRI)
Cruise Indicator Light (If Installed)
Malfunction Indicator Light
Electronic Stability Program Indicator Lights (If Installed)
Low Windshield Washer Fluid Level Warning Light
Front Fog Indicator Light
Cruise SET Indicator Light (If Installed)
* More detailed explanations of these items will be found beginning on page 1-62.Low Fuel Level Warning Light
Trunk Lid Open Warning Light Immobilizer Warning Light (If Installed)
Page 76 of 297
1
FEATURES OF YOUR HYUNDAI
59
1. Malfunction Indicator Light (MIL)
2. Low Oil Pressure Warning Light
3. Charging System Warning Light
4. Passenger's Front Airbag OFF Indicator Light (If Installed)
5. SRS (Airbag) Service Reminder Indicator (SRI)
6. Tachometer
7. Turn Signal Indicator Lights
8. High Beam Indicator Light
9. Electronic Stability Program (ESP) Indicator Light (If Installed)
10. Automatic Transaxle Position Indicator Light
11. CRUISE Indicator Light (If Installed)
12. Front Fog Indicator Light 13. Cruise SET Indicator Light (If Installed)
14. Speedometer
15. Low Windshield Washer Fluid Level Warning Light
16. Trunk Lid Open Warning Light
17. Immobilizer Warning Light (If Installed)
18. Coolant Temperature Gauge
19. ABS Service Reminder Indicator (SRI)
20. Door Ajar Warning Light
21. Seat Belt Warning Light (Driver's Side)
22. Odometer/ Trip Computer
23. Parking Brake/Low Brake Fluid Level Warning Light
24. Low Fuel Warning Light
25. Fuel Gauge
Page 78 of 297
1
FEATURES OF YOUR HYUNDAI
61
1. Tachometer
2. High Beam Indicator Light
3. Turn Signal Indicator Lights
4. Speedometer
5. Front Fog Indicator Light
6. Coolant Temperature Gauge
7. Fuel Gauge
8. Charging System Warning Light
9. Passenger's Front Airbag OFF Indicator Light (If Installed)
10. Parking Brake/Low Brake Fluid Level Warning Light
11. Seat Belt Warning Light (Driver's Side)
12. Door Ajar Warning Light
13. SRS (Airbag) Service Reminder Indicator (SRI) 14. Malfunction Indicator Light (MIL)
15. Low Oil Pressure Warning Light
16. Low Windshield Washer Fluid Level Warning Light
17. ABS Service Reminder Indicator (SRI)
18. CRUISE Indicator Light (If Installed)
19. Trunk Lid Open Warning Light
20. Immobilizer Warning Light (If Installed)
21. Cruise SET Indicator Light (If Installed)
22. Automatic Transaxle Position Indicator Light
23. Odometer/Trip Computer/Warning Text
24. Electronic Stability Program (ESP) Indicator Light
(If Installed)
25. Low Fuel Warning Light
Page 79 of 297

1FEATURES OF YOUR HYUNDAI
62
B260F01A-AAT High Beam Indicator Light
The high beam indicator light comes on whenever the headlights areswitched to the high beam or flash position.
If your vehicle is equipped with the supervision type cluster, the warning text is double informed on the dot ma-trix display. The warning text comes on for about 20 seconds. If you push the RESET button behind the steeringwheel, the warning text will go out.
CAUTION:
If the low oil pressure warning lightstays on while the engine is running, serious engine damage may result. The low oil pressure warning lightcomes on whenever there is insuffi- cient oil pressure. In normal opera- tion, it should come on when the ignition switch is turned on, then go out when the engine is started. If thelow oil pressure warning light stays on while the engine is running, there is a serious malfunction.If this happens, stop the car as soon as it is safe to do so, turn off the engine and check the oil level. If theoil level is low, fill engine oil to the proper level and start the engine again. If the light stays on with theengine running, turn the engine off immediately. In any instance where the oil light stays on when the engineis running, the engine should be checked by an authorized Hyundai dealer before the car is driven again.
!
B260G01TG
WARNING AND INDICATOR LIGHTS
B260D01A-AAT Turn Signal Indicator
Lights
The blinking green arrows on the in- strument panel show the direction indi-cated by the turn signals. If the arrow comes on but does not blink, blinks more rapidly than normal, or does notilluminate at all, a malfunction in the turn signal system is indicated. Your dealer should be consulted for repairs.
B260G01TG-AAT Low Oil Pressure Warn-
ing Light
Page 94 of 297

1
FEATURES OF YOUR HYUNDAI
77
B340B01A-AAT Lane Change Signal To indicate a lane change, move the lever up or down to a point where it begins flashing.The lever will automatically return to the center position when released. HTG2108B340C03L-AAT Headlight Switch To operate the headlights, turn the bar- rel on the end of the multi-function switch. The first position turns on theparking lights, sidelights, tail lights and instrument panel lights. The second position turns on the headlights. NOTE: The ignition must be in the "ON" position to turn on the headlights. HTG2103
MULTI-FUNCTION LIGHT SWITCH
B340A01A-AAT COMBINATION TURN SIGNAL, HEADLIGHT AND HIGH-BEAMSWITCHTurn Signal Operation Pulling down on the lever causes the turn signals on the left side of the car to blink. Pushing upwards on the levercauses the turn signals on the right side of the car to blink. As the turn is completed, the lever will automaticallyreturn to the center position and turn off the turn signals at the same time. If either turn signal indicator light blinksmore rapidly than usual, goes on but does not blink, or does not go on at all, there is a malfunction in the system.Check for a burned-out fuse or bulb or see your Hyundai dealer.
Page 96 of 297
1
FEATURES OF YOUR HYUNDAI
79FOG LIGHT SWITCH
B360B01TG-GAT Front Fog Light Switch To turn on the front fog lights, place the switch in the "ON" position. They will light when the headlight switch is in the first position. HTG2109B340E01A-AAT Headlight Flasher To flash the headlights, pull the switch lever toward you, then release it. The headlights can be flashed even thoughthe headlight switch is in the "OFF" position. HTG2107
B340D01A-AAT High-beam Switch To turn on the headlight high beams, push the lever forward (away fromyou). The High Beam Indicator Light will come on at the same time. For low beams, pull the lever back toward you.
HTG2106
Page 100 of 297

1
FEATURES OF YOUR HYUNDAI
83
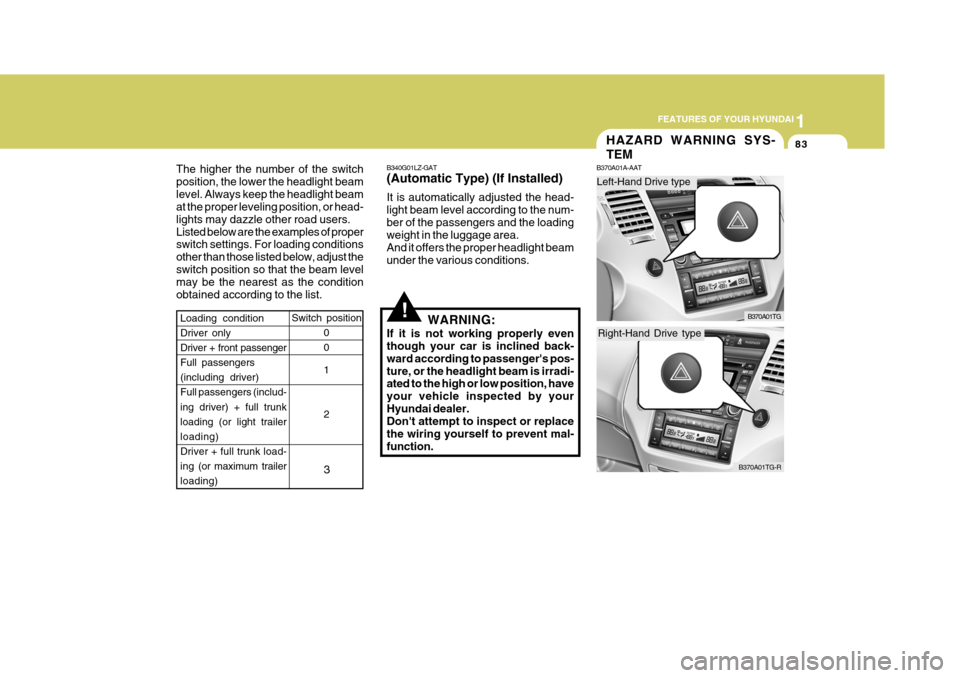
Left-Hand Drive type
HAZARD WARNING SYS- TEM
B370A01A-AAT
B370A01TG
B370A01TG-R
Right-Hand Drive type
Switch position
0 0 1 2 3
Loading condition Driver onlyDriver + front passenger Full passengers (including driver)Full passengers (includ- ing driver) + full trunk loading (or light trailerloading)
Driver + full trunk load- ing (or maximum trailer
loading)
The higher the number of the switch position, the lower the headlight beamlevel. Always keep the headlight beam at the proper leveling position, or head- lights may dazzle other road users.Listed below are the examples of proper switch settings. For loading conditions other than those listed below, adjust theswitch position so that the beam level may be the nearest as the condition obtained according to the list.
!
B340G01LZ-GAT (Automatic Type) (If Installed) It is automatically adjusted the head- light beam level according to the num-ber of the passengers and the loading weight in the luggage area. And it offers the proper headlight beamunder the various conditions.
WARNING:
If it is not working properly even though your car is inclined back- ward according to passenger's pos-ture, or the headlight beam is irradi- ated to the high or low position, have your vehicle inspected by yourHyundai dealer. Don't attempt to inspect or replace the wiring yourself to prevent mal-function.
Page 262 of 297

6 DO-IT-YOURSELF MAINTENANCE
26HEADLIGHT AIMING ADJUSTMENT
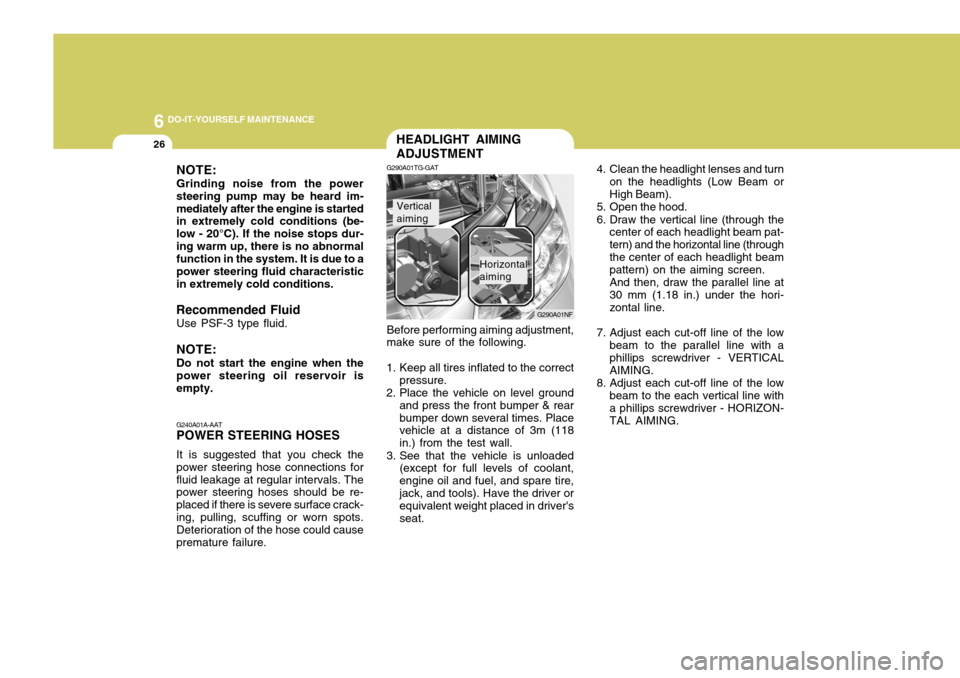
G290A01TG-GAT
G290A01NF
Before performing aiming adjustment, make sure of the following.
1. Keep all tires inflated to the correct pressure.
2. Place the vehicle on level ground and press the front bumper & rear bumper down several times. Place vehicle at a distance of 3m (118 in.) from the test wall.
3. See that the vehicle is unloaded (except for full levels of coolant,engine oil and fuel, and spare tire,jack, and tools). Have the driver or equivalent weight placed in driver's seat.
Vertical aiming
Horizontal aiming 4. Clean the headlight lenses and turn
on the headlights (Low Beam or High Beam).
5. Open the hood.
6. Draw the vertical line (through the center of each headlight beam pat- tern) and the horizontal line (throughthe center of each headlight beam pattern) on the aiming screen. And then, draw the parallel line at 30 mm (1.18 in.) under the hori- zontal line.
7. Adjust each cut-off line of the low beam to the parallel line with a phillips screwdriver - VERTICAL AIMING.
8. Adjust each cut-off line of the low beam to the each vertical line with a phillips screwdriver - HORIZON-TAL AIMING.
NOTE: Grinding noise from the power steering pump may be heard im-mediately after the engine is started in extremely cold conditions (be- low - 20°C). If the noise stops dur-ing warm up, there is no abnormal function in the system. It is due to a power steering fluid characteristicin extremely cold conditions.
Recommended Fluid Use PSF-3 type fluid. NOTE: Do not start the engine when the power steering oil reservoir is empty. G240A01A-AAT POWER STEERING HOSES It is suggested that you check the power steering hose connections forfluid leakage at regular intervals. The power steering hoses should be re- placed if there is severe surface crack-ing, pulling, scuffing or worn spots. Deterioration of the hose could cause premature failure.