2005 Hyundai Azera hood open
[x] Cancel search: hood openPage 30 of 297
1
FEATURES OF YOUR HYUNDAI
13THEFT-ALARM SYSTEM
B070A01A-AAT (If Installed) This system is designed to provide protection from unauthorized entry intothe car. This system is operated in three stages: the first is the "Armed" stage, the second is the "Alarm" stage,and the third is the "Disarmed" stage. If triggered, the system provides an audible alarm with blinking of the turnsignal lights.
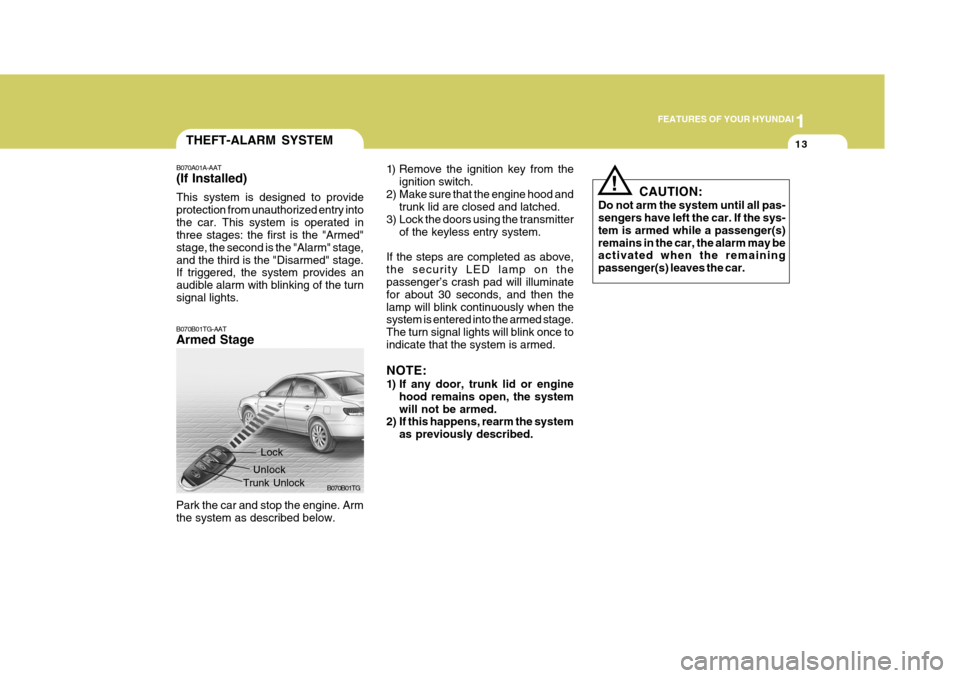
B070B01TG-AAT Armed Stage
B070B01TG1) Remove the ignition key from the
ignition switch.
2) Make sure that the engine hood and trunk lid are closed and latched.
3) Lock the doors using the transmitter
of the keyless entry system.
If the steps are completed as above, the security LED lamp on the passenger’s crash pad will illuminate for about 30 seconds, and then thelamp will blink continuously when the system is entered into the armed stage. The turn signal lights will blink once toindicate that the system is armed. NOTE:
1) If any door, trunk lid or engine hood remains open, the system will not be armed.
2) If this happens, rearm the system
as previously described.
Lock
Unlock
Trunk Unlock
Park the car and stop the engine. Arm the system as described below.
! CAUTION:
Do not arm the system until all pas- sengers have left the car. If the sys- tem is armed while a passenger(s)remains in the car, the alarm may be activated when the remaining passenger(s) leaves the car.
Page 31 of 297
1FEATURES OF YOUR HYUNDAI
14
CAUTION:
Only the transmitter can disarm the armed stage. If the transmitter doesnot disarm the system, it is neces- sary to take the following steps;
1. Unlock the door with the key, which will cause the alarm to be activated.
2. Insert the key in the ignition key cylinder and turn the ignition keyto "ON" position.
3. Wait for 30 seconds. After completing the steps above, the system will be disarmed.
!
! CAUTION:
Avoid trying to start the engine while the system is armed. B070D01TG-GAT Disarmed Stage The system will be disarmed when the driver's or passeng er's door is un-
locked by depressing the "UNLOCK
( )" button on the transmitter. After completion of the step above, the turn signal lights will blink twice to indicate that the system is disarmed. NOTE: Although the system is disarmed, the security LED lamp will blink con- tinuously. Insert the key in the igni-tion key cylinder to turn off the lamp. If any door, trunk lid or engine hood is not opened or the ignition key is not inserted in the ignition switch within 30 seconds, the system will be rearmed.
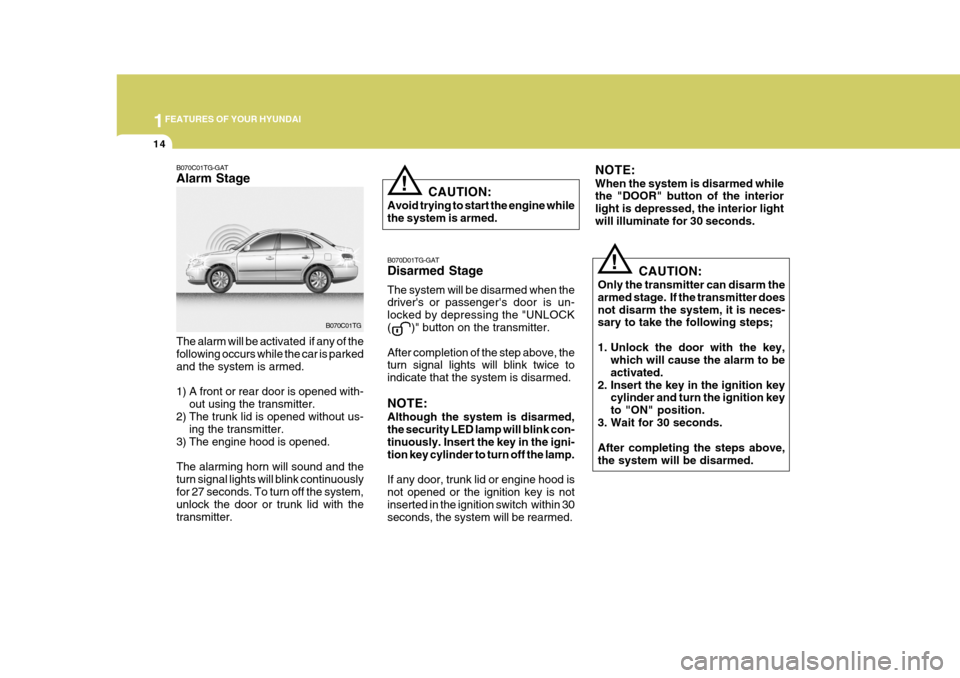
B070C01TG-GAT Alarm Stage The alarm will be activated if any of the following occurs while the car is parked and the system is armed.
1) A front or rear door is opened with-
out using the transmitter.
2) The trunk lid is opened without us- ing the transmitter.
3) The engine hood is opened.The alarming horn will sound and the turn signal lights will blink continuouslyfor 27 seconds. To turn off the system, unlock the door or trunk lid with the transmitter. B070C01TG
NOTE: When the system is disarmed while the "DOOR" button of the interior light is depressed, the interior lightwill illuminate for 30 seconds.
Page 88 of 297

1
FEATURES OF YOUR HYUNDAI
71
The needle on the engine coolant tem- perature gauge should stay in the nor-mal range. If it moves across the dial to "H" (Hot), pull over and stop as soon as possible and turn off the engine. Thenopen the hood and check the coolant level (See "If the engine overheats" on the page 3-4.) and the water pumpdrive belt . If you suspect cooling sys- tem trouble, have your cooling system checked by a Hyundai dealer as soonas possible. B300A01A-GAT SPEEDOMETER Your Hyundai's speedometer is cali- brated in kilometers per hour or milesper hour.B300A01TG
B300A02TG
Conventional Type
Supervision Type
!
B290A03A-AAT ENGINE COOLANT TEMPERATURE GAUGE
WARNING:
Never remove the radiator cap when the engine is hot. The engine cool-ant is under pressure and could erupt and cause severe burns. Wait until the engine is cool before re-moving the radiator cap. B290A01TG
Conventional Type Supervision Type
Page 122 of 297
1
FEATURES OF YOUR HYUNDAI
105
!
HOOD RELEASE
B570A01NF-GAT
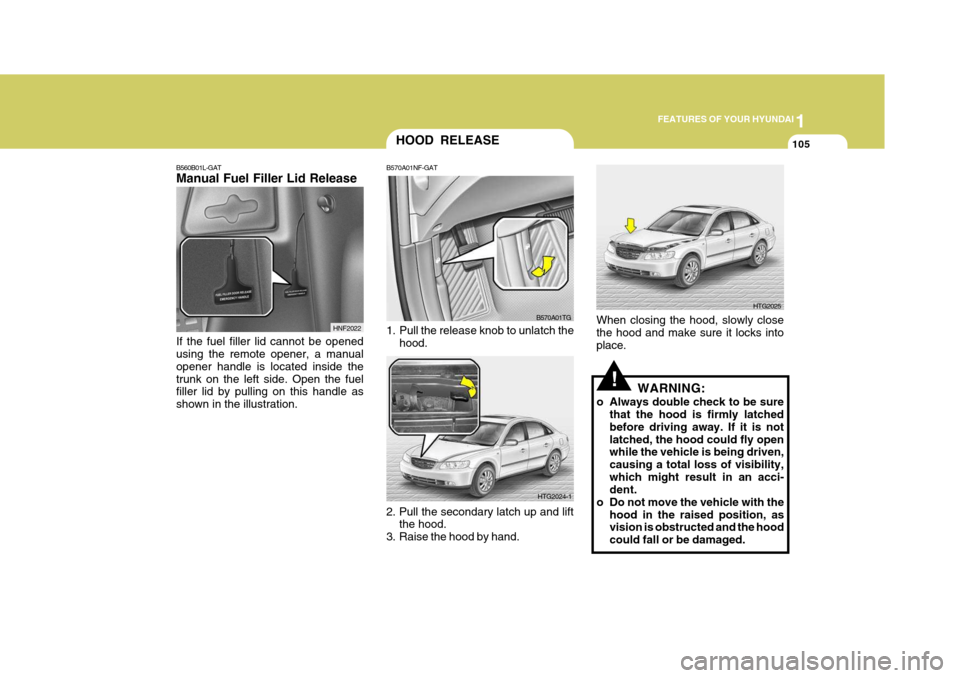
1. Pull the release knob to unlatch the hood.
2. Pull the secondary latch up and lift the hood.
3. Raise the hood by hand. B570A01TG
HTG2024-1 WARNING:
o Always double check to be sure that the hood is firmly latched before driving away. If it is notlatched, the hood could fly open while the vehicle is being driven, causing a total loss of visibility,which might result in an acci- dent.
o Do not move the vehicle with the hood in the raised position, asvision is obstructed and the hood could fall or be damaged.
When closing the hood, slowly closethe hood and make sure it locks intoplace.
HTG2025
B560B01L-GAT Manual Fuel Filler Lid Release If the fuel filler lid cannot be opened using the remote opener, a manual opener handle is located inside thetrunk on the left side. Open the fuel filler lid by pulling on this handle as shown in the illustration.
HNF2022
Page 211 of 297

3 WHAT TO DO IN AN EMERGENCY
4
!
!
IF THE ENGINE OVERHEATS
(If the air conditioning had been in use, it is normal for cold water to bedraining from it when you stop).
D030A01TG-AAT If your temperature gauge indicates overheating, you experience a loss of power, or hear loud pinging or knock- ing, the engine is probably too hot. Ifthis happens to you, you should:
1. Pull off the road and stop as soon as
it is safe to do so.
2. Place the gear selector lever in "P"
and set the parking brake. If the air conditioning is on, turn it off.
3. If engine coolant is running out under
the car or steam is coming out fromthe hood, stop the engine. Do not open the hood until the engine coolant has stopped running or thesteaming has stopped. If there is no visible loss of coolant and no steam, leave the engine running and checkto be sure the engine cooling fan is operating. If the fan is not running, turn the engine off.
4. Check to see if the water pump drive belt is missing. If it is not missing,check to see that it is tight. If thedrive belt seems to be satisfactory, check for engine coolant leaking from the radiator, hoses or under the car.
6. Carefully remove the jumper cables
in the reverse order of attachment.
If you do not know why your batterybecame discharged (because the lightswere left on, etc.), have the charging system checked by your Hyundai dealer. WARNING:
While the engine is running, keephands and clothing away from mov-ing parts such as the fan and drive belts to prevent injury.
5. If the water pump drive belt is broken or coolant is leaking out, stop theengine immediately and call the near- est Hyundai dealer for assistance.
WARNING:
Do not remove the radiator cap whenthe engine is hot. This can allow coolant to be blown out of the open- ing and cause serious burns.
Page 251 of 297
6
DO-IT-YOURSELF MAINTENANCE
15
!
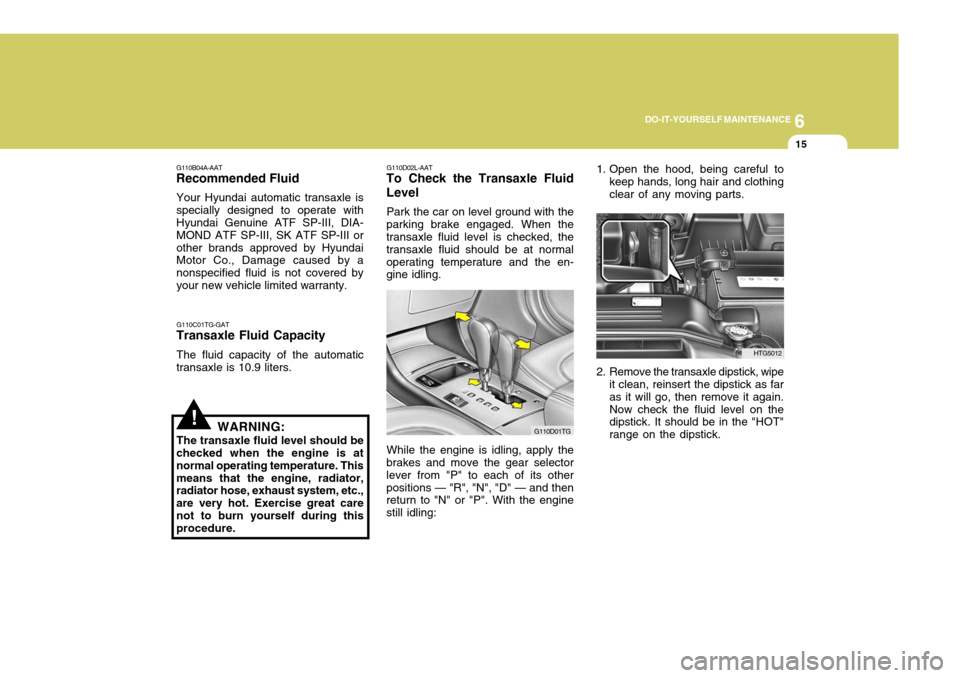
1. Open the hood, being careful to
keep hands, long hair and clothing clear of any moving parts.
2. Remove the transaxle dipstick, wipe it clean, reinsert the dipstick as faras it will go, then remove it again.Now check the fluid level on the dipstick. It should be in the "HOT" range on the dipstick. HTG5012
G110C01TG-GAT
Transaxle Fluid Capacity
The fluid capacity of the automatic
transaxle is 10.9 liters.
WARNING:
The transaxle fluid level should be
checked when the engine is atnormal operating temperature. Thismeans that the engine, radiator, radiator hose, exhaust system, etc., are very hot. Exercise great carenot to burn yourself during this procedure. G110D02L-AAT
To Check the Transaxle Fluid Level
Park the car on level ground with the
parking brake engaged. When the transaxle fluid level is checked, the transaxle fluid should be at normaloperating temperature and the en- gine idling.
While the engine is idling, apply the
brakes and move the gear selector lever from "P" to each of its otherpositions — "R", "N", "D" — and then return to "N" or "P". With the engine still idling:
G110D01TG
G110B04A-AAT
Recommended Fluid
Your Hyundai automatic transaxle is specially designed to operate with Hyundai Genuine ATF SP-III, DIA- MOND ATF SP-III, SK ATF SP-III orother brands approved by Hyundai Motor Co., Damage caused by a nonspecified fluid is not covered byyour new vehicle limited warranty.
Page 262 of 297
6 DO-IT-YOURSELF MAINTENANCE
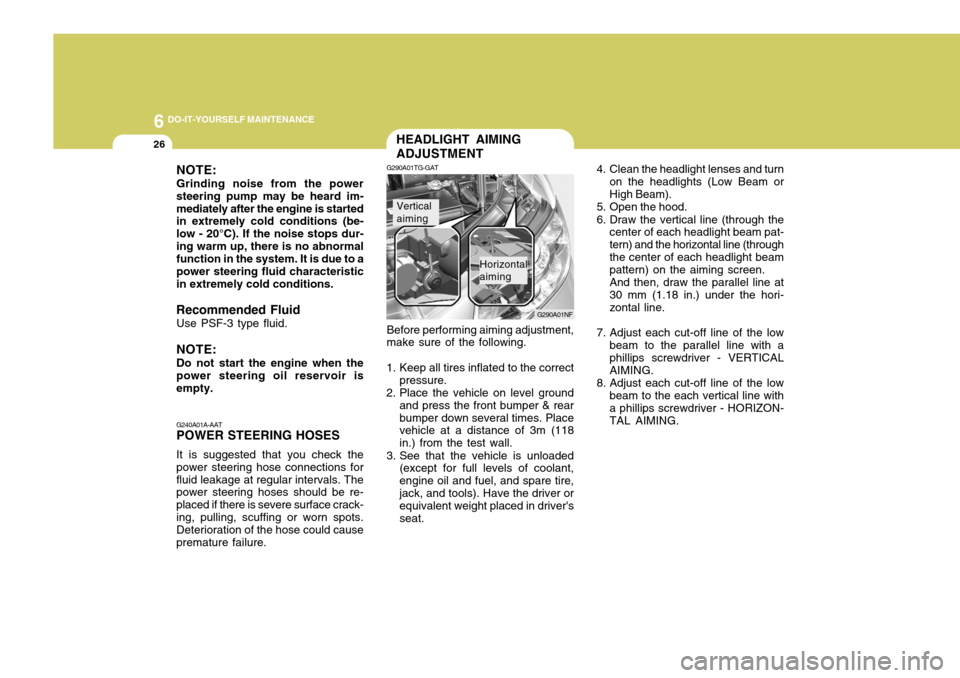
26HEADLIGHT AIMING ADJUSTMENT
G290A01TG-GAT
G290A01NF
Before performing aiming adjustment, make sure of the following.
1. Keep all tires inflated to the correct pressure.
2. Place the vehicle on level ground and press the front bumper & rear bumper down several times. Place vehicle at a distance of 3m (118 in.) from the test wall.
3. See that the vehicle is unloaded (except for full levels of coolant,engine oil and fuel, and spare tire,jack, and tools). Have the driver or equivalent weight placed in driver's seat.
Vertical aiming
Horizontal aiming 4. Clean the headlight lenses and turn
on the headlights (Low Beam or High Beam).
5. Open the hood.
6. Draw the vertical line (through the center of each headlight beam pat- tern) and the horizontal line (throughthe center of each headlight beam pattern) on the aiming screen. And then, draw the parallel line at 30 mm (1.18 in.) under the hori- zontal line.
7. Adjust each cut-off line of the low beam to the parallel line with a phillips screwdriver - VERTICAL AIMING.
8. Adjust each cut-off line of the low beam to the each vertical line with a phillips screwdriver - HORIZON-TAL AIMING.
NOTE: Grinding noise from the power steering pump may be heard im-mediately after the engine is started in extremely cold conditions (be- low - 20°C). If the noise stops dur-ing warm up, there is no abnormal function in the system. It is due to a power steering fluid characteristicin extremely cold conditions.
Recommended Fluid Use PSF-3 type fluid. NOTE: Do not start the engine when the power steering oil reservoir is empty. G240A01A-AAT POWER STEERING HOSES It is suggested that you check the power steering hose connections forfluid leakage at regular intervals. The power steering hoses should be re- placed if there is severe surface crack-ing, pulling, scuffing or worn spots. Deterioration of the hose could cause premature failure.
Page 264 of 297

6 DO-IT-YOURSELF MAINTENANCE
28
Replacement instructions:
1. Allow the bulb to cool. Wear eye protection.
2. Open the engine hood and discon- nect the negative (-) post of the battery.
3. Always grasp the bulb by its plastic base, avoid touching the glass.
G270A01TG-GAT
HEADLIGHT AND FRONT FOG LIGHT
Headlight (High beam) Headlight(Low beam)
G270A01TG
Front Fog Light
REPLACEMENT OF LIGHT BULBS
G260A01TG-GAT Before attempting to replace a light
bulb, be sure the ignition switch is turned to the "OFF" position.
The next paragraph shows how to
reach the light bulbs so they may bechanged. Be sure to replace theburned-out bulb with one of the same number and wattage rating.
See page 6-36 for the wattage descrip-
tions.
! CAUTION:
o Keep the lights out of contact with petroleum products, such as oil, gasoline, etc.
o Be sure to replace the LED type
equipped bulbs with an assem- bly.
o If you don't have necessary tools, the correct bulbs and the exper-tise, consult your authorized Hyundai dealer. CAUTION:
o The headlight aiming should be checked by an authorized Hyundaidealer after replacing the head-light bulbs.
o If your vehicle is equipped with
HID (High Intensity Discharge) type headlight, you must not replace or inspect the headlight. It has a danger of an electric shock. If the headlight is not work- ing, have your vehicle inspectedby your Hyundai Dealer.
! Headlight