Page 202 of 374

Remember, unless you have ABS, if you brake so hard
that your wheels stop rolling, you will just slide. Brake
so your wheels always keep rolling and you can
still steer.
•Whatever your braking system, allow greater
following distance on any slippery road.
•Watch for slippery spots. The road might be fine
until you hit a spot that is covered with ice. On
an otherwise clear road, ice patches may appear in
shaded areas where the sun cannot reach, such
as around clumps of trees, behind buildings,
or under bridges. Sometimes the surface of a curve
or an overpass may remain icy when the
surrounding roads are clear. If you see a patch of
ice ahead of you, brake before you are on it. Try not
to brake while you are actually on the ice, and
avoid sudden steering maneuvers.
If You Are Caught in a Blizzard
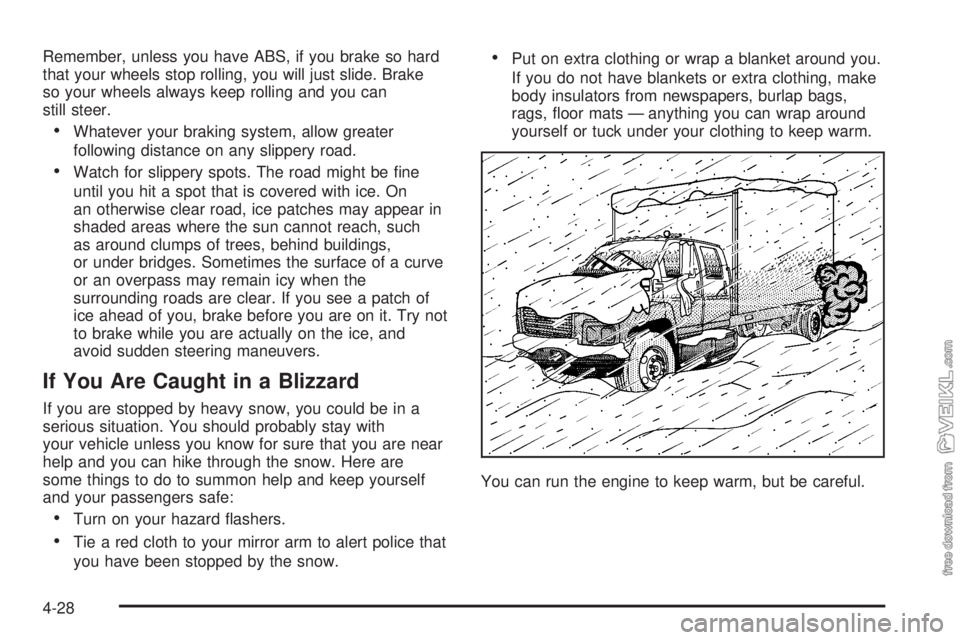
If you are stopped by heavy snow, you could be in a
serious situation. You should probably stay with
your vehicle unless you know for sure that you are near
help and you can hike through the snow. Here are
some things to do to summon help and keep yourself
and your passengers safe:
•Turn on your hazard flashers.
•Tie a red cloth to your mirror arm to alert police that
you have been stopped by the snow.
•Put on extra clothing or wrap a blanket around you.
If you do not have blankets or extra clothing, make
body insulators from newspapers, burlap bags,
rags, floor mats — anything you can wrap around
yourself or tuck under your clothing to keep warm.
You can run the engine to keep warm, but be careful.
4-28
Page 208 of 374

Adding a Snow Plow or Similar
Equipment
If you will be installing a snow plow on your vehicle, we
recommend that the vehicle be equipped with the
snow plow prep package (RPO ANQ). Before installing
a snow plow, see your dealer for information on
other recommended optional equipment and vehicle
weight restrictions.
Notice:If your vehicle does not have the snow
plow prep package, adding a plow can damage your
vehicle, and the repairs would not be covered by
warranty. The payload your vehicle can carry will be
reduced when a snow plow is installed. Your
vehicle can be damaged if either the front or rear
axle ratings, or the GVW, are exceeded. See
your dealer for more information.
{CAUTION:
On some vehicles equipped with certain front
mounted equipment, such as a snow plow, it
may be possible to load the front axle to the
front GAWR but not have enough weight on
the rear axle to have proper braking
performance. If your brakes can not work
properly, you could have a crash. To help your
brakes work properly when a snow plow is
installed, always follow the snow plow
manufacturer or installer’s recommendation for
rear ballast to ensure a proper front and rear
weight distribution ratio, even though the
actual front weight may be less than the front
GAWR, and the total vehicle weight is less
than the GVWR. Maintaining a proper front and
rear weight distribution ratio is necessary to
provide proper braking performance.
4-34
Page 209 of 374
Towing
Towing Your Vehicle
Consult your dealer or a professional towing service if
you need to have your disabled vehicle towed. See
Roadside Assistance Program on page 7-5.
Releasing Air-Operated Parking Brakes
If your vehicle has air brakes, you could have a
special towing problem. If your vehicle has to be towed
because of a complete loss of air pressure from
both systems, the parking brakes will have automatically
engaged. The tow operator can release the brakes
manually by using the following steps. Then your vehicle
can be towed with all wheels or only the rear wheels
on the ground.
1. Block the wheels of the vehicle.2. Remove the release stud and nut from the side of
the brake chamber. Some chambers have studs
which are visible at all times.
4-35
Page 210 of 374
3. Remove the rubber
cap from the rear of
the chamber.
4. Put the release stud, nut and flat washer into
the chamber.
5. Turn the stud clockwise a quarter of a turn.6. Turn the stud nut
clockwise several turns
to release the brakes.
Follow the same
procedure to release
the other brake
or brakes.
7. At the repair facility, apply air pressure of at least
70 psi (480 kPa) to the brake chambers, either
from an external air supply or the vehicle’s
air system.
8. Turn the stud nut counterclockwise several turns.
Remove the stud from the chamber.
9. Replace the stud and washer and tighten the nut
into the side of the chamber.
10. Replace the rubber cap.
4-36
Page 211 of 374
Trailer Connections
Heavy-Duty Trailer Wiring Package
Your vehicle may be equipped with an eight-wire trailer
towing harness. This harness, with a seven-pin
universal heavy-duty trailer connector, is attached to a
bracket on the platform hitch.
The Center High-Mounted Stoplamp (CHMSL) wire
is tied next to the trailer wiring harness for use with
a trailer.The eight-wire harness contains the following trailer
circuits:
•Yellow: Left Stop/Turn Signal
•Dark Green: Right Stop/Turn Signal
•Brown: Taillamps
•White: Ground
•Light Green: Back-up Lamps
•Light Blue: CHMSL
•Red: Battery Feed
•Dark Blue: Trailer Brake
4-37
Page 213 of 374

Service............................................................5-3
Doing Your Own Service Work.........................5-4
Two Safety Cautions about Engine Fan
Breakage...................................................5-5
Fuel................................................................5-6
Gasoline Octane............................................5-6
Gasoline Specifications....................................5-6
Additives.......................................................5-6
Diesel Engine Fuel.........................................5-7
What Fuel to Use...........................................5-8
Very Cold Weather Operation.........................5-10
Water in Fuel...............................................5-10
Running Out of Fuel.....................................5-15
Fuel Filter Replacement.................................5-16
Fuels in Foreign Countries.............................5-17
Filling the Tank............................................5-18
Filling a Portable Fuel Container.....................5-19
Checking Things Under the Hood....................5-20
Hood Latches...............................................5-20
Engine Oil (Caterpillar
®Diesel Engine).............5-22
Engine Oil (DURAMAX®Diesel)......................5-22
Engine Oil (Gasoline Engine)..........................5-26
Engine Oil Life System (Gasoline Engine)........5-29
Engine Oil Life System (DURAMAX
®Diesel).....5-31
Engine Oil Life System (Caterpillar®
Diesel Engine)..........................................5-32Engine Air Cleaner/Filter................................5-33
Automatic Transmission Fluid.........................5-34
Manual Transmission Fluid.............................5-35
Engine Coolant (Gas and
DURAMAX
®Engines).................................5-36
Engine Coolant (Caterpillar®Diesel Engines).....5-38
Coolant Surge Tank Pressure Cap..................5-38
Engine Overheating.......................................5-38
Cooling System (Gas and
DURAMAX
®Engines).................................5-40
Engine Fan Noise.........................................5-45
Power Steering Fluid.....................................5-45
Windshield Washer Fluid................................5-46
Brakes........................................................5-47
Battery........................................................5-55
Jump Starting...............................................5-56
Rear Axle.......................................................5-60
Rear Axle Shift Motor....................................5-62
Four-Wheel Drive............................................5-62
Front Axle......................................................5-63
Noise Control System.....................................5-64
Tampering with Noise Control System
Prohibited.................................................5-64
Bulb Replacement..........................................5-65
Windshield Wiper Blade Replacement..............5-65
Section 5 Service and Appearance Care
5-1
Page 223 of 374

Water In Fuel Light Chart
Problem Recommended Action
Light comes on
intermittently.Drain water from the
fuel filter.
Light stays on at
temperatures above
freezing.Drain the fuel filter
immediately. If no water
can be drained and the
light stays on, see your
dealer for assistance.
Light stays on at
temperatures below
freezing.Drain the fuel filter
immediately. If no water
can be drained, water
may be frozen in the
water drain system, or in
the fuel lines. Move the
vehicle to a warm location
to thaw out, and then
drain the filter system.
Light stays on
immediately after
refueling, and a large
amount of water was
possibly pumped into the
fuel tank.Fuel tank purging is
required. See your dealer
for assistance.Notice:If you drive when this warning indicator is
on, you can damage your fuel injection system
and your engine. If the indicator comes on right after
you refuel, it means water was pumped into your
fuel tank. Turn off your engine immediately.
Then, have the water drained at once.
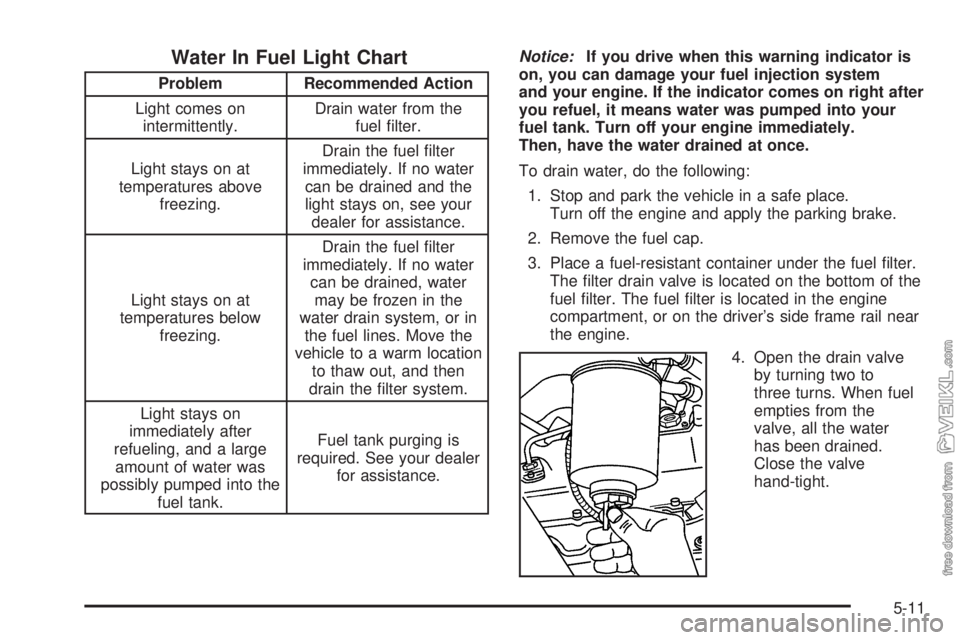
To drain water, do the following:
1. Stop and park the vehicle in a safe place.
Turn off the engine and apply the parking brake.
2. Remove the fuel cap.
3. Place a fuel-resistant container under the fuel filter.
The filter drain valve is located on the bottom of the
fuel filter. The fuel filter is located in the engine
compartment, or on the driver’s side frame rail near
the engine.
4. Open the drain valve
by turning two to
three turns. When fuel
empties from the
valve, all the water
has been drained.
Close the valve
hand-tight.
5-11
Page 228 of 374
Fuel Filter Replacement
If you want to change the diesel engine fuel filter
yourself, here is how to do it:
{CAUTION:
Diesel fuel is �ammable. It could start a �re if
something ignites it, and you could be burned.
Do not let it get on hot engine parts, and keep
matches or other ignition sources away.
First, drain any water from the filter by following the
water draining procedure earlier in this section.
Your vehicle’s engine should be off until the end of this
procedure.The fuel filter is located in the engine compartment on
the passenger’s side of the vehicle, or on the driver’s
side frame rail in front of the fuel tank.
1. Apply the parking brake.
2. Unplug the water
sensor wire connected
to the fuel filter and
unscrew the filter
element.
5-16