2005 BMW 545I SEDAN navigation
[x] Cancel search: navigationPage 88 of 221

Controls
87Reference
At a glance
Driving tips
Communication
Navigation
Entertainment
Mobility
Lamps
Parking lamps/low beams
0Lights off
1Parking lamps
2Low beams/daytime driving lamps
*
3Automatic headlamp control*/
Adaptive Head Light
*
Parking lamps
In switch position1, the front, rear and side
vehicle lighting is switched on. You can use the
parking lamps for parking. For lighting on one
side for parking as an additional feature, refer to
page88.
Low beams
The low beams are activated in switch
position2 only when the engine is running, oth-
erwise only the parking lamps are switched on.
Pathway lighting
If the vehicle is parked and the headlamps are
switched off, operating the headlamp flasher
activates the low beams. You can set the dura-
tion on the Control Display or deactivate the
function.
Control Center, for principle details, refer to
page16.
1.Open the menu.
2.Select "Vehicle settings" and press the
controller.3.Select "Light" and press the controller.
4.Select "Pathway lighting" and press the
controller.
5.Turn the controller to select the corre-
sponding duration.
6.Press the controller to apply the setting.
Lights on warning
If you turn the ignition key to position 0, an
acoustic signal sounds when you open the
driver's door for a few seconds to remind you
that the light has not yet been switched off.
At the same time a message appears on the
Control Display.
Daytime driving lamps*
If so desired, you can leave the light switch in
the low beam position2.
Always observe all applicable laws governing
the use of daytime driving lamps.
You can switch on the parking lamps when
needed using the standard procedure
described under Parking lamps.
Automatic headlamp control*
In the switch position3, the system activates
and switches on and off the low beams in
response to changes in ambient light condi-
tions, for instance, in a tunnel, at dawn and
d u s k , a n d in r a i n o r s n o w . A d a p t iv e H e a d L ig h t
*
is active. The LED next to the symbol is illumi-
nated when the low beams are on.
Page 90 of 221

Controls
89Reference
At a glance
Driving tips
Communication
Navigation
Entertainment
Mobility
If the automatic headlamp control is acti-
vated, the low beams will come on auto-
matically when you switch on the fog lamps.<
Instrument lighting
You can control the lighting intensity by using
the serrated dial.
Interior lamps
The interior lamps, footwell lamps, door entry
lighting and courtesy lamps
* are controlled
automatically.
Switching interior lamps on and off
manually
Press the button.
If you want the interior lamps to remain off con-
tinuously, maintain pressure on the button for
approx. 3 seconds.
Reading lamps
Reading lamps are provided in the front and rear
adjacent to the interior lamps. Press the button
to activate or deactivate this system.
To avoid draining the battery, all of the
vehicle's interior lamps are automatically
switched off approx. 15 minutes after the igni-
tion is switched off.<
Page 92 of 221
Controls
91Reference
At a glance
Driving tips
Communication
Navigation
Entertainment
Mobility
A congenial climate
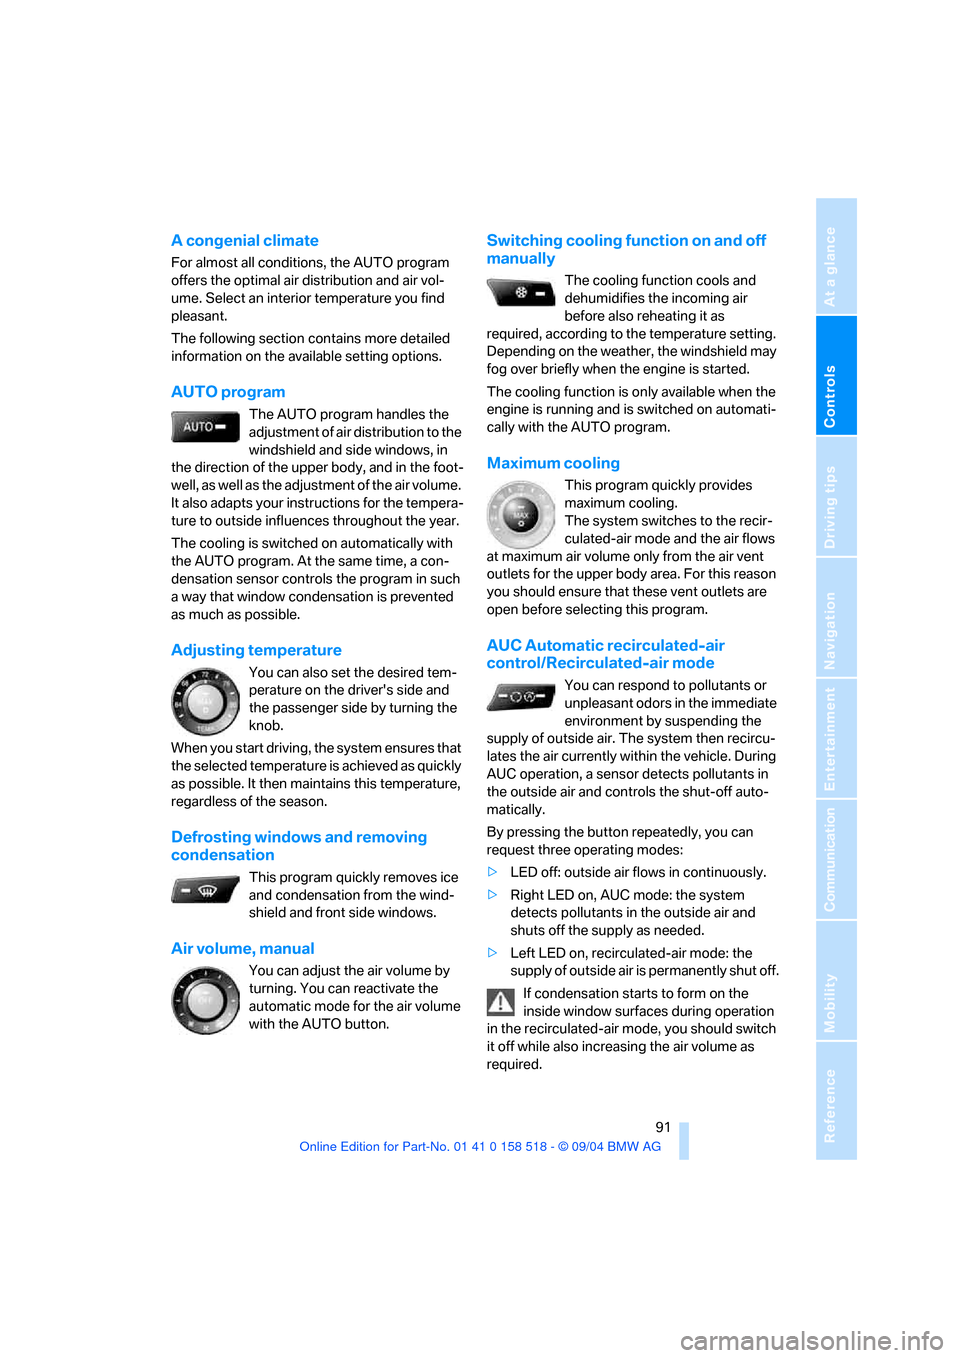
For almost all conditions, the AUTO program
offers the optimal air distribution and air vol-
ume. Select an interior temperature you find
pleasant.
The following section contains more detailed
information on the available setting options.
AUTO program
The AUTO program handles the
adjustment of air distribution to the
windshield and side windows, in
the direction of the upper body, and in the foot-
well, as well as the adjustment of the air volume.
It also adapts your instructions for the tempera-
ture to outside influences throughout the year.
The cooling is switched on automatically with
the AUTO program. At the same time, a con-
densation sensor controls the program in such
a way that window condensation is prevented
as much as possible.
Adjusting temperature
You can also set the desired tem-
perature on the driver's side and
the passenger side by turning the
knob.
When you start driving, the system ensures that
the selected temperature is achieved as quickly
as possible. It then maintains this temperature,
regardless of the season.
Defrosting windows and removing
condensation
This program quickly removes ice
and condensation from the wind-
shield and front side windows.
Air volume, manual
You can adjust the air volume by
turning. You can reactivate the
automatic mode for the air volume
with the AUTO button.
Switching cooling function on and off
manually
The cooling function cools and
dehumidifies the incoming air
before also reheating it as
required, according to the temperature setting.
Depending on the weather, the windshield may
fog over briefly when the engine is started.
The cooling function is only available when the
engine is running and is switched on automati-
cally with the AUTO program.
Maximum cooling
This program quickly provides
maximum cooling.
The system switches to the recir-
culated-air mode and the air flows
at maximum air volume only from the air vent
outlets for the upper body area. For this reason
you should ensure that these vent outlets are
open before selecting this program.
AUC Automatic recirculated-air
control/Recirculated-air mode
You can respond to pollutants or
unpleasant odors in the immediate
environment by suspending the
supply of outside air. The system then recircu-
lates the air currently within the vehicle. During
AUC operation, a sensor detects pollutants in
the outside air and controls the shut-off auto-
matically.
By pressing the button repeatedly, you can
request three operating modes:
>LED off: outside air flows in continuously.
>Right LED on, AUC mode: the system
detects pollutants in the outside air and
shuts off the supply as needed.
>Left LED on, recirculated-air mode: the
supply of outside air is permanently shut off.
If condensation starts to form on the
inside window surfaces during operation
in the recirculated-air mode, you should switch
it off while also increasing the air volume as
required.
Page 93 of 221
A congenial climate
92 The recirculated-air mode should not be used
over an extended period of time, as the air qual-
ity inside the vehicle deteriorates continu-
ously.<
Residual heat mode
Press this button when the engine
is switched off, but warm.
The heat stored in the engine is
used to heat the passenger com-
partment, e.g. while stopped at a school to pick
up a child.
You can adjust the automatic climate control
settings in ignition key position 1.
Provided that the engine has warmed to its nor-
mal operating temperature and the battery is
charged, you can use this function for up to
15 minutes after switching off the ignition. The
LED in the button lights up to confirm compli-
ance with both of these conditions.
Switching off automatic climate control
The air volume, the heater and the
cooling function are all switched
off.
You can restart the automatic cli-
mate control by pressing any of its buttons
except the REST button.
Settings using Control Center
Ignition key:
>On vehicles with separate drives for audio
CDs and navigation DVDs, ignition key in
position 2
>In vehicles with one drive for audio CDs,
ignition key in position 1Control Center, for principle details, refer to
page16.
1.Press button.
This opens the start menu.
2.Move the controller to the left to open "Cli-
mate".
You can set the following:
>Manual air distribution, separate for driver's
side and passenger side
>Adjusting temperature in upper body region
>Intensity of the AUTO program
The settings are stored for the remote control
currently in use.
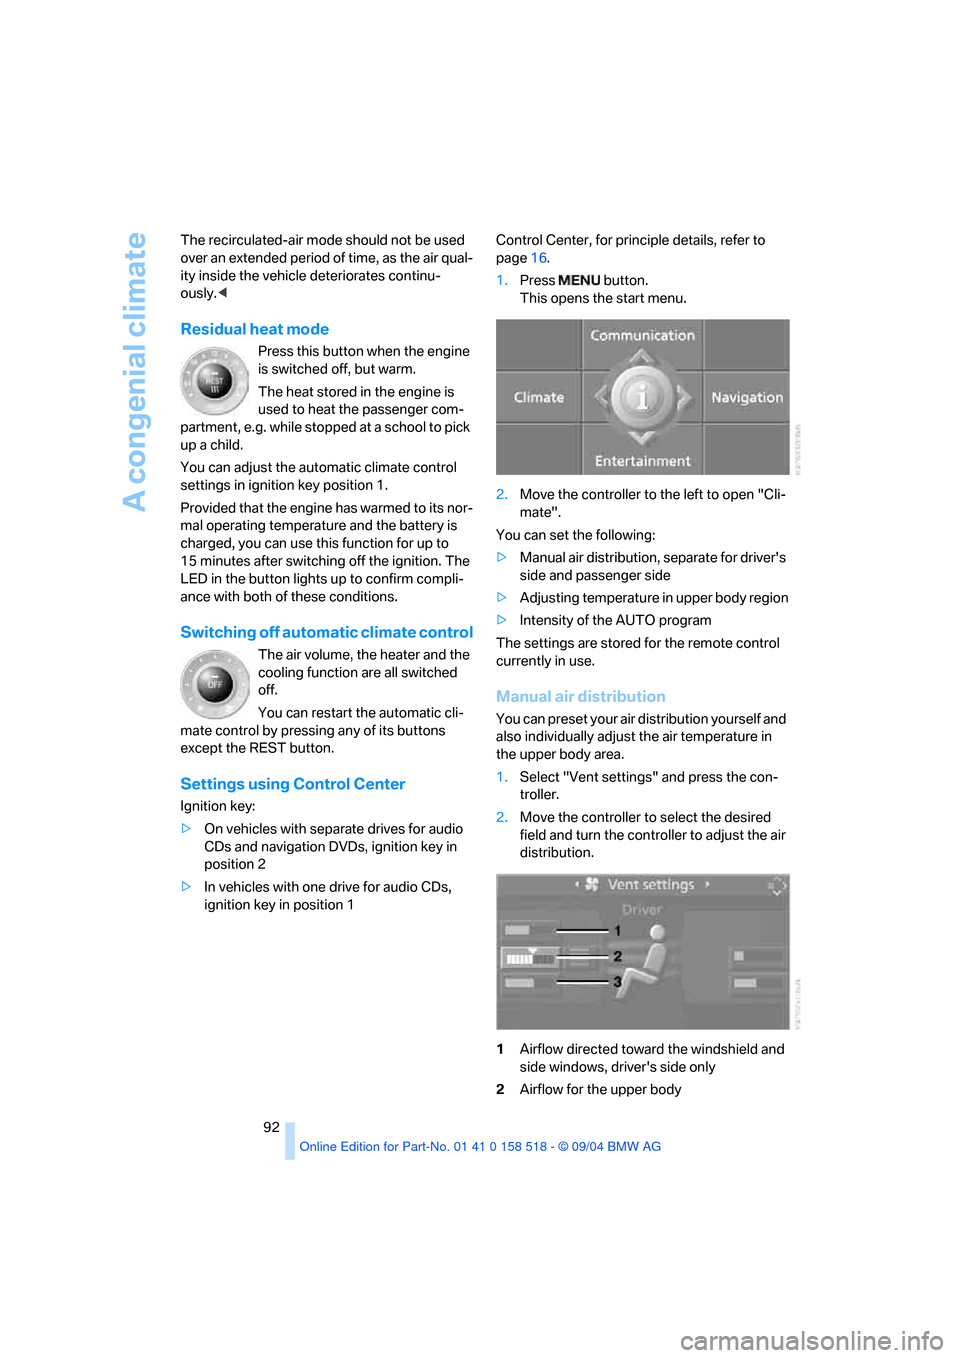
Manual air distribution
You can preset your air distribution yourself and
also individually adjust the air temperature in
the upper body area.
1.Select "Vent settings" and press the con-
troller.
2.Move the controller to select the desired
field and turn the controller to adjust the air
distribution.
1Airflow directed toward the windshield and
side windows, driver's side only
2Airflow for the upper body
Page 94 of 221
Controls
93Reference
At a glance
Driving tips
Communication
Navigation
Entertainment
Mobility
3Air to footwell
In order to select the passenger region:
Move controller toward the right.
Pressing the AUTO button cancels the air
distribution settings on the Control Dis-
play and vice versa.<
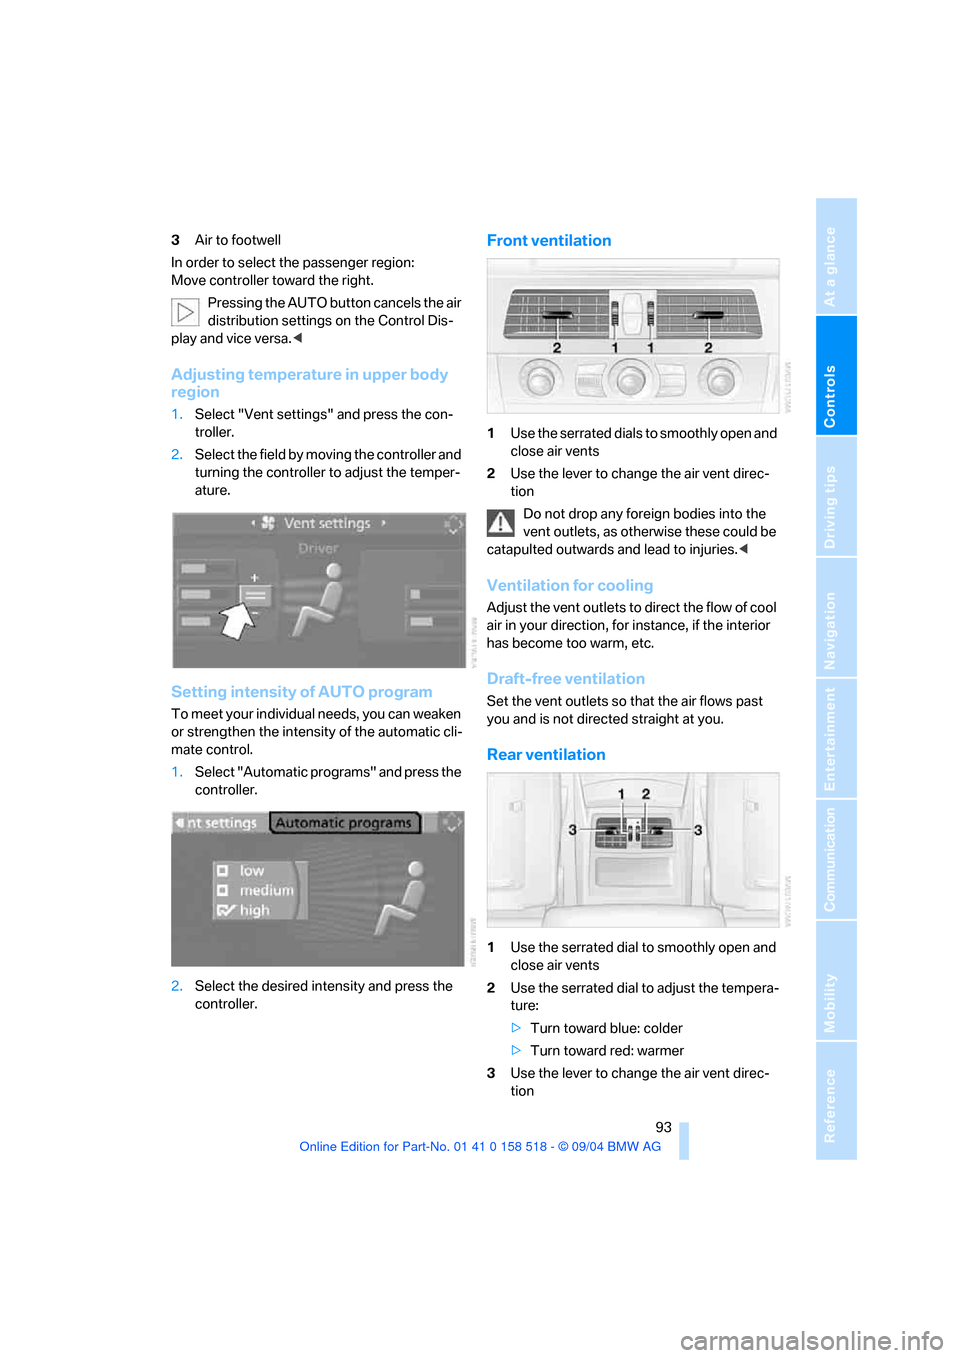
Adjusting temperature in upper body
region
1.Select "Vent settings" and press the con-
troller.
2.Select the field by moving the controller and
turning the controller to adjust the temper-
ature.
Setting intensity of AUTO program
To meet your individual needs, you can weaken
or strengthen the intensity of the automatic cli-
mate control.
1.Select "Automatic programs" and press the
controller.
2.Select the desired intensity and press the
controller.
Front ventilation
1Use the serrated dials to smoothly open and
close air vents
2Use the lever to change the air vent direc-
tion
Do not drop any foreign bodies into the
vent outlets, as otherwise these could be
catapulted outwards and lead to injuries.<
Ventilation for cooling
Adjust the vent outlets to direct the flow of cool
air in your direction, for instance, if the interior
has become too warm, etc.
Draft-free ventilation
Set the vent outlets so that the air flows past
you and is not directed straight at you.
Rear ventilation
1Use the serrated dial to smoothly open and
close air vents
2Use the serrated dial to adjust the tempera-
ture:
>Turn toward blue: colder
>Turn toward red: warmer
3Use the lever to change the air vent direc-
tion
Page 96 of 221
Controls
95Reference
At a glance
Driving tips
Communication
Navigation
Entertainment
Mobility
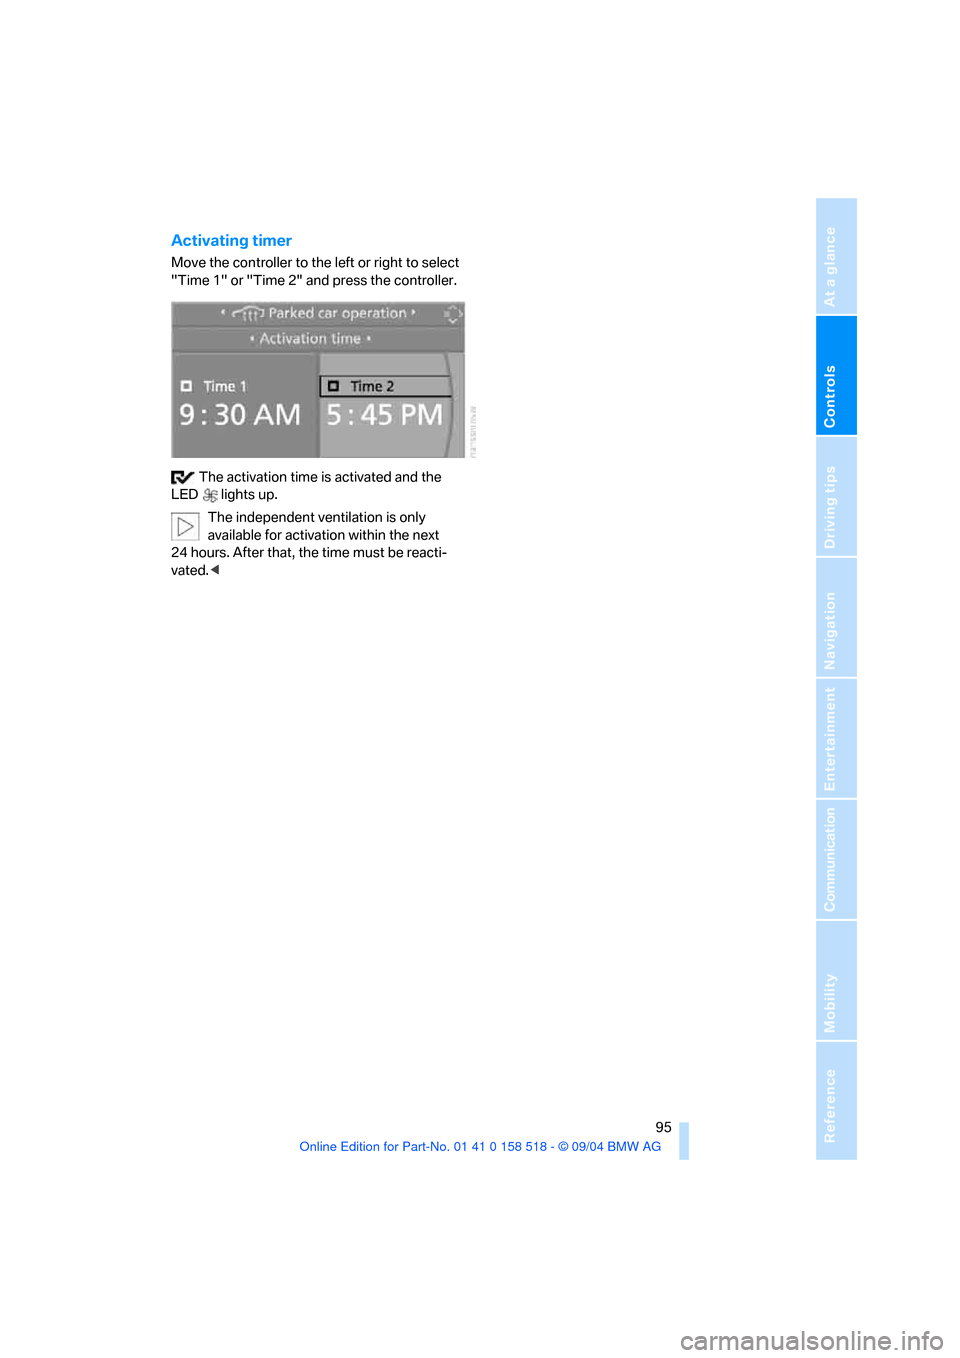
Activating timer
Move the controller to the left or right to select
"Time 1" or "Time 2" and press the controller.
The activation time is activated and the
LED lights up.
The independent ventilation is only
available for activation within the next
24 hours. After that, the time must be reacti-
vated.<
Page 98 of 221

Controls
97Reference
At a glance
Driving tips
Communication
Navigation
Entertainment
Mobility
The corresponding memory button 1 is now
programmed with the signal of the original
hand-held transmitter.
You can operate the system with the ignition
key in position 2.
If the device can not be operated after
repeated programming, check whether
the original hand-held transmitter uses an alter-
nating-code system. To do so, either read the
instructions for the original hand-held transmit-
ter or hold down the programmed memory
button1 of the integrated universal remote
control. If the LED 2 on the integrated universal
remote control flashes rapidly for a short time
and then remains lit for approx. 2 seconds, this
indicates that the original hand-held transmitter
uses an alternating-code system. In the case of
an alternating-code system, program the mem-
ory buttons1 as described at Alternating-code
transmitters.<
Alternating-code transmitters
To program the integrated universal remote
control, consult the operating instructions for
the equipment to be set. You will find informa-
tion there on the possibilities for synchroniza-
tion.
When programming hand-held transmitters
that employ an alternating code, please observe
the following supplementary instructions:
P r o g ra m m in g w i ll b e ea s i er w it h t h e a i d o f
a second person.<
1.Park your vehicle within the range of the
remote-controlled device.
2.Program the integrated universal remote
control as described above in the section
Fixed-code hand-held transmitters.
3.Locate the button on the receiver of the
device to be set, e. g. on the drive unit.
4.Press the button on the receiver of the
device to be set. After step 4, you have
approx. 30 seconds for step 5.
5.Press the programmed memory button1 of
the integrated universal remote control
three times.The corresponding memory button 1 is now
programmed with the signal of the original
hand-held transmitter.
Clearing memory buttons
Press both outer buttons1 for approx. 20 sec-
onds until the LED2 flashes: all memory but-
tons are cleared.
The memory of individual memory buttons 1
cannot be cleared.
Roller sun blinds*
Rear window blind
Press the button on the driver's door.
Roller sun blinds for rear side windows
Pull the loop of the roller sun blind and hook
onto bracket.
Glove compartment
Opening
Pull the handle. The light in the glove compart-
ment switches on.
Page 100 of 221
Controls
99Reference
At a glance
Driving tips
Communication
Navigation
Entertainment
Mobility
Storage compartments
Storage compartment on center
console between front seats
Open by pressing the cover back.
Other compartments
There are other compartments in the doors as
well as in the front and rear center console.
Storage nets are located on the backrests of the
front seats.
Clothes hooks
When suspending clothing from the
hooks ensure that it will not obstruct the
driver's vision. Do not hang heavy objects on
the hooks. If you do so, they could cause per-
sonal injury to occupants during braking or eva-
sive maneuvers.<
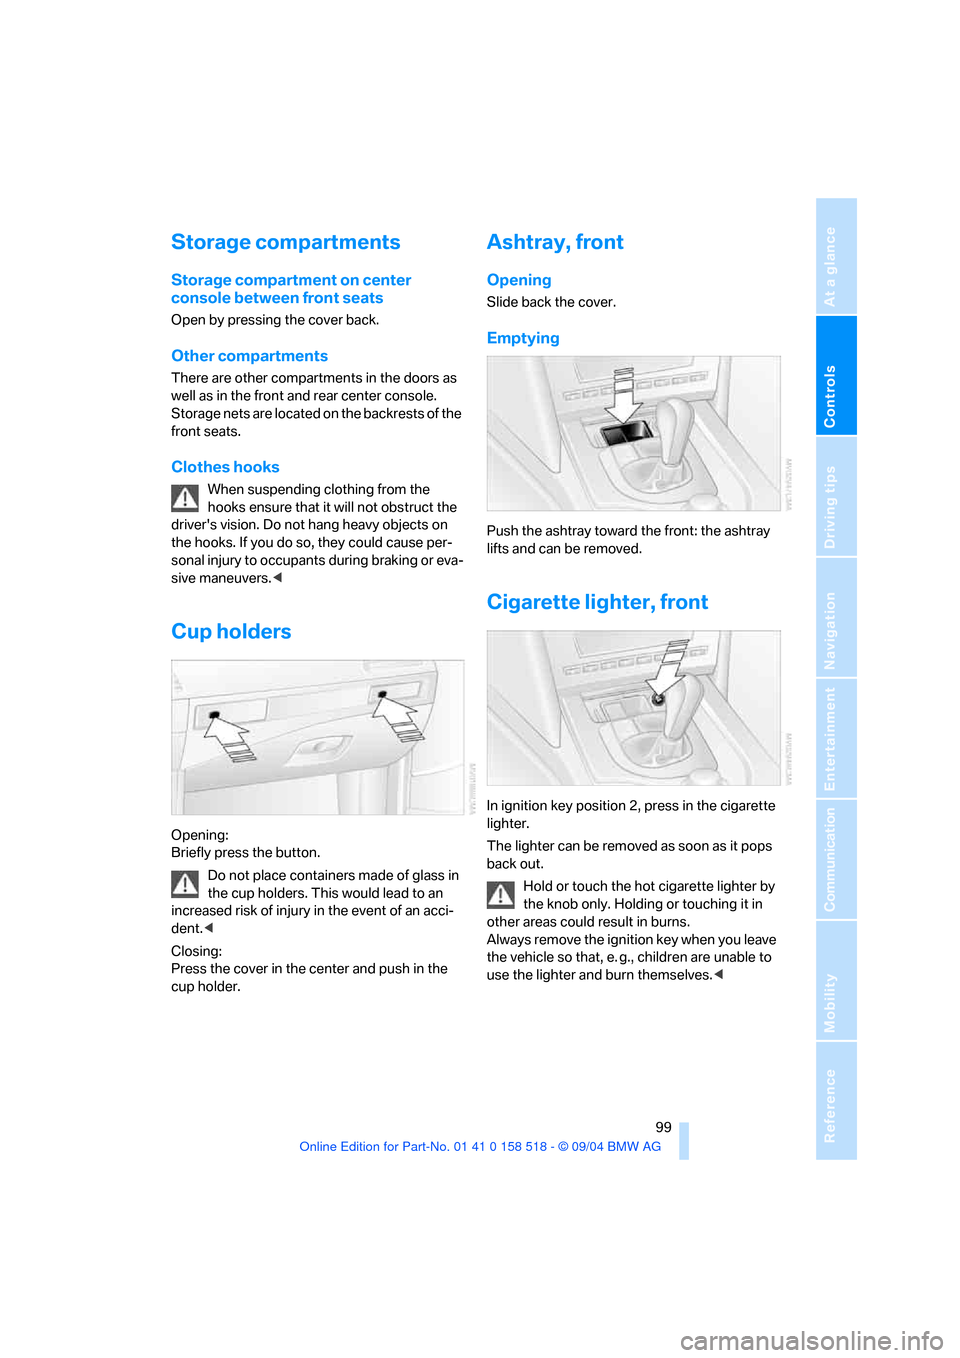
Cup holders
Opening:
Briefly press the button.
Do not place containers made of glass in
the cup holders. This would lead to an
increased risk of injury in the event of an acci-
dent.<
Closing:
Press the cover in the center and push in the
cup holder.
Ashtray, front
Opening
Slide back the cover.
Emptying
Push the ashtray toward the front: the ashtray
lifts and can be removed.
Cigarette lighter, front
In ignition key position 2, press in the cigarette
lighter.
The lighter can be removed as soon as it pops
back out.
Hold or touch the hot cigarette lighter by
the knob only. Holding or touching it in
other areas could result in burns.
Always remove the ignition key when you leave
the vehicle so that, e. g., children are unable to
use the lighter and burn themselves.<