Page 138 of 221
Navigation
Entertainment
Driving tips
137Reference
At a glance
Controls
Communication
Mobility
4.Select "Unlock rear menu" and press the
controller.
5.Select Rear seat and press the controller.
>In order to deactivate the remote control:
"Rear not enabled".
>In order to deactivate the control for the
speakers:
"Headphone operation only".
In order to set the headphones to the same
audio source as for the speakers:
1.Press the button to open the start
menu.
2.Move the controller back to open "Enter-
tainment".
3.Press the controller.
Other menu items are displayed.
4.Select "Headphones" and press the con-
troller.
The same audio source will be heard
over the speakers and headphones.Tone control
You can adjust the tone right and left for the
speakers or for the headphones.
1.Press one of the buttons1.
2.Select "Rear entertainment using speak-
ers" or "Rear entertainment via head-
phones" and press the controller.
3.Adjust the tone, refer to page133.
Page 140 of 221

Navigation
Entertainment
Driving tips
139Reference
At a glance
Controls
Communication
Mobility
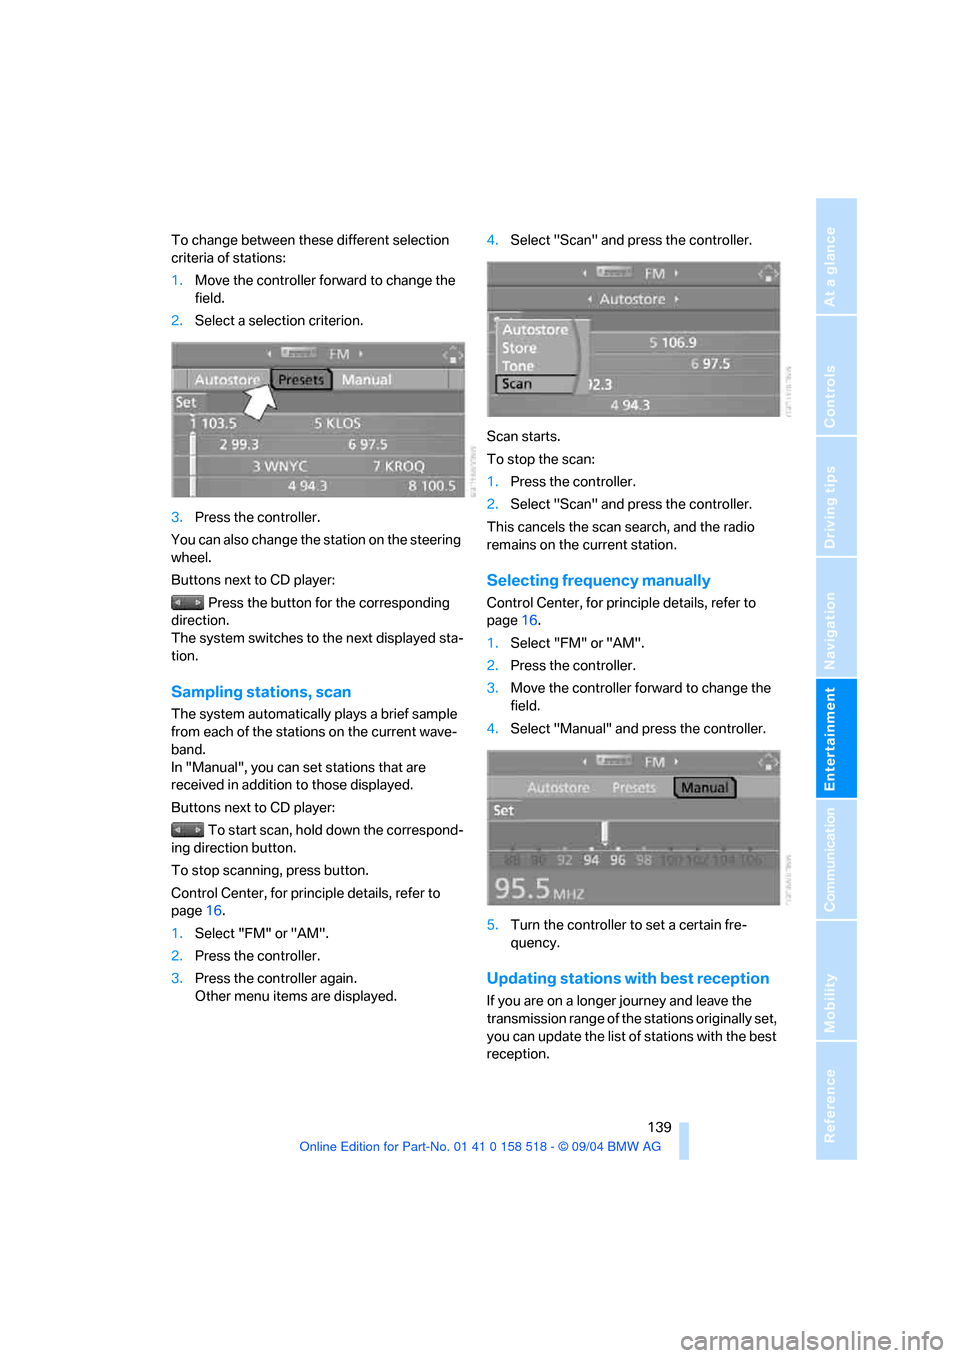
To change between these different selection
criteria of stations:
1.Move the controller forward to change the
field.
2.Select a selection criterion.
3.Press the controller.
You can also change the station on the steering
wheel.
Buttons next to CD player:
Press the button for the corresponding
direction.
The system switches to the next displayed sta-
tion.
Sampling stations, scan
The system automatically plays a brief sample
from each of the stations on the current wave-
band.
In "Manual", you can set stations that are
received in addition to those displayed.
Buttons next to CD player:
To start scan, hold down the correspond-
ing direction button.
To stop scanning, press button.
Control Center, for principle details, refer to
page16.
1.Select "FM" or "AM".
2.Press the controller.
3.Press the controller again.
Other menu items are displayed.4.Select "Scan" and press the controller.
Scan starts.
To stop the scan:
1.Press the controller.
2.Select "Scan" and press the controller.
This cancels the scan search, and the radio
remains on the current station.
Selecting frequency manually
Control Center, for principle details, refer to
page16.
1.Select "FM" or "AM".
2.Press the controller.
3.Move the controller forward to change the
field.
4.Select "Manual" and press the controller.
5.Turn the controller to set a certain fre-
quency.
Updating stations with best reception
If you are on a longer journey and leave the
transmission range of the stations originally set,
you can update the list of stations with the best
reception.
Page 142 of 221

Navigation
Entertainment
Driving tips
141Reference
At a glance
Controls
Communication
Mobility
The channels of the last selection criterion are
displayed once again after a short time.
The stations are stored for the remote control
currently in use.
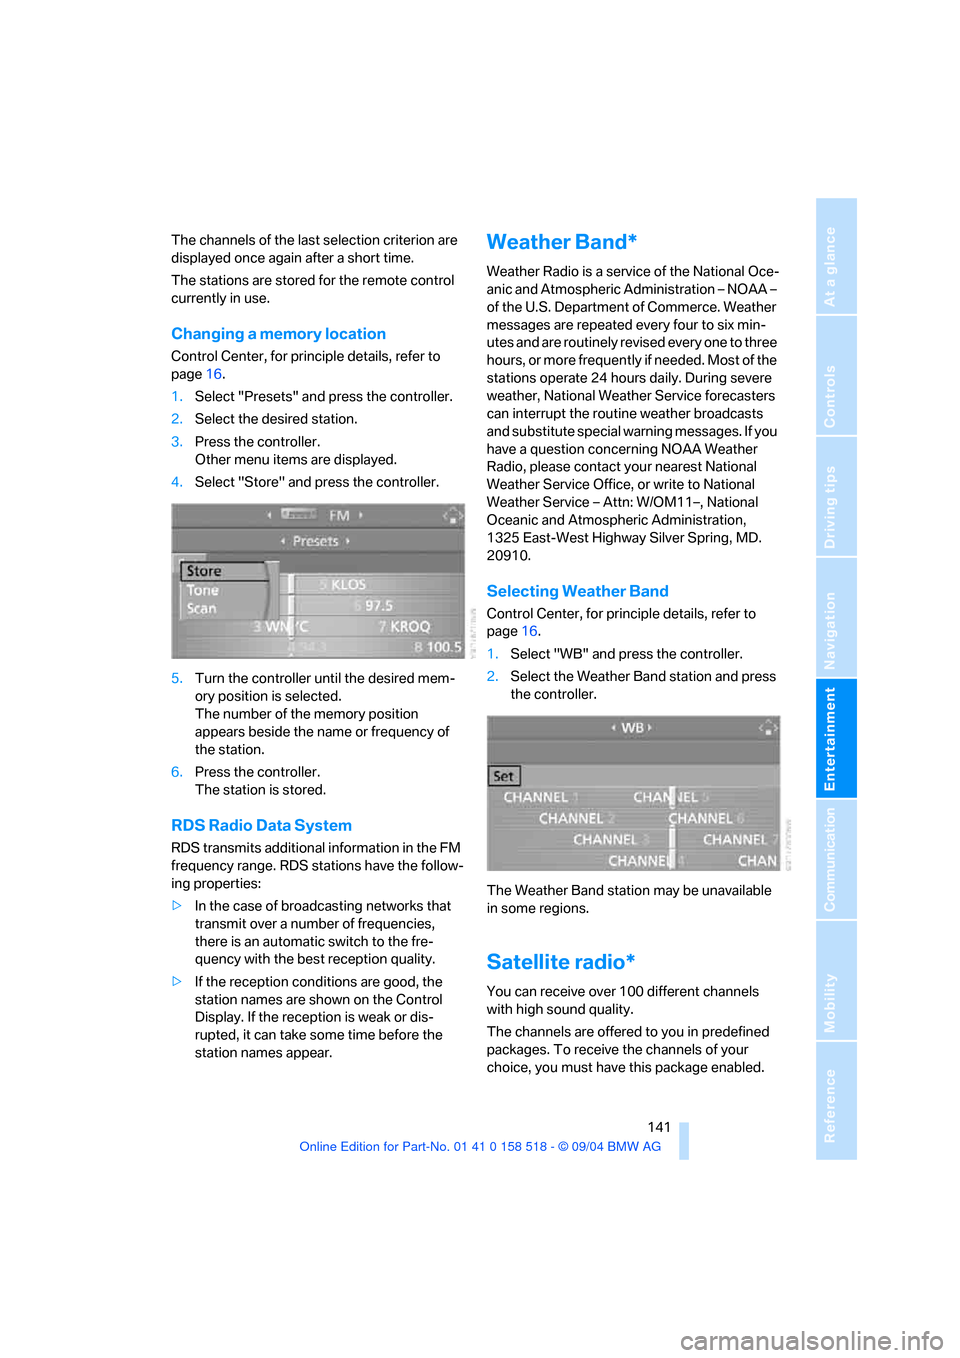
Changing a memory location
Control Center, for principle details, refer to
page16.
1.Select "Presets" and press the controller.
2.Select the desired station.
3.Press the controller.
Other menu items are displayed.
4.Select "Store" and press the controller.
5.Turn the controller until the desired mem-
ory position is selected.
The number of the memory position
appears beside the name or frequency of
the station.
6.Press the controller.
The station is stored.
RDS Radio Data System
RDS transmits additional information in the FM
frequency range. RDS stations have the follow-
ing properties:
>In the case of broadcasting networks that
transmit over a number of frequencies,
there is an automatic switch to the fre-
quency with the best reception quality.
>If the reception conditions are good, the
station names are shown on the Control
Display. If the reception is weak or dis-
rupted, it can take some time before the
station names appear.
Weather Band*
Weather Radio is a service of the National Oce-
anic and Atmospheric Administration – NOAA –
of the U.S. Department of Commerce. Weather
messages are repeated every four to six min-
utes and are routinely revised every one to three
hours, or more frequently if needed. Most of the
stations operate 24 hours daily. During severe
weather, National Weather Service forecasters
can interrupt the routine weather broadcasts
and substitute special warning messages. If you
have a question concerning NOAA Weather
Radio, please contact your nearest National
Weather Service Office, or write to National
Weather Service – Attn: W/OM11–, National
Oceanic and Atmospheric Administration,
1325 East-West Highway Silver Spring, MD.
20910.
Selecting Weather Band
Control Center, for principle details, refer to
page16.
1.Select "WB" and press the controller.
2.Select the Weather Band station and press
the controller.
The Weather Band station may be unavailable
in some regions.
Satellite radio*
You can receive over 100 different channels
with high sound quality.
The channels are offered to you in predefined
packages. To receive the channels of your
choice, you must have this package enabled.
Page 144 of 221
Navigation
Entertainment
Driving tips
143Reference
At a glance
Controls
Communication
Mobility
2.Select a menu item:
>"Presets":
Up to twelve channels you have stored
previously.
>"All channels":
All channels are displayed.
>"Categories":
All channels, sorted by categories, e. g.
news, jazz.
3.Press the controller.
4.If "Categories" has been selected:
Select the desired category and press the
controller.
The channels of this category are displayed.
5. Select a channel marked with this sym-
bol.6.Press the controller.
Other menu items are displayed.
7.Select "Play" and press the controller.
Additional information
The name of the channel and additional infor-
mation on the current track are displayed, e. g.
the name of the artist.
1Artist
2Track
Storing channel
1.Select desired channel.
2.Press the controller.
Other menu items are displayed.
3.Select "Store" and press the controller.
"Presets" is displayed.
Page 146 of 221
Navigation
Entertainment
Driving tips
145Reference
At a glance
Controls
Communication
Mobility
CD player and CD changer
Listening to CDs
CD player: starting CD
When equipped with two drives:
The upper drive is for audio CDs.
Insert the CD into the drive with the labeled side
up.
Playback starts automatically if the sound out-
put is on.
To start playback when there is already a CD in
the drive:
Control Center, for principle details, refer to
page16.
1.Press button.
This opens the start menu.
2.Move the controller back to open "Enter-
tainment".3.Select "CD" and press the controller.
4.On vehicles with a CD changer, select "CD"
and press the controller to start the CD
player.
Playback starts automatically if the sound out-
put is switched on.
To eject the CD, press the button on the
CD player.
The CD emerges slightly from the drive.
*
Page 148 of 221

Navigation
Entertainment
Driving tips
147Reference
At a glance
Controls
Communication
Mobility
Stop repeating:
Press controller, select "Repeat" and press
controller again.
Sampling tracks, scan
The system automatically plays a brief sample
from each of the tracks on the current CD.
Control Center, for principle details, refer to
page16.
1.Select "Set" and press the controller.
Other menu items are displayed.
2.Select "Scan" and press the controller.
To stop the scan:
1.Press the controller.
2.Select "Scan" and press the controller.
This cancels the scan, and the selected track
remains.
Random play sequence
In this mode, the music tracks on the current CD
are played once in a random sequence.
Control Center, for principle details, refer to
page16.
1.Select "Set" and press the controller.
Other menu items are displayed.
2.Select "Random" and press the controller.
Stop random function:
Press controller, select "Random" and press
controller again.
Fast forward/reverse
Buttons next to CD player:
Press and hold the button for the corre-
sponding direction.
CD magazine
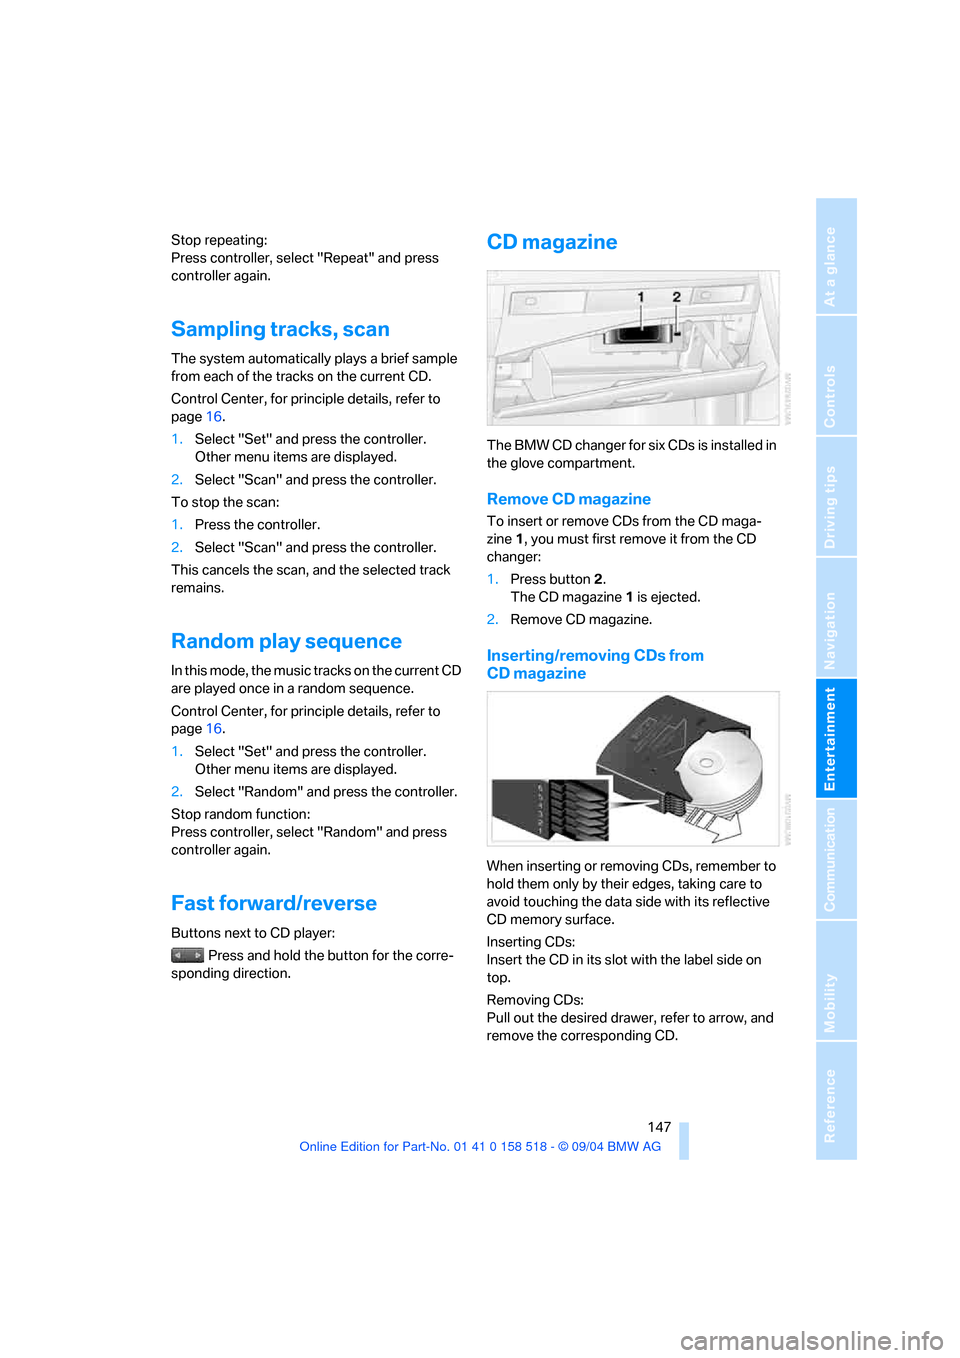
The BMW CD changer for six CDs is installed in
the glove compartment.
Remove CD magazine
To insert or remove CDs from the CD maga-
zine 1, you must first remove it from the CD
changer:
1.Press button 2.
The CD magazine 1 is ejected.
2.Remove CD magazine.
Inserting/removing CDs from
CD magazine
When inserting or removing CDs, remember to
hold them only by their edges, taking care to
avoid touching the data side with its reflective
CD memory surface.
Inserting CDs:
Insert the CD in its slot with the label side on
top.
Removing CDs:
Pull out the desired drawer, refer to arrow, and
remove the corresponding CD.
Page 150 of 221
Navigation
Entertainment
Driving tips
149Reference
At a glance
Controls
Communication
Mobility
Page 154 of 221

153
Entertainment
Reference
At a glance
Controls
Driving tips Communication
Navigation
Mobility
your portable phone.
To avoid possible short circuits, after removing
a battery you should never allow it to come into
contact with metallic surfaces of any kind.<
Disposing of used batteries
Return used batteries to a recycling col-
lection point or to your BMW center.<
Care instructions
You can find what you need to know about car-
ing for your portable phone in the separate Car-
ing for your vehicle brochure and in the portable
phone Owner's Manual.
Operating options
You can operate the portable phone* with:
>The steering wheel, refer to page10
>The Control Center, refer to page153
>Voice commands, refer to page158
You can get information about activating the
portable phone in the separate Owner's Manual
for the Full Preparation Package Cellphone.
Making calls with the car phone:
BMW Assist calls
You can use the car phone via the hands-free
system for BMW Assist calls.
When the status information "Communication"
is displayed in "Car Phone", only BMW Assist
calls are possible.
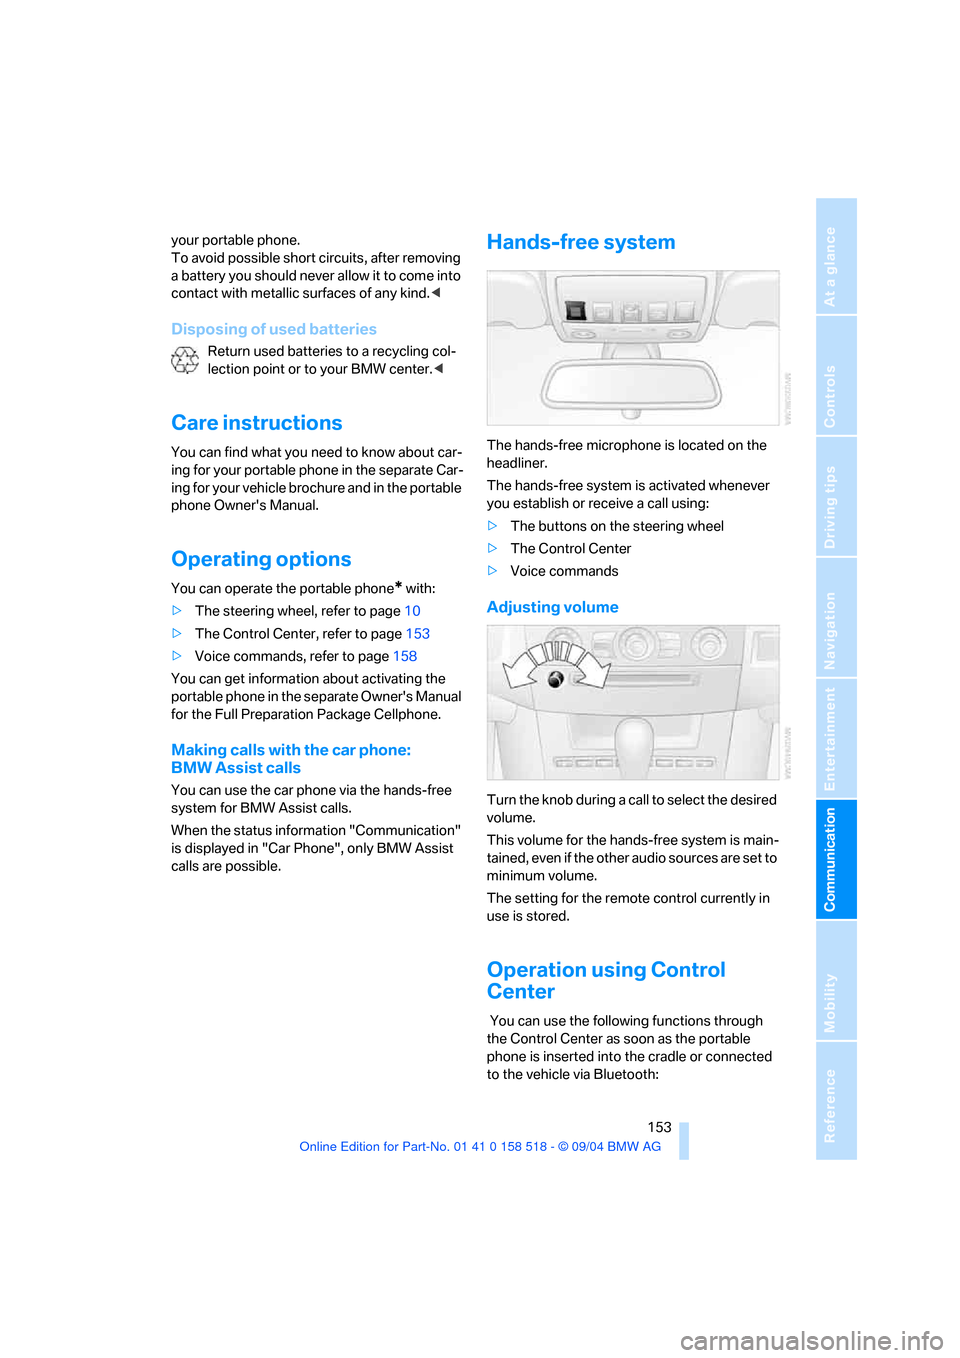
Hands-free system
The hands-free microphone is located on the
headliner.
The hands-free system is activated whenever
you establish or receive a call using:
>The buttons on the steering wheel
>The Control Center
>Voice commands
Adjusting volume
Turn the knob during a call to select the desired
volume.
This volume for the hands-free system is main-
tained, even if the other audio sources are set to
minimum volume.
The setting for the remote control currently in
use is stored.
Operation using Control
Center
You can use the following functions through
the Control Center as soon as the portable
phone is inserted into the cradle or connected
to the vehicle via Bluetooth: