Page 145 of 178
145
Side turn signal indicators5 watt bulb
1. Press the back edge of the lamp
toward the front with the tip of your
finger and remove
2. Apply gentle pressure to the bulb
while turning it to the left to remove.
Rear lampsAll bulbs: 21 watts
1Turn signal indicator
2Backup lamp
3Tail lamp
4Tail lamp/brake lamp
Section of the left cargo area:
Bulbs in the fender:
All of the bulbs are integrated in a cen-
tral bulb holder.
1. Release and remove the cargo area
side panel
2. Release and remove the bulb holder
– see arrow
3. Remove the power plug and lay the
bulb holder to one side, for instance,
on the floor of the cargo area
4. Applying light pressure, turn the bulb
to the left. Remove and replace the
bulb
5. Plug in the power supply fitting
6. Press the bulb holder into position
until you hear it engage.
Lamps and bulbs
OverviewControlsMaintenanceRepairsDataIndex
Page 146 of 178
146
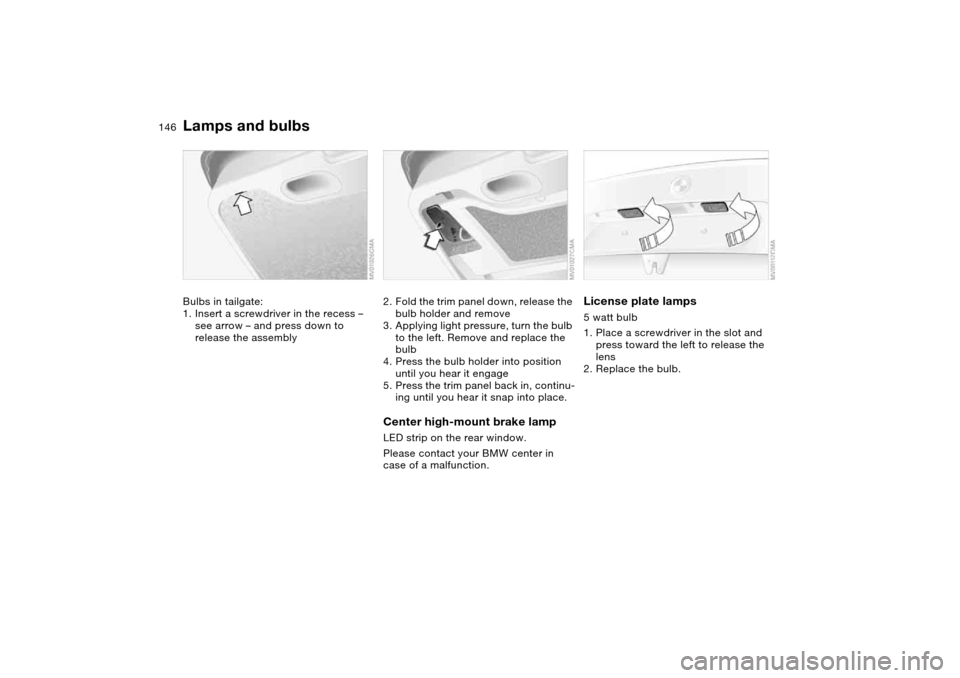
Bulbs in tailgate:
1. Insert a screwdriver in the recess –
see arrow – and press down to
release the assembly
2. Fold the trim panel down, release the
bulb holder and remove
3. Applying light pressure, turn the bulb
to the left. Remove and replace the
bulb
4. Press the bulb holder into position
until you hear it engage
5. Press the trim panel back in, continu-
ing until you hear it snap into place.Center high-mount brake lampLED strip on the rear window.
Please contact your BMW center in
case of a malfunction.
License plate lamps5 watt bulb
1. Place a screwdriver in the slot and
press toward the left to release the
lens
2. Replace the bulb.
Lamps and bulbs
Page 147 of 178

147
Tailgate lamp5 watt bulb
1. Pull out the bulb socket
2. Replace the bulb.
Changing a wheel
Safety precautions in the event of
a flat tire or wheel change:
Stop the vehicle as far as possible from
passing traffic. Park on a firm, flat, sur-
face. Switch on the hazard warning
flashers. Turn the steering wheel to the
straight-ahead position and engage the
steering lock. Shift into 1st or Reverse,
or if you have an automatic transmis-
sion position the selector lever in Park,
and engage the parking brake.
All passengers should be outside the
vehicle and well away from your imme-
diate working area, behind a guardrail,
for instance.
If a warning triangle or portable hazard
warning lamp is available, set it up on
the roadside at an appropriate distance
from the rear of the vehicle. Comply
with all local safety guidelines and reg-
ulations.
Change the wheel only on a level, firm
surface which is not slippery. Avoid
jacking the vehicle on a soft or slippery
support surface – snow, ice, loose
gravel, etc. – as either the vehicle or the
jack could slip sideways.
Position the jack on a firm support sur-
face.
Do not place wooden blocks or similar
objects under the jack. They could pre-
vent the jack from extending to its full
height and reduce its support capacity.
Do not lie under the vehicle or start the
engine when the vehicle is supported
by the jack. There is otherwise a risk of
fatal injury.<
Your BMW is equipped with a spare tire
or a space-saver spare tire designed for
temporary use in maintaining the vehi-
cle's mobility in an emergency.
To remove the spare tire, lift the
floor panel in the cargo area com-
pletely out, refer to page 113.<
Lamps and bulbs
OverviewControlsMaintenanceRepairsDataIndex
Page 148 of 178
148
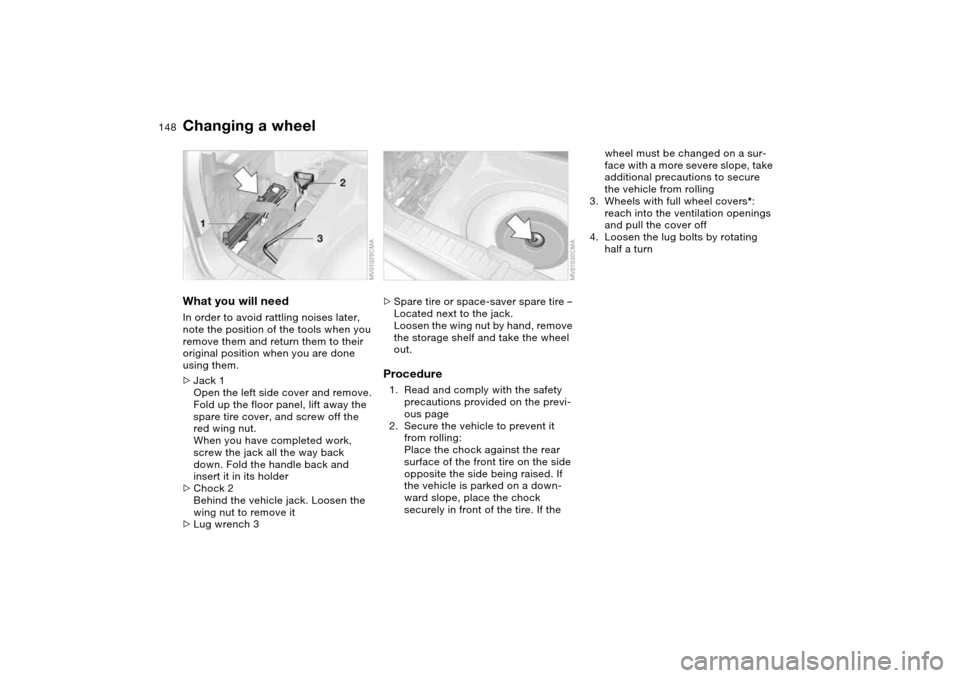
What you will needIn order to avoid rattling noises later,
note the position of the tools when you
remove them and return them to their
original position when you are done
using them.
>Jack 1
Open the left side cover and remove.
Fold up the floor panel, lift away the
spare tire cover, and screw off the
red wing nut.
When you have completed work,
screw the jack all the way back
down. Fold the handle back and
insert it in its holder
>Chock 2
Behind the vehicle jack. Loosen the
wing nut to remove it
>Lug wrench 3
>Spare tire or space-saver spare tire –
Located next to the jack.
Loosen the wing nut by hand, remove
the storage shelf and take the wheel
out.Procedure1. Read and comply with the safety
precautions provided on the previ-
ous page
2. Secure the vehicle to prevent it
from rolling:
Place the chock against the rear
surface of the front tire on the side
opposite the side being raised. If
the vehicle is parked on a down-
ward slope, place the chock
securely in front of the tire. If the
wheel must be changed on a sur-
face with a more severe slope, take
additional precautions to secure
the vehicle from rolling
3. Wheels with full wheel covers*:
reach into the ventilation openings
and pull the cover off
4. Loosen the lug bolts by rotating
half a turn
Changing a wheel
Page 149 of 178

149
5. Position the jack at the jacking
point closest to the flat tire with the
jack base vertically below the jack-
ing point. The entire surface of the
head of the jack moves into the
square recess of the jacking point –
refer to the detail in the next illus-
tration – when the jack is cranked
6. Jack the vehicle up until the wheel
you are changing is raised from the
ground
7. Unscrew the lug bolts and remove
the wheel
8. Remove accumulations of mud or
dirt from the mounting surfaces of
the wheel and hub. Clean the lug
bolts
9. Position the new wheel or the
space-saver spare tire on the hub
and screw at least two lug bolts fin-
ger-tight into opposite bolt holes
10. Screw in the remaining lug bolts.
Screw in all the bolts in a diagonal
pattern
11. Lower the jack and remove it from
beneath the vehicle
12. Tighten the lug bolts securely in a
diagonal pattern
13. Wheels with full wheel covers*:
place the wheel cover with the
valve opening over the valve. Use
both hands to press the cover
securely onto the rim
14. Check and correct the tire inflation
pressure at the earliest opportunity.
Vehicles with Flat Tire Monitor:
after mounting the spare tire or
correcting the tire inflation pres-
sure, reinitialize the system, refer to
page 91.
Protect valve stems and valves from dirt
using screw-on valve stem caps. Dirty
valve stems frequently lead to slow
pressure loss.
Changing a wheel
OverviewControlsMaintenanceRepairsDataIndex
Page 150 of 178
150
Do not attempt to install the full
wheel cover on the space-saver
spare tire, since this could damage the
cover.<
The vehicle jack is designed for
changing wheels only. Do not
attempt to raise another vehicle model
with it or to raise any other type of load.
To do so could cause accidents and
personal injury.
To ensure continued safety, have the
tightness of the torque bolts checked
with a calibrated lug wrench – torque
specification: 88.5 lb ft/120 Nm – at the
earliest opportunity.<
When storing a wheel in the spare tire
recess, take care to avoid bending the
threaded rod.
If the original BMW light-alloy wheels
have been replaced with other light-
alloy wheels, different lug bolts may be
required.
Replace the defective tire as soon as
possible and have the new wheel/tire
balanced.
Driving with the space-saver
spare tireDrive cautiously. Do not exceed a
speed of 50 mph / 80 km/h.
Be aware that vehicle handling may be
altered. Anticipate, e.g., reduced track-
ing during braking, longer braking dis-
tances, and changed steering charac-
teristics when approaching limit
conditions. These handling characteris-
tics will be even more pronounced if
winter tires are mounted.
Only one space-saver spare tire
may be mounted at one time.
Mount a wheel and tire of the original
size at the earliest possible opportu-
nity.
For certain wheel/tire combina-
tions, the size of the spare tire will
differ from that of the remaining tires.
The spare tire is fully functional at all
loads and speeds. However, the spare
tire should be replaced at the earliest
possible opportunity in order to achieve
the original operating conditions.<
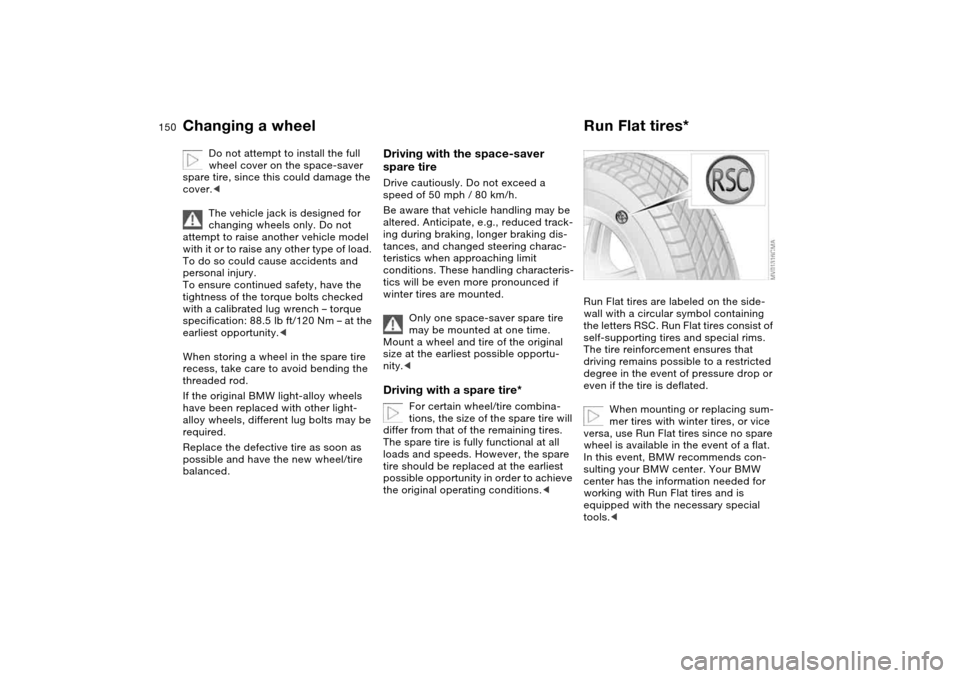
Run Flat tires*Run Flat tires are labeled on the side-
wall with a circular symbol containing
the letters RSC. Run Flat tires consist of
self-supporting tires and special rims.
The tire reinforcement ensures that
driving remains possible to a restricted
degree in the event of pressure drop or
even if the tire is deflated.
When mounting or replacing sum-
mer tires with winter tires, or vice
versa, use Run Flat tires since no spare
wheel is available in the event of a flat.
In this event, BMW recommends con-
sulting your BMW center. Your BMW
center has the information needed for
working with Run Flat tires and is
equipped with the necessary special
tools.<
Changing a wheel
Page 151 of 178
151
Driving with a damaged tireDepending on the cargo load, Run Flat
tires allow you to continue driving at a
maximum speed of 50 mph / 80 km/h. If
there is a total loss of tire inflation pres-
sure, 0 psi/0 kPa, or obvious tire dam-
age, you can determine the distance
you may continue driving based on the
following values:
>With a light load:
1 to 2 persons without luggage:
approx. 150 miles/250 km
>With a medium load:
2 persons, full cargo area; or 5 per-
sons without luggage:
approx. 100 miles/150 km
>With a full load:
5 persons, full cargo area:
approx. 30 miles/50 km.
Drive cautiously. Do not exceed a
speed of 50 mph / 80 km/h. Be
aware that vehicle handling will be
altered when there is a loss in inflation
pressure. Anticipate, e.g., reduced
tracking during braking, longer braking
distances and changed steering char-
acteristics.
For safety reasons, BMW recommends
not having damaged Run Flat tires
repaired. In this case, consult your
BMW center.<
BatteryMaintenanceThe battery is absolutely maintenance-
free, that is, the original electrolyte will
normally last for the service life of the
battery under moderate climatic condi-
tions.
Please consult your BMW center
whenever you have any questions
concerning the battery.
cle, leave the engine off at all times.
Connect the charge cables to the termi-
nals in the engine compartment. For
terminal locations, refer to Jump-start-
ing on page 153.Disposal
Return used batteries to a recy-
cling point or your BMW center.
Maintain the battery in an upright posi-
tion for transport and storage. Secure
the battery against tilting during trans-
port.<
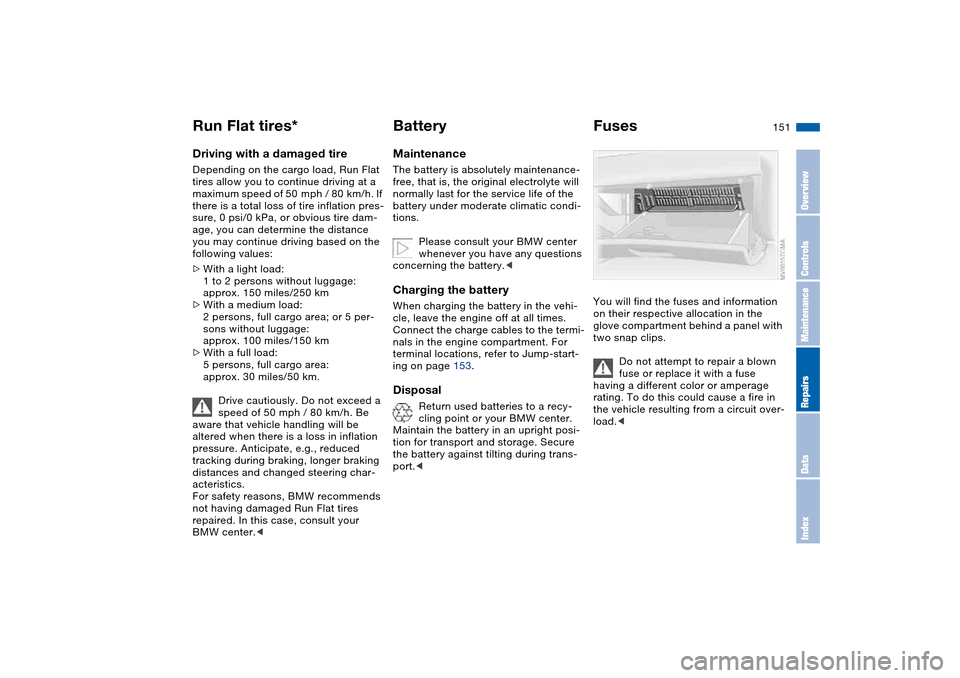
FusesYou will find the fuses and information
on their respective allocation in the
glove compartment behind a panel with
two snap clips.
Do not attempt to repair a blown
fuse or replace it with a fuse
having a different color or amperage
rating. To do this could cause a fire in
the vehicle resulting from a circuit over-
load.<
Run Flat tires*
OverviewControlsMaintenanceRepairsDataIndex
Page 152 of 178
152Giving and receiving assistance
Receiving assistanceThe BMW Group's Mobile Service
offers you 24-hour assistance in the
event of a breakdown, even on week-
ends and holidays.
The telephone numbers of the Mobile
Service control center in your country
are listed in the BMW Dealer Directory.
If your vehicle has the necessary equip-
ment, you can contact the Mobile Ser-
vice or issue an emergency call using
buttons in the interior rearview mirror.
When an emergency call is initiated, a
telephone connection is established
with the general emergency call center.
In vehicles with activated BMW Assist
function, a telephone connection is set
up to the BMW Assist emergency call
center. If the current location of your
vehicle can be determined, this location
is transmitted to the BMW Assist emer-
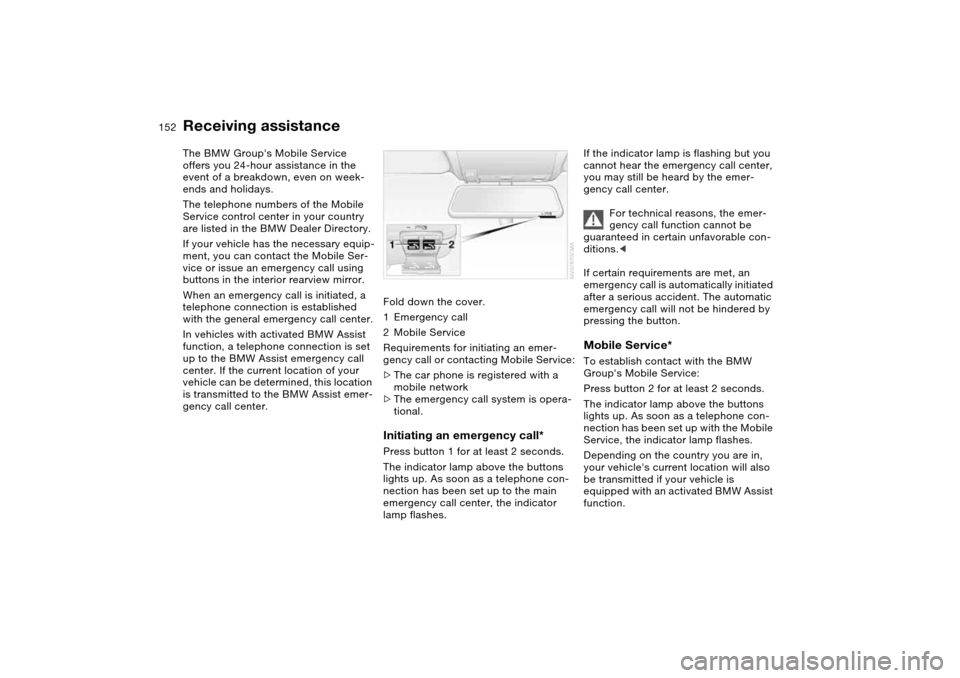
gency call center.Fold down the cover.
1Emergency call
2Mobile Service
Requirements for initiating an emer-
gency call or contacting Mobile Service:
>The car phone is registered with a
mobile network
>The emergency call system is opera-
tional.
Initiating an emergency call*Press button 1 for at least 2 seconds.
The indicator lamp above the buttons
lights up. As soon as a telephone con-
nection has been set up to the main
emergency call center, the indicator
lamp flashes.
If the indicator lamp is flashing but you
cannot hear the emergency call center,
you may still be heard by the emer-
gency call center.
For technical reasons, the emer-
gency call function cannot be
guaranteed in certain unfavorable con-
ditions.<
If certain requirements are met, an
emergency call is automatically initiated
after a serious accident. The automatic
emergency call will not be hindered by
pressing the button.Mobile Service*To establish contact with the BMW
Group's Mobile Service:
Press button 2 for at least 2 seconds.
The indicator lamp above the buttons
lights up. As soon as a telephone con-
nection has been set up with the Mobile
Service, the indicator lamp flashes.
Depending on the country you are in,
your vehicle's current location will also
be transmitted if your vehicle is
equipped with an activated BMW Assist
function.
 1
1 2
2 3
3 4
4 5
5 6
6 7
7 8
8 9
9 10
10 11
11 12
12 13
13 14
14 15
15 16
16 17
17 18
18 19
19 20
20 21
21 22
22 23
23 24
24 25
25 26
26 27
27 28
28 29
29 30
30 31
31 32
32 33
33 34
34 35
35 36
36 37
37 38
38 39
39 40
40 41
41 42
42 43
43 44
44 45
45 46
46 47
47 48
48 49
49 50
50 51
51 52
52 53
53 54
54 55
55 56
56 57
57 58
58 59
59 60
60 61
61 62
62 63
63 64
64 65
65 66
66 67
67 68
68 69
69 70
70 71
71 72
72 73
73 74
74 75
75 76
76 77
77 78
78 79
79 80
80 81
81 82
82 83
83 84
84 85
85 86
86 87
87 88
88 89
89 90
90 91
91 92
92 93
93 94
94 95
95 96
96 97
97 98
98 99
99 100
100 101
101 102
102 103
103 104
104 105
105 106
106 107
107 108
108 109
109 110
110 111
111 112
112 113
113 114
114 115
115 116
116 117
117 118
118 119
119 120
120 121
121 122
122 123
123 124
124 125
125 126
126 127
127 128
128 129
129 130
130 131
131 132
132 133
133 134
134 135
135 136
136 137
137 138
138 139
139 140
140 141
141 142
142 143
143 144
144 145
145 146
146 147
147 148
148 149
149 150
150 151
151 152
152 153
153 154
154 155
155 156
156 157
157 158
158 159
159 160
160 161
161 162
162 163
163 164
164 165
165 166
166 167
167 168
168 169
169 170
170 171
171 172
172 173
173 174
174 175
175 176
176 177
177
