Page 1044 of 2870
LU(H4SO)-16
LUBRICATION
Oil Pan and Strainer
5. Oil Pan and Strainer
A: REMOVAL
1) Set the vehicle on lift arms.
2) Remove the front wheels.
3) Disconnect the ground cable from battery.
4) Remove the air intake duct and air cleaner case.
(Non-turbo model)
Case.>
5) Disconnect the connector from mass air flow
sensor. (Turbo model)
6) Remove the air intake boot and air cleaner upper
cover. (Turbo model)
7) Remove the intercooler (Turbo model)
IN(H4DOTC)-10, REMOVAL, Intercooler.>8) Remove the pitching stopper.
9) Remove the radiator upper brackets.
10) Support the engine with a lifting device and
wire ropes.
11) Lift-up the vehicle.
CAUTION:
When lifting up the vehicle, rise up the wire
rope together.
12) Remove the under cover.
FU-00009
LU-00026
LU-00070
ME-00213
LU-00027
LU-00028
Page 1045 of 2870
LU(H4SO)-17
LUBRICATION
Oil Pan and Strainer
13) Drain the engine oil.
Set a container under the vehicle, and remove the
drain plug from oil pan.
14) Remove the front and center exhaust pipes.
(Non-turbo model)
AL, Front Exhaust Pipe.>
15) Remove the nuts which install front cushion
rubber onto front crossmember.
16) Remove the bolts which install oil pan on cylin-
der block while raising up engine.
17) Insert the oil pan cutter blade between the cyl-
inder block to oil pan clearance.
CAUTION:
Do not use a screwdriver or similar tool in place
of oil pan cutter.18) Remove the oil strainer.
19) Remove the baffle plate.
(A) Gasket
(B) Drain plug
LU-00029
(B)(A)
LU-00030
LU-00031
LU-00032
LU-00033
Page 1046 of 2870

LU(H4SO)-18
LUBRICATION
Oil Pan and Strainer
B: INSTALLATION
CAUTION:
Before installing the oil pan, clean sealant from
oil pan and engine block.
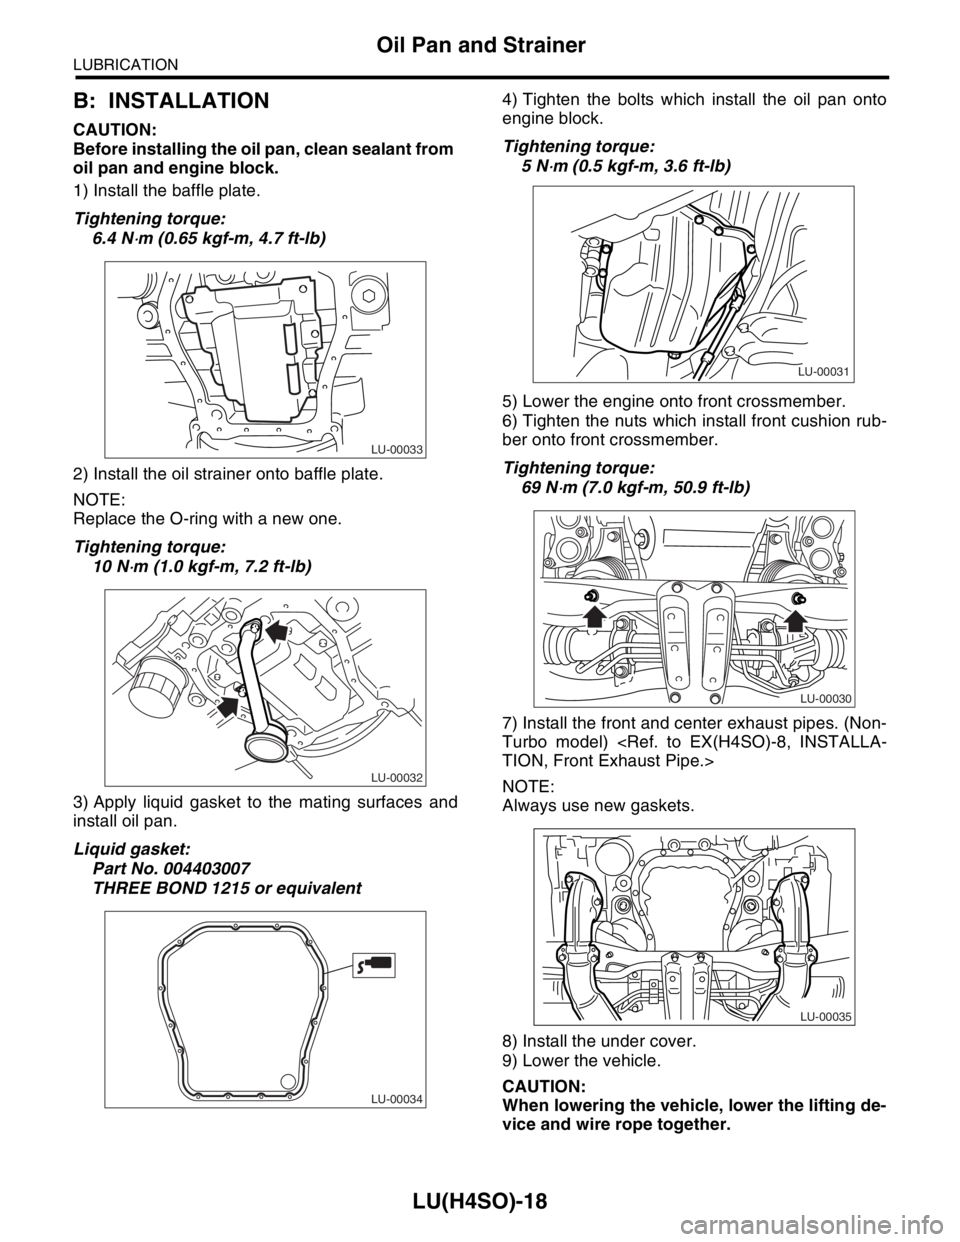
1) Install the baffle plate.
Tightening torque:
6.4 N
⋅m (0.65 kgf-m, 4.7 ft-lb)
2) Install the oil strainer onto baffle plate.
NOTE:
Replace the O-ring with a new one.
Tightening torque:
10 N
⋅m (1.0 kgf-m, 7.2 ft-lb)
3) Apply liquid gasket to the mating surfaces and
install oil pan.
Liquid gasket:
Part No. 004403007
THREE BOND 1215 or equivalent4) Tighten the bolts which install the oil pan onto
engine block.
Tightening torque:
5 N
⋅m (0.5 kgf-m, 3.6 ft-lb)
5) Lower the engine onto front crossmember.
6) Tighten the nuts which install front cushion rub-
ber onto front crossmember.
Tightening torque:
69 N
⋅m (7.0 kgf-m, 50.9 ft-lb)
7) Install the front and center exhaust pipes. (Non-
Turbo model)
TION, Front Exhaust Pipe.>
NOTE:
Always use new gaskets.
8) Install the under cover.
9) Lower the vehicle.
CAUTION:
When lowering the vehicle, lower the lifting de-
vice and wire rope together.
LU-00033
LU-00032
LU-00034
LU-00031
LU-00030
LU-00035
Page 1047 of 2870
LU(H4SO)-19
LUBRICATION
Oil Pan and Strainer
10) Remove the lifting device and steel cables.
11) Install the pitching stopper.
Tightening torque:
T1: 50 N
⋅m (5.1 kgf-m, 36.9 ft-lb)
T2: 58 N
⋅m (5.9 kgf-m, 42.8 ft-lb)
12) Install the radiator upper brackets.
13) Install the air intake duct and air cleaner case.
(Non-turbo model)
LATION, Air Intake Duct.>
INSTALLATION, Air Cleaner Case.>
14) Install the intercooler. (Turbo model)
IN(H4DOTC)-11, INSTALLATION, Intercooler.>15) Install the air intake boot and air cleaner upper
cover. (Turbo model)
16) Connect the connector to mass air flow sensor.
(Turbo model)
17) Install the front wheels.
18) Connect the battery ground cable to battery.
19) Fill engine oil.
TION, Engine Oil.>
C: INSPECTION
By visual check make sure the oil pan, oil strainer,
oil strainer stay and baffle plate are not damaged.
LU-00028
ME-00218T2T1
LU-00027
LU-00070
LU-00026
FU-00009
Page 1048 of 2870
LU(H4SO)-20
LUBRICATION
Oil Pressure Switch
6. Oil Pressure Switch
A: REMOVAL
1) Remove the generator from bracket.
SC(H4SO)-15, REMOVAL, Generator.>
2) Disconnect the terminal from oil pressure switch.
3) Remove the oil pressure switch.
B: INSTALLATION
1) Apply liquid gasket to the oil pressure switch
threads.
Liquid gasket:
Part No. 004403007
THREE BOND 1324 or equivalent
2) Install the oil pressure switch onto engine block.
Tightening torque:
25 N
⋅m (2.5 kgf-m, 18.1 ft-lb)
3) Connect the terminal of oil pressure switch.
4) Install the generator on bracket.
SC(H4SO)-15, INSTALLATION, Generator.>
C: INSPECTION
Make sure oil does not leak or seep from where the
oil pressure switch is installed.
LU-00036
LU-00037
LU-00038
LU-00037
LU-00036
Page 1049 of 2870
LU(H4SO)-21
LUBRICATION
Engine Oil Cooler
7. Engine Oil Cooler
A: REMOVAL
NOTE:
Engine oil cooler is equipped with turbo model only.
1) Lift-up the vehicle.
2) Remove the under cover.
3) Drain the engine oil. Set a container under the
vehicle, and remove the drain plug from oil pan.
4) Drain the engine coolant.
5) Remove the water by-pass pipe between oil
cooler and water pump.
6) Remove the engine oil filter.
23, REMOVAL, Engine Oil Filter.>
7) Remove the connector and remove oil cooler.8) Remove the adapters (1) and (2).
(A) Gasket
(B) Drain plug
LU-00039
(B)(A)
LU-00040
(A) Adapter (1)
(B) Adapter connector
(C) Adapter (2)
(D) Oil cooler
(E) Oil cooler connector
LU-00041
(A)
(B)
(C)
(D)
(E)
Page 1050 of 2870
LU(H4SO)-22
LUBRICATION
Engine Oil Cooler
B: INSTALLATION
NOTE:
Engine oil cooler is equipped with turbo model only.
1) Install in the reverse order of removal.
2) Contact the knock pin (A) of adapter (1) to cylin-
der block rib (B) to install adapter (1).
3) Install the adapter (2).
4) Contact the engine oil cooler stopper (A) to
adapter (2) rib (B) to install engine oil cooler.
Tightening torque:
T1: 6.4 N
⋅m (0.7 kgf-m, 5.1 ft-lb)
T2: 44 N
⋅m (4.5 kgf-m, 33 ft-lb)
T3: 54 N
⋅m (5.5 kgf-m, 40 ft-lb)NOTE:
Always use a new O-ring.
C: INSPECTION
1) Check that the coolant passages are not
clogged using air blow method.
2) Check the mating surfaces of cylinder block, O-
ring groove and oil filter for damage.
LU-00042
(A)
(B)
LU-00043
(B)(A)
(A) Adapter (1)
(B) Adapter connector
(C) Adapter (2)
(D) Oil cooler
(E) Oil cooler connector
LU-00044
(A)
(B)
(C)
(D)
(E)
T1
T2
T3
Page 1051 of 2870

LU(H4SO)-23
LUBRICATION
Engine Oil Filter
8. Engine Oil Filter
A: REMOVAL
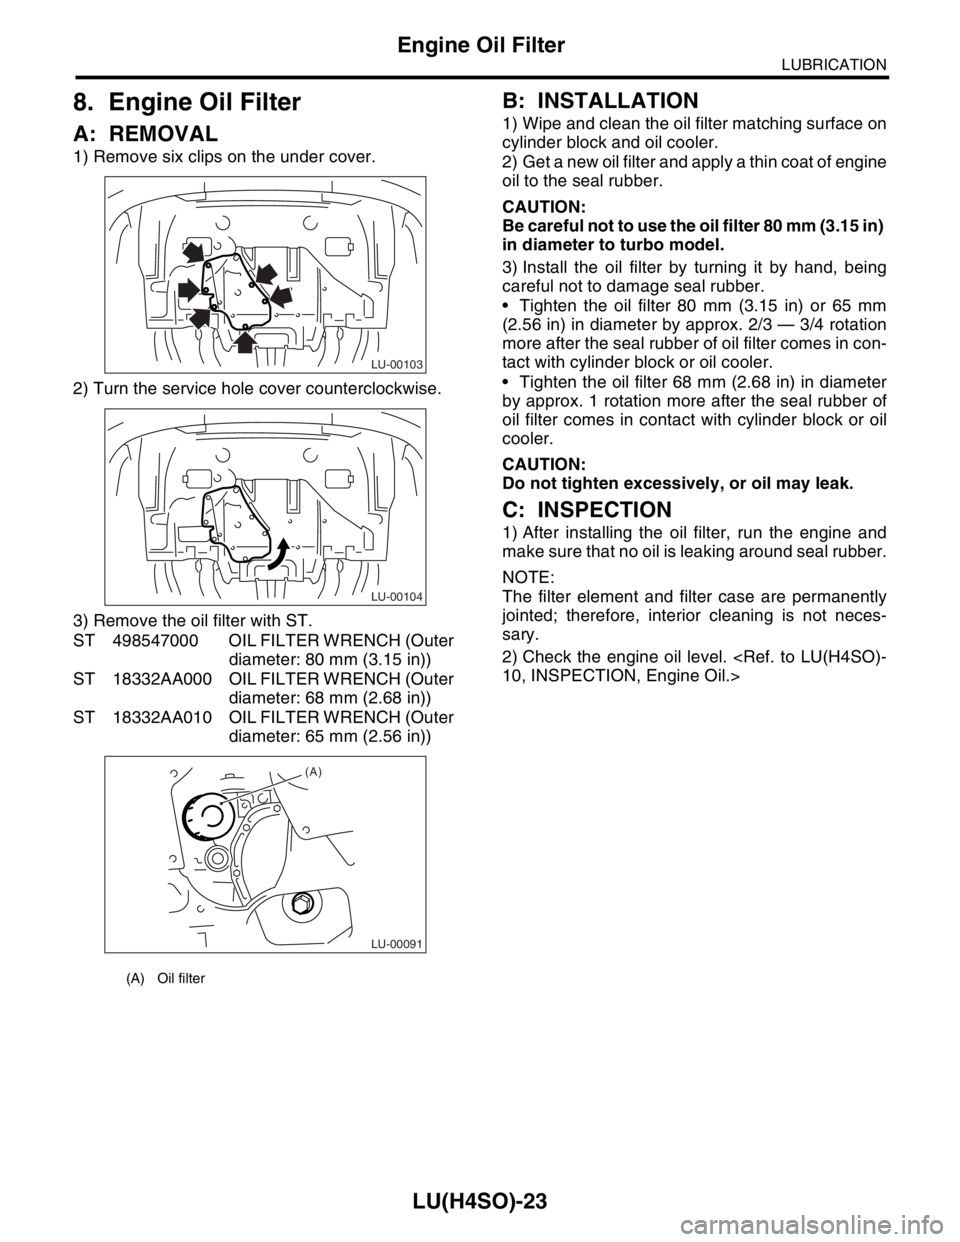
1) Remove six clips on the under cover.
2) Turn the service hole cover counterclockwise.
3) Remove the oil filter with ST.
ST 498547000 OIL FILTER WRENCH (Outer
diameter: 80 mm (3.15 in))
ST 18332AA000 OIL FILTER WRENCH (Outer
diameter: 68 mm (2.68 in))
ST 18332AA010 OIL FILTER WRENCH (Outer
diameter: 65 mm (2.56 in))
B: INSTALLATION
1) Wipe and clean the oil filter matching surface on
cylinder block and oil cooler.
2) Get a new oil filter and apply a thin coat of engine
oil to the seal rubber.
CAUTION:
Be careful not to use the oil filter 80 mm (3.15 in)
in diameter to turbo model.
3) Install the oil filter by turning it by hand, being
careful not to damage seal rubber.
Tighten the oil filter 80 mm (3.15 in) or 65 mm
(2.56 in) in diameter by approx. 2/3 — 3/4 rotation
more after the seal rubber of oil filter comes in con-
tact with cylinder block or oil cooler.
Tighten the oil filter 68 mm (2.68 in) in diameter
by approx. 1 rotation more after the seal rubber of
oil filter comes in contact with cylinder block or oil
cooler.
CAUTION:
Do not tighten excessively, or oil may leak.
C: INSPECTION
1) After installing the oil filter, run the engine and
make sure that no oil is leaking around seal rubber.
NOTE:
The filter element and filter case are permanently
jointed; therefore, interior cleaning is not neces-
sary.
2) Check the engine oil level.
10, INSPECTION, Engine Oil.>
(A) Oil filter
LU-00103
LU-00104
LU-00091
(A)