2004 MITSUBISHI L200 key
[x] Cancel search: keyPage 25 of 264

LOCKING AND UNLOCKING
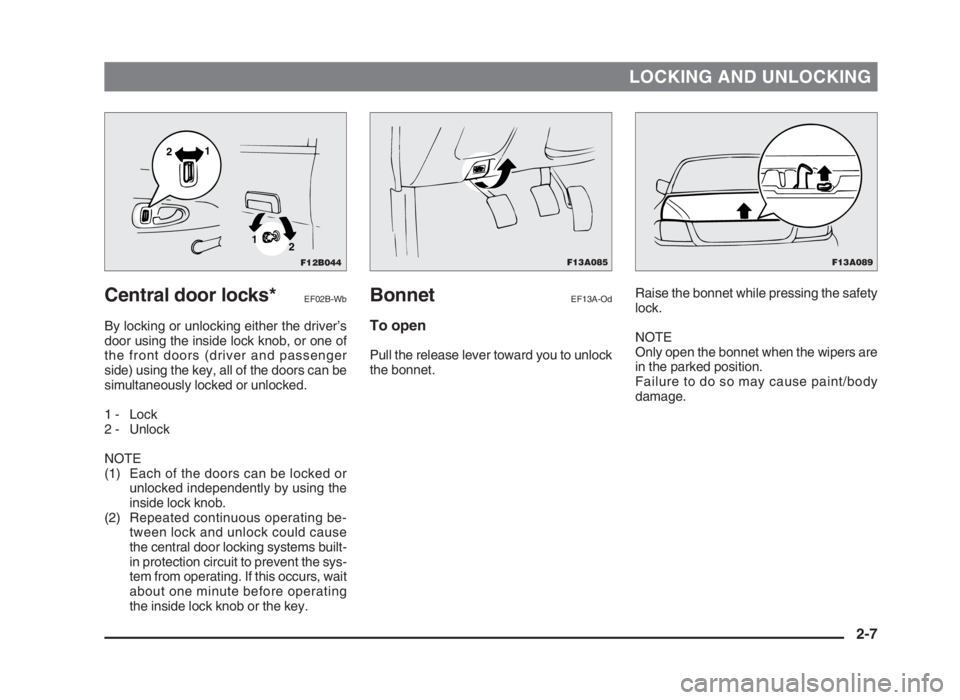
Central door locks*EF02B-Wb
By locking or unlocking either the driver’s
door using the inside lock knob, or one of
the front doors (driver and passenger
side) using the key, all of the doors can be
simultaneously locked or unlocked.
1 - Lock
2 - Unlock
NOTE
(1) Each of the doors can be locked or
unlocked independently by using the
inside lock knob.
(2) Repeated continuous operating be-
tween lock and unlock could cause
the central door locking systems built-
in protection circuit to prevent the sys-
tem from operating. If this occurs, wait
about one minute before operating
the inside lock knob or the key.Raise the bonnet while pressing the safety
lock.
NOTE
Only open the bonnet when the wipers are
in the parked position.
Failure to do so may cause paint/body
damage.
BonnetEF13A-Od
To open
Pull the release lever toward you to unlock
the bonnet.
2-7
F13A089F12B044
21
1
2
F13A085
02engL2_240082_4 22-01-2004 12:59 Page 2-7
Page 27 of 264

LOCKING AND UNLOCKING
Manual window control*
EF17B-Ac
1 - To close
2 - To open
WARNING(1) Before operating the electric
window control, make sure that
nothing is capable of being
trapped (head, hand, finger,
etc.).
(2) Never leave the vehicle without
removing the key.
(3) Never leave a child (or other per-
son who might not be capable of
safe operation of the electric
window control switch) in the
vehicle alone.
NOTE
Repeated operation with the engine
stopped will run down the battery. Operate
the window switches only while the engine
is running.
Electric window control*
EF17APD
The electric windows can only be operat-
ed with the ignition switch in the “ON”
position.
Each door window opens or closes while
the corresponding switch is operated.
1 - Driver’s door window
2 - Front passenger’s door window
3 - Rear left door window (Double cab)*
4 - Rear right door window (Double cab)*
5 - Lock switch
2-9
F17A091
1
2 3
45
LHD
F17A094
RHD
21
34 5
F17B010
1
2
02engL2_240082_4 22-01-2004 12:59 Page 2-9
Page 46 of 264

SEAT AND SEAT BELTS
3-14
Key of letters to be inserted in the table above:
U - Suitable for “universal” category restraints approved for use in this mass group.
UF - Suitable for forward-facing “universal” category restraints approved for use in this mass group.
L - Suitable for particular child restraints (MITSUBISHI genuine parts).
B - Built-in restraint approved for this mass group.
X - Seat position not suitable for children in this mass group.
L (Genuine part information)
NOTE
MITSUBISHI MOTORS Europe B.V. reserves the right to changes without any prior announcement.
For detailed information, please consult your authorized MITSUBISHI dealer.
Genuine parts No.
ECE No.
*
1
MZ312807 E1-03301146
*
2
MZ312745 E1-03301136
*
3
MZ312808 E1-03301148
*
4
MZ311097 E1-03301063
*
5
MZ311099 E1-03301061
Suitability for various seating positionsEG20CPUa
Single cab (Separate seat)Single cab (Bench seat)
Mass Group
Seating position
Front PassengerFront
CentreWith
Air BagWithout
Air Bag
0- - Up to 10 kg (0-9 months) X X
- 0+ - Up to 13 kg (0-2 years) X L*
1
I - 9 to 18 kg (9 months - 4 years) L*
2
L*
2
II & III - 15 to 36 kg (4-12 years) L*
3
L*
3
Mass Group
Seating position
Front PassengerFront
CentreWith
Air BagWithout
Air Bag
0- - Up to 10 kg (0-9 months) X L*
4
X
0+ - Up to 13 kg (0-2 years) X X X
I - 9 to 18 kg (9 months - 4 years) L*
2
L*
2
X
II & III - 15 to 36 kg (4-12 years) L*
5
L*
5
X
03engL2_240082_4 22-01-2004 13:01 Page 3-14
Page 47 of 264

SEAT AND SEAT BELTS
3-15
Club cab
Key of letters to be inserted in the table above:
U - Suitable for “universal” category restraints approved for use in this mass group.
UF - Suitable for forward-facing “universal” category restraints approved for use in this mass group.
L - Suitable for particular child restraints (MITSUBISHI genuine parts).
B - Built-in restraint approved for this mass group.
X - Seat position not suitable for children in this mass group.
L (Genuine part information)
NOTE
There is no MITSUBISHI Genuine Part applicable to the Mass Group 0-Up to 10 kg (0-9 months)”.
MITSUBISHI MOTORS Europe B.V. reserves the right to changes without any prior announcement.
For detailed information, please consult your authorized MITSUBISHI dealer.
Mass Group
Seating position
Front PassengerRear OutboardWith Air BagWithout Air Bag
0- - Up to 10 kg (0-9 months)
XXX
0+ - Up to 13 kg (0-2 years)
XL*
1
L*
1
I - 9 to 18 kg (9 months - 4 years)
L*
2
L*
2
L*
2
II & III - 15 to 36 kg (4-12 years)
L*
3
L*
3
L*
3
Genuine parts No.ECE No.
*1MZ312807 E1-03301146
*2MZ312745 E1-03301136
*3MZ312808 E1-03301148
03engL2_240082_4 22-01-2004 13:01 Page 3-15
Page 48 of 264

Double cab
Key of letters to be inserted in the table above:
U - Suitable for “universal” category restraints approved for use in this mass group.
UF - Suitable for forward-facing “universal” category restraints approved for use in this mass group.
L - Suitable for particular child restraints (MITSUBISHI genuine parts).
B - Built-in restraint approved for this mass group.
X - Seat position not suitable for children in this mass group.
L (Genuine part information)
NOTE
There is no MITSUBISHI Genuine Part applicable to the Mass Group “0-Up to 10 kg (0-9 months)”.
MITSUBISHI MOTORS Europe B.V. reserves the right to changes without any prior announcement.
For detailed information, please consult your authorized MITSUBISHI dealer.
SEAT AND SEAT BELTS
3-16
Mass Group
Seating position
Front PassengerRear OutboardRear CentreWith Air BagWithout Air Bag
0- - Up to 10 kg (0-9 months)
XXXX
0+ - Up to 13 kg (0-2 years)
XL*
1L*1X
I - 9 to 18 kg (9 months - 4 years)
L*2L*2L*2X
II & III - 15 to 36 kg (4-12 years)
L*3L*3L*3X
Genuine parts No.
ECE No.
*
1
MZ312807 E1-03301146
*
2
MZ312745 E1-03301136
*
3
MZ312808 E1-03301148
03engL2_240082_4 22-01-2004 13:01 Page 3-16
Page 61 of 264

SEAT AND SEAT BELTS
3-29
WARNING(1) Do not attach anything to the
steering wheel padded cover,
such as trim material, badges,
etc. It might strike and injure an
occupant if the air bag inflates.
(2) Do not set anything on, or attach
anything to, the instrument
panel above the glove box. It
might strike and injure an occu-
pant if the air bag inflates.
(3) Do not attach accessories to, or
put them in front of, the wind-
shield. These objects could re-
strict air bag inflation, or strike
and injure an occupant if the air
bags inflate.
SRS warning lamp
There is a supplemental restraint system
(“SRS”) warning lamp on the instrument
panel. The system self-checks and the
warninglamp warns you if there is a
problem. When the ignition key is turned
to the “ON” or “START” position, the warn-
ing lamp should illuminate for several sec-
onds and then should go out. This means
the system is ready.
The SRS warning lamp is shared by the
driver’s front air bag and the front passen-
ger’s air bag (if so equipped).
(4) Do not put packages, pets or
other objects between the air
bags and the driver or front pas-
senger. It could affect air bag
performance, or could cause in-
jury when the air bag inflates.
(5) Right after air bag inflation, sev-
eral air bag system components
will be hot. Do not touch them;
you could be burned.
(6) The air bag system is designed
to work only once. After the air
bags deploy, they will not work
again. They must promptly be
replaced, and the entire air bag
system inspected, by an author-
ized MITSUBISHI dealer.
(7) If the vehicle is involved in a
frontal collision but the air bags
are not inflated, have the air bag
system checked and, if neces-
sary, replaced by an authorized
MITSUBISHI dealer.
G28G269G28G109
SRS
SRS
03engL2_240082_4 22-01-2004 13:01 Page 3-29
Page 73 of 264

INSTRUMENTS AND CONTROLS
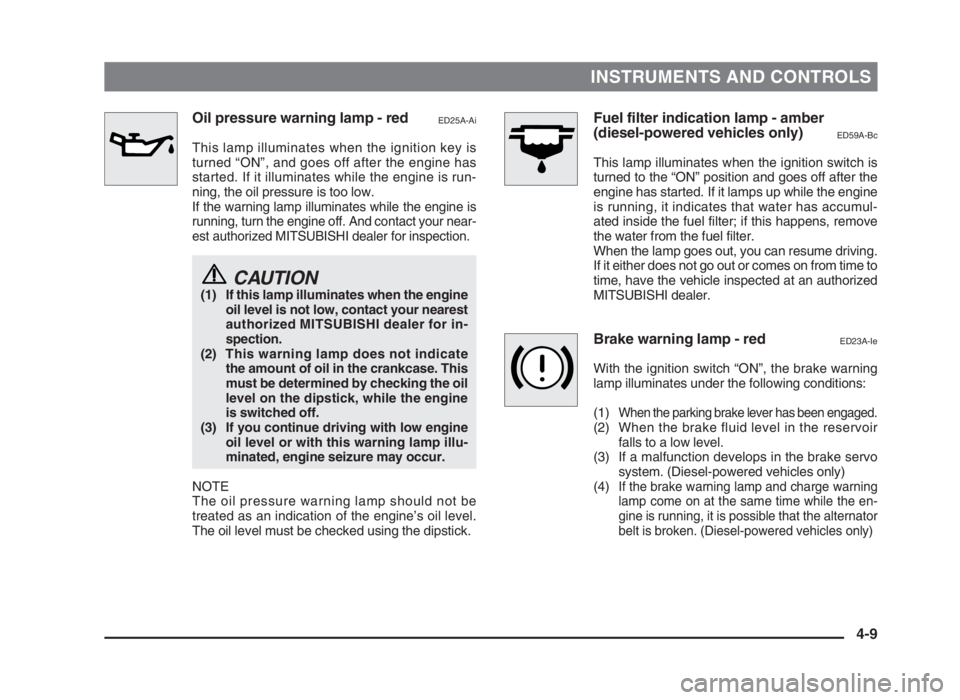
Oil pressure warning lamp - redED25A-Ai
This lamp illuminates when the ignition key is
turned “ON”, and goes off after the engine has
started. If it illuminates while the engine is run-
ning, the oil pressure is too low.
If the warning lamp illuminates while the engine is
running, turn the engine off. And contact your near-
est authorized MITSUBISHI dealer for inspection.
CAUTION(1) If this lamp illuminates when the engine
oil level is not low, contact your nearest
authorized MITSUBISHI dealer for in-
spection.
(2) This warning lamp does not indicate
the amount of oil in the crankcase. This
must be determined by checking the oil
level on the dipstick, while the engine
is switched off.
(3) If you continue driving with low engine
oil level or with this warning lamp illu-
minated, engine seizure may occur.
NOTE
The oil pressure warning lamp should not be
treated as an indication of the engine’s oil level.
The oil level must be checked using the dipstick.
Fuel filter indication lamp - amber
(diesel-powered vehicles only)
ED59A-Bc
This lamp illuminates when the ignition switch is
turned to the “ON” position and goes off after the
engine has started. If it lamps up while the engine
is running, it indicates that water has accumul-
ated inside the fuel filter; if this happens, remove
the water from the fuel filter.
When the lamp goes out, you can resume driving.
If it either does not go out or comes on from time to
time, have the vehicle inspected at an authorized
MITSUBISHI dealer.
Brake warning lamp - redED23A-Ie
With the ignition switch “ON”, the brake warning
lamp illuminates under the following conditions:
(1)
When the parking brake lever has been engaged.(2) When the brake fluid level in the reservoir
falls to a low level.
(3) If a malfunction develops in the brake servo
system. (Diesel-powered vehicles only)
(4)
If the brake warning lamp and charge warning
lamp come on at the same time while the en-
gine is running, it is possible that the alternator
belt is broken. (Diesel-powered vehicles only)
4-9
04engL2_240082_4 22-01-2004 13:19 Page 4-9
Page 74 of 264

INSTRUMENTS AND CONTROLS
CAUTIONIf the brake warning lamp does not illumi-
nate when you pull the parking brake lever,
or if it does not go out when you release
the lever, contact your nearest authorized
MITSUBISHI dealer immediately.
If the brake warning lamp illuminates while driv-
ing, it could mean braking system deterioration.
Park your vehicle in a safe place and follow these
procedures:
1.
If, when pressing the brake pedal, braking is poor,
press your foot harder against the brake pedal.
2. Should the brakes fail, use engine braking to
reduce your speed and slowly pull the park-
ing brake lever to park your vehicle.
Depress the brake pedal to operate the stop
lamp (brake lamp) to alert the vehicles be-
hind you.
CAUTIONSudden application of the parking brake is
dangerous and can lock the rear wheels.
Diesel preheat warning lamp - amber
(diesel-powered vehicles only)
ED58A-Hb
The warning lamp illuminates when the ignition
switch is placed in the “ON” position. As the glow
plug becomes hot, the lamp goes out and the en-
gine can be started.
NOTE
(1) If the engine is cold, the diesel preheat warn-
ing lamp is on for a longer time.
(2) When the engine has not been started within
about 5 seconds after the diesel preheat
warning lamp went out, return the ignition key
to the “LOCK” position. Then, turn the key to
the “ON” position to preheat the engine
again.
(3) When the engine is warm, the diesel preheat
warning lamp does not come on even if the
ignition key is placed in the “ON” position.
4-10
04engL2_240082_4 22-01-2004 13:19 Page 4-10