2004 MITSUBISHI L200 height
[x] Cancel search: heightPage 16 of 264

GENERAL INFORMATION
CAUTION(2) When luggage is loaded onto
the vehicle, please make sure to
drive slowly and avoid exces-
sive manoeuvres such as sud-
den braking or quick turning.
In addition, place the luggage on
the carrier so that its weight is
distributed evenly with the heav-
iest items on the bottom. Do not
load items that are wider than
the roof carrier.
The additional weight on the
roof could heighten the vehi-
cle’s centre of gravity and affect
the vehicle's handling charac-
teristics.
As a result, driving errors or
emergency manoeuvres could
lead to loss of control and result
in an accident.
(3) Before driving and after travel-
ling a short distance, always
check the load to make sure it is
securely fastened to the roof
carrier. Check periodically dur-
ing your travel that the load re-
mains secure. If the load is not
secure, it could fall from the ve-
hicle and damage your vehicle,
another vehicle or create road
hazard.
Genuine partsEB05A-Fi
Don’t play around with substitutes.
MITSUBISHI has gone to great lengths to
bring you a superbly crafted vehicle offer-
ing the highest quality and dependability.
Don’t reduce that quality and dependability
by using substitute parts.
Always use MITSUBISHI Genuine Parts
designed and manufactured to maintain
your MITSUBISHI vehicle at top perform-
ance. The operation of vehicle compo-
nents can be less efficient in case of using
Non-Genuine Parts.
Failure to use Genuine Parts, may in-
validate any future warranty claim.
MITSUBISHI will not be liable for any mal-
function of your vehicle that may have
been caused by the use of substitute parts
in place of MITSUBISHI Genuine Parts.
At the MITSUBISHI dealer you can also
get appropriate advise and the assem-
bling of Genuine Parts will be handled pro-
fessionally.
MITSUBISHI Genuine Parts are identified
by this mark, and are available at all au-
thorized MITSUBISHI dealers. NOTE
(1) To prevent wind noise or reduction in
gas mileage, remove the roof carrier
when not in use.
(2) Before using an automatic car wash,
check with the attendant to determine
if the roof carrier should be removed.
1-16
01engL2_240082_4 22-01-2004 12:58 Page 1-16
Page 37 of 264
SEAT AND SEAT BELTS
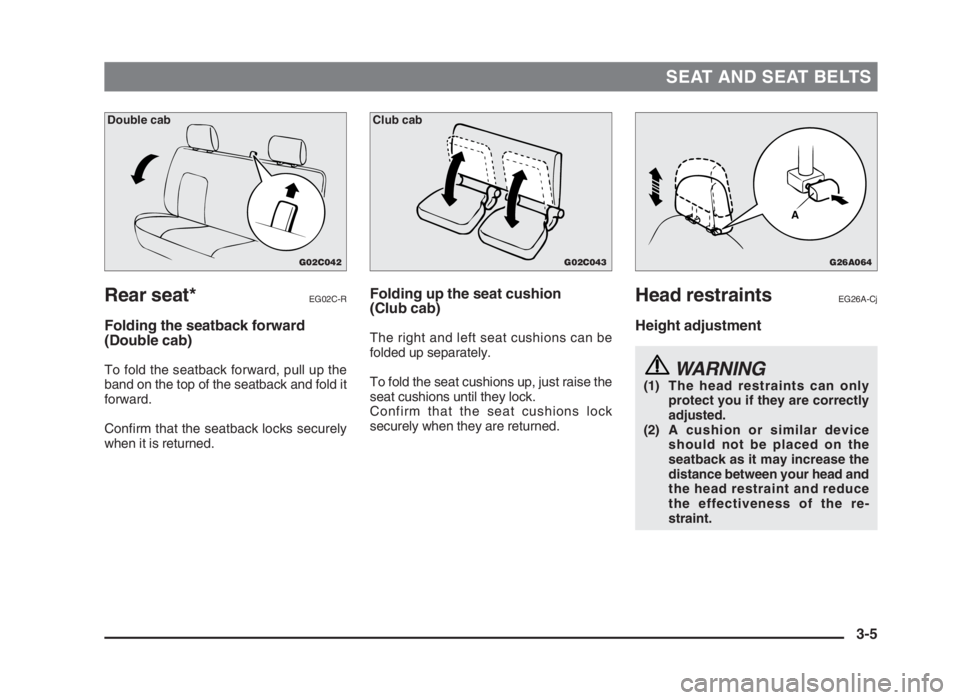
Rear seat*EG02C-R
Folding the seatback forward
(Double cab)
To fold the seatback forward, pull up the
band on the top of the seatback and fold it
forward.
Confirm that the seatback locks securely
when it is returned.
Head restraintsEG26A-Cj
Height adjustment
WARNING(1) The head restraints can only
protect you if they are correctly
adjusted.
(2) A cushion or similar device
should not be placed on the
seatback as it may increase the
distance between your head and
the head restraint and reduce
the effectiveness of the re-
straint.
Folding up the seat cushion
(Club cab)
The right and left seat cushions can be
folded up separately.
To fold the seat cushions up, just raise the
seat cushions until they lock.
Confirm that the seat cushions lock
securely when they are returned.
3-5
G02C042
Double cab
G02C043
Club cab
G26A064
A
03engL2_240082_4 22-01-2004 13:01 Page 3-5
Page 38 of 264

Adjust the head restraint height so that the
centre of the restraint is as close as possi-
ble to eye level to reduce the chances of
injury in the event of collision.
Any person too tall for the restraint to
reach their seated eye level, should adjust
the restraint as high as possible.
To raise the head restraint, move it up-
ward. To lower the restraint, move it down-
ward while pushing the height adjusting
knob (A) in the direction of the arrow. After
adjustment, push the head restraint down-
ward and make sure that it is locked.
SEAT AND SEAT BELTS
Removal of head restraintsEG28BAOa
To remove the head restraints, lift the
head restraint with the height adjusting
knob (A) pushed in.
To install the head restraints, first confirm
that they are facing the correct direction,
and then insert them into the seatback
while pressing the height adjusting knobs
(A) in the direction indicated by the ar-
rows.Confirm that the height adjusting knobs
(A) are correctly adjusted as shown in the
illustration and also lift the head restraints
to ensure that they do not come out of the
seatback.
WARNINGIt is dangerous to drive with incor-
rectly adjusted head restraints or
without head restraints installed; al-
ways have them correctly fitted
when using the vehicle.
Failure to do so could cause serious
injury if involved in an accident.
3-6
G26A064
A
G26B022
03engL2_240082_4 22-01-2004 13:01 Page 3-6
Page 43 of 264

SEAT AND SEAT BELTS
Lap belts*
The lap belts should be adjusted by hold-
ing the belt and latch plate at right angles
to each other, and then pulling the belt as
shown in the illustration to a snug fit
around the occupant.
1 - Tighten
2 - Loosen
While holding the latch plate, insert the
latch plate into the buckle until a “click” is
heard.
NOTE
The buckle and latch plate of the centre
lap belt are marked with “CENTER”.
Be sure to check the marking before wear-
ing the centre lap belt.
Child restraintEG28BPUd
When transporting children in your vehi-
cle, some type of child restraint system
should be used according to the size of
the child. This is required by law in most
countries.
The regulations concerning driving with
children in the front seat may differ from
country to country. You are advised to
comply with the relevant regulations.
WARNING(1) When possible, put children in
the rear seat. Accident statistics
indicate that children of all sizes
and ages are safer when prop-
erly restrained in the rear seat
rather than in the front seat.
(Double cab, Club cab)
(2) Holding a child in your arms is
no substitute for a restraint sys-
tem. Failure to use a proper
restraint system can result in se-
vere or fatal injury to your child.
(3) Each restraint device or fixing is
to be used only by one child.
Adjustable seat belt anchor*
(front seats)
EG08C-Ca
The seat belt anchor height can be ad-
justed.
Move the seat belt anchor down with the
lock knob (A) depressed. To move the an-
chor up, slide it without depressing the
lock knob (A).
CAUTIONWhen adjusting the seat belt anchor,
set it at a position that is sufficiently
high so that the belt will make full
contact with your shoulder but will
not touch your neck.
3-11
G28A052
90°1
2
G08C009
A
03engL2_240082_4 22-01-2004 13:01 Page 3-11
Page 45 of 264
SEAT AND SEAT BELTS
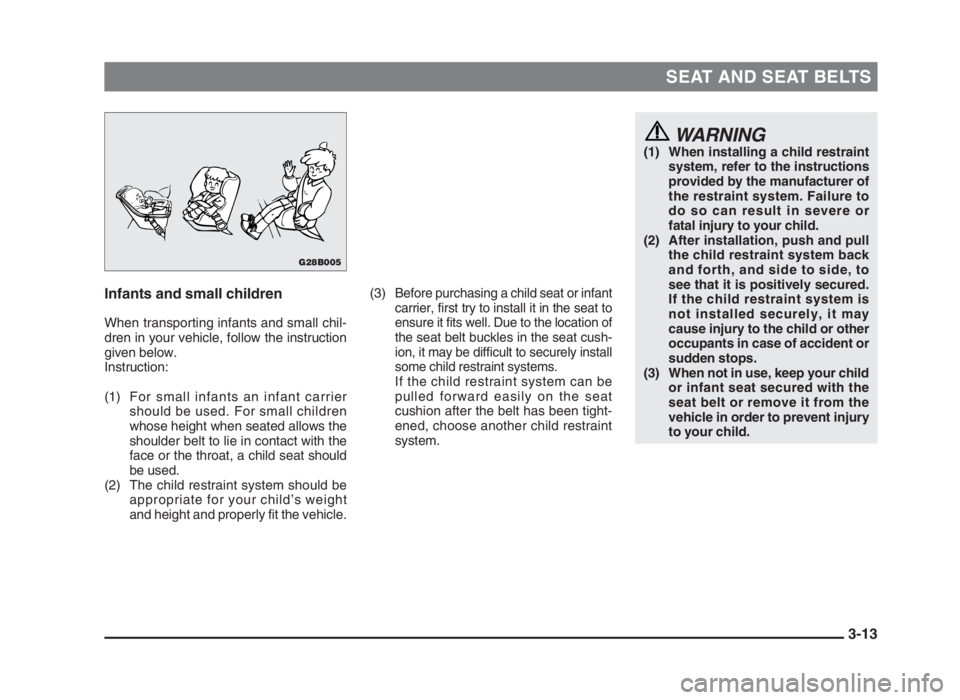
Infants and small children
When transporting infants and small chil-
dren in your vehicle, follow the instruction
given below.
Instruction:
(1) For small infants an infant carrier
should be used. For small children
whose height when seated allows the
shoulder belt to lie in contact with the
face or the throat, a child seat should
be used.
(2) The child restraint system should be
appropriate for your child’s weight
and height and properly fit the vehicle.
WARNING(1) When installing a child restraint
system, refer to the instructions
provided by the manufacturer of
the restraint system. Failure to
do so can result in severe or
fatal injury to your child.
(2) After installation, push and pull
the child restraint system back
and forth, and side to side, to
see that it is positively secured.
If the child restraint system is
not installed securely, it may
cause injury to the child or other
occupants in case of accident or
sudden stops.
(3) When not in use, keep your child
or infant seat secured with the
seat belt or remove it from the
vehicle in order to prevent injury
to your child.
(3)Before purchasing a child seat or infant
carrier, first try to install it in the seat to
ensure it fits well. Due to the location of
the seat belt buckles in the seat cush-
ion, it may be difficult to securely install
some child restraint systems.
If the child restraint system can be
pulled forward easily on the seat
cushion after the belt has been tight-
ened, choose another child restraint
system.
3-13
G28B005
03engL2_240082_4 22-01-2004 13:01 Page 3-13
Page 87 of 264

Running-in recommendations .................... 5-2
Fuel selection ............................................... 5-3
Filling the fuel tank ...................................... 5-3
Catalytic converter* ..................................... 5-5
Economical driving ...................................... 5-6
Trailer towing ............................................... 5-7
Ignition switch .............................................. 5-9
Starting ......................................................... 5-11
Manual transmission ................................... 5-14
Automatic transmission .............................. 5-16
Operation of the automatic transmission .. 5-18
Transfer shift lever (4WD vehicles) ............ 5-20
Rear differential lock* .................................. 5-23
Correct 4-wheel drive operation ................. 5-26
Cautions on handling of 4WD vehicles ...... 5-29
Parking brake ............................................... 5-30
Parking .......................................................... 5-32
Braking.......................................................... 5-32
Anti-lock brake system (ABS)* ................... 5-33
Limited-slip differential* .............................. 5-35
Steering wheel height adjustment .............. 5-36
Power steering system* .............................. 5-37
Day/Night type inside rearview mirror ....... 5-37
Manual outside rear-view mirrors* ............. 5-37
Electric remote-controlled outside
rear-view mirrors* .................................. 5-38
Starting and driving
5
05engL2_240082_4 22-01-2004 13:04 Page 5-1
Page 119 of 264

STARTING AND DRIVING
5-33 Brake pads and linings
(1) With new brake pads or linings, avoid
where possible sudden full applica-
tion of the brakes for the first 200 km
(125 miles) of driving.
(2) The disc brakes are provided with a
warning device which emits a shriek-
ing metallic sound while braking if the
brake pads have reached their limit.
If you hear this sound, have the brake
pads replaced by your MITSUBISHI
dealer.
CAUTION(1) Do not leave any objects or
place a thick floor mat around
the brake pedal; doing so could
prevent the full pedal stroke that
would be necessary in an emer-
gency. Make sure that the pedal
can be operated freely at all
times.
(2) Avoid driving habits that may
lead to sudden braking and
never “ride” the brakes by rest-
ing your foot on the brake pedal
while driving.
It causes brake overheating and
fade.
• Driving on gravel or snow-covered
roads.
• Driving with tyre chains installed.
• Driving on roads where the road
surface is pitted or has other differ-
ences in surface height.
• Driving on bumpy roads or other
poor driving surfaces.
(3) Operation of the ABS is not restricted
to situations where brakes are applied
suddenly. This system may also oper-
ate to prevent wheel lock when you
are driving over manholes, steel road-
work plates, or the vehicle is driven
over steps or level differences in the
road, road markings, or other sur-
faces which are difficult for the wheels
to grip.
(4) When the ABS is activated, you may
feel the brake pedal pulsating and
hear a characteristic noise. Also at
this time, it may feel as if the pedal at-
tempts to resist being depressed.
In this situation, to let the ABS
work for you, just hold the brake
pedal down more firmly. Do not
pump the brake. This will result in
reduced braking performance.Anti-lock brake system
(ABS)*
EI24APD
Environmental conditions can have an ef-
fect on braking. During sudden braking
when there is snow, ice, oil, water etc; on
the road surface, a skid may occur. In this
situation, steering control and braking ef-
fectiveness is reduced and the stopping
distance is increased. The vehicle may
also go into an uncontrolled spin.
The ABS helps prevent the wheels from
locking during braking, thus maintaining
directional stability, ensuring controllabi-
lity, and providing optimum braking force.
Driving hints
(1) With ABS fitted, steering during sud-
den braking (when the ABS functions)
differs slightly from when the brakes
are not being applied.
Steer the vehicle carefully in these
conditions.
(2) Always maintain the same distance
from the vehicle in front of you as you
would for a vehicle not equipped with
an ABS.
Compared with vehicles not fitted
with ABS, your vehicle may require a
longer stopping distance in the follow-
ing cases:
05engL2_240082_4 22-01-2004 13:05 Page 5-33
Page 122 of 264

STARTING AND DRIVING
5-36
CAUTION
(1) Never start the engine while one
of the rear wheels is jacked up
and the other in contact with the
ground; doing so may cause the
vehicle to jump forward.
(2) When attempting to extract the
vehicle from snow, mud, etc.,
and the engine is run continu-
ously at high speed, the limited-
slip differential will be adversely
affected.
Steering wheel height adjustment
EG09A-Ci
To adjust the steering wheel height, re-
lease the tilt lock lever while holding the
steering wheel by hand, and raise or lower
the steering wheel to the desired height.
After adjustment, securely lock the lever
by pulling it upward.
1 - Locked
2 - Release
WARNING
(1) After adjusting to the desired
height, check to be sure that the
lever is secured.
(2) Do not attempt to adjust the
steering wheel while you are
driving the vehicle.
(3) When releasing the tilt lock
lever, move it to the release po-
sition (2) and hold the steering
wheel by hand to prevent it
falling to the lowest position.
G09A016
1
2
05engL2_240082_4 22-01-2004 13:05 Page 5-36