Page 115 of 434

114 Controls in detailMemory function
�Memory function
With the memory switch you can store up
to three different settings per SmartKey or
SmartKey with KEYLESS-GO*.
The following settings are saved for each
stored position:�
Driver’s seat and backrest position
�
Steering wheel position
�
Interior rear view mirror position
�
Driver’s side exterior rear view mirror
position
�
Passenger side exterior rear view mir-
ror position
These key-dependent memory settings
can be deactivated if desired
(
�page 149).The memory switch is located on the door.
M Memory button
1, 2, 3 Stored positions
�
Switch on ignition.
or
�
Open the respective door.
All the lamps in the instrument cluster
come on when the ignition is switched
on.
!Prior to operating the vehicle, the driv-
er should check and adjust the seat
height, seat position fore and aft, and
seat backrest angle if necessary, to en-
sure adequate control, reach and com-
fort. The head restraint should also be
adjusted for proper height. See also the
section on airbags (
�page 59) for
proper seat positioning.
In addition, adjust the steering wheel to
ensure adequate control, reach, opera-
tion and comfort. Both the inside and
outside rear view mirrors should be ad-
justed for adequate rear vision.
Fasten seat belts. Infants and small
children should be seated in a properly
secured restraint system that complies
with U.S. Federal Motor Vehicle Safety
Standard 213 and Canadian Motor Ve-
hicle Safety Standard 213.
Warning!
G
Do not activate the memory function while
driving. Activating the memory function
while driving could cause the driver to lose
control of the vehicle.
Page 117 of 434
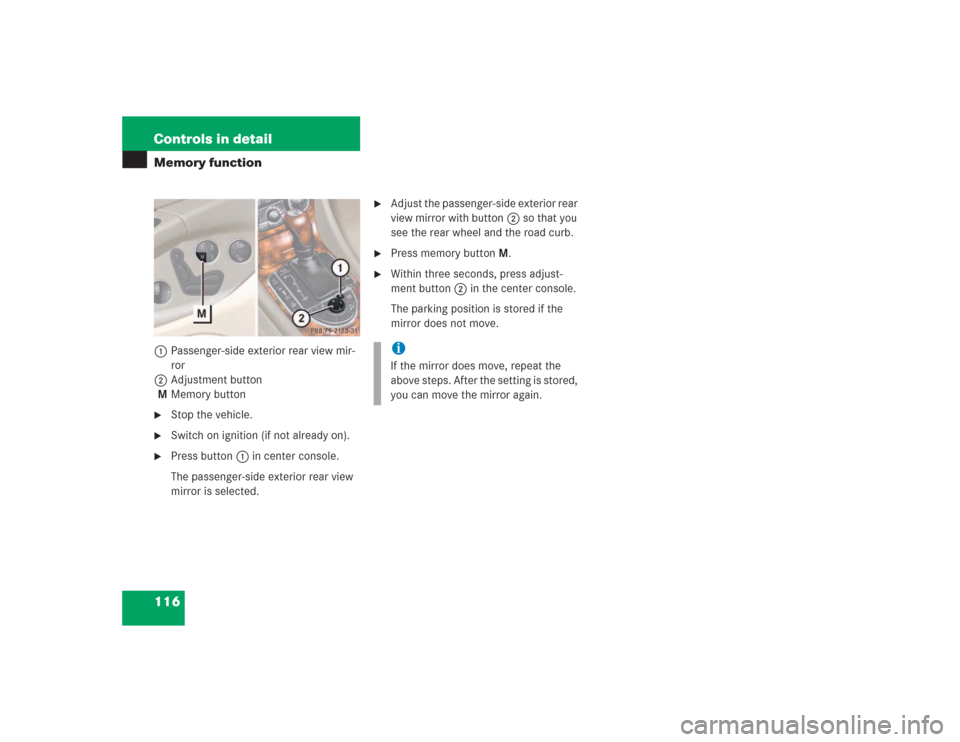
116 Controls in detailMemory function1Passenger-side exterior rear view mir-
ror
2Adjustment button
MMemory button�
Stop the vehicle.
�
Switch on ignition (if not already on).
�
Press button1 in center console.
The passenger-side exterior rear view
mirror is selected.
�
Adjust the passenger-side exterior rear
view mirror with button2 so that you
see the rear wheel and the road curb.
�
Press memory buttonM.
�
Within three seconds, press adjust-
ment button2 in the center console.
The parking position is stored if the
mirror does not move.iIf the mirror does move, repeat the
above steps. After the setting is stored,
you can move the mirror again.
Page 122 of 434
121 Controls in detail
Lighting
Switching on high beams�
Turn the exterior lamp switch toB
or toU (
�page 117).
�
Push the combination switch in
direction1.
The high beam indicator A in the ta-
chometer comes on.
High beam flasher
�
Pull the combination switch briefly in
direction2.
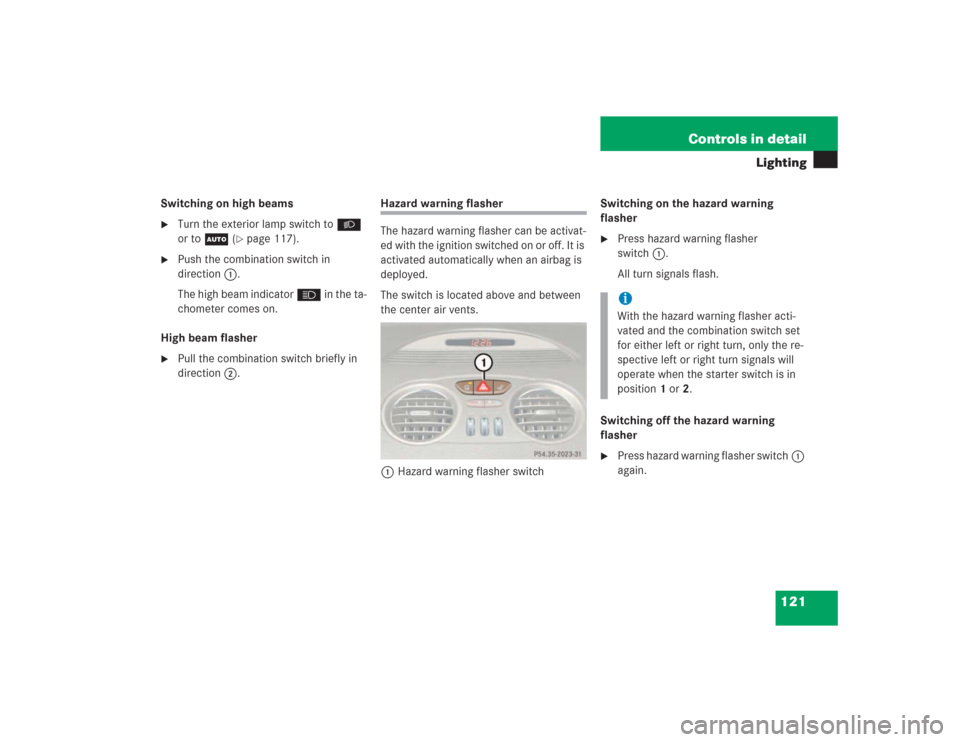
Hazard warning flasher
The hazard warning flasher can be activat-
ed with the ignition switched on or off. It is
activated automatically when an airbag is
deployed.
The switch is located above and between
the center air vents.
1Hazard warning flasher switchSwitching on the hazard warning
flasher
�
Press hazard warning flasher
switch1.
All turn signals flash.
Switching off the hazard warning
flasher
�
Press hazard warning flasher switch1
again.iWith the hazard warning flasher acti-
vated and the combination switch set
for either left or right turn, only the re-
spective left or right turn signals will
operate when the starter switch is in
position 1 or 2.
Page 125 of 434
.
The instrument cluster is activated when")
124 Controls in detailInstrument cluster
�Instrument clusterFor a full view illustration of the instrument
cluster, see “Instrument cluster”
(�page 22).
The instrument cluster is activated when
you
�
open a door
�
switch on the ignition
�
press the reset button (
�page 22)
�
switch on the exterior lamps
Opening a door will activate the instrument
cluster only for about 30 seconds.
You can change the instrument cluster set-
tings in the Instrument cluster submenu of
the control system (
�page 140).
Instrument cluster illumination
Use the reset button to adjust the illumina-
tion brightness for the instrument cluster
and the switches on the center console.
To brighten illumination�
Turn the reset button in the instrument
cluster (
�page 22) clockwise.
The instrument cluster illumination will
brighten.
To dim illumination
�
Turn the reset button in the instrument
cluster (
�page 22) counterclockwise.
The instrument cluster illumination will
dim.
Coolant temperature gauge
iThe instrument cluster illumination is
dimmed or brightened to suit ambient
light conditions.
Warning
G
�
Driving when your engine is badly over-
heated can cause some fluids which
may have leaked into the engine com-
partment to catch fire. You could be se-
riously burned.
�
Steam from an overheated engine can
cause serious burns an can occur just by
opening the hood. Stay away from the
engine if you see or hear steam coming
from it.
Turn off the engine, get out of the vehicle
and do not stand near the vehicle until the
engine has cooled down.
Page 137 of 434

136 Controls in detailControl systemMalfunction memory menu
Use the malfunction memory menu to scan
malfunction and warning messages that
may be stored in the system. What infor-
mation is shown in the display fields de-
pends on whether malfunctions have
actually occurred.
�
Press button è or ÿ repeatedly
until you see the message
Malfunction
memory
in the right display.
No malfunction messages
If no malfunctions have occurred, the mes-
sage in the right display is:
Malfunction
memory, no malfunctions.
Malfunctions have occurred
If malfunctions have occurred, you will see
the number of malfunctions in the right dis-
play:
1Number of malfunctions
�
Press button k or j.The stored messages will now be displayed
in order. See the “Practical hints” section
for malfunction and warning messages
(
�page 291).
Should any malfunctions occur while driv-
ing, the number of malfunctions will reap-
pear in the right display field when the
SmartKey in the starter switch is turned to
position0 or removed from the starter
switch.
Warning!
G
Malfunction and warning messages are only
indicated for certain systems and are inten-
tionally not very detailed. The malfunction
and warning messages are simply a remind-
er with respect to the operation of certain
systems and do not replace the owner’s
and/or driver’s responsibility to maintain
the vehicle’s operating safety by having all
required maintenance and safety checks
performed on the vehicle and by bringing
the vehicle to an authorized Mercedes-Benz
Center to address the malfunction and
warning messages (
�page 291).
iThe message memory will be cleared
when you switch on the ignition. You
will then only see high priority malfunc-
tions (
�page 291).
Page 167 of 434
.
Rear view mirrors
Automatic antiglare rear view mirror
The refle")
166 Controls in detailGood visibility
�Good visibilityFor information on setting the rear view
mirrors, see “Mirrors” (
�page 38).
Rear view mirrors
Automatic antiglare rear view mirror
The reflection brightness of the exterior
rear view mirror on the driver’s side and
the interior rear view mirror will respond
automatically to glare when�
the ignition is switched on
and
�
incoming light from headlamps falls on
the sensor in the interior rear view mir-
ror.
The interior rear view mirror will not react if
�
reverse gear is engaged
�
the interior lighting is turned on
Warning!
G
The automatic antiglare function does not
react if incoming light is not aimed directly
at sensors in the interior rear view mirror.
The interior rear view mirror and the exterior
rear view mirror on the driver’s side do not
react, for example, if the wind screen is in-
stalled.
Glare can endanger you and others.Warning!
G
In the case of an accident liquid electrolyte
may escape from the mirror housing if the
mirror glass breaks.
Electrolyte has an irritating effect. Do not al-
low the liquid to come into contact with
eyes, skin, clothing, or respiratory system.
In case it does, immediately flush affected
area with water, and seek medical help if
necessary.
Warning!
G
Exercise care when using the passen-
ger-side exterior rear view mirror. The mirror
surface is convex (outwardly curved surface
for a wider field of view). Objects in mirror
are closer than they appear. Check your in-
terior rear view mirror or glance over your
shoulder before changing lanes.!Electrolyte drops coming into contact
with the vehicle paint finish can be
completely removed only while in the
liquid state by applying plenty of water.
Page 168 of 434

167 Controls in detail
Good visibility
Activating exterior rear view mirror
parking position
Follow these steps to activate the mirror
parking position so that the passen-
ger-side exterior rear view mirror will be
turned downward to the stored position.�
Make sure you have stored a parking
position for the passenger-side exterior
rear view mirror (
�page 115).
�
Make sure the
Mirror setting when
parking
function in the
Convenience
submenu of the control system is
switched to
ON (�page 149).
�
Switch on ignition (if not already on).
�
Press button2 for the passenger-side
exterior rear view mirror.
�
Place the gear selector lever in reverse
gearR.
The passenger-side exterior rear view
mirror will be turned downward to the
stored position.
1Driver’s side exterior rear view mirror
button
2Passenger-side exterior rear view
mirror buttonThe exterior rear view mirror returns to its
previously stored driving position:
�
ten seconds after you put the gear se-
lector lever out of positionR
�
immediately once your vehicle exceeds
a speed of approximately 6 mph
(10 km/h)
�
immediately when you press button1
for driver’s side mirror.
Page 169 of 434
.
A rain sensor automatically controls the
windshield wi")
168 Controls in detailGood visibilityWindshield wipers
For information on windshield wiper opera-
tion, see “Windshield wipers” (
�page 47).
A rain sensor automatically controls the
windshield wipers depending on how wet
the windshield is.
�
Switch on ignition.
�
Set wiper switch to position I
(�page 47).
After the initial wipe, pauses between
wipes are automatically controlled by the
rain sensor.
Headlamp cleaning system
The switch is located on the left side of the
dashboard.
1Headlamp washer switch�
Switch on ignition.
�
Press switch1.
The headlamps are cleaned with a
high-pressure water jet.
For information on filling up the washer flu-
id reservoir, see “Windshield washer sys-
tem and headlamp cleaning system”
(
�page 261).
iIntermittent wiping is interrupted when
the vehicle is at a standstill and a door
is opened.
!Do not leave windshield wipers in inter-
mittent setting when vehicle is taken to
an automatic car wash or during wind-
shield cleaning. Wipers will operate in
the presence of water sprayed on the
windshield, and wipers may be dam-
aged as a result.
The switch should not be left in inter-
mittent setting as the wipers will wipe
the windshield once every time the en-
gine is started. Dust that accumulates
on the windshield might scratch the
glass and/or damage the wiper blades
when wiping occurs on a dry wind-
shield.