Page 36 of 434

35 Getting started
Adjusting
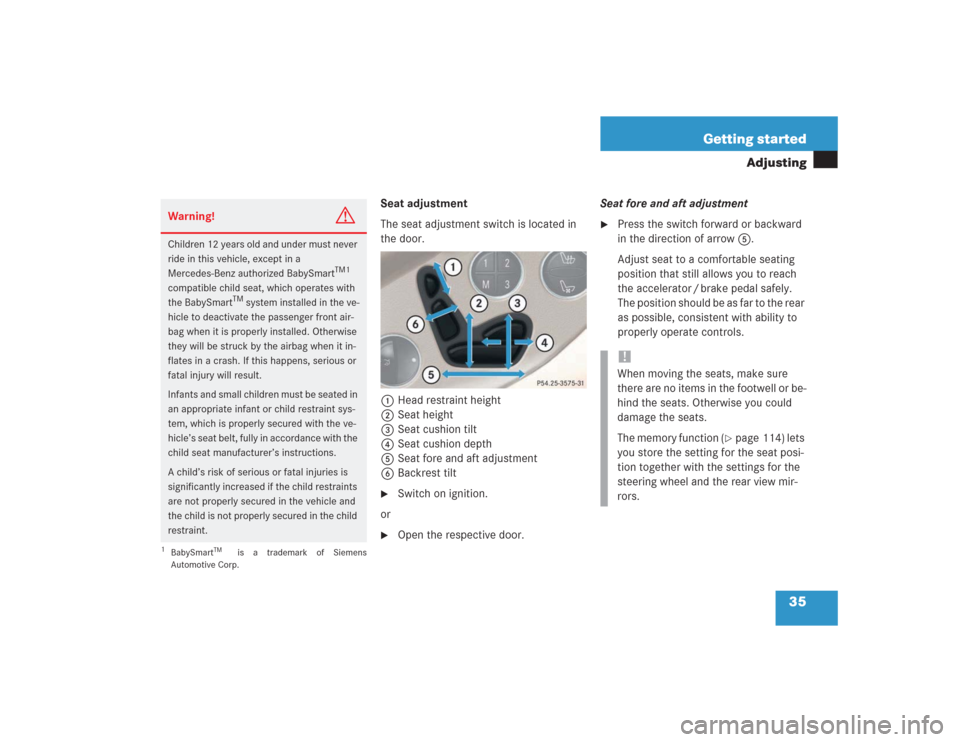
Seat adjustment
The seat adjustment switch is located in
the door.
1Head restraint height
2Seat height
3Seat cushion tilt
4Seat cushion depth
5Seat fore and aft adjustment
6Backrest tilt�
Switch on ignition.
or
�
Open the respective door.Seat fore and aft adjustment
�
Press the switch forward or backward
in the direction of arrow 5.
Adjust seat to a comfortable seating
position that still allows you to reach
the accelerator / brake pedal safely.
The position should be as far to the rear
as possible, consistent with ability to
properly operate controls.
Warning!
G
Children 12 years old and under must never
ride in this vehicle, except in a
Mercedes-Benz authorized BabySmart
TM1
compatible child seat, which operates with
the BabySmart
TM system installed in the ve-
hicle to deactivate the passenger front air-
bag when it is properly installed. Otherwise
they will be struck by the airbag when it in-
flates in a crash. If this happens, serious or
fatal injury will result.
Infants and small children must be seated in
an appropriate infant or child restraint sys-
tem, which is properly secured with the ve-
hicle’s seat belt, fully in accordance with the
child seat manufacturer’s instructions.
A child’s risk of serious or fatal injuries is
significantly increased if the child restraints
are not properly secured in the vehicle and
the child is not properly secured in the child
restraint.
1BabySmart
TM
is a trademark of Siemens
Automotive Corp.
!When moving the seats, make sure
there are no items in the footwell or be-
hind the seats. Otherwise you could
damage the seats.
The memory function (
�page 114) lets
you store the setting for the seat posi-
tion together with the settings for the
steering wheel and the rear view mir-
rors.
Page 110 of 434
109 Controls in detailSeats
Multicontour backrest* (standard on SL 600 and SL 55 AMG)
The multicontour backrest has inflatable
air cushions built into the seat backrest to
provide additional lumbar and side sup-
port.
The seat backrest cushion height and cur-
vature can be continuously varied with
switches on the lower side of the seat
when the ignition is switched on.1Shoulder region support
2Side bolsters adjustment
3Massage function (PULSE)
4Lumbar region support
�
Make sure the ignition is switched on.
All the lamps in the instrument cluster
come on.
Shoulder region support
�
Press æ or ç on switch1.
The air cushion inflates or deflates.Lumbar region support
�
Press k or j on rocker
switch4.
This selects the air cushion you wish to
adjust.
�
Press æ or ç on rocker
switch4.
The air cushion inflates or deflates.
Side bolsters adjustment
�
Press switch2 to the right or left.
The lateral support increases or de-
creases.
Page 209 of 434

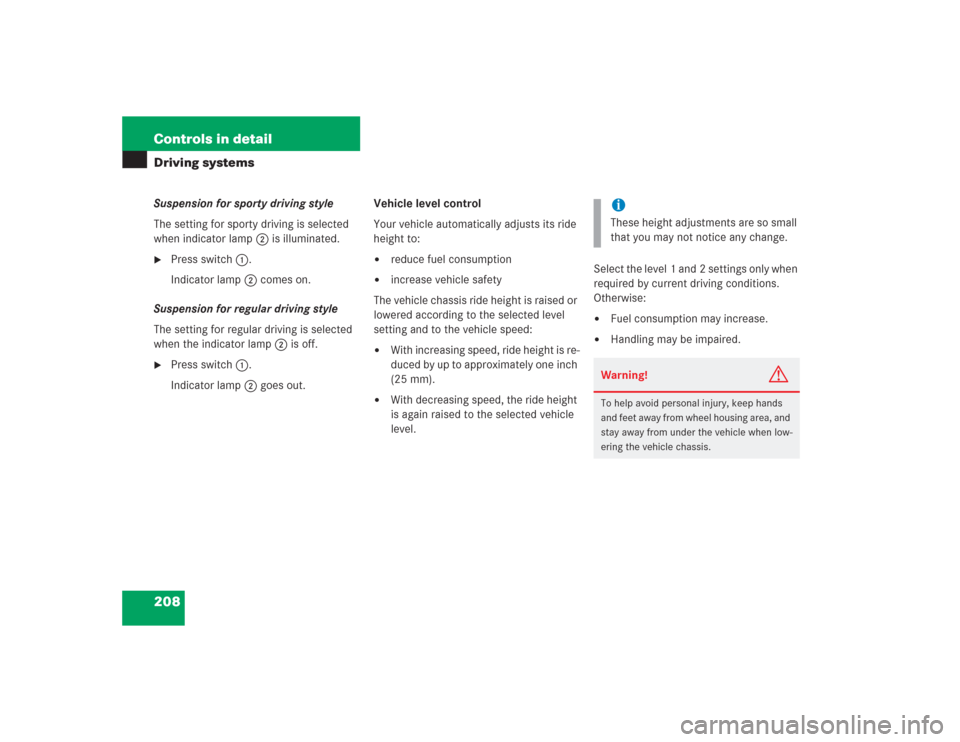
208 Controls in detailDriving systemsSuspension for sporty driving style
The setting for sporty driving is selected
when indicator lamp2 is illuminated.�
Press switch1.
Indicator lamp2 comes on.
Suspension for regular driving style
The setting for regular driving is selected
when the indicator lamp2 is off.
�
Press switch1.
Indicator lamp2 goes out.Vehicle level control
Your vehicle automatically adjusts its ride
height to:
�
reduce fuel consumption
�
increase vehicle safety
The vehicle chassis ride height is raised or
lowered according to the selected level
setting and to the vehicle speed:
�
With increasing speed, ride height is re-
duced by up to approximately one inch
(25 mm).
�
With decreasing speed, the ride height
is again raised to the selected vehicle
level.Select the level 1 and 2 settings only when
required by current driving conditions.
Otherwise:
�
Fuel consumption may increase.
�
Handling may be impaired.iThese height adjustments are so small
that you may not notice any change.Warning!
G
To help avoid personal injury, keep hands
and feet away from wheel housing area, and
stay away from under the vehicle when low-
ering the vehicle chassis.
Page 412 of 434

411 Index
Fuse chart 369
Fuse chart see Vehicle tool kit
Fuses 369
Fuse chart 369
Fuse extractor 369
Main fuse box 369
Spare fuses 369
G
Garage door opener 27, 231
Gasoline see Fuel
Gear range
Automatic transmission 157
Indicator 23
Limiting 157
Shifting into optimal 156
Gear range limit
Canceling 156
Gear selector lever 26
Cleaning 279
Lock 43, 401
Position 158
Position (automatic
transmission) 155Glove box 21, 214
GPS 399
H
Hands-free microphone 27
Hard plastic trim items
Cleaning 279
Hardtop open/close control 26
Hardtop see Retractable hardtop
Hardtop switch 185
Hazard warning flasher 121
Hazard warning flasher switch 25
Headlamp switch-off delay see Delayed
switch-off, exterior lamps
Headlamps
Automatic mode 118
Headlamp cleaning system 168, 261
Manual mode 118
Refilling washer fluid 261Headliner
Cleaning 279
Head-thorax airbag 72, 399
Heated steering wheel* 220
Height adjustment
Head restraints 36
Height adjustments
Vehicle level 208
High beam flasher 121
High beam headlamp indicator 23
High beam headlamps 47, 117, 332
Replacing bulbs 334
Switching on 121
Hood 253
Messages in display 309
Horn 21
Hydroplaning 243
Page 421 of 434

420 Index
Global locking 96
Global unlocking 96
Locking 98
Loss of 98
Messages in display 311
Reprogramming 96
Selective setting 96
Unlocking 32, 93
SmartKey with remote control 90
Snow chains 269
Spare fuses 369
Spare fuses see Vehicle tool kit
Spare parts service 372
Spare tire see Spare wheel 339
Spare wheel 323, 324, 350, 382
Inflating tire 354
Tire inflation pressure 354
Speed settings
Cruise control 195
Distronic* 202Speedometer 23
Setting units 141
Sporty driving style 208
SRS 401
Indicator lamp 289
Standing lamps 117, 332
Replacing bulbs 335
Standing water
Driving instructions 246
Starter battery 260, 358
Starter switch 21, 31
Starting difficulties 44
Starting position 31
Starting the engine
With the SmartKey 43
With the SmartKey with
KEYLESS-GO* 44
Steering column
In/out adjustment 37
Length adjustment 37
Up/down adjustment 37Steering wheel
Adjusting 37
Buttons 24
Cleaning 279
Heating* 220
Height adjustment 37
Steering wheel adjustment lever 21
Stopping
Windows 183
Storage compartments 214
Armrest 215
Cup holder 214
Glove box 214
In door 215
In rear 216
Locking compartments
separately 216
Locking storage compartments 216
Rear 216
Storage tray 216
Unlocking compartments
separately 217