Page 189 of 434

�
Aim the transmitter eye at the door
handle.
�
Press and hold button Πuntil t")
188 Controls in detailRetractable hardtop
Opening the retractable hardtop with
the SmartKey (Summer opening
feature)
�
Aim the transmitter eye at the door
handle.
�
Press and hold button Πuntil the
retractable hardtop is completely
open.
The seat ventilation for the driver’s seat
switches on. The rear side windows
open. In the tachometer display you
will see the message
Vario-Roof open
.
�
Release button Πto interrupt pro-
cedure.
Warning!
G
If the retractable hardtop does not com-
pletely open or close, the roof hydraulics will
lose pressure and the retractable hardtop is
lowered�
after approximately seven minutes
when the ignition is switched on
�
after approximately 15 seconds when
the ignition is switched off
Shortly before the hardtop is lowered, a
warning will sound and the hardtop switch
lamp will flash. In the speedometer display
you will see
K
, in the tachometer display
you will see the message
being lowered!
�
Properly lock the retractable hardtop
(�page 187) before continuing to drive.
Warning!
G
Before operating the switch for the retract-
able hardtop make sure that no persons can
be injured by the moving parts (retractable
roof, roof frame, and trunk lid) due to inat-
tention.
Hands must never be placed near the roof
frame, upper windshield area, hardtop, shelf
behind roll bars, or trunk lid while the re-
tractable hardtop is being raised or lowered.
Serious personal injury may occur.
If potential danger exists, release the re-
spective button on the SmartKey. This im-
mediately interrupts the raising or lowering
procedure. You then can operate
Œ
or
‹
to raise or lower the hardtop away
from the danger zone.
Page 190 of 434
�
Aim the transmitter eye at the door
handle.
�
Press and hold button ‹ until the")
189 Controls in detail
Retractable hardtop
Closing the retractable hardtop with
the SmartKey (Convenience feature)�
Aim the transmitter eye at the door
handle.
�
Press and hold button ‹ until the
retractable hardtop is completely
closed.
The retractable hardtop and the side
windows close. In the tachometer dis-
play you will see the message Vario-Roof closed
.Problems when operating the
retractable hardtop
Indicator lamp in the retractable hard-
top switch is flashing
Several problems may cause the indicator
lamp in the hardtop switch to flash when
activated:
�
The luggage cover in the trunk is not
closed.�
Close the luggage cover in the
trunk.
�
The trunk lid is open.�
Close the trunk lid.
�
The battery voltage is too low.�
Start engine and let run while acti-
vating switch.
�
The hardtop drive system has shut it-
self down. For safety reasons, no more
than five consecutive attempts may be
made to raise or lower the hardtop.�
After about ten minutes you may
again attempt to open or close the
retractable hardtop again.
If the indicator lamp in the retractable
hardtop switch flashes when starting off or
while driving and you hear a warning sound
for a maximum of 10 seconds, the retract-
able hardtop is not locked.
�
Properly lock the retractable hardtop
(�page 187) before continuing to
drive.
If the indicator lamp continues to flash af-
ter you have carried out the above actions,
there is a malfunction.
�
Have the retractable hardtop system
checked at an authorized
Mercedes-Benz Center.
Warning!
G
If the retractable hardtop does not com-
pletely open or close a warning sounds and
the retractable hardtop switch flashes. In
the speedometer display you will see
K
,
in the tachometer display you will see the
message
being lowered!
. After about
15 seconds the roof hydraulics lose pres-
sure.
Properly lock the retractable hardtop
(
�page 187) before continuing to drive.
Page 192 of 434

191 Controls in detail
Retractable hardtop
2Buckle�
Guide the fastening straps around the
top of the roll bar and close buckles 2.
�
Tighten the fastening straps if neces-
sary.
�
Lower the roll bar.
�
Fold the upper section of the wind
screen up towards the head restraints
until it stops.Removing
�
Fold the upper section of the wind
screen back down.
�
Raise the roll bar slightly (
�page 69).
1Release button
�
Undo the buckles on the upper section
of the roll bar by pressing release
button1.
�
Lower the roll bar. Make sure the fas-
tening straps do not get caught.
�
Pull the wind screen out towards the
front of the vehicle. Be careful not to
damage interior trim with the guide
tabs.
�
Place the wind screen back into the
bag.
Sunshade for panorama roof*
The sunshade protects you from excessive
sunlight coming in through the panorama
roof.Warning!
G
Do not operate the sunshade while driving.
Adjusting the sunshade while driving could
cause the driver to lose control of the vehi-
cle.
Page 193 of 434
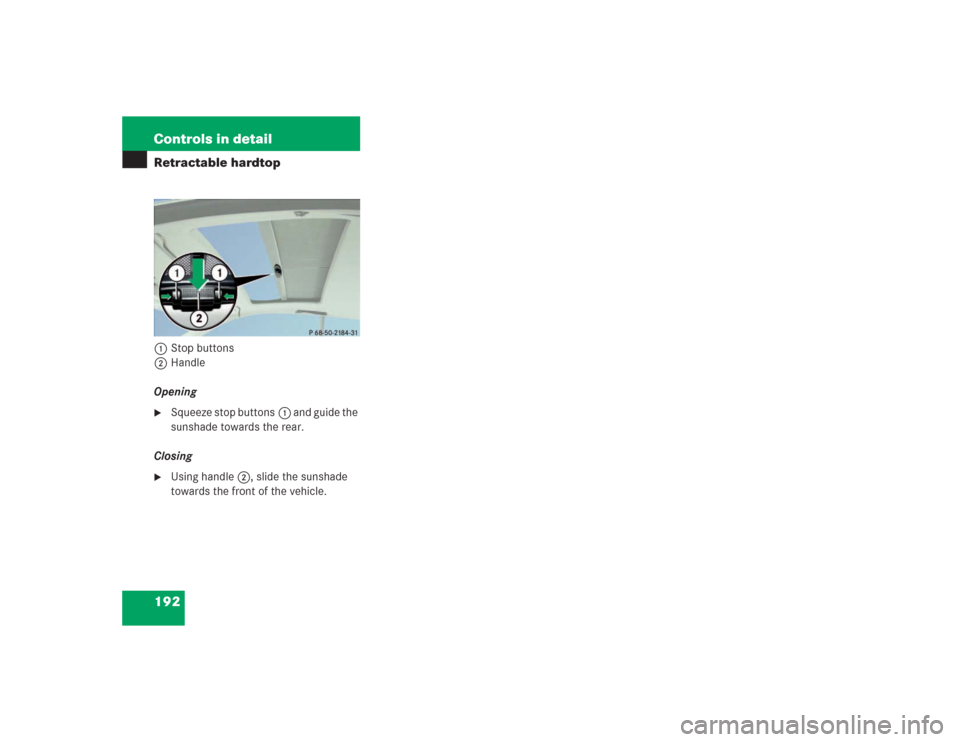
192 Controls in detailRetractable hardtop1Stop buttons
2Handle
Opening�
Squeeze stop buttons1 and guide the
sunshade towards the rear.
Closing
�
Using handle2, slide the sunshade
towards the front of the vehicle.
Page 200 of 434

199 Controls in detail
Driving systems
Distronic menu in the control system
In the Distronic menu you can read the cur-
rent settings for Distronic. What appears in
the left display field depends on whether
the Distronic is turned on or off.�
Press button è or ÿ repeatedly
until you see one of the following dis-
plays.Distronic deactivated
When Distronic is deactivated you will see
the standard display in the left display
field.
1Vehicle ahead, if detected
2Actual distance to vehicle ahead
3Preset distance threshold to vehicle
ahead
4Your vehicle
5Symbol for activated distance warning
function
Warning!
G
The Distronic brakes your vehicle with a
maximum of 6.5 ft/s
2 (2 m/s
2). This corre-
sponds to about 20% of the maximum decel-
eration ability of your vehicle.
Distronic brakes the vehicle in an effort to
restore the preset distance or to maintain
the speed. The brake pedal is automatically
applied as this happens which results in the
brake pedal moving.
Keep driver’s foot area clear at all times, in-
cluding the area under the brake pedal. Ob-
jects stored in this area may impair pedal
movement which could interfere with the
braking ability of the Distronic system.
Do not place your foot under the brake pedal
– your foot could become caught.
Page 215 of 434
214 Controls in detailUseful features
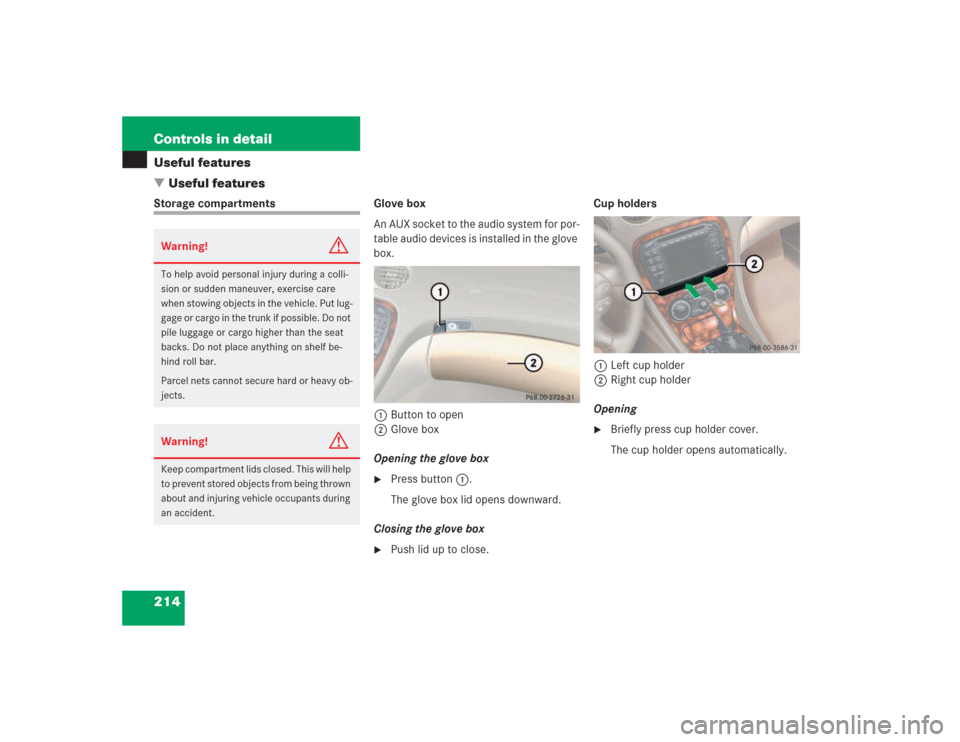
�Useful featuresStorage compartments Glove box
An AUX socket to the audio system for por-
table audio devices is installed in the glove
box.
1Button to open
2Glove box
Opening the glove box
�
Press button1.
The glove box lid opens downward.
Closing the glove box
�
Push lid up to close.Cup holders
1Left cup holder
2Right cup holder
Opening
�
Briefly press cup holder cover.
The cup holder opens automatically.
Warning!
G
To help avoid personal injury during a colli-
sion or sudden maneuver, exercise care
when stowing objects in the vehicle. Put lug-
gage or cargo in the trunk if possible. Do not
pile luggage or cargo higher than the seat
backs. Do not place anything on shelf be-
hind roll bar.
Parcel nets cannot secure hard or heavy ob-
jects. Warning!
G
Keep compartment lids closed. This will help
to prevent stored objects from being thrown
about and injuring vehicle occupants during
an accident.
Page 216 of 434
215 Controls in detail
Useful features
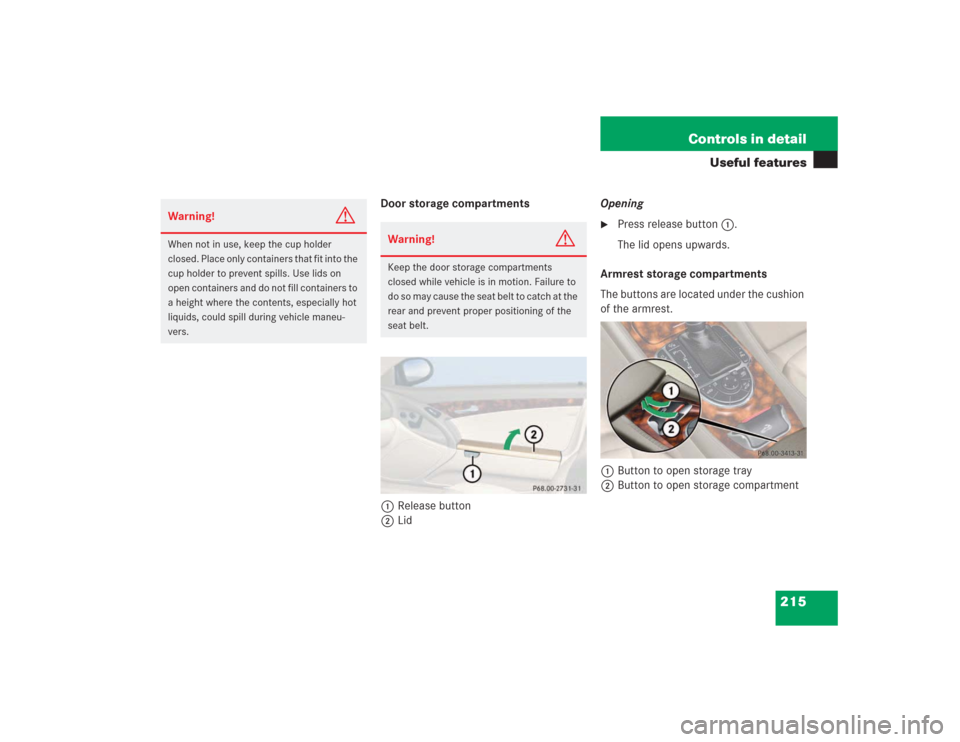
Door storage compartments
1Release button
2LidOpening
�
Press release button 1.
The lid opens upwards.
Armrest storage compartments
The buttons are located under the cushion
of the armrest.
1Button to open storage tray
2Button to open storage compartment
Warning!
G
When not in use, keep the cup holder
closed. Place only containers that fit into the
cup holder to prevent spills. Use lids on
open containers and do not fill containers to
a height where the contents, especially hot
liquids, could spill during vehicle maneu-
vers.
Warning!
G
Keep the door storage compartments
closed while vehicle is in motion. Failure to
do so may cause the seat belt to catch at the
rear and prevent proper positioning of the
seat belt.
Page 217 of 434
216 Controls in detailUseful featuresOpening storage tray�
Press button1 and lift up the armrest.
Opening storage compartment
�
Press button2 and lift the armrest.
Locking the storage compartments
The storage compartments are centrally
locked when you lock the vehicle from the
outside.
You can also lock the storage compart-
ments separately, see “Locking the stor-
age compartments separately”
(
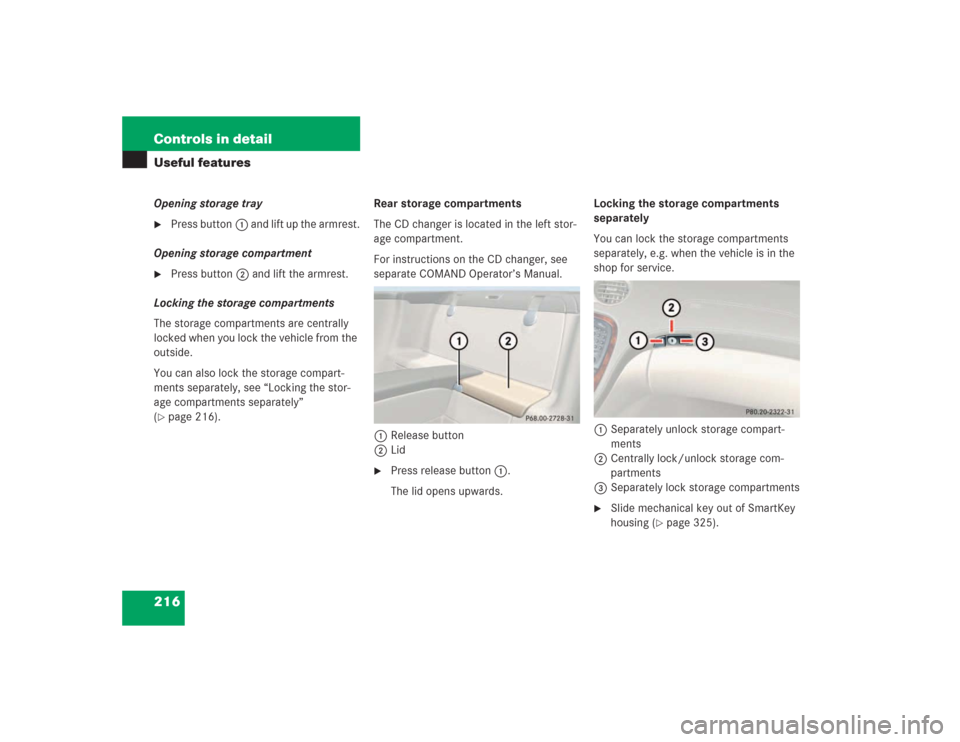
�page 216).Rear storage compartments
The CD changer is located in the left stor-
age compartment.
For instructions on the CD changer, see
separate COMAND Operator’s Manual.
1Release button
2Lid
�
Press release button 1.
The lid opens upwards.Locking the storage compartments
separately
You can lock the storage compartments
separately, e.g. when the vehicle is in the
shop for service.
1Separately unlock storage compart-
ments
2Centrally lock/unlock storage com-
partments
3Separately lock storage compartments
�
Slide mechanical key out of SmartKey
housing (
�page 325).