Page 51 of 168
50 AudioCD changer* operation
In order to insert CDs, you will need to first
access the CD changer* (
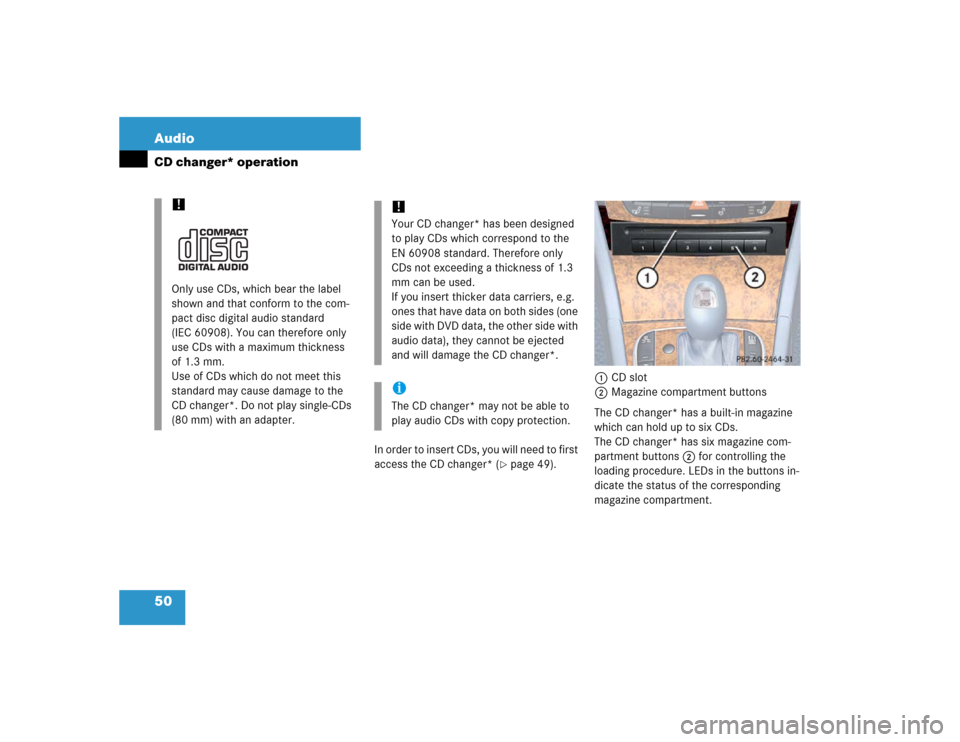
�page 49).1CD slot
2Magazine compartment buttons
The CD changer* has a built-in magazine
which can hold up to six CDs.
The CD changer* has six magazine com-
partment buttons 2 for controlling the
loading procedure. LEDs in the buttons in-
dicate the status of the corresponding
magazine compartment.
!Only use CDs, which bear the label
shown and that conform to the com-
pact disc digital audio standard
(IEC 60908). You can therefore only
use CDs with a maximum thickness
of 1.3 mm.
Use of CDs which do not meet this
standard may cause damage to the
CD changer*. Do not play single-CDs
(80 mm) with an adapter.
!Your CD changer* has been designed
to play CDs which correspond to the
EN 60908 standard. Therefore only
CDs not exceeding a thickness of 1.3
mm can be used.
If you insert thicker data carriers, e.g.
ones that have data on both sides (one
side with DVD data, the other side with
audio data), they cannot be ejected
and will damage the CD changer*.iThe CD changer* may not be able to
play audio CDs with copy protection.
Page 52 of 168
51 Audio
CD changer* operation
The status of a magazine compartment can
also be seen when selecting a CD in the CD
Selection menu (
�page 56).
The CD slot 1 for loading CDs into the CD
changer is located above the buttons 2.
Loading options:
�
Loading all six magazine compart-
ments (
�page 52)
�
Loading a single magazine compart-
ment Loading a single magazine compart-
ment
�
Access the CD changer* (
�page 49).
�
Briefly press the button 2 of the emp-
ty magazine compartment to be load-
ed.
�
Wait until the LED in the button 2
flashes green.
This indicates that the CD changer* re-
quests a CD.
�
Insert an audio CD into the CD slot 1
within approx. 15 seconds. The label of
the CD must face up.The CD is retracted. The red LED in the
corresponding magazine compartment
button 2 lights up continuously. The
system starts playing the CD.
�
Retract the CD changer* (
�page 49).
The loading procedure is completed.
iButton LED off:
Magazine compartment empty
Button LED continuously red:
Magazine compartment loaded with a
CD
iLoading a magazine slot will stop the
playback of a CD in the changer*.
Page 53 of 168
52 AudioCD changer* operationLoading all six magazine compart-
ments
Initial situation: all magazine compart-
ments empty.
The CD changer* loads all magazine com-
partments beginning with compartment 1.�
Access the CD changer* (
�page 49).
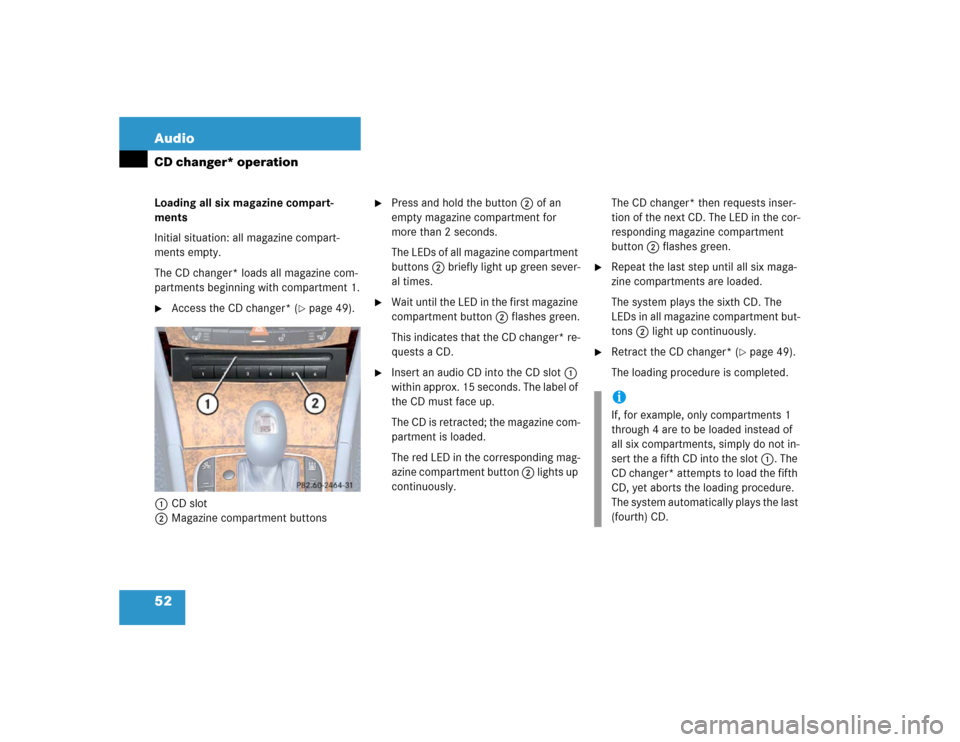
1CD slot
2Magazine compartment buttons
�
Press and hold the button 2 of an
empty magazine compartment for
more than 2 seconds.
The LEDs of all magazine compartment
buttons 2 briefly light up green sever-
al times.
�
Wait until the LED in the first magazine
compartment button 2 flashes green.
This indicates that the CD changer* re-
quests a CD.
�
Insert an audio CD into the CD slot 1
within approx. 15 seconds. The label of
the CD must face up.
The CD is retracted; the magazine com-
partment is loaded.
The red LED in the corresponding mag-
azine compartment button 2 lights up
continuously. The CD changer* then requests inser-
tion of the next CD. The LED in the cor-
responding magazine compartment
button 2 flashes green.
�
Repeat the last step until all six maga-
zine compartments are loaded.
The system plays the sixth CD. The
LEDs in all magazine compartment but-
tons 2 light up continuously.
�
Retract the CD changer* (
�page 49).
The loading procedure is completed.
iIf, for example, only compartments 1
through 4 are to be loaded instead of
all six compartments, simply do not in-
sert the a fifth CD into the slot 1. The
CD changer* attempts to load the fifth
CD, yet aborts the loading procedure.
The system automatically plays the last
(fourth) CD.
Page 68 of 168
67 Satellite radio*
Satellite radio operation
�
Pressj.
The search proceeds in descending or-
der.
The search stops at the first receivable
station.
Tuning via scan search
Scan search is characterized as follows:
�
Scan search plays a channel for
approx. 8 seconds and then skips to
the next channel within the current
category.
�
Scan search can be terminated manu-
ally.
�
Scan search stops automatically at the
station that was playing when scan
search was started.
�
Press the Scan soft key.
The scan search starts.
�
Press the Scan soft key again.
The scan search stops.
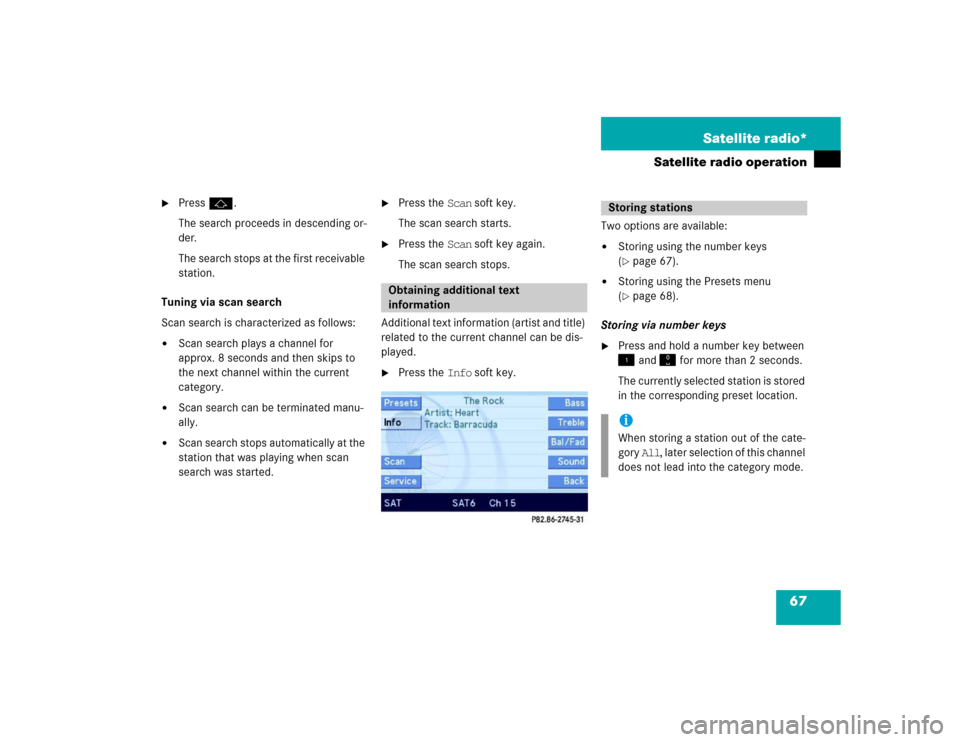
Additional text information (artist and title)
related to the current channel can be dis-
played.
�
Press the Info soft key.Two options are available:
�
Storing using the number keys
(�page 67).
�
Storing using the Presets menu
(�page 68).
Storing via number keys
�
Press and hold a number key between
� and � for more than 2 seconds.
The currently selected station is stored
in the corresponding preset location.
Obtaining additional text
information
Storing stationsiWhen storing a station out of the cate-
gory All, later selection of this channel
does not lead into the category mode.
Page 69 of 168
68 Satellite radio*Satellite radio operationStoring via Presets menu �
Press the Presets soft key.
The Preset list appears.
�
Use� or � to select a preset loca-
tion.
�
Press� for more than 2 seconds.
The currently selected station is stored
in the corresponding preset location.Resetting Presets menu
�
Press the Presets soft key.
All channels in the Preset list are delet-
ed.
�
Press the Service soft key.
The telephone number of the Sirius
Service Center and the twelve-digit
electronic serial number (ESN) of the
particular receiver appear.It may be necessary to call the Sirius Ser-
vice Center.
�
if you want to cancel the subscription
or to re-subscribe at a later date,
�
if you forget to pay the bill, or
�
if you sell the car to another person.
Calling the Sirius Service Center
Page 76 of 168
75 Telephone*
Telephone operation
In succession, press the number keys �,
� and �.�
Press�.
The telephone establishes the connec-
tion, the ringing tone is audible.
�
Wait until the emergency call center
answers, then describe the emergency.
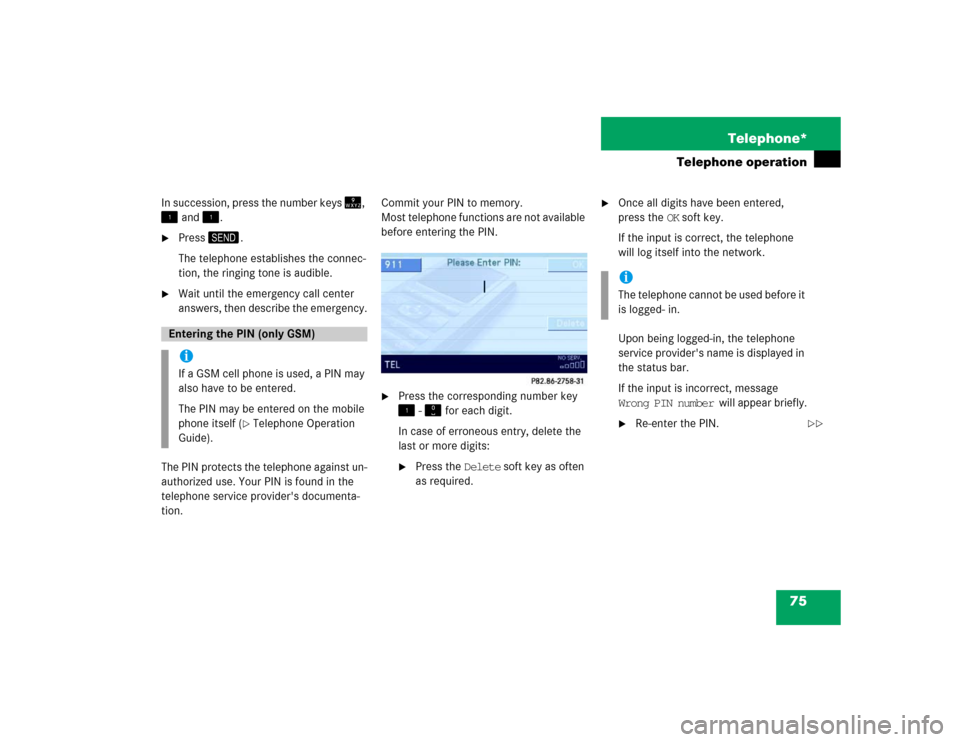
The PIN protects the telephone against un-
authorized use. Your PIN is found in the
telephone service provider's documenta-
tion.Commit your PIN to memory.
Most telephone functions are not available
before entering the PIN.
�
Press the corresponding number key
� - � for each digit.
In case of erroneous entry, delete the
last or more digits:�
Press the Delete soft key as often
as required.
�
Once all digits have been entered,
press the OK soft key.
If the input is correct, the telephone
will log itself into the network.
Upon being logged-in, the telephone
service provider's name is displayed in
the status bar.
If the input is incorrect, message
Wrong PIN number will appear briefly.�
Re-enter the PIN.
Entering the PIN (only GSM) iIf a GSM cell phone is used, a PIN may
also have to be entered.
The PIN may be entered on the mobile
phone itself (
�Telephone Operation
Guide).
iThe telephone cannot be used before it
is logged- in.
��
Page 90 of 168
89 Telephone*
SMS (Mail)
� SMS (Mail)
SMS messages can be received if your ve-
hicle is equipped with a telephone* and
SMS messaging is available from your car-
rier.
Received messages are saved in the folder
SMS inbox.�
Open the Telephone main menu
(�page 77).
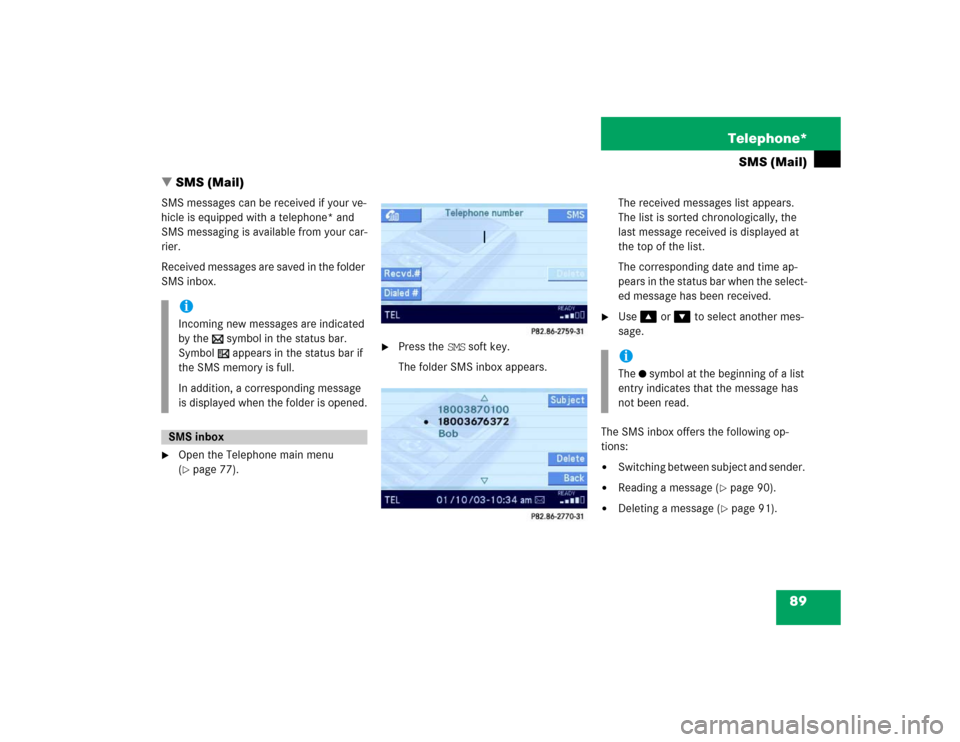
�
Press the SMS soft key.
The folder SMS inbox appears.The received messages list appears.
The list is sorted chronologically, the
last message received is displayed at
the top of the list.
The corresponding date and time ap-
pears in the status bar when the select-
ed message has been received.
�
Use� or � to select another mes-
sage.
The SMS inbox offers the following op-
tions:
�
Switching between subject and sender.
�
Reading a message (
�page 90).
�
Deleting a message (
�page 91).
iIncoming new messages are indicated
by the symbol in the status bar.
Symbol appears in the status bar if
the SMS memory is full.
In addition, a corresponding message
is displayed when the folder is opened.SMS inbox
iThe symbol at the beginning of a list
entry indicates that the message has
not been read.
Page 116 of 168
115 Navigation*
Destination entry
Selectable soft keys:�
soft key:
The map scale will change to display a
more detailed map.
�
soft key:
The map scale will change to display a
map that shows a wider area.
�
Memory soft key
The current location is stored
(�page 101).
This soft key is visible only if the map
has been called up using�.
.�
Move the cursor using�, �, �or
� to select the desired destination.
�
Release the buttons.If the system finds a street name at the
location the cursor is pointing to, the
corresponding street name is shown in
the status bar.
In this example: WATER ST
�
Press �.
The system sets the location the cursor
is pointing to as the destination.
The Start Route Guidance menu
(�page 116) appears.
iThe cursor can also be moved diagonal-
ly using � and �.
iThe destination selection will be lost
when pressing the Back soft key.
The system reverses to the details of
the previously entered destination.